Window Shade Tags

the garden marker doesn’t wash off in repeated rain showers. (charlotte ekker wiggins photo)

Window Shade Tags

Maybe it’s because I kept tripping over an old shade stored in my garage. There’s definitely a measure of liking to repurpose. And now I enjoy seeing the cut down window shades as garden markers.

You don’t have to round one of the sides of the cut blinds but I do to make them prettier in a pot. The rounded edges also don’t poke back when I retrieve a tag stored in the old glass milk bottle

I also use an indelible marker so the plant names don’t easily wash off.

Round off one end with scissors and store for easy retrieval. (charlotte ekker wiggins photo)

There are more expensive and fancier plant tags around but these work just fine for me.

For more gardening, beekeeping, cooking and easy home decor tips, subscribe to Garden Notes.

Charlotte

April Gardening Jobs

1. Identify places where you want to add fall bulbs for maximum enjoyment. (Charlotte Ekker Wiggins photo)

April Gardening Tasks

Spring sprung a good 4-6 weeks early this year but winter is having a last hurrah this week. At this time of year in USDA Hardiness zone 6b, there are many garden tasks to tackle:

2. Clean out composters and add to flower beds and fruit trees. Leave a good bucket of finished compost as starter for the next compost batch and start adding leaves, grass clippings if you have them, kitchen scraps and water. Don’t forget to mix.

3. Put up your birdhouses if you haven’t already. Songbirds are natural pest control and add so much interest to our gardens. 60% of all bird species depend on insects for their food so if you have a lot of birds, you should naturally have less pests. Include at least one hummingbird feeder.

4. Lilacs should be blooming this month. Prune lilacs immediately after they bloom. If you wait until later in the season, you will be cutting off next year’s blooms.

5. Continue to sow lettuce, spinach and radish seeds every 10 days or so for fresh spring salads in your pot garden. Call it your garden in pots, if you prefer.

6. If you like to grow peas, this is the last month to plant sugar snap peas and snow peas, they prefer cooler weather conditions. To keep their roots happy, mulch with cardboard to keep them cool, then add a layer of wood chips.

7. Mark off areas behind other plants for fall bulb planting. (Charlotte Ekker Wiggins photo)

8. As daffodils and tulips continue to grow and bloom, sprinkle compost around them to keep the bulbs well fed. When the flowers fade, remove them by snipping off the flower heads. Leave the greenery until it turns yellow; the green leaves help the bulbs store energy for next season’s blooms. Don’t mow the leaves down with the lawn mower until they turn yellow or the bulbs will gradually become smaller and you will not have any more blooms next spring.

9. If you have a vegetable garden area, this is a good time to add cardboard to kill off any growth prior to summer planting. Don't till. The prevailing thought now is that tilling damages the soil ecosystem. Kill the plants you don’t want, make holes to plant the ones you do, or make trenches to plant seeds, and cover.

10. Start your summer plants inside in containers you can transplant outside later; tomatoes, peppers, watermelons, squash, pumpkins, cucumbers, zucchini.

11. Don’t forget companion plants to reduce crop damage; basil is a good bug deterrent for a lot of plants and grows easily from seed.

12. Plant for pollinators as well. I love zinnias and so do butterflies and bees. Native plants such as New England Asters, yarrow and purple coneflowers are good choices for pollinators because they have long blooming seasons. For another good annual, try sunflower seeds. Birds will love the seeds in the fall.

13. Plant more native trees along with compact dwarf fruit trees. Although planting native flowers is still good for pollinators, trees provide better, and more reliable, pollen sources for bees. The smaller fruit trees are good pollen sources as well and, when pollinated by bees, will also give you easily accessible fruit to pick.

14. Start thinking about fall planting. Many suppliers take spring bulb orders for fall delivery.

For more gardening, beekeeping, cooking and easy home decor tips, subscribe to Garden Notes.

Charlotte

Invasive Jumping Worms

Invasive jumping worms look similar to earthworms but are dry and fast-jumping. (Charlotte Ekker Wiggins photo)

Invasive Jumping Worms

I read about this threat to soil health a couple of years ago. Like most invasives, jumping worms grow faster than earth worms, consume more nutrients and basically can destroy the matrix of soil and soil nutrients.

As I was moving a pot of begonias in the shade outside of my garage door June 13, 2022, I was surprised to find a mount of greyish worm castings under the pot. Knowing what worm poop looks like from my two red wriggler composting farms, I was intrigued. I had never seen “earthworms” at the soil surface in leaf litter nor jumping around as I uncovered them.

On closer inspection of the squiggly grey worms, some dropped their tails. Then I noticed a whitish or beige smooth band that circled all around from about an inch from their tips. Not earthworms; definitely invasive jumping worms confirmed by Missouri Department of Conservation.

Lightly scraping leaf litter over gravel, I found several more jumping worms. (Charlotte Ekker Wiggins photo)

Introduced Species for Anglers

According to the Missouri Department of Conservation,  Missouri is among 34 states with invasive jumping worms. The worms are native to East Asia and are a glossy gray or brown with a white band. When exposed, they thrash and leap around like a snake.

Missouri Department of Conservation spokesperson Dan Zarlenga explained that this species of worm was first introduced for anglers. He said reports of jumping worms in the state have mainly come from northern Missouri. Well, until now.

These jumping worms are good for aerating soil, but they consume a lot of organic matter making it harder for the soil to hold water. They also reproduce a lot faster than worms that are native to Missouri.

Zarlenga said they become sexually mature in about 60 days after hatching. Worms can also reproduce on their own. 

Telltale smooth neck band about an inch from the tip. (Charlotte Ekker Wiggins photo)

Jumping Worms v. Earthworms

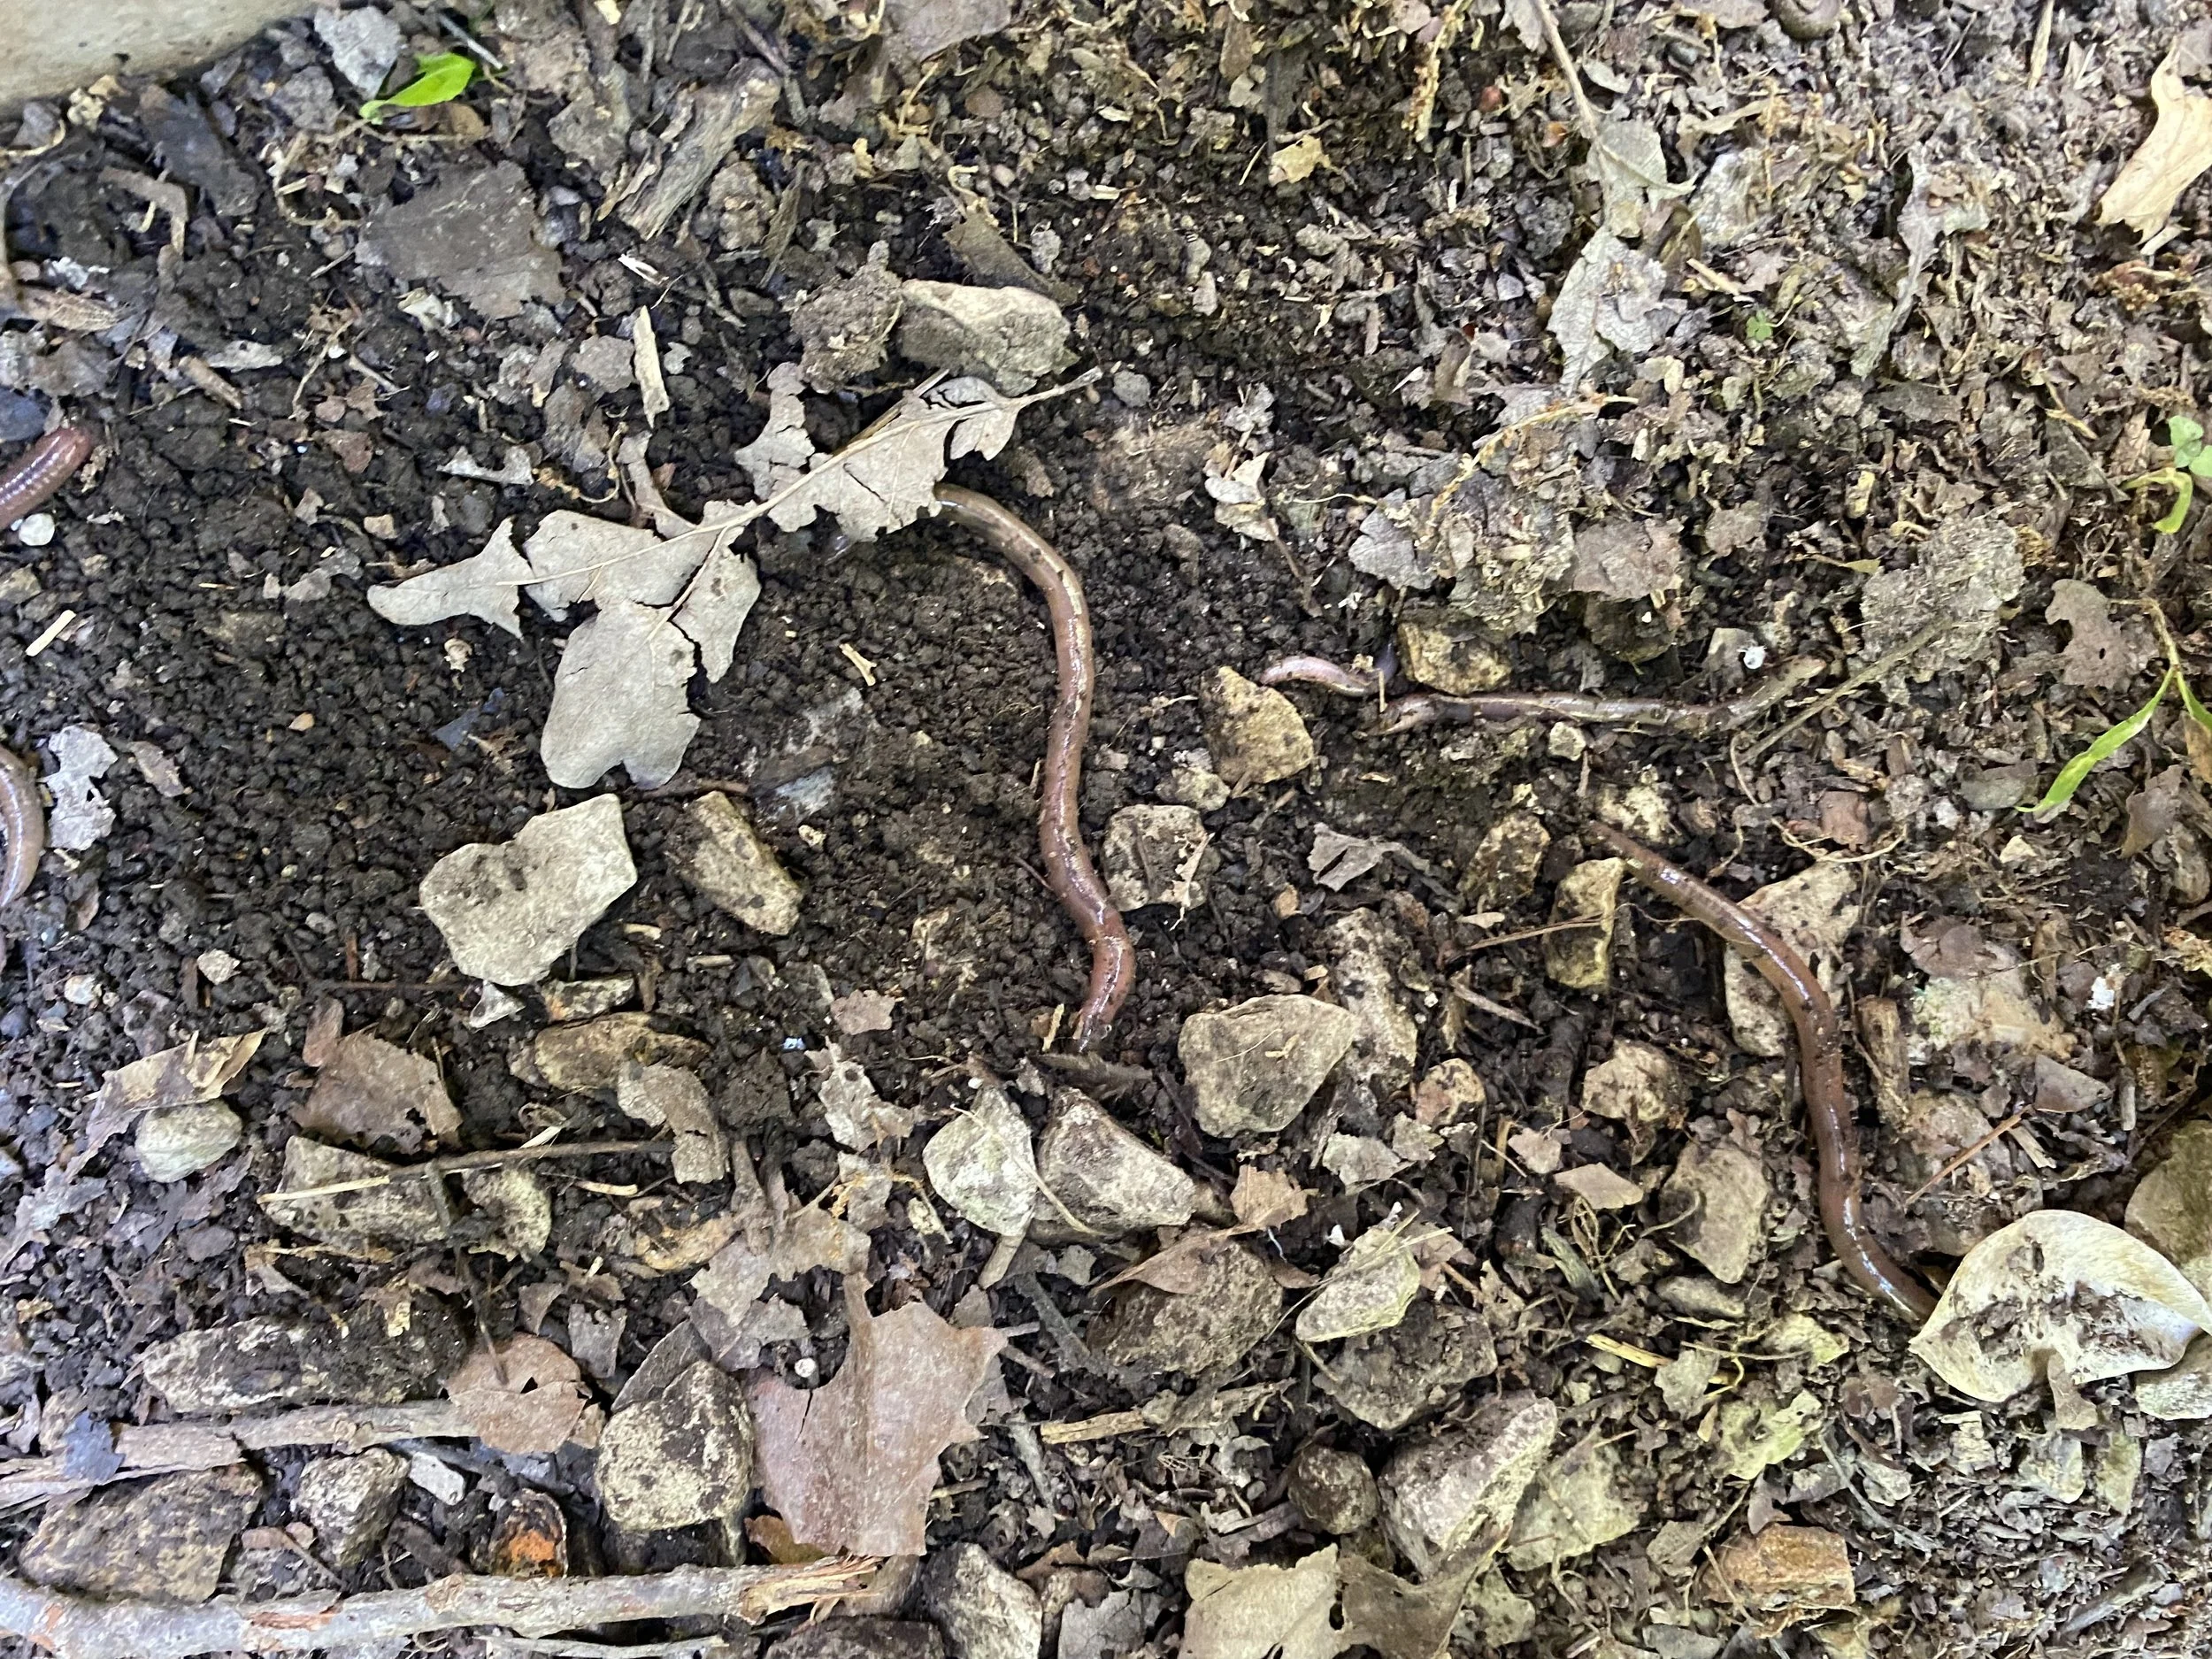
Jumping worms are often mistaken for earthworms. If you’ve spent any time digging up earthworms for fishing, you know earthworms don’t jump around as fast as jumping worms. The band about an inch from their tip has ridges and doesn’t encircle them. Earthworms also live deeper in the soil, some 5 inches or so.

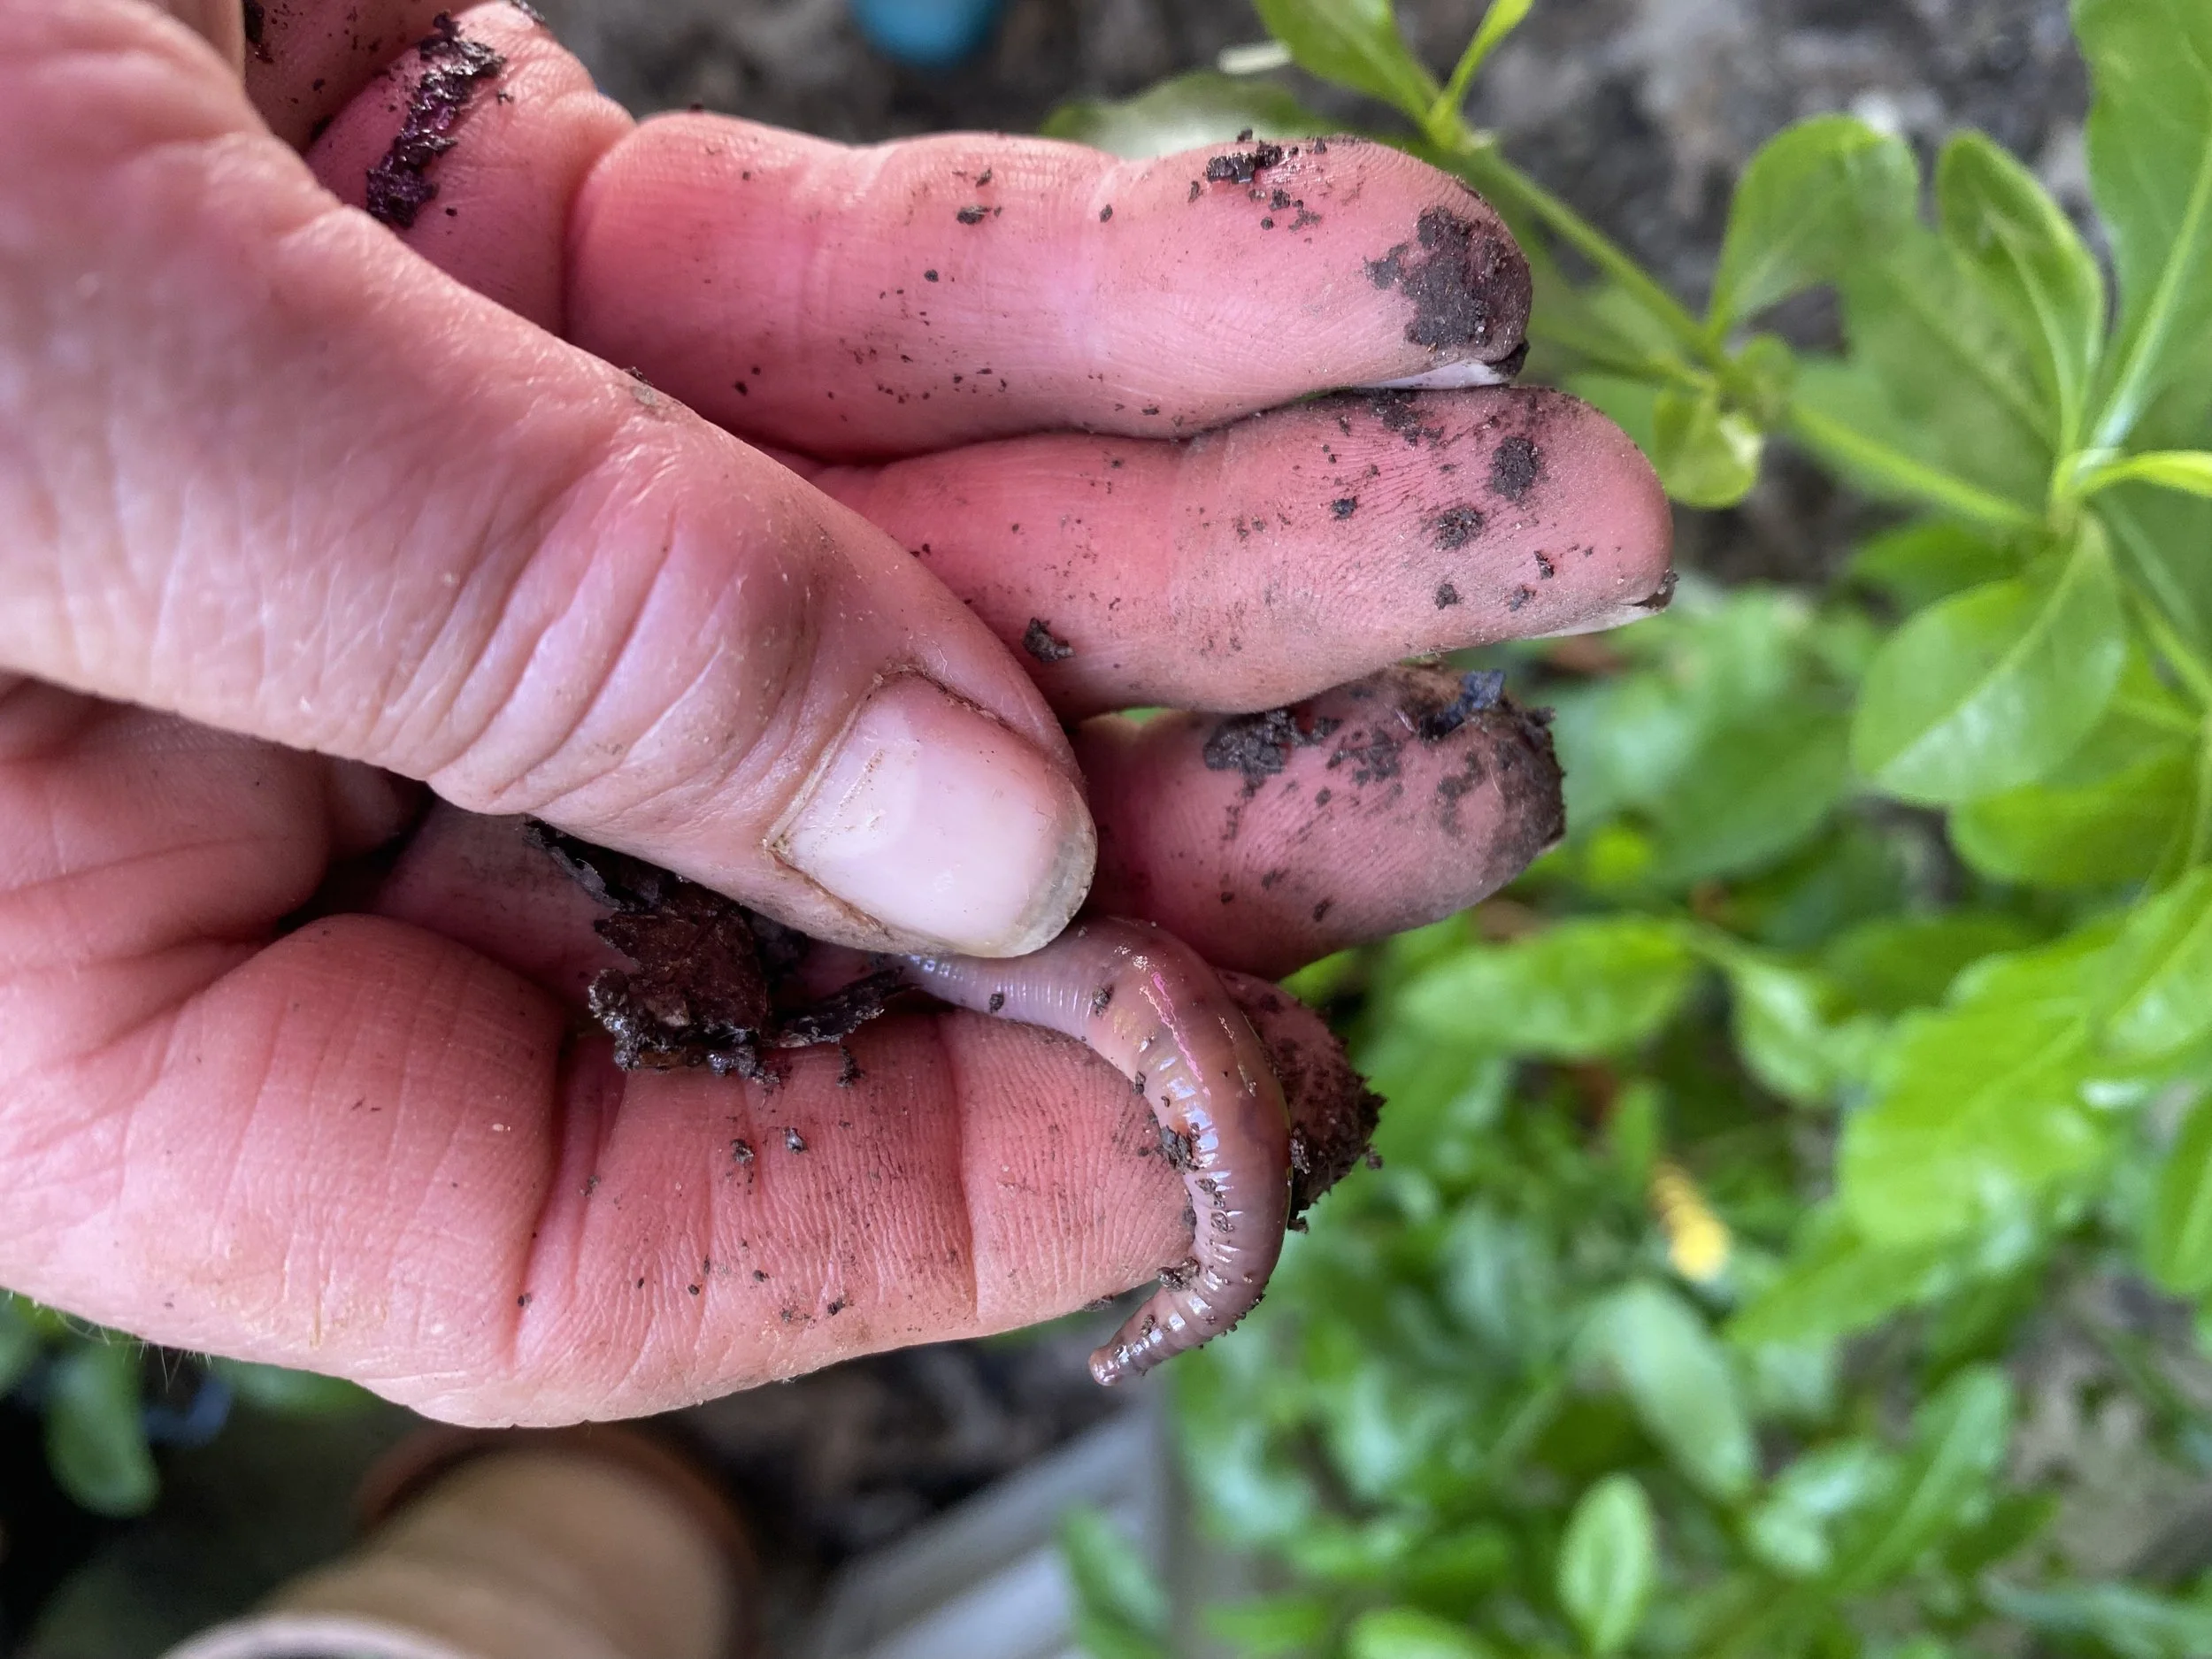
Jumping worms are drier than common native earthworms. They could also have an iridescent sheen to them, and darker on the top and lighter on the bottom.

Missouri’s earthworms and jumping worms both have a clitellum which is like a collar behind their head. The earthworms’ clitellum is thick and stands out, encircling part of the body while jumping worms’ clitellum is smooth, the same size as the body and encircles the whole the body.

Jumping worms’ also drop their tails when caught.

Damage to Ecosystem

Mo. Department of Conservation notes “Invasive jumping worms consume more soil nutrients than other earthworms, meaning that they actually deplete the soil of nutrients, rendering the soil less fertile for plants; and without plants, the soil is more likely to erode. Where a large population of these worms is established, the soil surface looks dry and granular, like coffee grounds or cooked up ground beef. Leaf litter disappears.

Invasive jumping worms damage forest ecosystems by rapidly eating up the leaf litter that usually protects forest topsoils. Without that mulchlike layer, the bare soil dries rapidly and is subject to erosion. Young forest plants have a difficult time getting established. The soil chemistry changes, and the soil’s microbial communities (bacterial, fungi, and other microbes) change as well. The amount of mycorrhizal fungi (which attach to plant roots in a symbiotic relationship) declines, making it harder for trees to take in nutrients.

Without the protective layer of leaf litter, many invertebrates (other worms, millipedes, centipedes, springtails, arachnids, and countless types of insects), plus amphibians, reptiles, small mammals, and ground-nesting birds, lose important habitat. Thus species diversity declines and forest food chains are disrupted.”

Removing Jumping Worms

Once I confirmed these were jumping worms, I dug up all I could find in the leaf litter over the gravel by my garage door. They were placed in a plastic bag and left in the sun to die. They were then added to my compost.

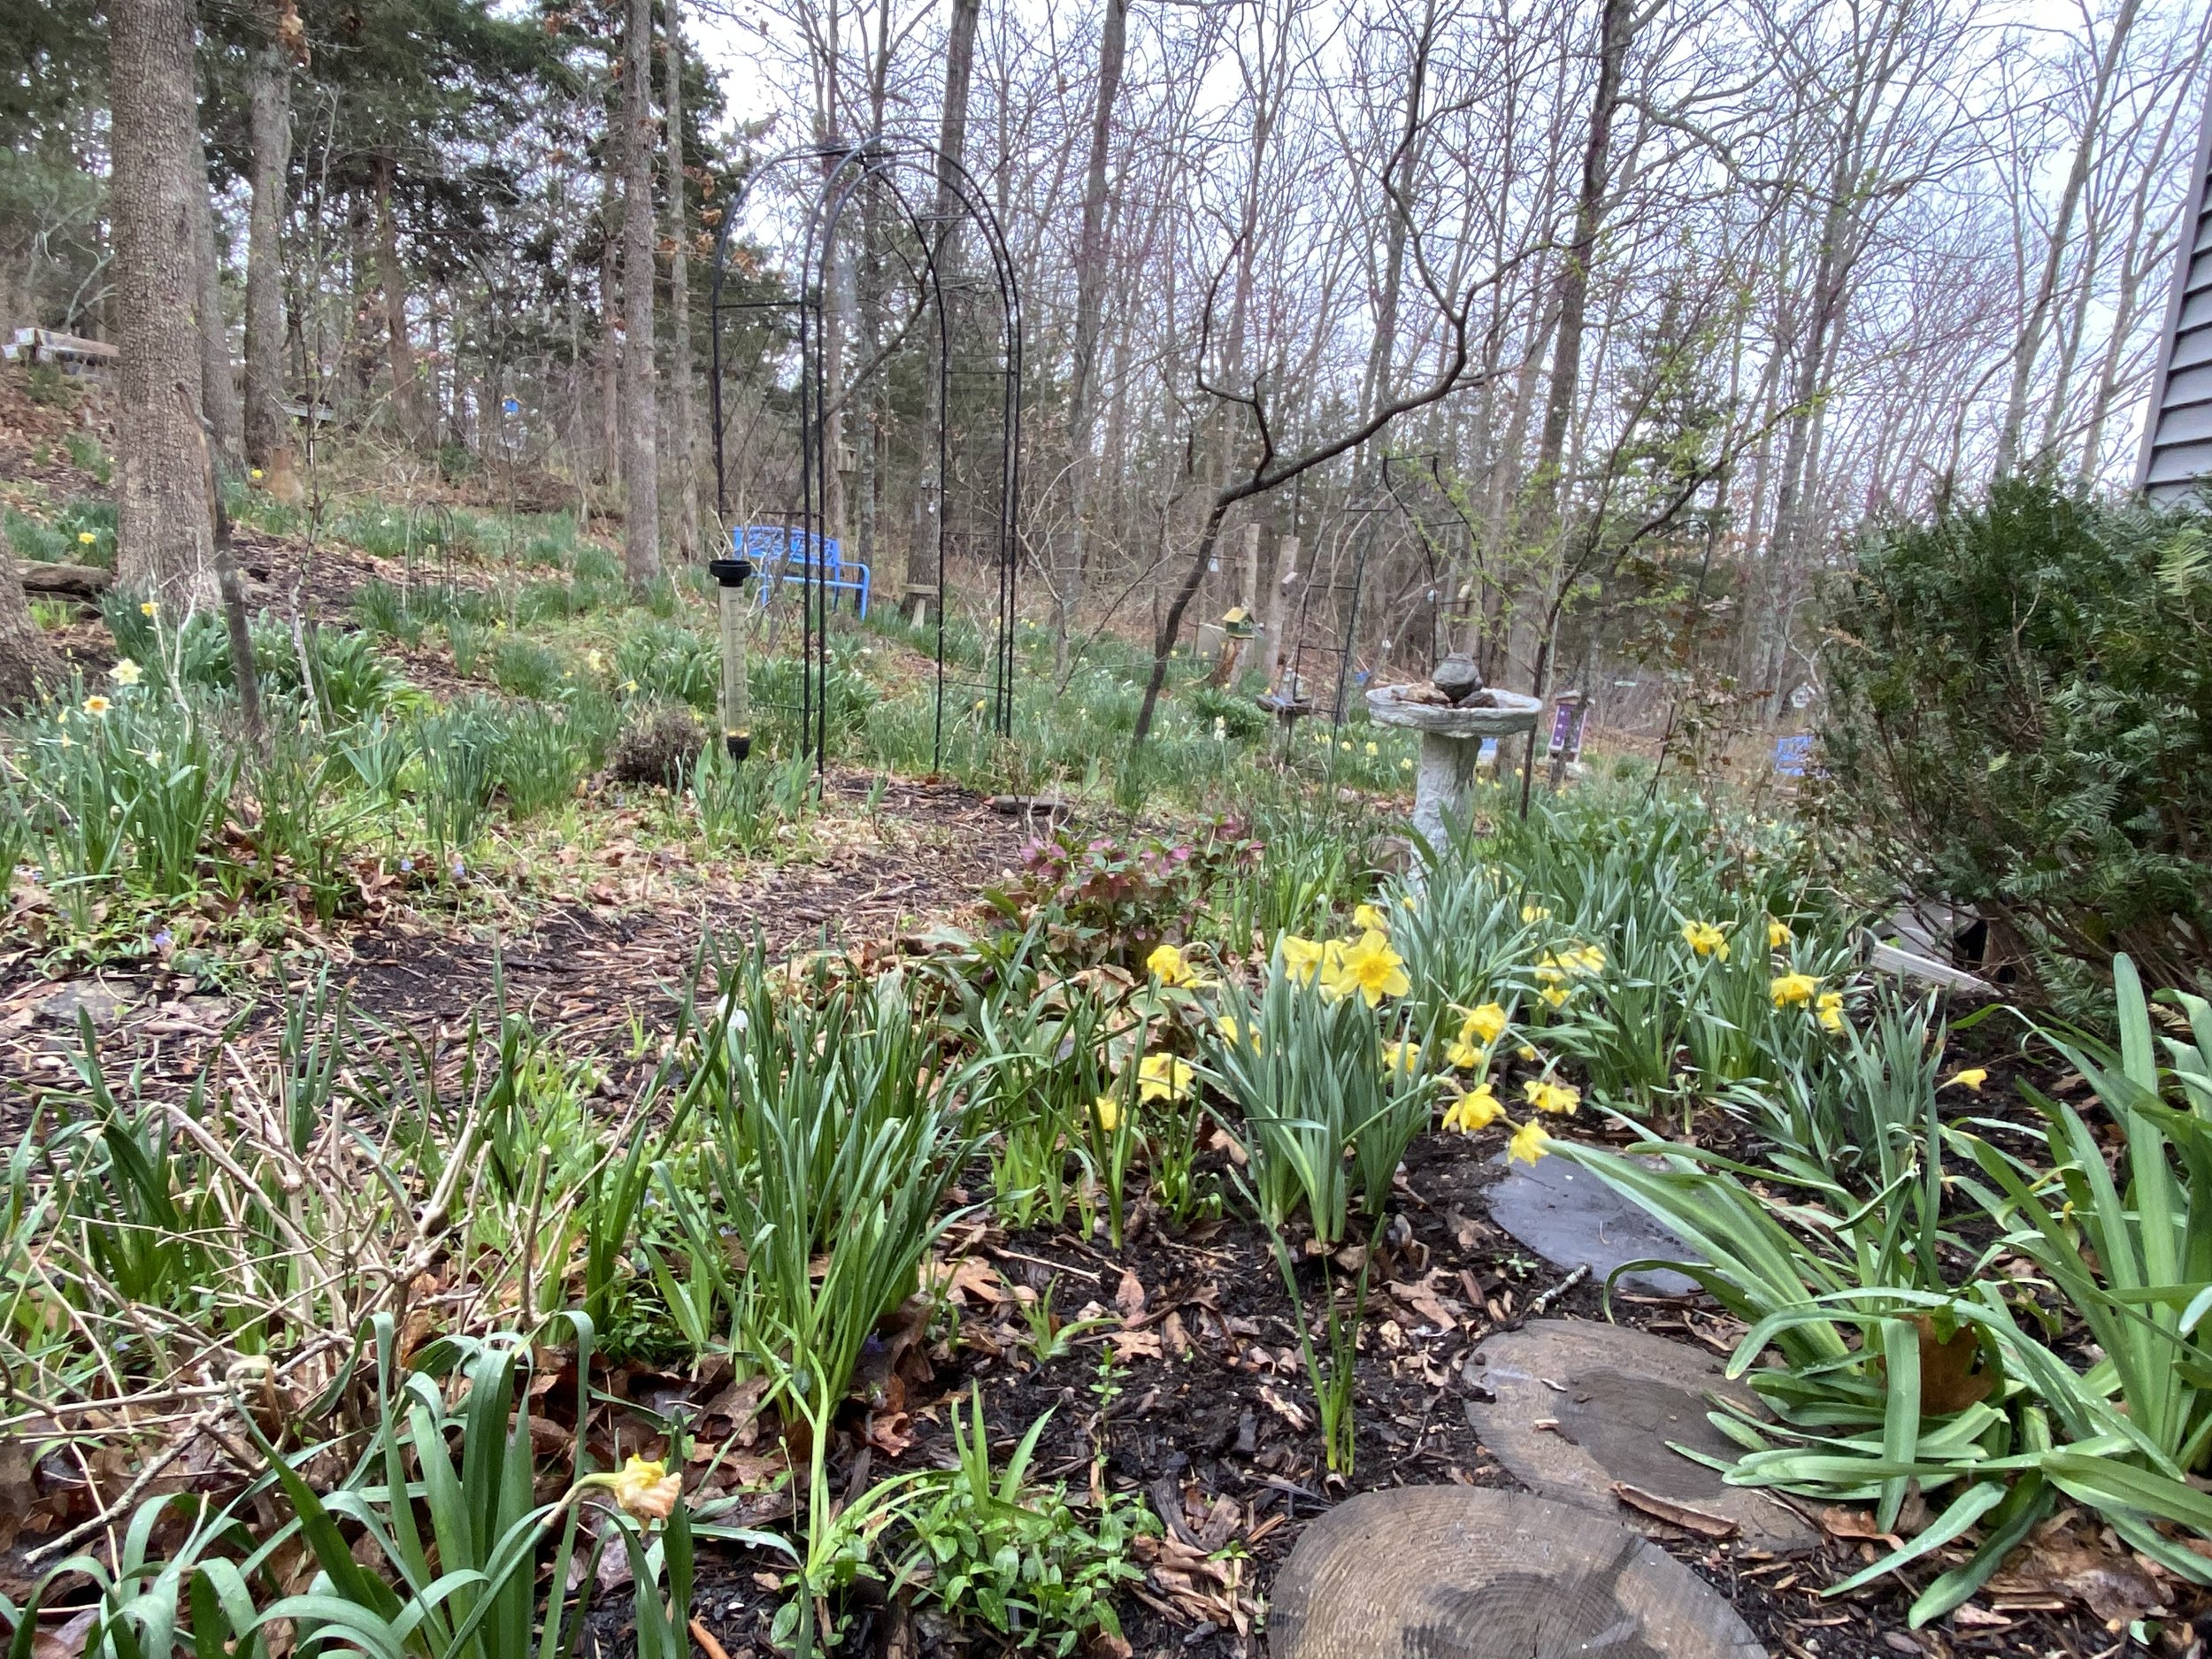
I’ve spent decades building up and keeping what little soil I have on this hillside healthy and enriched. I don’t need jumping worms destroying all of those years of caring for soil.

For more gardening, beekeeping, cooking and easy home decor tips, subscribe to Garden Notes.

Charlotte

Milk Jug Planting

Jim Fullerton brings me his planted milk jugs to see the growth. (Charlotte Ekker Wiggins photo)

Milk Jug Planting

My beekeeping friends last year heard about milk jug planting. It’s a great way to start seeds that need cold exposure over winter and get an early start on the planting season.

During a recent bee club meeting, Jim Fullerton surprised me by bringing in two of his planted milk jugs to show me the growth he had over last winter.

He said he did the same thing I said to do: holes in the bottom, half full of potting soil. Then after watering, tape the milk jugs closed and label.

Jim sewed daisy seeds, left, and coreopsis seeds, right. (Charlotte Ekker Wiggins photo)

Good to see such growth!

Charlotte

Favorite Gardening Tool

Some of my tools to garden on a Missouri limestone hillside. (Charlotte Ekker Wiggins photo)

Favorite Gardening Tool

It’s interesting to watch a new generation of gardeners with their raised beds, ergonomic hats and specialty tools. Gardening for several decades now on a one-acre Missouri limestone hillside, where my neighbors said nothing would grow, I didn’t have some of those options. I resorted to hardware stores for my gardening gear.

Basic gardening gear today usually includes a cute pair of ergonomic shoes; floral-patterned gloves; a collection of unique purpose hand tools and a pretty, wide-brimmed hat perfect for a tea party.

I love hats and have several pretty gardening ones hanging on my hallway wall. My favorite and most practical gardening hat was a thrift store find. It has an under-the-chin tie. Although not as pretty as most gardening hats, it gives me shade and stays on when winds out of the west quickly move in from the south. Although I can see storms moving in from my vantage point, I don’t always stop gardening preceding an incoming storm. I really should rethink that. Our last storm was an EF1 tornado.

I also have waterproof footwear; heavy duty hunting boots, best for trampling through overgrown patches and staying upright when a steep hillside is wet.

My favorite small gardening gloves with built-in grips were found on sale at a hardware store at the end of the season. I bought all that were left and wouldn’t know where to find more. They have flowers printed on part of the fabric. The more important aspect is that they have a woven fabric on the palms that give me extra grip. One doesn’t think grip is important until one has a hefty tool in hand using my favorite gardening tool: a pick ax.

Actually I have two, one for each side of the garden flanking the house. I grow mostly rocks on this hillside with intermittent hardy flowers. They have to be to survive in this USDA Hardiness zone 6 garden. I still garden as if I am in USDA Hardiness zone 5 because weather has become so unpredictable. I am especially fond of native trees, shrubs and flowers. The one downside is that it can take them a long time for roots to get established. One of my flowering dogwood trees was 3-feet tall for a good 20 years before it added new growth.

Since soil is 45% rock, I may also be contributing to developing new soil by pickaxing this hillside. Soil is not renewable so I include flower borders to protect what little soil I do have. The pick ax helps me build trenches to install downed tree trunks I use for soil guarding borders.

Cut down trees also make for wonderful water-retaining bottoms to new flower beds. I can pickax holes in the trees to make planting spaces until plants can get established roots. See previous reference for how long that can take.

Wood chips from our local recycling center and homemade compost boost the soil. I can easily mix them with the pick ax pointed end.

The pick ax is also handy because I either need to create planting holes or locate them. Either way, the pick ax makes the process faster and easier, as long as it doesn’t hit me on the head as it ricochets from hitting something hard. Now I rummage around to determine what I’m digging into first. Had to relearn that lesson just last week.

With practice, the pick ax is also an excellent tool for digging up plants that need to be moved. I can easily get a ball of soil around their roots. Moving that big blob of plants and soil is a different story. Not to mention having to dig a large enough hole to welcome it.

One of my two pick axes losing their red paint. (Charlotte Ekker Wiggins photo)

Someone else must have my growing conditions because the latest pick axes I bought had a green plastic coating. When I first purchased these, they were frequently lost, or as I prefer to refer to them, still working somewhere.

My handyman surprised me one day by spray painting them red. In the meantime I also developed a system where I would only place them in certain areas so that I didn’t lose them.

Pick axes vary in size and weight. Whatever my green ones are, they give me a good workout best appreciated at the end of a day in the garden.

Time for a new coat of red paint.

Charlotte

This post is part of the #GardenBloggersChallenge sponsored by Gardencomm for the month of May. You are invited to join in and can see more details at gardencomm.org.

April Gardening Tasks

1. Identify places where you want to add fall bulbs for maximum enjoyment. (Charlotte Ekker Wiggins photo2

April Gardening Tasks

Missouri’s native Eastern redbuds should start their blooming after our slow spring rain earlier this week. I was hard pressed to stay out of the garden even on that rainy day. There are new flowers popping up every day.

At this time of year in USDA Hardiness zone 5 b, there are many garden tasks to tackle:

2. Clean out composters and add to flower beds and fruit trees. Leave a good bucket of finished compost as starter for the next compost batch and start adding leaves, grass clippings if you have them, kitchen scraps and water. Don’t forget to mix.

3. Put up your birdhouses if you haven’t already. Songbirds are natural pest control and add so much interest to our gardens. 60% of all bird species depend on insects for their food so if you have a lot of birds, you should naturally have less pests. Include at least one hummingbird feeder.

4. Lilacs should be blooming this month. Prune lilacs immediately after they bloom. If you wait until later in the season, you will be cutting off next year’s blooms.

5. Continue to sow lettuce, spinach and radish seeds every 10 days or so for fresh spring salads in your pot garden. Call it your garden in pots, if you prefer.

6. If you like to grow peas, this is the last month to plant sugar snap peas and snow peas, they prefer cooler weather conditions. To keep their roots happy, mulch with cardboard to keep them cool, then add a layer of wood chips.

7. Mark off areas behind other plants for fall bulb planting. (Charlotte Ekker Wiggins photo)

8. As daffodils and tulips continue to grow and bloom, sprinkle compost around them to keep the bulbs well fed. When the flowers fade, remove them by snipping off the flower heads. Leave the greenery until it turns yellow; the green leaves help the bulbs store energy for next season’s blooms. Don’t mow the leaves down with the lawn mower until they turn yellow or the bulbs will gradually become smaller and you will not have any more blooms next spring.

9. If you have a vegetable garden area, this is a good time to add cardboard to kill off any growth prior to summer planting. Don't till. The prevailing thought now is that tilling damages the soil ecosystem. Kill the plants you don’t want, make holes to plant the ones you do, or make trenches to plant seeds, and cover.

10. Start your summer plants inside in containers you can transplant outside later; tomatoes, peppers, watermelons, squash, pumpkins, cucumbers, zucchini.

11. Don’t forget companion plants to reduce crop damage; basil is a good bug deterrent for a lot of plants and grows easily from seed.

12. Plant for pollinators as well. I love zinnias and so do butterflies and bees. Native plants such as New England Asters, yarrow and purple coneflowers are good choices for pollinators because they have long blooming seasons. For another good annual, try sunflower seeds. Birds will love the seeds in the fall.

13. Plant more native trees along with compact dwarf fruit trees. Although planting native flowers is still good for pollinators, trees provide better, and more reliable, pollen sources for bees. The smaller fruit trees are good pollen sources as well and, when pollinated by bees, will also give you easily accessible fruit to pick.

Charlotte

Homemade Potting Bench

Potting benches can be something simple to save your back. (Photo by Charlotte Ekker Wiggins)

Potting benches can be something simple to save your back. (Photo by Charlotte Ekker Wiggins)

Homemade Potting Bench

Several years ago, I decided I wanted a potting bench on my deck. Something simple, where I could pot plants without hurting my back. A place where I could haul my cut flowers and still enjoy the outdoors while I was getting them arranged in a flower vase. Or two.

Dozens of websites later, I saw a wide range of potting benches from cute cottage style to elaborate, professional-grade florist potting tables. They were lovely. Some were very expensive. And none of them would fit on either my small deck or in my garage, where I wanted to store it for easy access.

Enter my handyman who saw me eyeing this lovely old aged wood plank. What are you going to do with that, he asked. I don’t know, I just like it. It’s old and weathered, like me. I wonder what stories it could tell.

A few days later, I found this very simple potting table waiting for me in my garage. It’s the perfect height to pot plants without bending over. It’s also narrow enough to easily get stored in front of my garage open shelving.

The legs were made out of remnant wood. The only thing we had to buy where the metal brackets that fit underneath to hold the table legs to the top.

If I don’t want to stand, I can now use a stool when I’m working on the bench. And I doubt there is any damage I can cause to the top.

Sometimes simple is better.

Charlotte

Dead Head New Strawberries

Strawberry flowers getting cut short of fruiting. (Photo by Charlotte Ekker Wiggins)

Strawberry flowers getting cut short of fruiting. (Photo by Charlotte Ekker Wiggins)

Dead Head New Strawberries

It usually takes one little self-talk, maybe two, before I can make myself do this but I know it’s for the best.

I should also confess I use strawberry plants a lot; as border plants as well as in their own beds. I like the idea of walking down a path, leaning over and grabbing a couple of strawberries.

Planting new strawberry plants, though, requires a little patience. The plants will spend their first year getting their roots established. If they are allowed to flower and then fruit, the strawberry fruits will tend to be small because of the energy it takes to fruit.

If you look at brand new and first year strawberry plants, the flowers tend to be small.

First year strawberry plants tend to produce small flowers. (Photo by Charlotte Ekker Wiggins)

First year strawberry plants tend to produce small flowers. (Photo by Charlotte Ekker Wiggins)

Which means the fruit, the actual strawberry, will also be small.

Ergo the need for a little self pep talk. You need to snip off those tiny flowers, Charlotte. Yes, I know. You will have larger strawberries next year if you do. Yes, I know but these look so good, what can it hurt to leave a few and get more strawberries this year…..and so it goes.

But when I spot strawberry plants from earlier year plantings, the argument is won. Those older strawberry plants have large flowers, promising big fruit.

Second year strawberry plants have larger flowers and fruit. (Photo by Charlotte Ekker Wiggins)

Second year strawberry plants have larger flowers and fruit. (Photo by Charlotte Ekker Wiggins)

Strawberries are also heavy feeders, meaning they take a lot of energy out of the soil. Planted in beds, it is recommended to move the plants every 3 years and give the soil time to recover.

If you snip off the flowers, the plants won’t drain all of the soil resources and will produce larger fruits. They can also stay in an area longer especially if you add compost yearly.

Charlotte

Growing Iris

Some of the blue Iris from my mother’s favorite iris beds. (Photo by Charlotte Ekker Wiggins)

Some of the blue Iris from my mother’s favorite iris beds. (Photo by Charlotte Ekker Wiggins)

Growing Iris

When I think of Mother’s Day flowers I think of peonies and iris, usually combined. Where I garden in USDA Hardiness zone 5B, peonies and iris tend to bloom in and around the traditional Mother’s Day holiday. The second weekend in May also tends to be the last hard frost day where I live. In other words, two great reasons to give Mom flowers for Mother’s Day.

There are more than 200 different Iris varieties. The ones most people ask me about are the Bearded Iris, like the ones in the photo.

If you don’t know if you have your Iris planted correctly, this is a good time to look at the green flags that represent leaves and monitor if you see any buds popping up.

White iris from a friend’s garden getting ready to bloom. (Photo by Charlotte Ekker Wiggins)

White iris from a friend’s garden getting ready to bloom. (Photo by Charlotte Ekker Wiggins)

If your Iris is blooming, that means you have it planted in the right conditions for both soil and light requirements.

If not, check how much light your Iris are getting, most prefer full sun.

Secondly, check how deep you planted the rhizomes. Iris flowers and leaves grow from basically a thick root that needs to sit on top of soil. The roots like to be below but the rhizome itself needs to sit at soil level.

Iris rhizomes need to be sitting on top of soil with roots nicely covered. (Photo by Charlotte Ekker Wiggins)

Iris rhizomes need to be sitting on top of soil with roots nicely covered. (Photo by Charlotte Ekker Wiggins)

If you can’t see your rhizomes you have your Iris planted too deeply.

To correct, carefully dig up the rhizomes after a good rain and re-plant with the rhizomes sitting on top. If you planted them too deep they won’t bloom this year so move them as soon as you can. That will give roots extra time to get established and hopefully bloom next year.

Another group of Bearded Iris in bloom in my garden. (Photo by Charlotte Ekker Wiggins)

Another group of Bearded Iris in bloom in my garden. (Photo by Charlotte Ekker Wiggins)

Aren’t these stunning? My mother used to call Iris the equivalent of North American orchids. We grew up in South America with a backyard full of orchids so that was a familiar reference.

One last thing about the name “Iris.” In Greek, the word stands for rainbow, a wonderful association with this lovely family of blooming plants.

The blue bearded Iris in the top photo, by the way, are descendants of ones I brought to Missouri from my mother’s favorite Iris bed. She was given the Iris for Mother’s Day many decades ago, then moved them when she moved to northern Illinois.

I like to think her spirit is still enjoying these flowers.

Charlotte

Forsythia Starts

Forsythias are a favorite spring flower and for good reason! (Photo by Charlotte Ekker Wiggins)

Forsythias are a favorite spring flower and for good reason! (Photo by Charlotte Ekker Wiggins)

Forsythia Starts

Where I live in mid-Missouri, forsythias in bloom are a favorite, and sure sign, of spring. Along with the yellow hues of daffodils, I think of forsythias as being spring gold.

Forsythias are a genus of deciduous flowering shrubs that belong to the olive family. They are known for their long branches that fill with brilliant yellow blooms early in the spring. Forsythia flowers precede their leaves, which means you get a good look at the blooms with no foliage.

Forsythias are very easy to propagate through cuttings. I have to trim mine every other year or so and instead of throwing those cuttings away, I start new plants.

To get new forsythias, start with soft green cuttings. The old growth will be on grayish stems; the newer growth is on the part of the bush we usually cut off.

To plant, make a hole in the moist ground where you want a new forsythia to grow. Recut the end of the cutting to under a growth node, where you see little bumps on the stems. You want those growth nodes under the ground.

I plant several close together in case one or more don’t make it. Keep it watered. The nice thing about doing this in spring is that nature usually takes care of the watering. Monitor, though, to make sure the cuttings are kept moist.

Forsythia branches gently pushed into the ground and watered. (Photo by Charlotte Ekker Wiggins)

Forsythia branches gently pushed into the ground and watered. (Photo by Charlotte Ekker Wiggins)

Now the hard part, the wait.

I monitor the cuttings for moisture but try not to frequently check where the stem hits the ground.

Three weeks after I planted the first forsythia cuttings, signs of success: green leaves growing from some of the cuttings.

Three weeks later, there is new growth from the planted forsythia branches. (Photo by Charlotte Ekker Wiggins)

Three weeks later, there is new growth from the planted forsythia branches. (Photo by Charlotte Ekker Wiggins)

Now I need to ensure this and other cuttings stay hydrated this year. The cuttings will spend most of their first year developing underground roots, which is why moisture is important.

Once the roots are established, forsythia bushes can usually take care of themselves.

I add forsythia cuttings under trees. They also work well as fencing and as a garden focal point.

If you trim some bushes in early spring to bring inside for color, you can also plant those cuttings outside once the blooms are finished.

Yes, it’s just that simple!

Charlotte

Daffodil After Care

Daffodils blooming among my soil-hugging Blue Vinca. (Photo by Charlotte Ekker Wiggins)

Daffodils blooming among my soil-hugging Blue Vinca. (Photo by Charlotte Ekker Wiggins)

Daffodil After Care

Daffodils are a garden favorites and for good reason. They are easy to plant; they come back year after year and, with a little good care, will bloom for many years to come. I’m talking decades here.

If you have ever come across abandoned farmsteads, you usually can find the main farm house by following the daffodils. These small, old-fashioned yellow trumpet-faced flowers announced the advent of spring and were usually planted close to home.

There is another reason why they survived for so long. Their green leaves, or stalks, were not cut down after they bloomed. The leaves are solar collectors, turning sunlight into sugar that is stored in the underground bulbs. That stored energy generates the next year’s flowers. Now do you think you might know why your daffodils aren’t blooming?

I keep bunches of daffodils together for garden color. (Photo by Charlotte Ekker Wiggins)

I keep bunches of daffodils together for garden color. (Photo by Charlotte Ekker Wiggins)

Cutting Daffodils

One of my favorite all time things to do with daffodils is to cut and share them. To maintain their obvious garden presence, I look for daffodils that have fallen to the ground to cut. Some have bent stems, others are just too leggy and can’t hold the flower heads up any more. Those to me are the daffodils that get to come inside, leaving a strong daffodil presence still in the garden.

Downed daffodils get cut for inside flower bouquets. (Photo by Charlotte Ekker Wiggins)

Downed daffodils get cut for inside flower bouquets. (Photo by Charlotte Ekker Wiggins)

One of my garden walks on the south side. (Photo by Charlotte Ekker Wiggins)

One of my garden walks on the south side. (Photo by Charlotte Ekker Wiggins)

Daffodil After Care

As I am walking the garden to cut daffodils, I also dead head the ones that are fading. Daffodils don’t all bloom at once. The tiny yellow ones are the first to bloom, followed by a wide variety of colors and shapes that get different starts depending on how much sun they have, how much rain, the quality of the soil.

When buying daffodil bulbs, get early, mid and late bloomers to extend your daffodil blooming season. While you are at it, also get a bag of bone meal to add to the bottom of the planting hole. Bone meal is a natural fertilizer and excellent daffodil food. A tiny handful per planting hole is all you need to provide the bulbs phosphate to ensure blooms next year. I also scatter a couple of bags of bone meal over the garden before a good rainfall after they finish blooming.

Now here is one of my clumps of white daffodils that are fading.

A clump of fading white daffodils next to a yellow daffodil bunch. (Photo by Charlotte Ekker Wiggins)

A clump of fading white daffodils next to a yellow daffodil bunch. (Photo by Charlotte Ekker Wiggins)

To save what energy they have left, I cut off the fading flower heads leaving the green stems intact. Use clippers to cleanly cut off the flower head.

I also leave the fading flowers in the ground to compost back into the soil. Not always, though. Sometimes I collect the flower heads and add them to the compost bin, just depends on how fastidious I’m feeling.

I don’t cut the nearby yellow daffodils, those stay to keep color in that garden spot.

The daffodil clump trimmed, leaving the fresh flowers. (Photo by Charlotte Ekker Wiggins)

The daffodil clump trimmed, leaving the fresh flowers. (Photo by Charlotte Ekker Wiggins)

The ground cover around the daffodils is Vinca. To keep my soil on this hillside, Vinca has been an excellent plant to hold in the soil. The blue flowers also look lovely among the yellow and white spring daffodils.

It can take over so if you add Vinca, keep it contained by pulling out the plants by their roots.

My refreshed bouquet of cut daffodils now keeping me company inside. (Photo by Charlotte Ekker Wiggins)

My refreshed bouquet of cut daffodils now keeping me company inside. (Photo by Charlotte Ekker Wiggins)

My newest bouquet of mixed daffodils now keeping me company. Do cut and bring some inside, they are wonderful signs of spring and hope!

Charlotte

Home Pot Garden

One of my past pot gardens growing on my back deck. (Photo by Charlotte Ekker Wiggins)

One of my past pot gardens growing on my back deck. (Photo by Charlotte Ekker Wiggins)

Home Pot Garden

Some people are calling the resurgence in gardening Victory Gardening 2.0, a reference to the gardens US citizens grew during World War II. I think “Pot Garden” is more appropriate. These pot gardens can grow almost anywhere and still provide fresh produce and herbs.

I have grown a pot garden on my southern facing deck for many years and here are my tips to getting started, with the help of the National Gardening Bureau:

  1. Know your hardiness zone, which is an average over 13 years of the coldest temperatures where you live,. This will determine what you can grow. I am in USDA Hardiness zone 5B. If you don’t know your growing zone, enter your zip code here to find your zone.

  2. What do you and your family like to eat? No point in growing something no one will touch. Make a list of what your family likes to eat and research their harvest times. Right now snow peas, lettuce, radishes, spinach, broccoli and cauliflower are good to grow, they prefer the cooler spring temperatures.

    Also consider growing favorite herbs you use in cooking, there’s nothing better than fresh herbs out of your own garden.

Herbs are excellent to grow in pots and great to add to cooking. (Photo by Charlotte Ekker Wiggins)

Herbs are excellent to grow in pots and great to add to cooking. (Photo by Charlotte Ekker Wiggins)

More on Setting up a Home Pot Garden

3. Seeds or Starts? If this is your first foray into gardening, get plant starts, those will grow faster and encourage you to plant more. Seeds will work as long as you read the packages and plant at the appropriate time.

4. Know Your Soil. If you are sowing, or adding starts, to soil, make sure you know what kind of soil you have, your local Extension office can run a test and tell you. One test costs $15.

5. Plan where you will grow. If you are making a pot garden that’s easy. If you are growing directly into soil it helps to have an area planned.

6. Grow both vegetables and flowers. Flowers attract pollinators that will make your vegetables healthier and more abundant. Mix vegetables and flowers, don’t plan them separately.

7. Start Composting. If you don’t already compost, start composting. You will repurpose kitchen scraps and help keep your garden soil healthy.

Keep gardening tools handy, here I have children’s tools close by. (Photo by Charlotte Ekker Wiggins)

Keep gardening tools handy, here I have children’s tools close by. (Photo by Charlotte Ekker Wiggins)

8. Punch holes in plastic bottles and bury them in your pots to help keep plant roots hydrated.

9. Stake plants. Some plants like tomatoes and peppers will need support to grow. Find straight garden sticks and consider tomato cages for vining plants like peas.

10. Monitor for pests. Check under leaves; remove by hand. Some garden pests like rabbits and deer will tend to stay away from pot gardens.

Pot gardens are not only easy to establish but work well through the growing season and don’t require a lot of space. Good luck and have fun!

Charlotte