Late Frost Protection

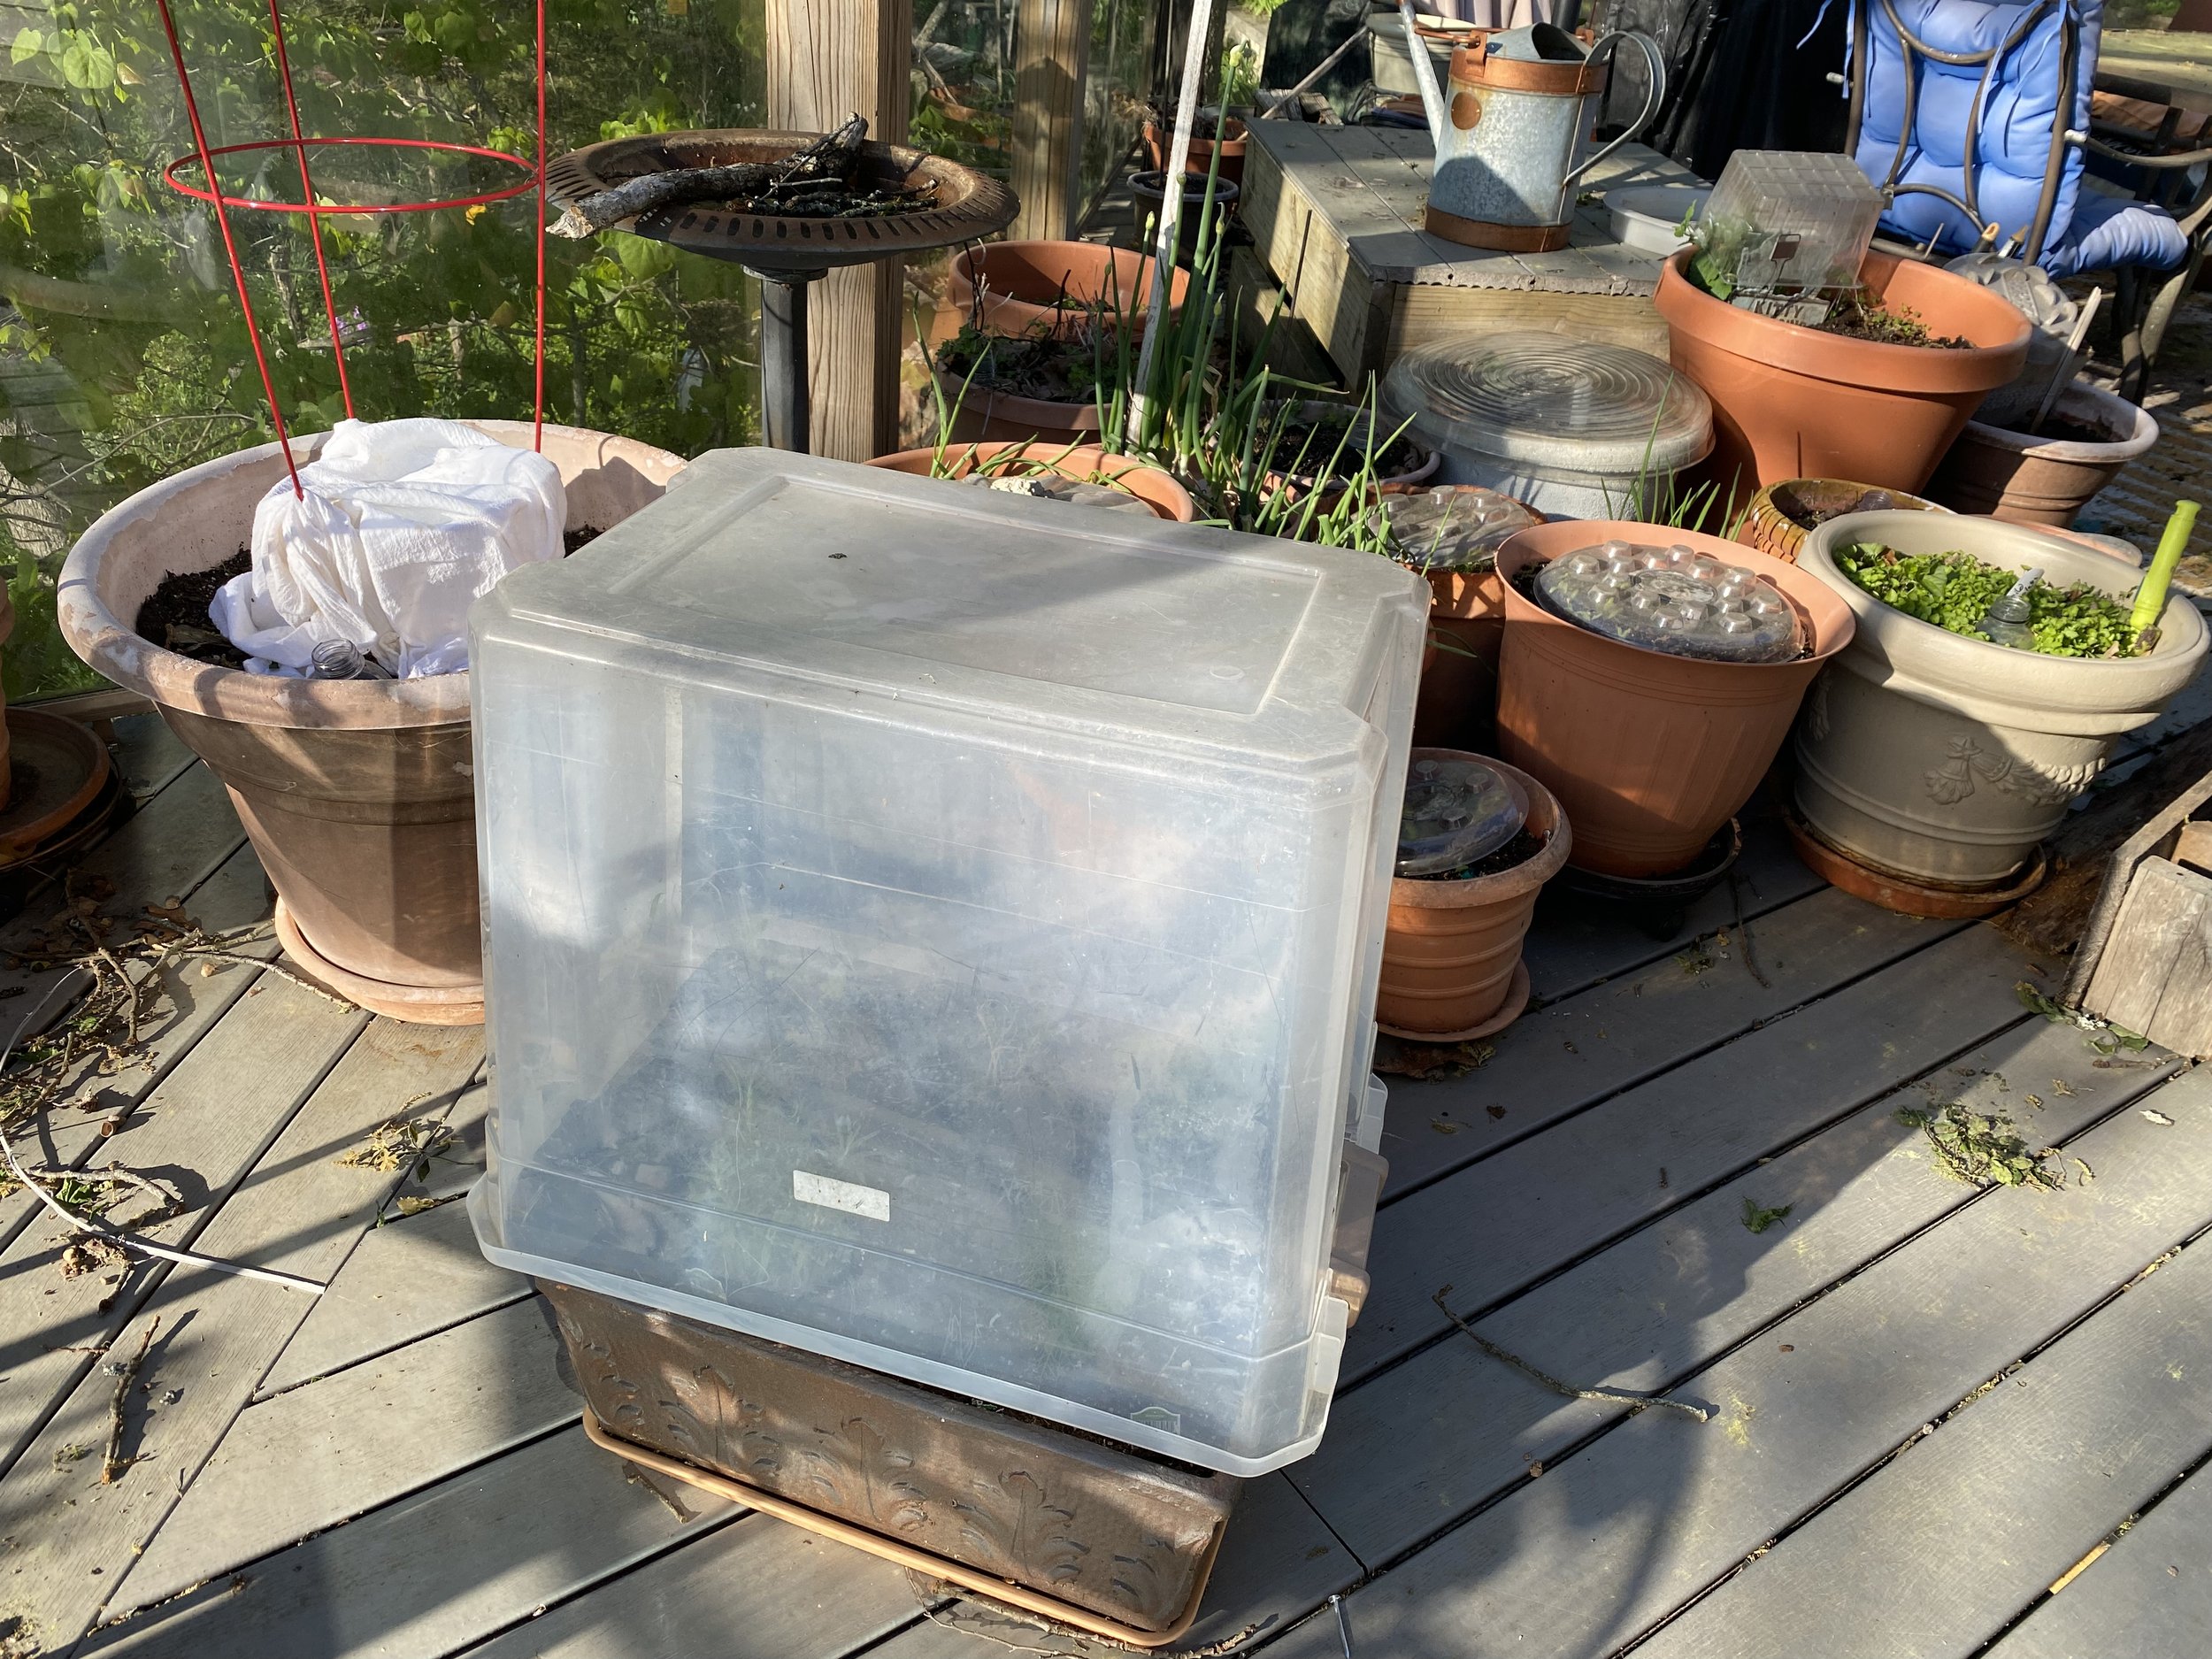
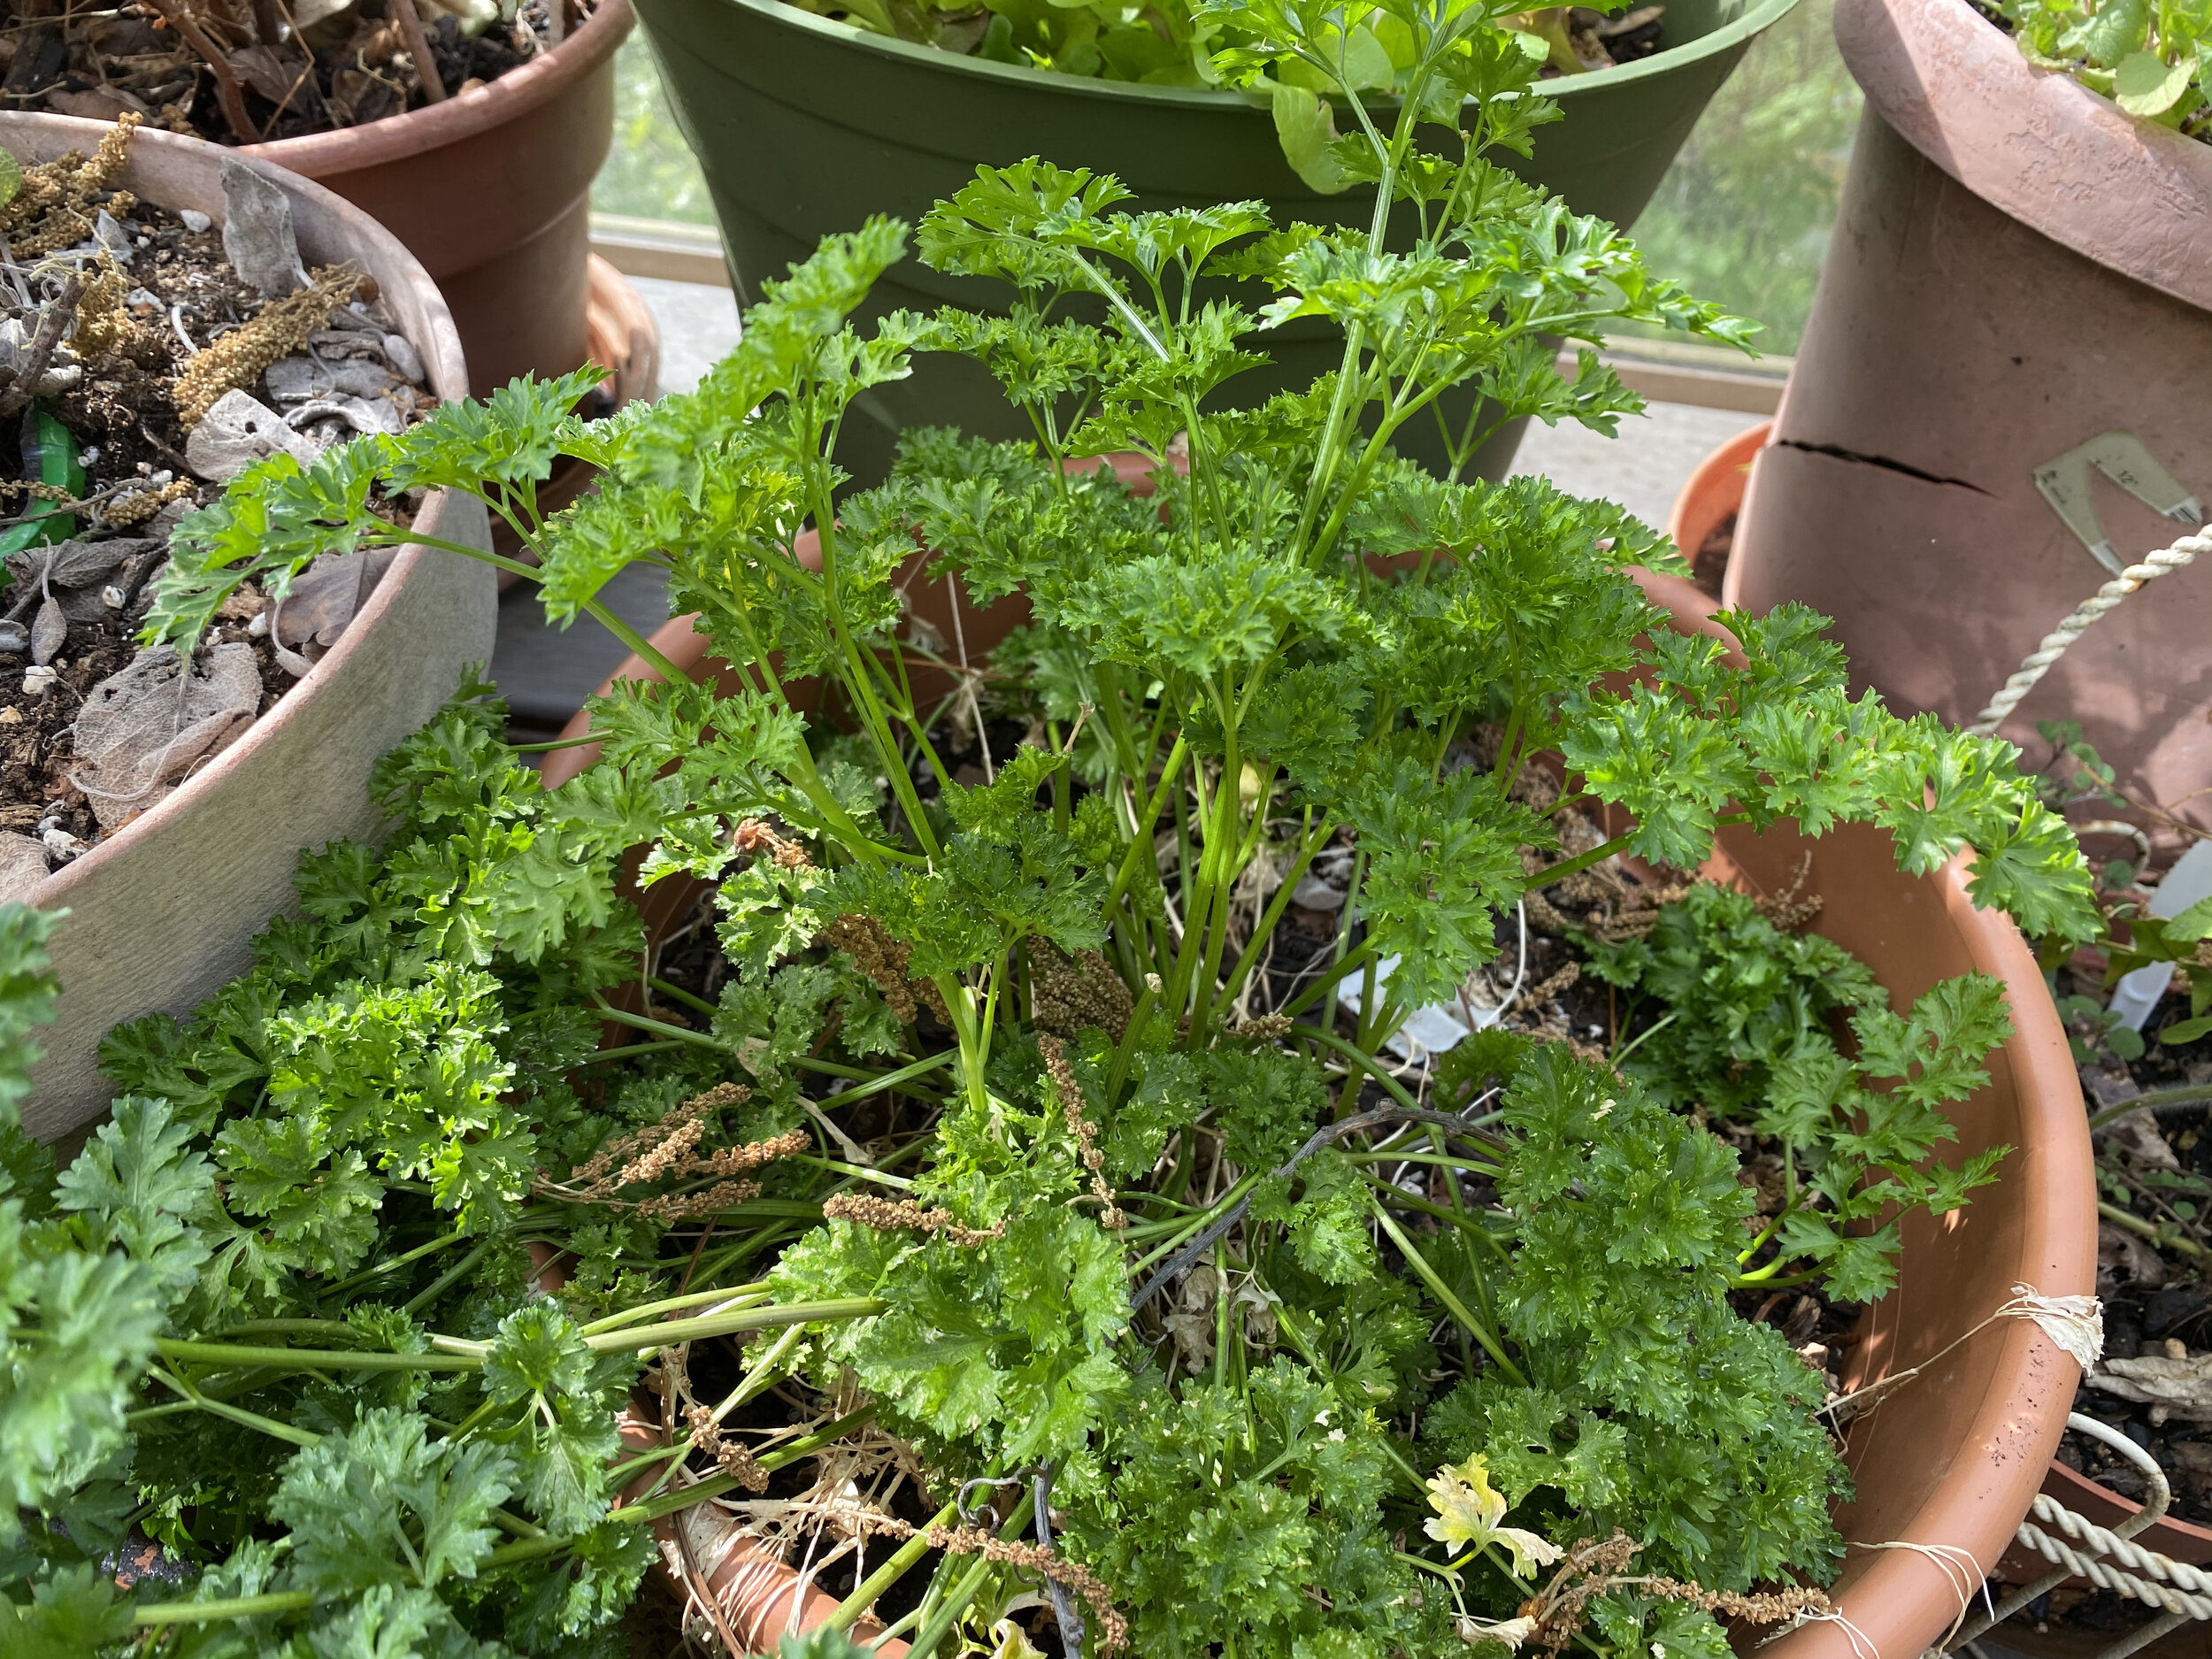
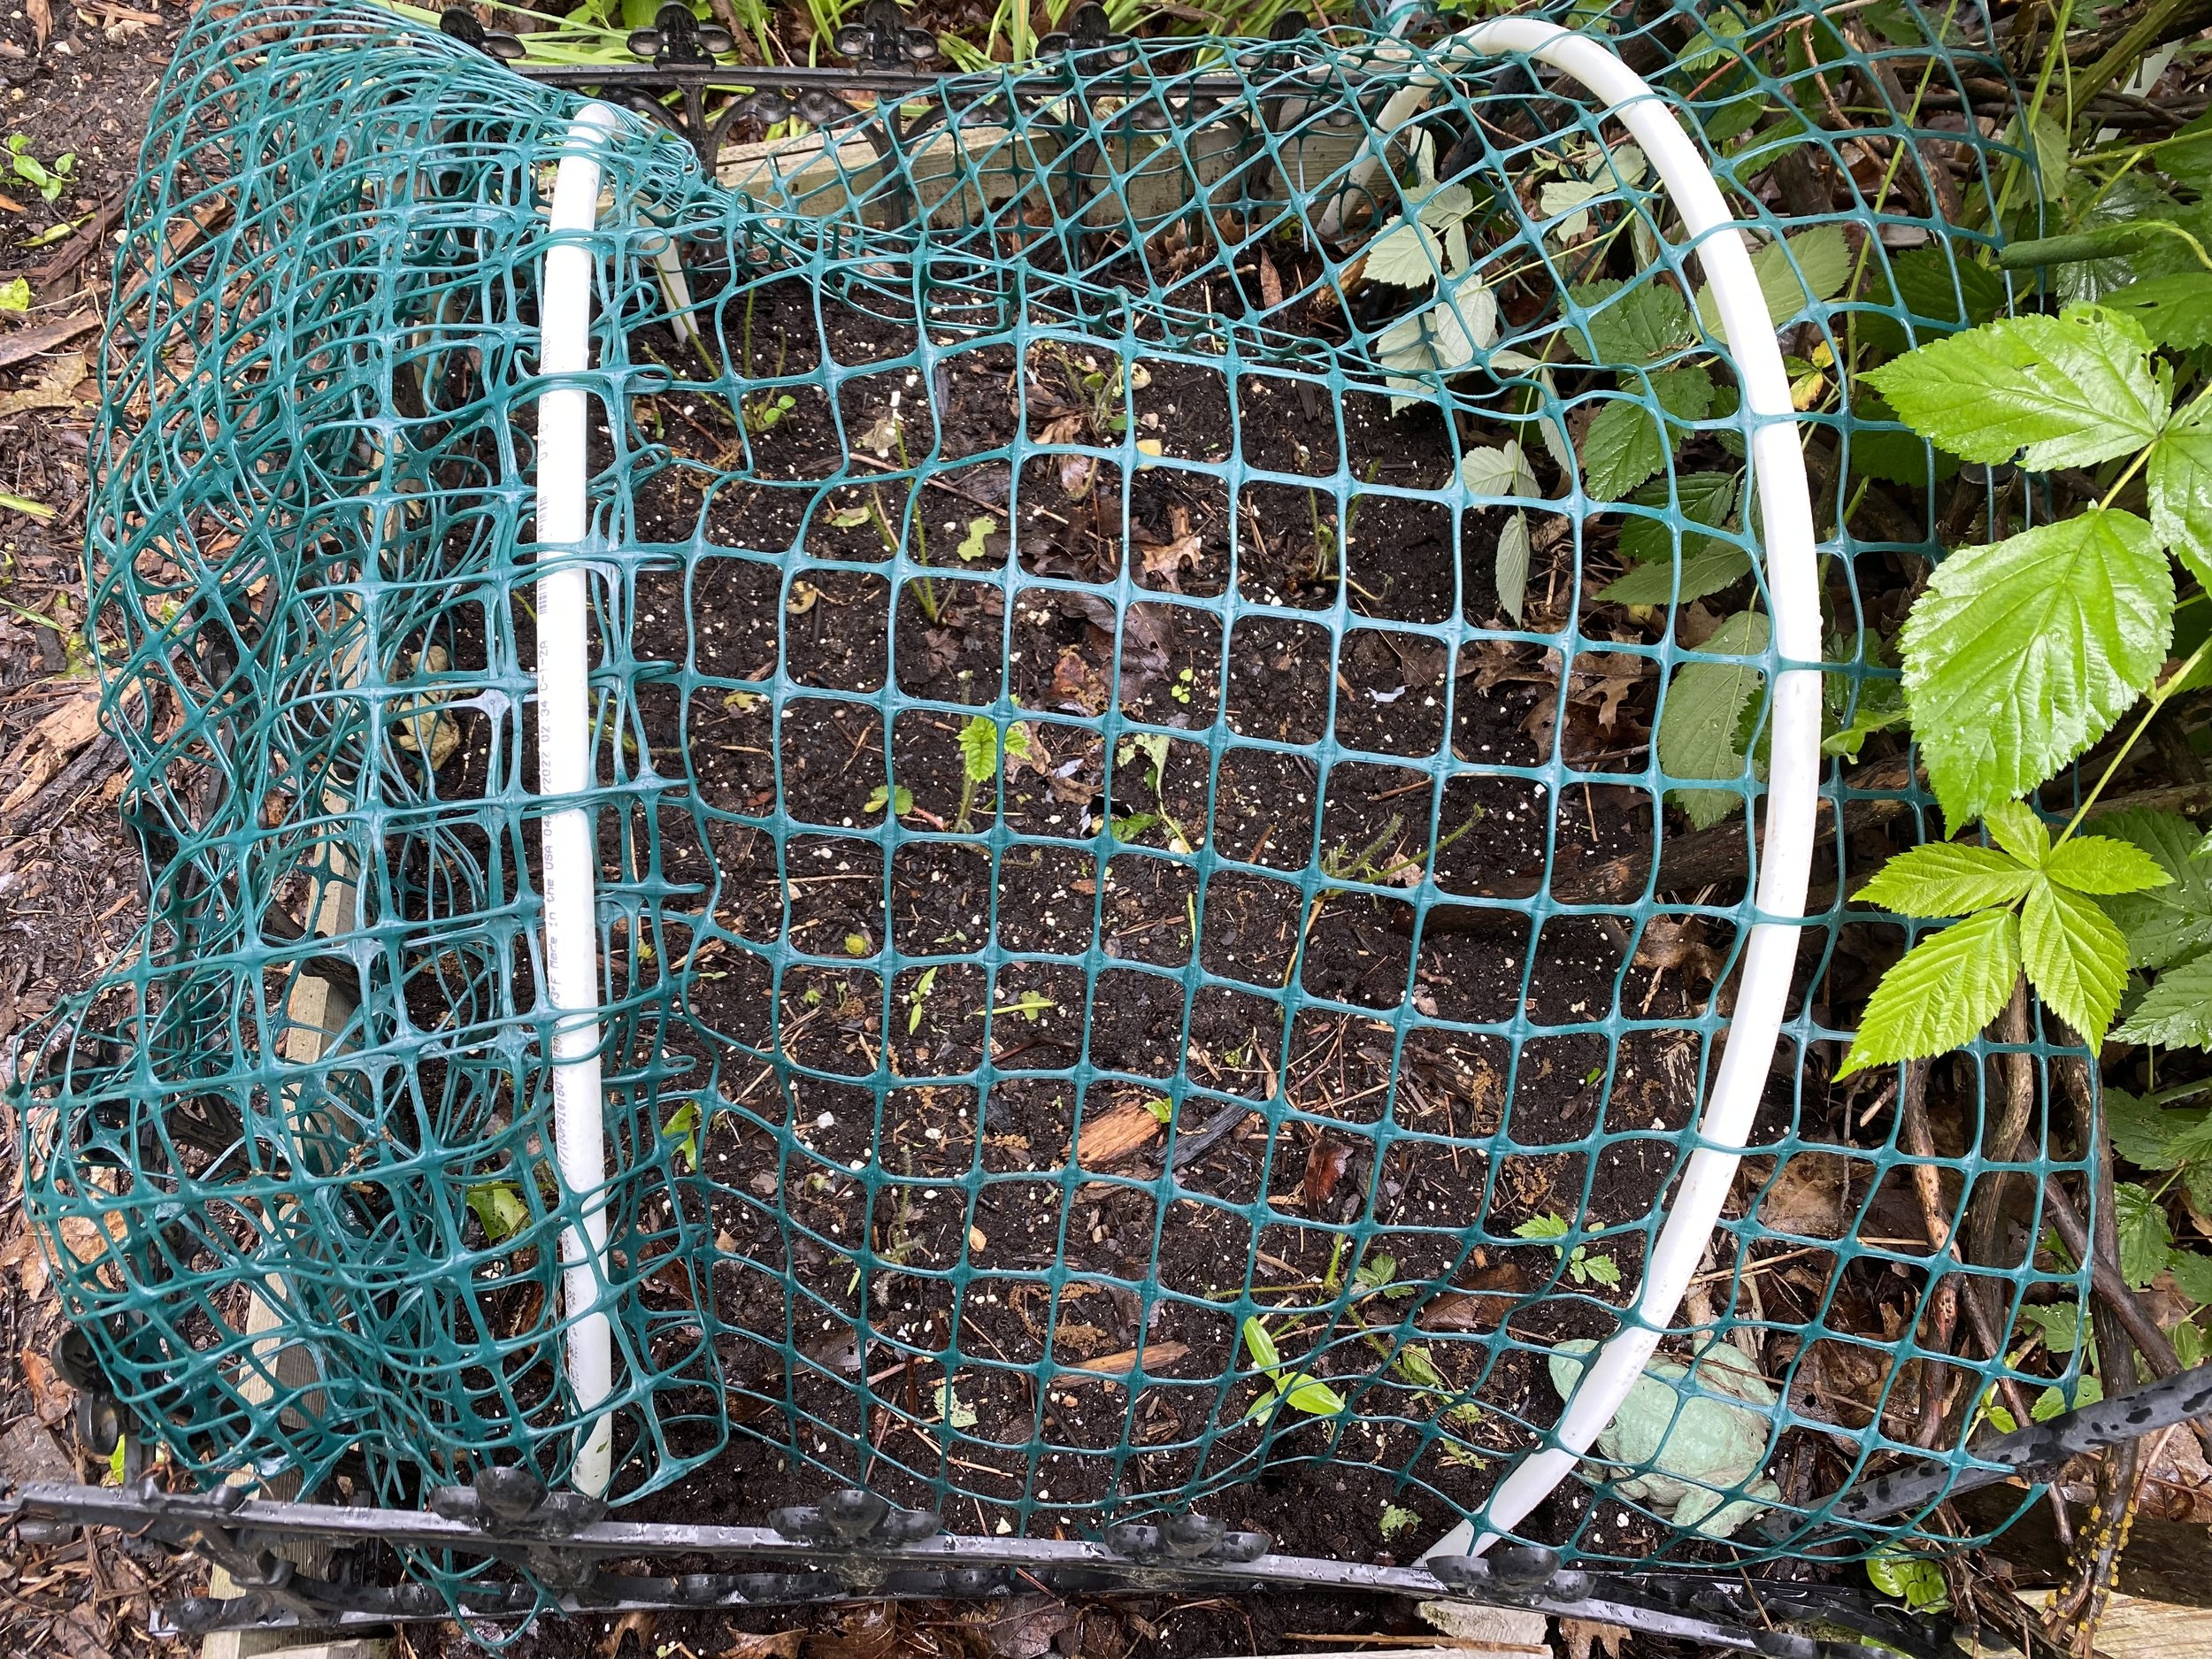
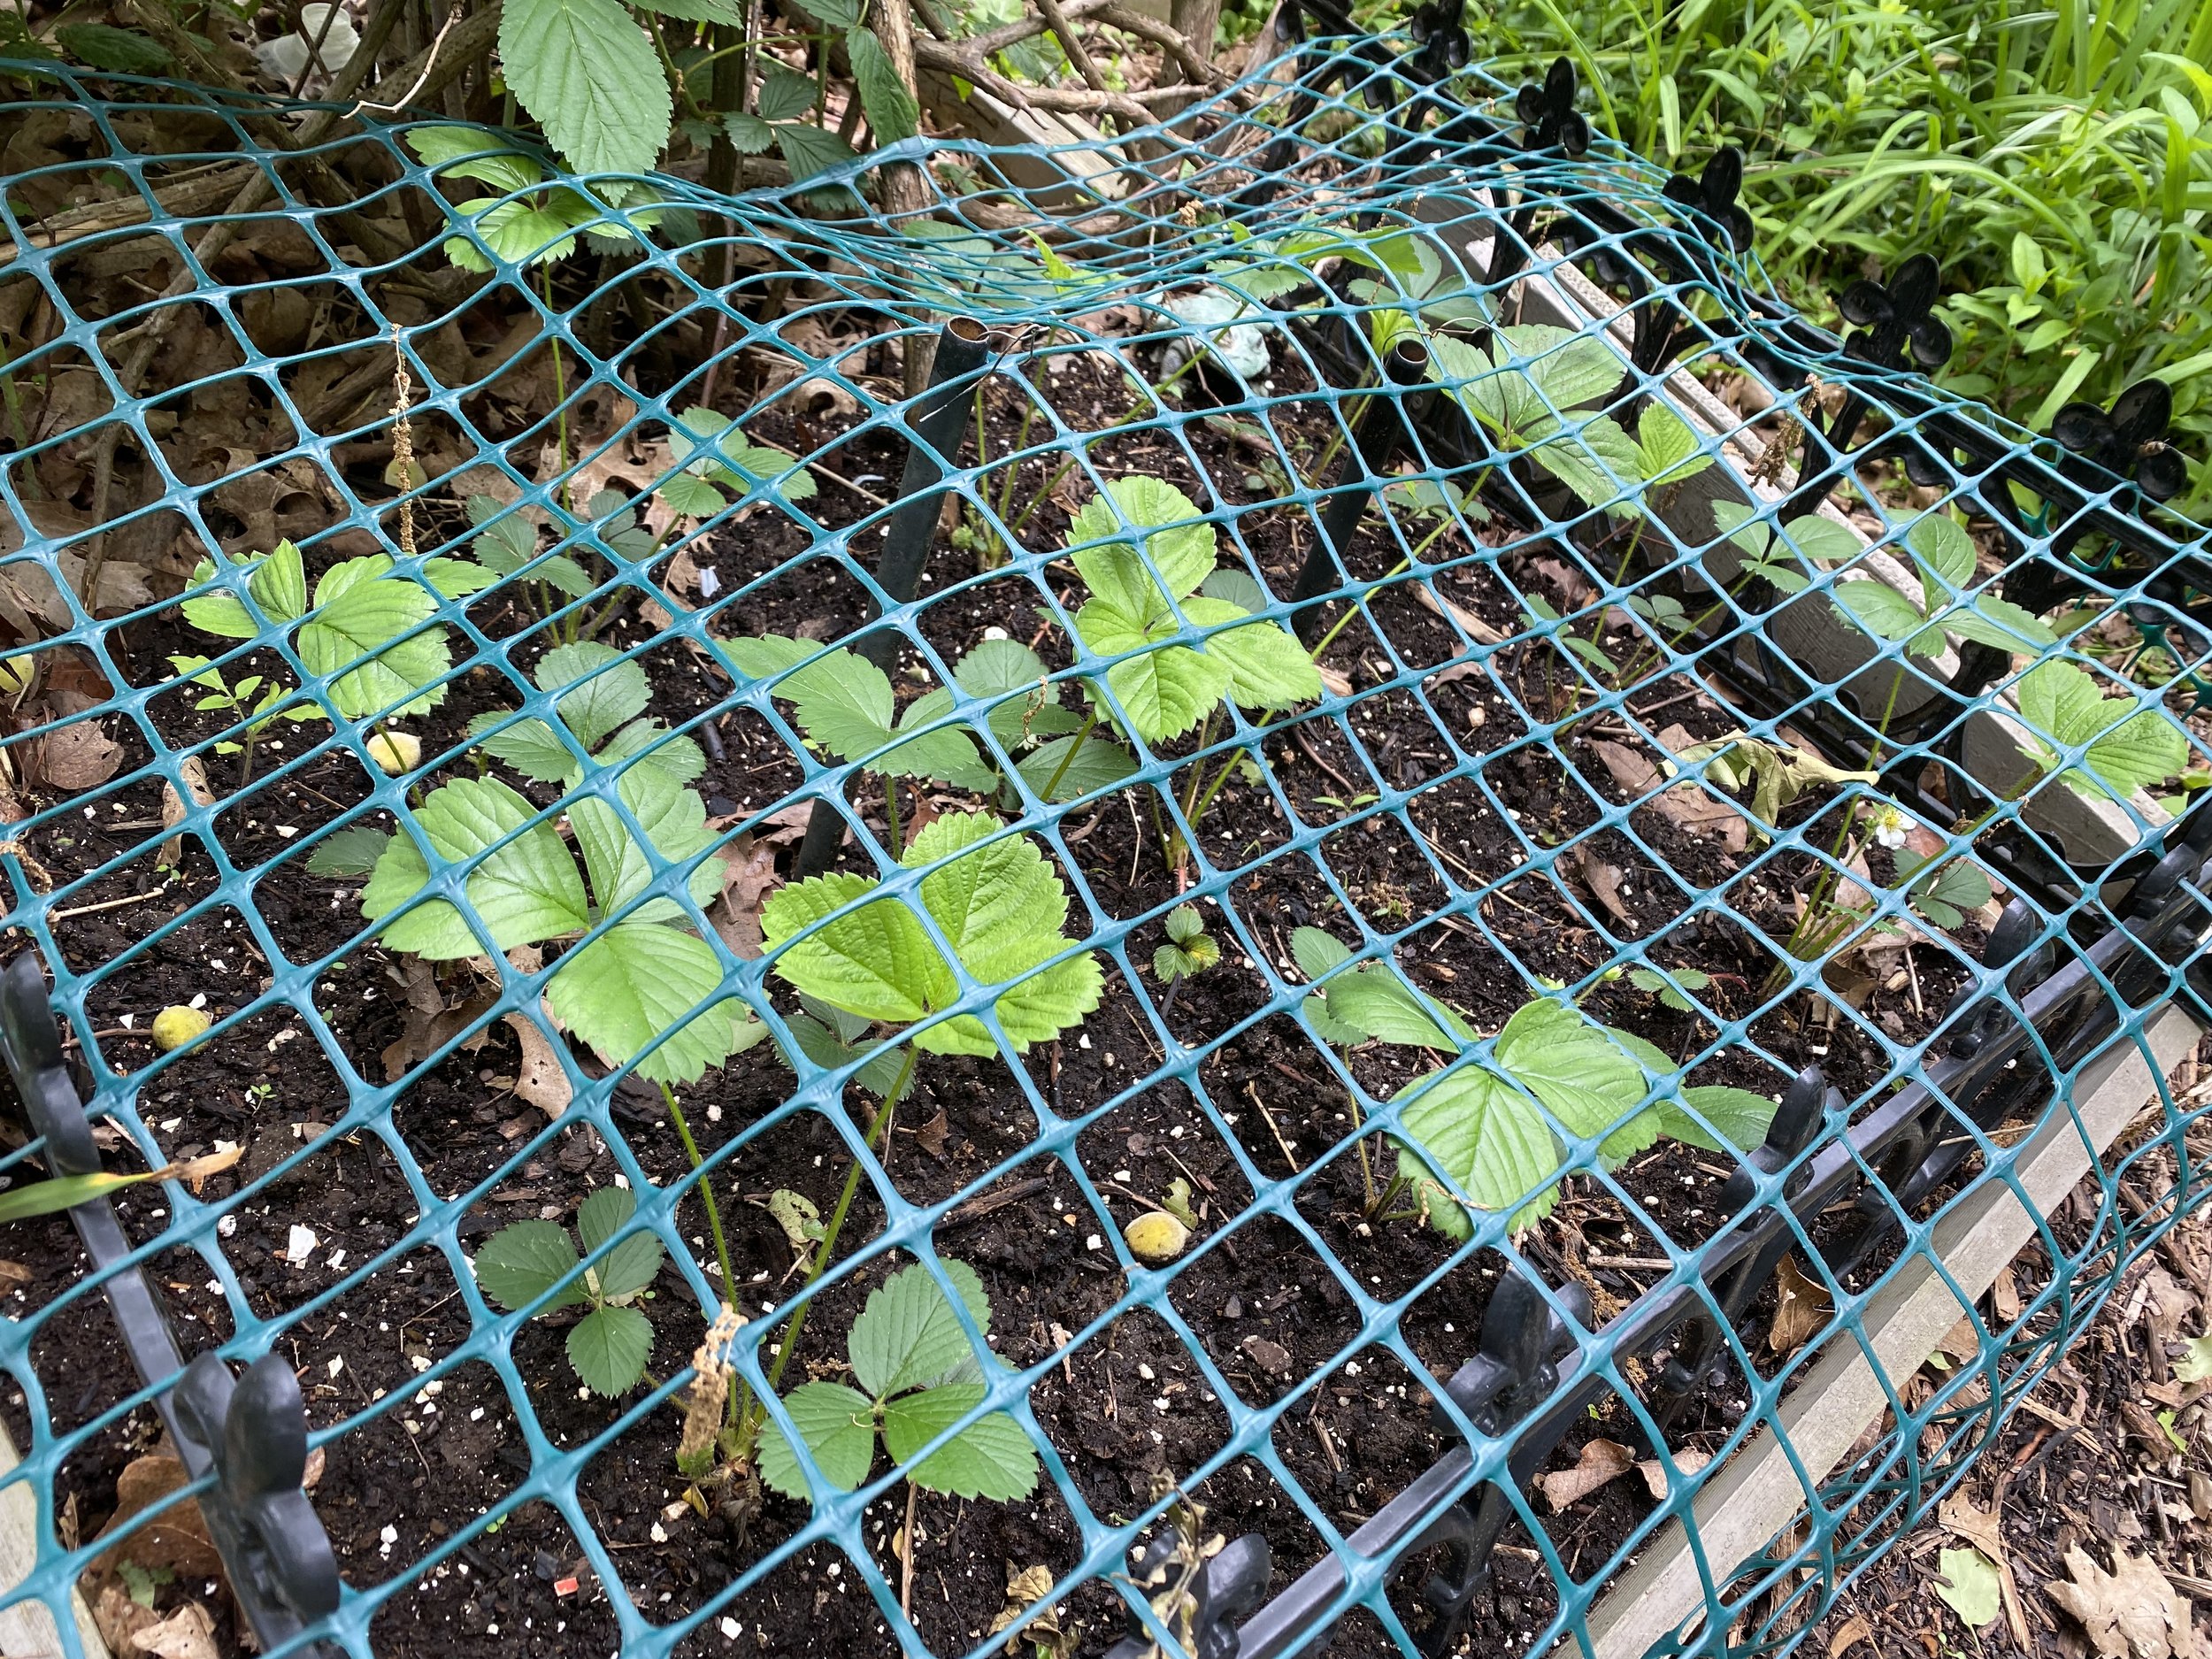
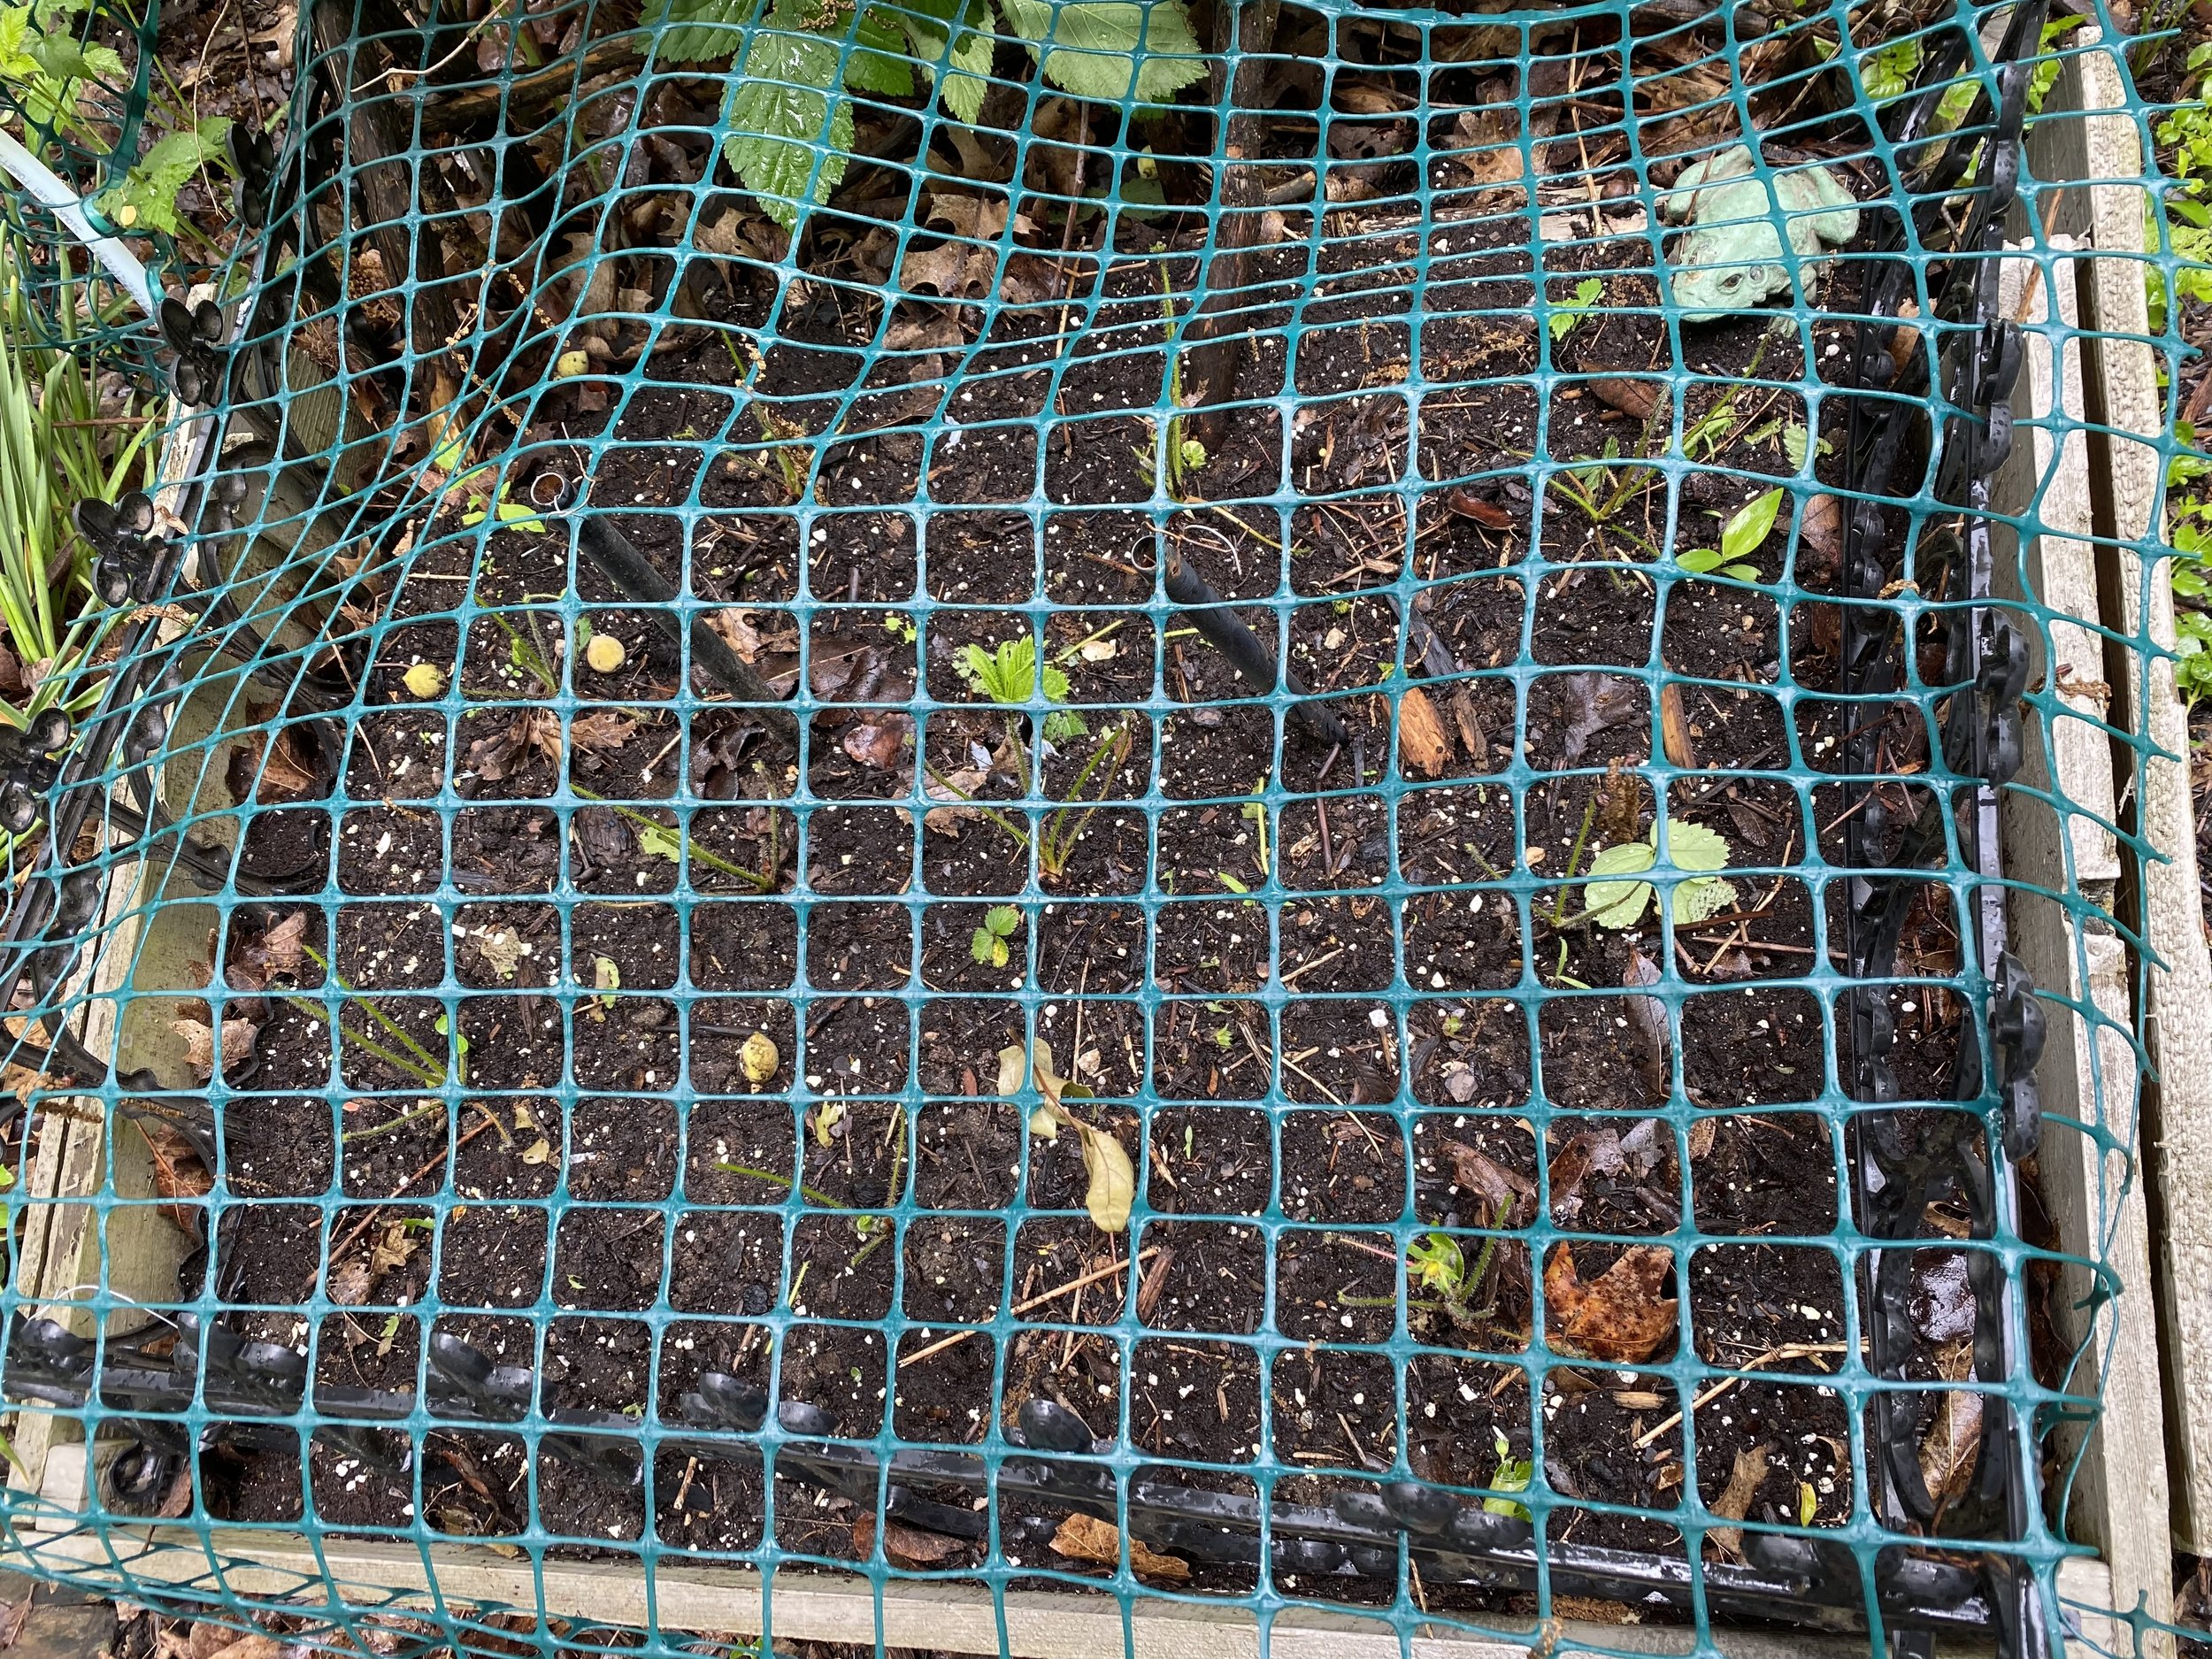
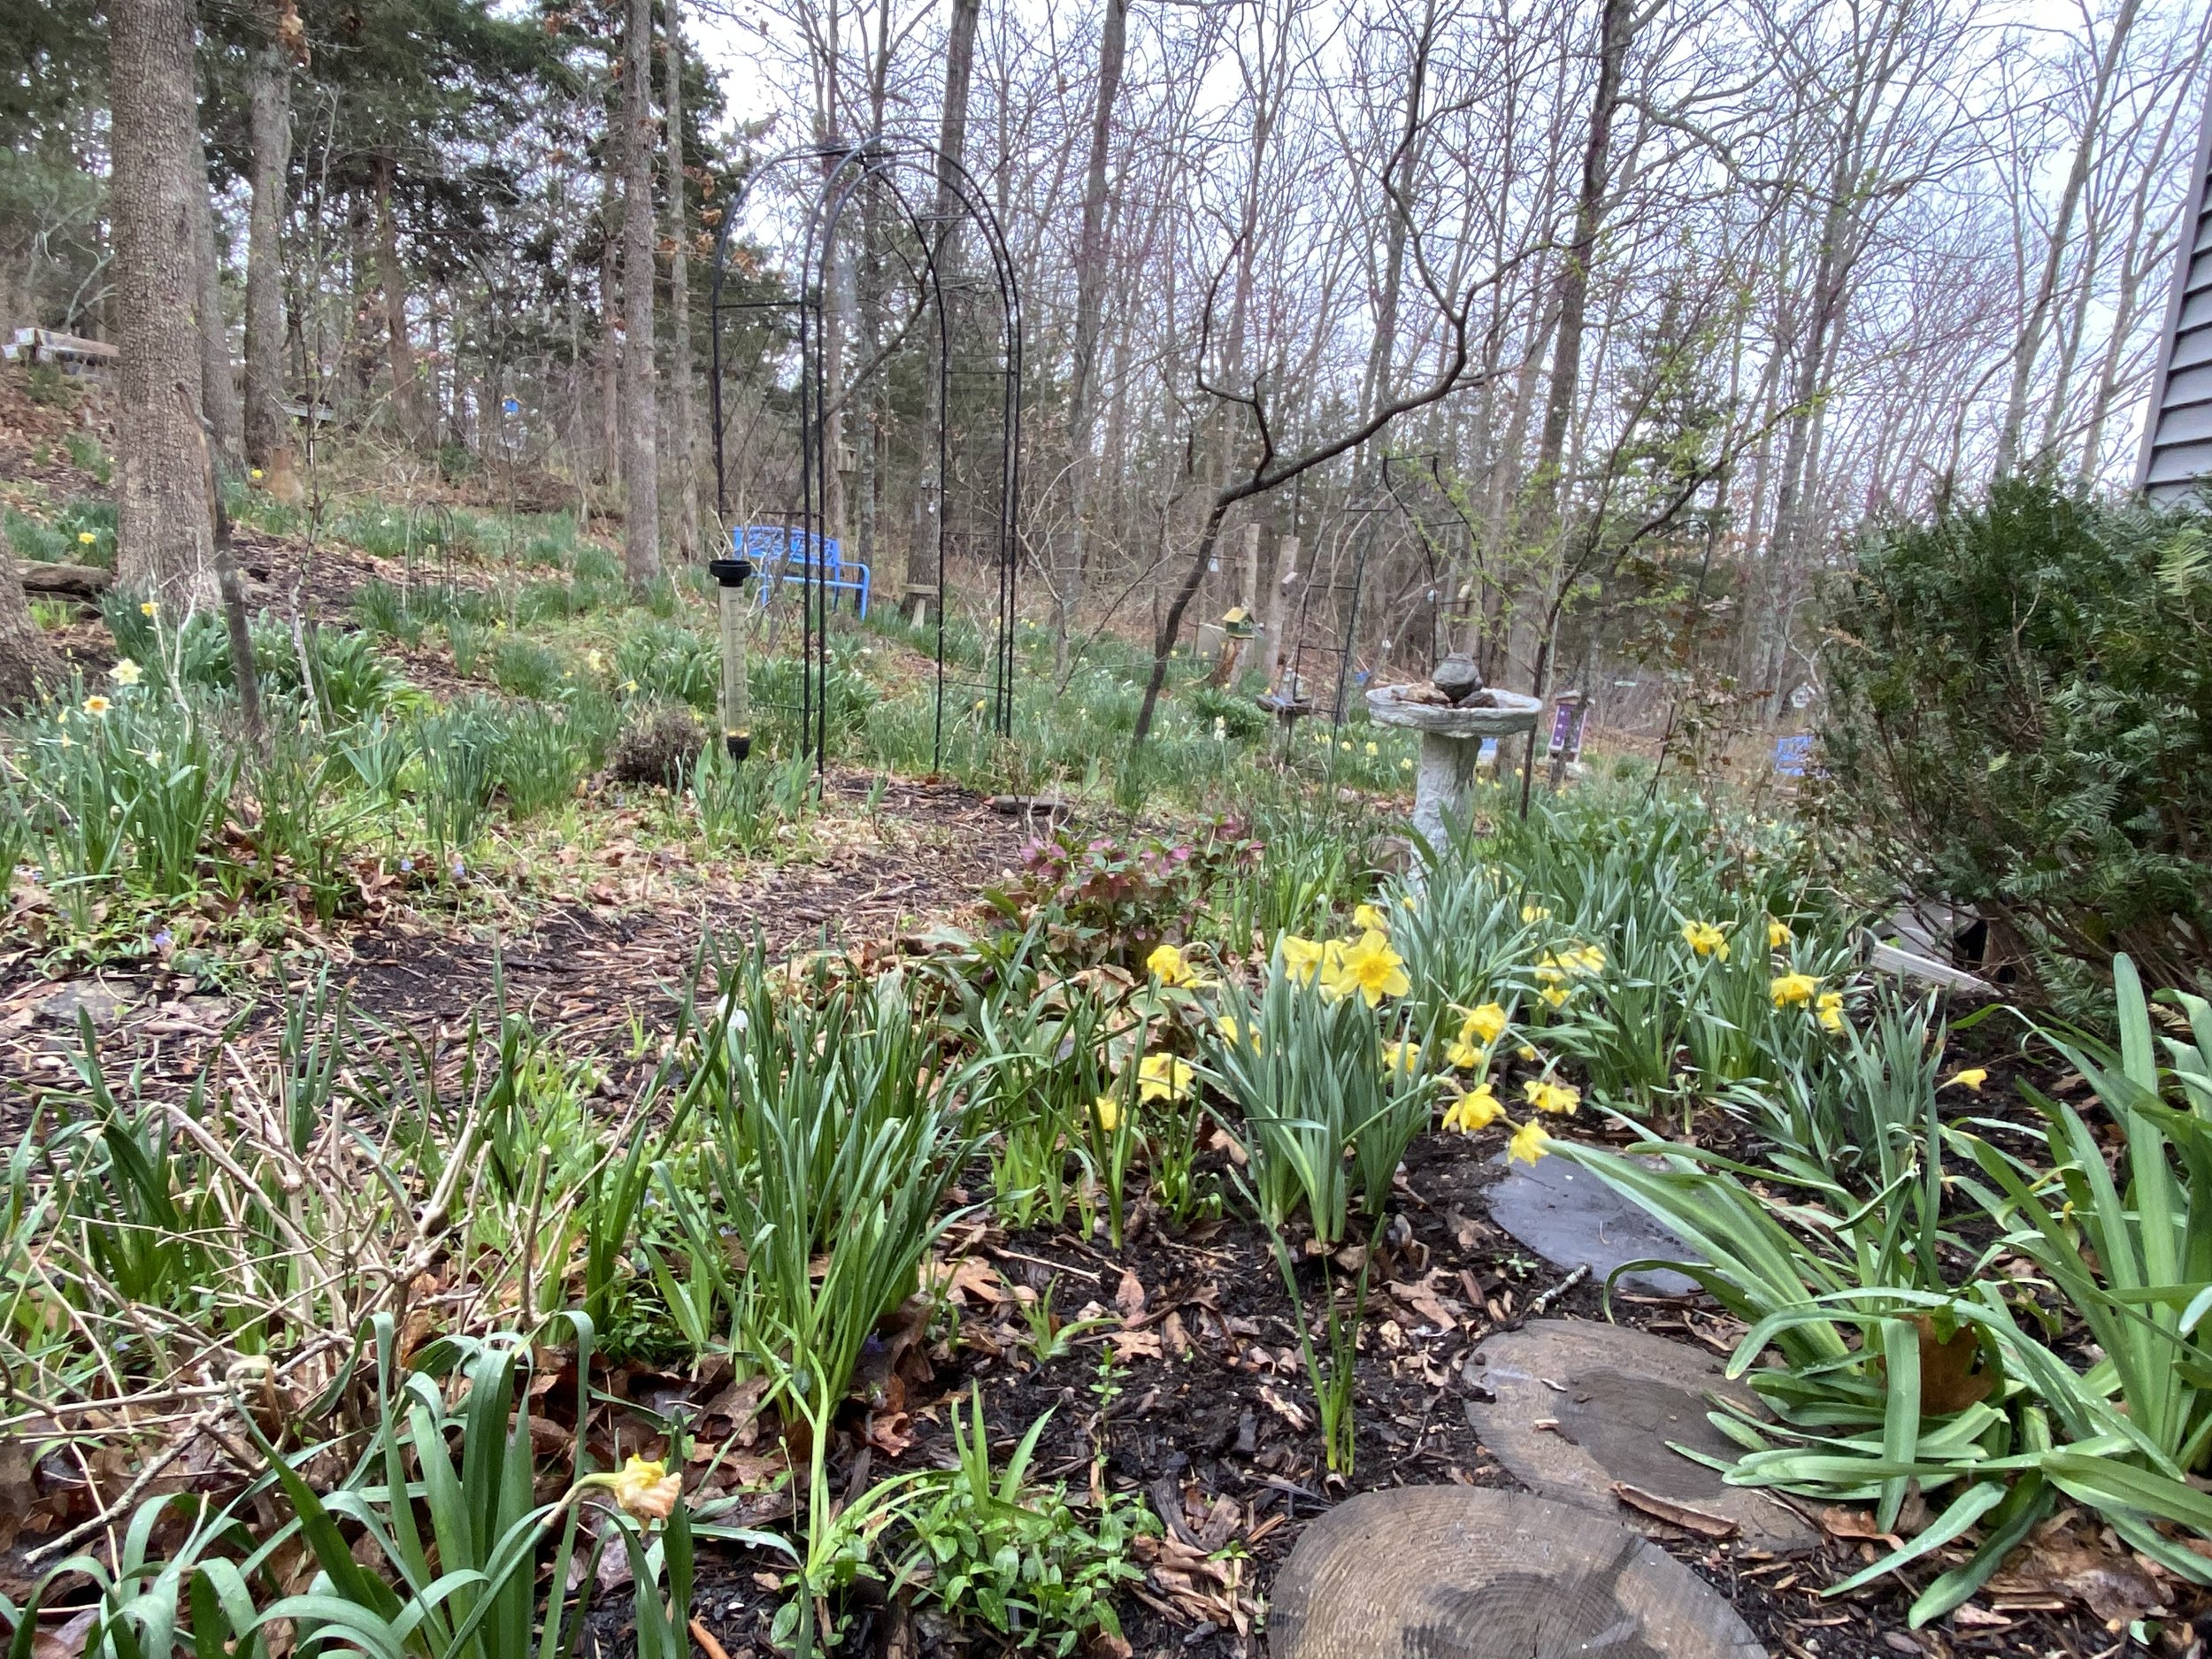
some of the easy ways to protect seedlings from a late frost. (charlotte ekker wiggins photo)

Late Frost Protection

Every spring I do it, too, I get plants started outside too early. Even though our average temperatures are warming overall, our last recommended hard frost date for USDA Hardiness zone 6b is still early May or US Mother's Day May 10.

So it’s no surprise that I find myself having to protect plants started, or taken, outside.

Here are some ideas on how to help outside plants through this last spate of cold weather:

  1. Monitor Weather Forecasts: Check your weather forecasts daily noting the danger of frost. Forecasts can change quickly so stay on top of forecast changes.

  2. Water Plants Before Sunset: Watering the soil around your plants before sunset can help them retain heat overnight. Moist soil releases heat more slowly than dry soil, which can provide some protection against frost.

  3. Mulch Around Plants: Apply a layer of mulch around the base of your plants to help retain soil moisture and regulate soil temperature. This can provide some insulation to the roots and protect them from frost damage.

  4. Provide Windbreaks: Wind can exacerbate the effects of frost, so providing windbreaks such as fences or hedges can help protect plants. These barriers can help reduce heat loss and create a more sheltered environment.

  5. Cover Vulnerable Plants: Use plant saucers on top of pots to give young plant starts cold weather protection. Bedsheets, blankets and yes, even coats can help protect plants; cover vulnerable plants before sunset to retain heat.

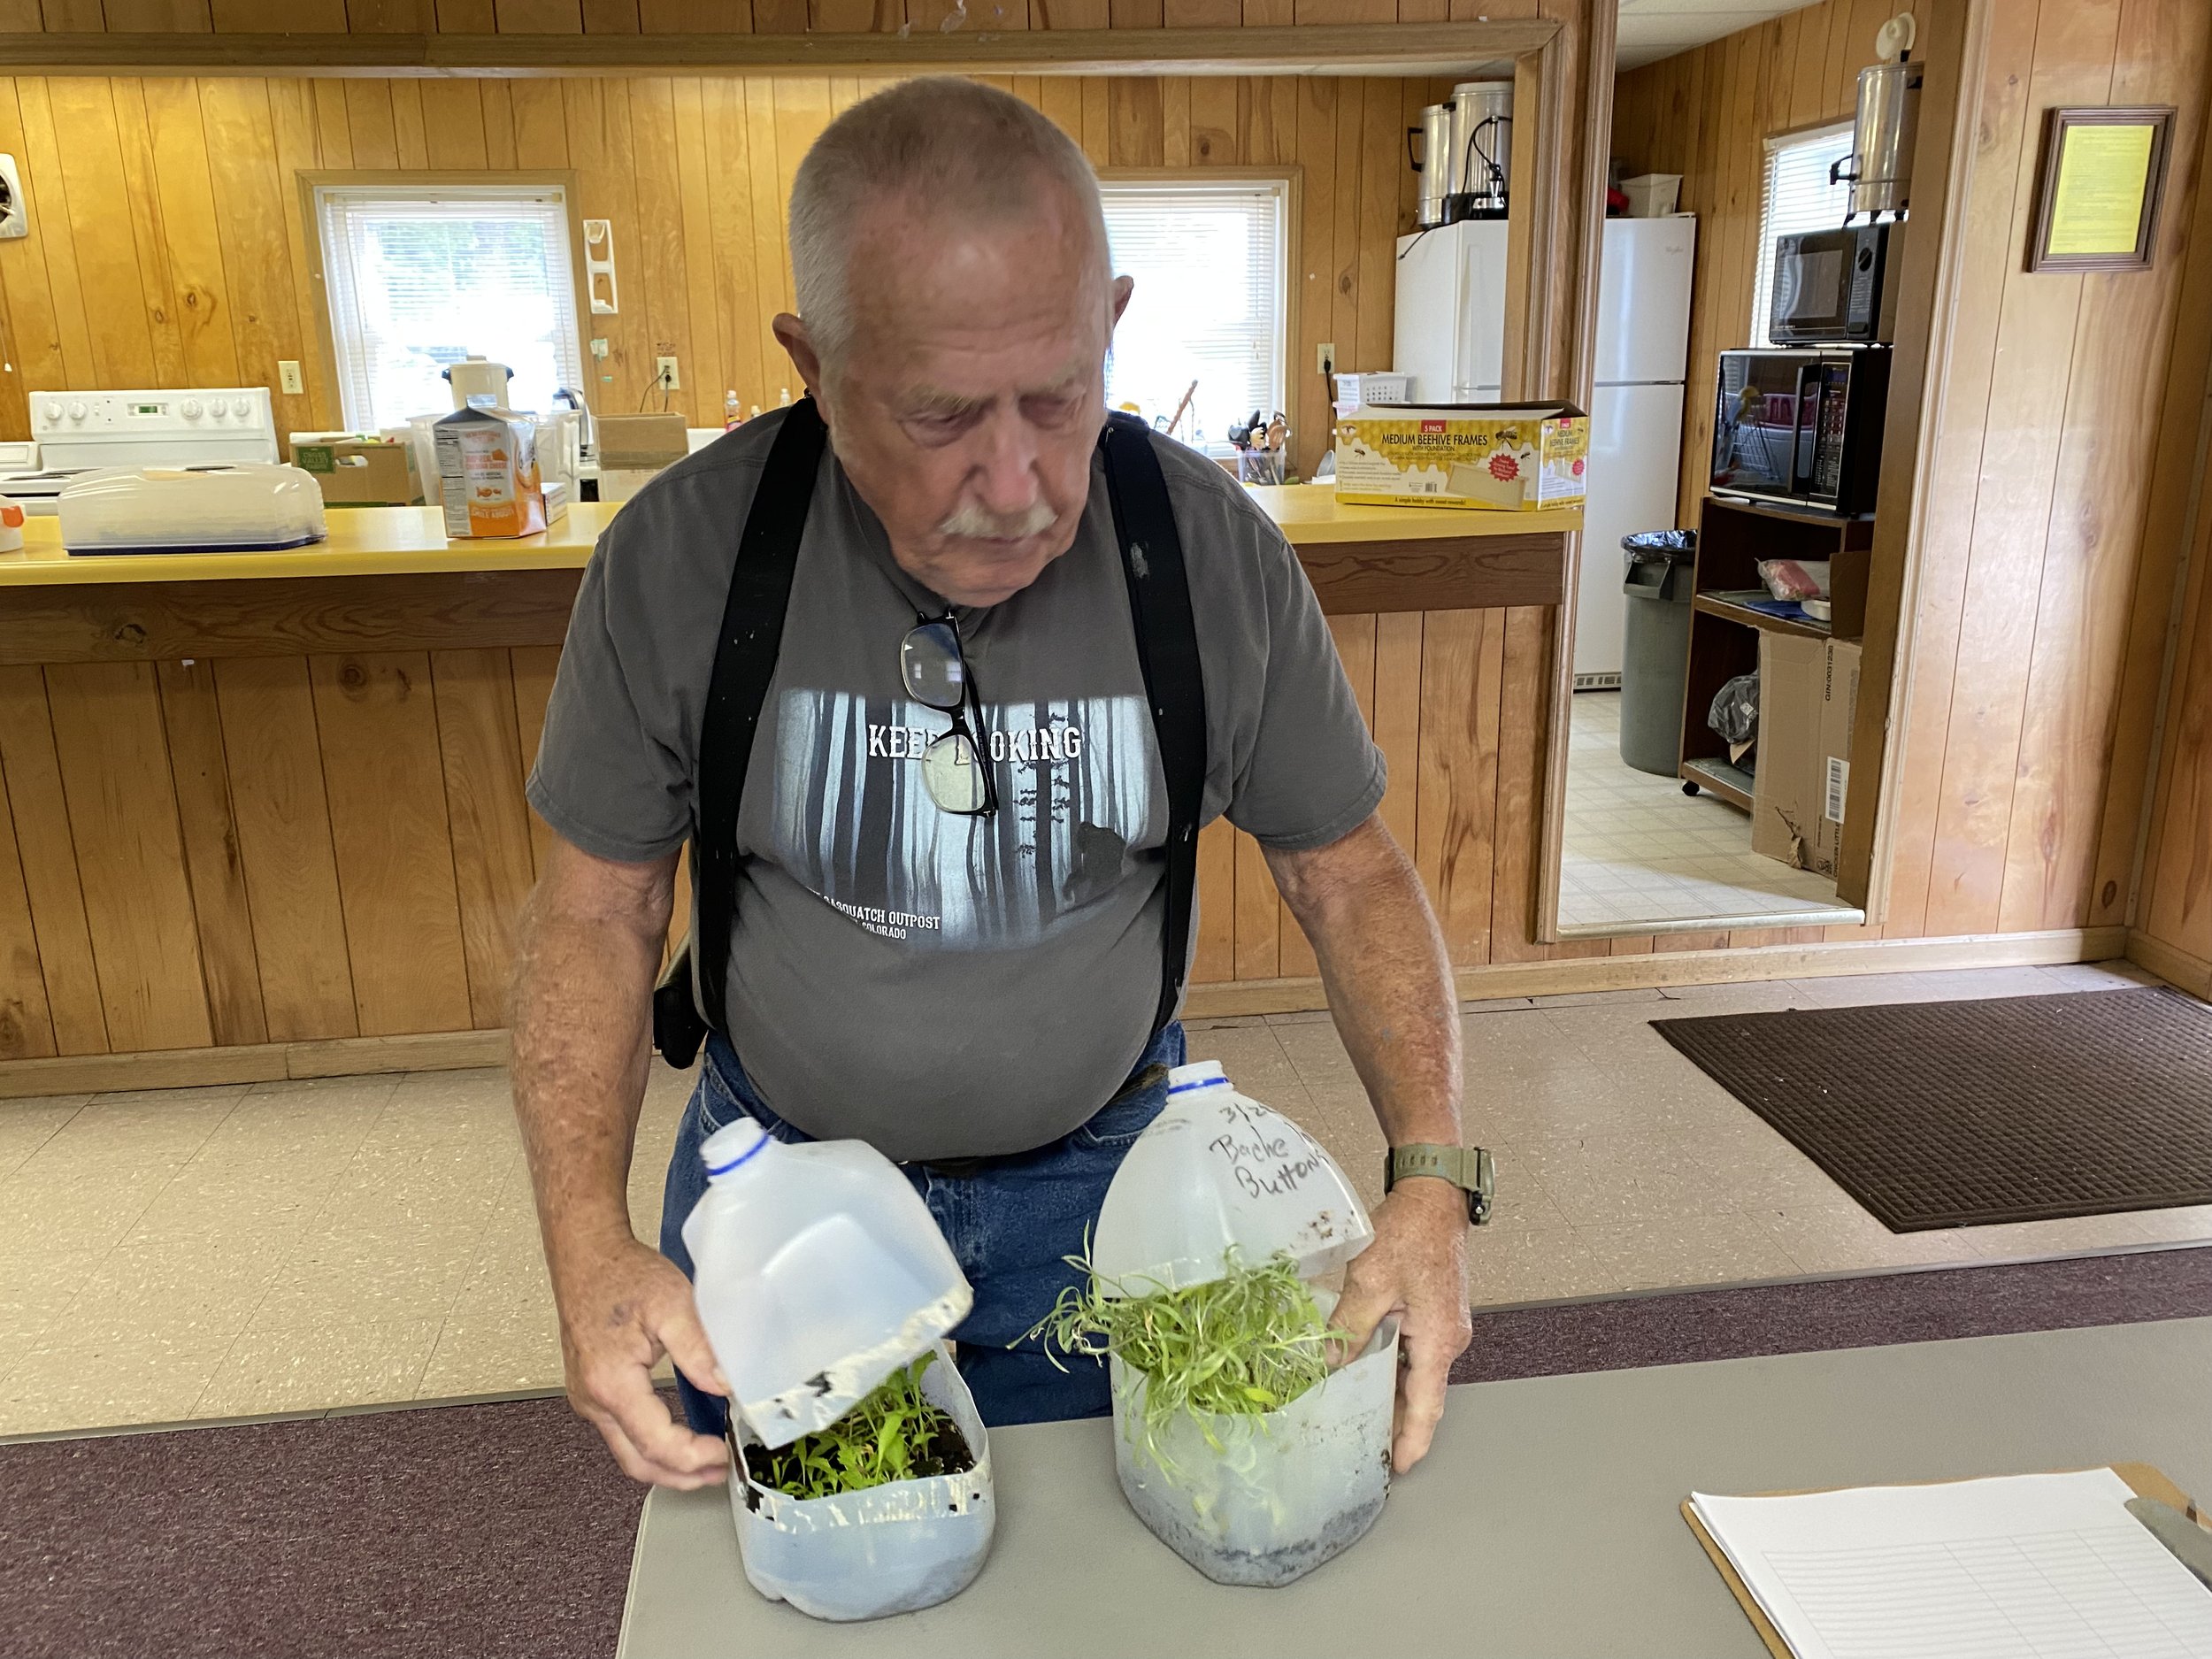
  6. Use Plant Covers: Install row covers, cold frames or plastic totes over your garden beds to create a protective barrier against frost. These covers can trap heat and create a microclimate that is warmer than the surrounding air.

  7. Bring Potted Plants Indoors: If you have potted plants that are susceptible to frost damage, bring them indoors or place them in a sheltered area such as a garage or porch until frost danger is passed.

    For more gardening, beekeeping, cooking and easy home decor tips, subscribe to Garden Notes.

    Charlotte

Mark Surprise Lily Spots

This patch of surprise lily tops are starting to die off. (Photo by Charlotte Ekker Wiggins)

This patch of surprise lily tops are starting to die off. (Charlotte Ekker Wiggins photo)

Mark Surprise Lily Spots

If you like surprise lilies, also called Resurrection lilies, as much as I do, you will have them planted all over your garden. The challenge is that come mid-spring, as daffodil greenery dies off, the easy to spot green leaf tops also start to die back. They’ve been around in spring storing energy for mid-July when the surprise lilies will bloom, aromatic pink flowers on top of naked stalks.

In Missouri, these lovely hardy Amaryllis cousins are also called “naked ladies.”

To make sure you don’t dig into the spot full of surprise lily bulbs, this is a good time to mark those spots.

  • You can do it with sticks at corners with twine.

  • You can also do what I do and wait for all of the greenery to die off, then plant annuals with shallow roots such as zinnias and cosmos. By late summer, when surprise lilies bloom, they will pop up in the middle of the blooming annuals making for a lovely combination.

Surprise lilies are bumblebee favorites, I often have to check inside the flower before picking.

These are surprise lilies in bloom mid-July where I live. (Photo by Charlotte Ekker Wiggins)

These are surprise lilies in bloom mid-July where I live. (Charlotte Ekker Wiggins PHOTO)

What you don’t want to do is to put a shovel, or pick ax, into that pile of resting bulbs. Whatever works to remind you to leave the bulbs undisturbed, this is a good time to do it.

Charlotte

Spring Pot Gardening

Lettuce and mixed greens are an excellent spring crop to grow in pots. (Photo by Charlotte Ekker Wiggins)

Lettuce and mixed greens are an excellent spring crop to grow in pots. (Charlotte Ekker Wiggins photo)

Spring Pot Gardening

Besides the sheer fun of saying you have a “pot garden,” growing food in pots is an easy and practical way to get yourself fresh produce.

Growing in pots allows each plant to have its own space, allows for easy pest control and helps you provide the right soil and other unique growing conditions. In addition, you can bring some pots such as herbs inside and extend the growing season over winter. I garden in USDA Hardiness zone 6b so for about 5 months some plants need to be protected inside.

To decide what to grow, here is a list of the basic five for spring pot gardening:

  1. Lettuce and mixed greens

  2. Radishes

  3. Peas

  4. Spinach

  5. Onions

All of these crops like cool spring weather.

Radishes, from the red bulbous root tot he greens, are excellent in salads. (Photo by Charlotte Ekker Wiggins)

Radishes, from the red bulbous root tot he greens, are excellent in salads. (Charlotte Ekker Wiggins photo)

A note about radishes. Add the top green to a salad, they are delicious.

If you have a crop you can’t get to, don’t toss it just yet, let it “bolt” or go to seed. If it’s not a hybrid, you can save the seeds for next year and local pollinators will appreciate the flowers.

This spinach is going to seed and will become bee and butterfly flood. (Photo by Charlotte Ekker Wiggins)

This spinach is going to seed and will become bee and butterfly flood. (Charlotte Ekker Wiggins photo)

If you can’t use what you grow, compost. You can start by putting the unused greens in the bottom of the next pot you are making.

Once you pot herbs, you can have them year around. I’ve had this pot of parsley for a couple of years now, wintering it over inside.

Herbs are excellent plants to grow in pots; here I have parsley that wintered over inside. (Photo by Charlotte Ekker Wiggins)

Herbs are excellent plants to grow in pots; here I have parsley that wintered over inside. (Charlotte Ekker Wiggins photo)

One other crop you can grow in pots gets your ready for summer. I grow tomato starts in a pot, then move them to their individual pots to grow more before locating them in their final growing location. Because I have to start them in February, using a pot for their nursery works well.

Start new plants in pots; here cocktail tomatoes are getting an early start. (Photo by Charlotte Ekker Wiggins)

Start new plants in pots; here cocktail tomatoes are getting an early start. (Charlotte Ekker Wiggins photo)

Once starting to crowd in the pot, I carefully move them to either toilet paper pots or their own pots. I give them a few hours a day outside so they get used to the change in conditions before planting them permanently in my garden or leaving them in pots outside on my deck.

There’s a strategy to this. I have squirrels and chipmunks who have developed a taste for tomatoes. If they decide to eat those in the garden I can then bring in the pots to have tomatoes growing inside.

Cats may enjoy an empty pot for naps and dust baths. (Photo by Charlotte Ekker Wiggins)

Cats may enjoy an empty pot for naps and dust baths. (Charlotte Ekker Wiggins photo)

If you have inside cats, you may find they enjoy having an empty pot of soil to curl up in and take a dust bath.

A few last tips about gardening in pots:

Include a handful of compost at the bottom to keep your soil healthy.

Don’t dig up soil from your garden; start with new potting soil.

Wet soil down before adding seeds or plants.

You may also need small gardening tools to make the process easier.

Pot gardening allows you to grow your own in small spaces and have a healthy source of fresh produce all year. Here’s a quick peek at the start of this year’s pot garden.

For more gardening, beekeeping, cooking and easy home decor tips, subscribe to Garden Notes.

What are you going to grow in pots?

Charlotte

Window Shade Tags

the garden marker doesn’t wash off in repeated rain showers. (charlotte ekker wiggins photo)

Window Shade Tags

Maybe it’s because I kept tripping over an old shade stored in my garage. There’s definitely a measure of liking to repurpose. And now I enjoy seeing the cut down window shades as garden markers.

You don’t have to round one of the sides of the cut blinds but I do to make them prettier in a pot. The rounded edges also don’t poke back when I retrieve a tag stored in the old glass milk bottle

I also use an indelible marker so the plant names don’t easily wash off.

Round off one end with scissors and store for easy retrieval. (charlotte ekker wiggins photo)

There are more expensive and fancier plant tags around but these work just fine for me.

For more gardening, beekeeping, cooking and easy home decor tips, subscribe to Garden Notes.

Charlotte

April Gardening Jobs

1. Identify places where you want to add fall bulbs for maximum enjoyment. (Charlotte Ekker Wiggins photo)

April Gardening Tasks

Spring sprung a good 4-6 weeks early this year but winter is having a last hurrah this week. At this time of year in USDA Hardiness zone 6b, there are many garden tasks to tackle:

2. Clean out composters and add to flower beds and fruit trees. Leave a good bucket of finished compost as starter for the next compost batch and start adding leaves, grass clippings if you have them, kitchen scraps and water. Don’t forget to mix.

3. Put up your birdhouses if you haven’t already. Songbirds are natural pest control and add so much interest to our gardens. 60% of all bird species depend on insects for their food so if you have a lot of birds, you should naturally have less pests. Include at least one hummingbird feeder.

4. Lilacs should be blooming this month. Prune lilacs immediately after they bloom. If you wait until later in the season, you will be cutting off next year’s blooms.

5. Continue to sow lettuce, spinach and radish seeds every 10 days or so for fresh spring salads in your pot garden. Call it your garden in pots, if you prefer.

6. If you like to grow peas, this is the last month to plant sugar snap peas and snow peas, they prefer cooler weather conditions. To keep their roots happy, mulch with cardboard to keep them cool, then add a layer of wood chips.

7. Mark off areas behind other plants for fall bulb planting. (Charlotte Ekker Wiggins photo)

8. As daffodils and tulips continue to grow and bloom, sprinkle compost around them to keep the bulbs well fed. When the flowers fade, remove them by snipping off the flower heads. Leave the greenery until it turns yellow; the green leaves help the bulbs store energy for next season’s blooms. Don’t mow the leaves down with the lawn mower until they turn yellow or the bulbs will gradually become smaller and you will not have any more blooms next spring.

9. If you have a vegetable garden area, this is a good time to add cardboard to kill off any growth prior to summer planting. Don't till. The prevailing thought now is that tilling damages the soil ecosystem. Kill the plants you don’t want, make holes to plant the ones you do, or make trenches to plant seeds, and cover.

10. Start your summer plants inside in containers you can transplant outside later; tomatoes, peppers, watermelons, squash, pumpkins, cucumbers, zucchini.

11. Don’t forget companion plants to reduce crop damage; basil is a good bug deterrent for a lot of plants and grows easily from seed.

12. Plant for pollinators as well. I love zinnias and so do butterflies and bees. Native plants such as New England Asters, yarrow and purple coneflowers are good choices for pollinators because they have long blooming seasons. For another good annual, try sunflower seeds. Birds will love the seeds in the fall.

13. Plant more native trees along with compact dwarf fruit trees. Although planting native flowers is still good for pollinators, trees provide better, and more reliable, pollen sources for bees. The smaller fruit trees are good pollen sources as well and, when pollinated by bees, will also give you easily accessible fruit to pick.

14. Start thinking about fall planting. Many suppliers take spring bulb orders for fall delivery.

For more gardening, beekeeping, cooking and easy home decor tips, subscribe to Garden Notes.

Charlotte

Milk Jug Planting

Jim Fullerton brings me his planted milk jugs to see the growth. (Charlotte Ekker Wiggins photo)

Milk Jug Planting

My beekeeping friends last year heard about milk jug planting. It’s a great way to start seeds that need cold exposure over winter and get an early start on the planting season.

During a recent bee club meeting, Jim Fullerton surprised me by bringing in two of his planted milk jugs to show me the growth he had over last winter.

He said he did the same thing I said to do: holes in the bottom, half full of potting soil. Then after watering, tape the milk jugs closed and label.

Jim sewed daisy seeds, left, and coreopsis seeds, right. (Charlotte Ekker Wiggins photo)

Good to see such growth!

Charlotte

June Gardening Jobs

I still have a few potted plants to get into the ground. (Charlotte Ekker Wiggins photo)

June Gardening Jobs

June is the last month where I live in USDA Hardiness zone 5 where plants will benefit from spring rains to settle in. Take advantage of the above average rain to plant new plants and move ones you want in other garden areas, as appropriate. In general it’s best to move plants either when they are still dormant or after they bloom.

Some other gardening chores for this month include:

1.        Keep asparagus beds weeded and let the green top ferns grow until they go brown; do not cut. Add compost.

2.        When mulching, leave 2-4 inches clear from the plant stem and the mulch ring no larger than 5 inches deep. More than that and you are smothering the plant.

3.        Leave spring bulb greenery to die off naturally. I gently remove only the yellow leaves if they bug me and plant summer annuals and perennials to cover them in the meantime. The key here is planting something on top with shallow roots so they don’t compete with the deeper-planted bulbs.

4.         Japanese beetles show up this month so hand pick and drop in a bucket of water with a few drops of dishwashing soap to drown them. Pick early in the morning when they are sluggish. Also treat your lawn with nematodes and milky spores, both will gradually help eliminate grubs.

5.         Trim lilacs immediately after they end flowering so growth the rest of this year will provide blooms next year. Same thing for iris and peonies.

6        Plant a new supply of vegetables every 2 weeks to give yourself a new crop through the season. Early spring crops are done but there is still time for tomatoes, green peppers, green beans, cucumbers, zucchini, squash, pumpkins and annual herbs.

7.  Get flower pots planted. Put a piece of wood in the bottom to absorb water. Water the soil first, let drain, then add your flowers for better adjustment.

8.         Plant annual flower seeds such as zinnias, sunflowers, forget-me-nots, cosmos, marigolds and herbs. Some herbs can be moved inside later for winter use.

9.       When planting wildflowers, mark the beds where seeds have been added. Some wildflowers may take 2 years to germinate.

10.       For those of you with grass, don’t cut more than 1/3 of the grass down at one time.  For spots where grass doesn’t grow, plant flowers.

11.       When adding perennials, focus on native plants. Once established, they will require less water and care than non-natives and they will be food for native pollinators.

12.        Pinch mums once a week to encourage them to grow bushy for fall flowering. I take the pinched off pieces, gently push them into the ground and encourage more plants to grow.

13.        Feed roses and other plants compost to give them a good source of energy. Roses should be fed once a month. A quick pick me up is to dig your banana peels, egg shells and coffee grounds in around roses.

14.        Make sure to have a nice seating area in your garden so you can stop and smell the flowers.

15.    Take photos of your garden. Use the same photo spots you used in spring so you can see the changes from one season to the next. Enjoy!

Charlotte

Protecting Strawberries

Plastic half inch pipes make hoops that keep plastic fencing over strawberries. (Charlotte Ekker Wiggins photo)

Protecting Strawberries

For several decades I have used strawberry plants for flower bed borders. Between June-bearing varieties and day neutrals that produce during the growing season, I can usually find a handful or two of strawberries for my use.

This year, I decided to add strawberries in my Berry Patch, knowing full well it would be a challenge to protect the plants against my local mowing crew of white-tailed deer and rescued rabbits.

My King Kong strawberries with their first growth and green fencing cover. (Charlotte Ekker Wiggins photo)

I started with this small bed of a strawberry called King King. They are supposed to be large berries and I fell for the name although friends who have grown them said they didn’t like their flavor.

The plants were growing quite well under a green plastic fence canopy.

Deer apparently can push the fencing down and reach the strawberries. (Charlotte Ekker Wiggins photo)

About a month after the plants were planted, someone came along and ate most of the growth.

Time to go into plan B to protect the plants.

Measuring the plastic green fencing over the half inch plastic pipe hoops. (Charlotte Ekker Wiggins photo)

Taking a cue from another nearby strawberry bed, I installed plastic hoops that now hold the green fencing mesh higher.

They are also attached at the sides so the canopy is more stable and harder to move.

Ok, now to see how will this will work.

Charlotte

May Gardening Jobs

1. Make notes of native flowers you want to increase, these are lovely native Celandine poppies. (Charlotte Ekker Wiggins photo)

May Gardening Jobs

More rain is in the forecast with the possibility of flooding. Wish I could share some of our extra rain with California, reeling under record drought with unprecedented watering restrictions.

Most of my tropical plants are now outside to enjoy these re-invigorating spring showers. It’s always a delight to watch a plant tired of being inside all winter to all of a sudden start showing new growth.

Where I live in mid-Missouri, the last frost date is usually around Mother’s Day. Here are some of my May gardening jobs:

2.We’ve had some late frosts this year. The last one nipped some of my dwarf fruit trees and flowering dogwood buds. If your spring crops didn’t make it, try again; there still should be time for at least one sowing of lettuce, spinach and radish seeds.

3. And onions, it is always a good time to plant onions. I grow several crops throughout the growing season. Onion sets planted around roses make good bug deterrents and are fun to harvest as long as you remember to leave a couple on bug patrol. And can find your roses!

4. A wet May means it’s a good time to get tree seedlings planted.

5. Be careful of disturbing newly emerging, self-sowing annuals. Learn to distinguish the sprouts of bachelor buttons and other carefree annuals so they can regrow all on their own.

6. Mark daffodils you want to dig up and move later this fall.

7. May is a wonderful time to stop and enjoy lovely sunsets. (Charlotte Ekker Wiggins photo)

8. As daffodils and tulips continue to fade, don’t mow the leaves down with the lawn mower until they turn yellow. The bulbs turn sun into sugar stored in their bulbs. If you cut down the greenery too early, they will gradually become smaller and you will not have any more blooms. If you don’t like the fading greenery, plant something to hide them. Daylilies and peonies make great screens.

9. See ants on your blooming peonies? Gently shake them off if you want to bring cut flowers inside, otherwise leave them alone. They are feeding off the honeydew the peonies produce.

10. If you don’t compost, this is a good month to start. Place a small grocery bag in your freezer and add kitchen scraps. When full, take outside and bury in a garden corner. As you get into the habit of saving kitchen scraps, it will be easier to then make your own compost area or buy one, then start adding leaves and grass clippings to the kitchen scraps, some water, and mix. After a few weeks, you will have black compost ready to add to your flowerbeds.

11. Summer plants started inside in containers can start to spend a few hours a day outside on warm, sunny days before you transplant them into your outside garden.

12. Shop for natives to add for mid to late summer flowers. Good choices include Purple Coneflowers, Black eyed Susan, New England Asters and any plants with low water requirements.

13. If you don’t have grass planted, plant clover instead. There are also other low-growing seed mixtures that are excellent alternatives to turf grass. These mixes provide food for pollinators.

14. If you do have turf grass, May is “no mow” month so stay off that lawn mower and let your garden host beneficial insects.

15. Consider how to minimize the golf course-look greenery and add more varieties of blooming flowers through the growing season. Better yet, start a vegetable plot in your front yard, they can look amazing and encourage your neighbors to grow their own as well. Add flowers like zinnias to encourage pollinators.

Charlotte

Best Plant Tags

This plant tag is identifying a dwarf Gala apple tree on my hillside. (Charlotte Ekker Wiggins photo)

Best Plant Tags

Over the years I’ve used a variety of ways to identify plants. Cutting up old window blinds works well using an indelible marker pen but they don’t look very nice. Instead I now use these easy to write on metal tags.

These easy to use tags require only a ballpoint pen. (Charlotte Ekker Wiggins photo)

These metal tags easily hold up to a variety of weather conditions without damaging the dwarf fruit trees where I hang them.

I also have them on some key trees like Theodore the dogwood tree that took a couple of decades before growing much height.

Impress-O-Tags can be used for anything that needs to be identified. (Charlotte Ekker Wiggins photo)

I’ve had these tags for a number of years and don’t recollect where I first found them.

They work well for a variety of uses, not just plant identification.

Charlotte

Checking Mum Transplants

Mums with brown, dead tops may have growth in the center crown. (Charlotte Ekker Wiggins photo)

Checking Mum Transplants

It’s almost as exciting as opening a present.

This time of year, I go around my garden and check the new chrysanthemums I planted last fall. I watered them over winter and mulched them hoping they would get a good root start. Once established, mums can take care of themselves from year to year.

It’s easy to believe the plant is dead when you see the old plant top. Don’t be so quick to remove that; it may be harboring growth at the base of the plant.

Here’s the new growth in the center of that dead-looking mum. (Charlotte Ekker Wiggins photo)

Sometimes mums have growth off to the side, too. Check all around the plant to see where the new growth may be starting.

The growth on this mum has started under the mulch. Gently remove mulch so the plant gets some sun and can grow stronger.

That tiny bit of green will grow so keep it protected. (Charlotte Ekker Wiggins photo)

And yes, even this little spot of green will become a developed mum given a chance.

So out of 15 mums I transplanted, 13 made it. These mums will now be contributing to repelling insects as well as adding a pop of fall color.

I may split a few of these and get them settled in this spring and will definitely plant more this fall.

Charlotte

April Gardening Tasks

1. Identify places where you want to add fall bulbs for maximum enjoyment. (Charlotte Ekker Wiggins photo2

April Gardening Tasks

Missouri’s native Eastern redbuds should start their blooming after our slow spring rain earlier this week. I was hard pressed to stay out of the garden even on that rainy day. There are new flowers popping up every day.

At this time of year in USDA Hardiness zone 5 b, there are many garden tasks to tackle:

2. Clean out composters and add to flower beds and fruit trees. Leave a good bucket of finished compost as starter for the next compost batch and start adding leaves, grass clippings if you have them, kitchen scraps and water. Don’t forget to mix.

3. Put up your birdhouses if you haven’t already. Songbirds are natural pest control and add so much interest to our gardens. 60% of all bird species depend on insects for their food so if you have a lot of birds, you should naturally have less pests. Include at least one hummingbird feeder.

4. Lilacs should be blooming this month. Prune lilacs immediately after they bloom. If you wait until later in the season, you will be cutting off next year’s blooms.

5. Continue to sow lettuce, spinach and radish seeds every 10 days or so for fresh spring salads in your pot garden. Call it your garden in pots, if you prefer.

6. If you like to grow peas, this is the last month to plant sugar snap peas and snow peas, they prefer cooler weather conditions. To keep their roots happy, mulch with cardboard to keep them cool, then add a layer of wood chips.

7. Mark off areas behind other plants for fall bulb planting. (Charlotte Ekker Wiggins photo)

8. As daffodils and tulips continue to grow and bloom, sprinkle compost around them to keep the bulbs well fed. When the flowers fade, remove them by snipping off the flower heads. Leave the greenery until it turns yellow; the green leaves help the bulbs store energy for next season’s blooms. Don’t mow the leaves down with the lawn mower until they turn yellow or the bulbs will gradually become smaller and you will not have any more blooms next spring.

9. If you have a vegetable garden area, this is a good time to add cardboard to kill off any growth prior to summer planting. Don't till. The prevailing thought now is that tilling damages the soil ecosystem. Kill the plants you don’t want, make holes to plant the ones you do, or make trenches to plant seeds, and cover.

10. Start your summer plants inside in containers you can transplant outside later; tomatoes, peppers, watermelons, squash, pumpkins, cucumbers, zucchini.

11. Don’t forget companion plants to reduce crop damage; basil is a good bug deterrent for a lot of plants and grows easily from seed.

12. Plant for pollinators as well. I love zinnias and so do butterflies and bees. Native plants such as New England Asters, yarrow and purple coneflowers are good choices for pollinators because they have long blooming seasons. For another good annual, try sunflower seeds. Birds will love the seeds in the fall.

13. Plant more native trees along with compact dwarf fruit trees. Although planting native flowers is still good for pollinators, trees provide better, and more reliable, pollen sources for bees. The smaller fruit trees are good pollen sources as well and, when pollinated by bees, will also give you easily accessible fruit to pick.

Charlotte

Cocktail Tomatoes

Self-pollinating cocktail tomatoes deliver fruit all year. (Photo by Charlotte Ekker Wiggins)

Self-pollinating cocktail tomatoes deliver fruit all year. (Photo by Charlotte Ekker Wiggins)

Cocktail Tomatoes

Sounds like something one eats at a party, doesn’t it - cocktail tomatoes.

“Cocktail tomatoes” where the darlings of the COVID 2020 year. I saw them featured on blogs and home and garden centers, the perfect tomato for that apartment or small space. I picked one up at the end of the season and not for the original $18.95 retail price. I was curious to see how they would weather inside through a Missouri winter.

Cocktail Tomatoes grow 1 foot by 1 foot. They are small, semi-determinate tomatoes that provide fruit through most of the growing season without overwhelming the supply. If they like it inside, they are supposed to be constantly growing self-pollinated fruit.

Not a hybrid, they do grow true from their seeds. I used the last tomato to start some new plants I shared with friends earlier this spring.

In terms of taste, they are nicely flavored for salads and just plain straight munching.

i now have some growing in pots on my deck to see how well they make it through our Missouri summers. I planted them with compost at the bottom of the pot including crushed egg shells, and monitor for even watering.

They were back this year at a lower price point $14.95. The plant tag also had more information, confirming that this is an heirloom, not a hybrid variety.

This year’s cocktail tomatoes are less expensive. (Photo by Charlotte Ekker Wiggins)

This year’s cocktail tomatoes are less expensive. (Photo by Charlotte Ekker Wiggins)

Although my fruit are still green, you can see how once they ripen Cocktail Tomatoes have a nice small size.

Ripening Cocktail tomatoes at one of our local hardware stores. (Photo by Charlotte Ekker Wiggins)

Ripening Cocktail tomatoes at one of our local hardware stores. (Photo by Charlotte Ekker Wiggins)

I have grown a number of tomatoes over the years. This one has a lot of advantages starting with its size. It’s handy for small spaces while still providing fruit for salads and other uses. Besides cooking, these plants make for nice growing gifts that will keep on giving.

Charlotte

Keep Mums Trimmed

This mum plant is on its way to falling over once it blooms so time to trim it. (Photo by Charlotte Ekker Wiggins)

This mum plant is on its way to falling over once it blooms so time to trim it. (Photo by Charlotte Ekker Wiggins)

Keep Mums Trimmed

You would think I would be following my own advice but I have a good reason, I don’t always remember where I’ve planted chrysanthemums. These hardy plants are excellent bug repellants as well as pretty fall color. I tend to sneak them into corners and other areas where I have a little room.

So if you’re like one of my gardening friends who doesn’t trim chrysanthemums, you can expect your mums to grow a good 3 feet tall That is, if they don’t first fall over. Those cute round, low growing plants you see sold in the fall have been trimmed through the growing season into that size so we all need to do the same if we want mums to be low and round this fall.

Now I don’t particularly want round mums but I do want low ones that don’t fall over. So when I find one that has escaped my earlier notice, I gently remove the top, leaving about a 4-inch growing plant base. Snipping off the tops will force the plant to branch out and be bushier instead of taller.

I left the bottom about 4 inches high and removed the mum tops. (Photo by Charlotte Ekker Wiggins)

I left the bottom about 4 inches high and removed the mum tops. (Photo by Charlotte Ekker Wiggins)

Don’t toss out those cut off top knots, you can get more mums out of those.

If the ground is soft, I use a nearby stick to make nearby holes and plant the trimmed tops into them past the lowest growing node. That way new mums will grow and make the plant looks wider.

Or I may take those trimmed tops to another part of the garden and plant them there. Once in the ground, remember to water to encourage root growth. You can also place them in a container with water and roots should appear in three weeks or so.

Gently tuck those mum tops back into soft ground, or make a hole, to grow more plants (Photo by Charlotte Ekker Wiggins)

Gently tuck those mum tops back into soft ground, or make a hole, to grow more plants (Photo by Charlotte Ekker Wiggins)

Either way, don’t toss out those trimmed tops, you can use them elsewhere in the garden and have more help with natural bug repelling.

I use these stainless steel plant snips to cleanly cut off the plant tops. Mark them so you don’t confuse them with the ones you use for your sewing and quilting. It’s amazing how handy thread snips can be for a variety of uses.

And who doesn’t like long-lasting flowers, mums are some of the longest so the more the better!

Charlotte

"Coral Charm" Peonies

This salmon coral color is eye-catching in all stages of bloom. (Photo by Charlotte Ekker Wiggins)

This salmon coral color is eye-catching in all stages of bloom. (Photo by Charlotte Ekker Wiggins)

“Coral Charm” Peonies

I finally found the name for these fascinating, color-changing peonies, “Coral Charm.”

The peonies were a gift from another garden, typical of most of the plants i have. i usually know what kind of plant it is but rarely the color.

One morning, as i was making my daily garden walk, the bud color startled me. I’m used to pink, white an burgundy peonies, not a peach-colored one.

“Coral Charm” peonies in bud form before they bloom. (Photo by Charlotte Ekker Wiggins)

“Coral Charm” peonies in bud form before they bloom. (Photo by Charlotte Ekker Wiggins)

There was delicious anticipation every morning as I watched this peony open. Once it was fully open, it then made a second change. As the petals faded, so did the color.

Coral Charm peonies as their coral color starts to fade to white. (Photo by Charlotte Ekker Wiggins)

Coral Charm peonies as their coral color starts to fade to white. (Photo by Charlotte Ekker Wiggins)

My garden is a mix of natives and traditional garden plants. It was fun to have several plants blooming this spring for the first time, then even more fun researching to identify them.

If you’re wanting “Coral Charm” peonies in your garden, now you can shop for them by name.

Charlotte

Clam Shell Guards

My first Bing cherries getting clam shell guards to protect them from birds. (Photo by Charlotte Ekker Wiggins)

My first Bing cherries getting clam shell guards to protect them from birds. (Photo by Charlotte Ekker Wiggins)

Clam Shell Guards

If you grow fruit, or try to grow fruit, you know it can be challenging to get to the ripe fruit before the birds and squirrels. There are a variety of items on the market to help, from netting to fencing if deer are an issue.

Since I can’t get netting over my trees or get fencing into my limestone hillside, I needed to find another alternative. That’s where clam shells came in.

Small clam shell protecting more growing Bing cherries. (Photo by Charlotte Ekker Wiggins)

Small clam shell protecting more growing Bing cherries. (Photo by Charlotte Ekker Wiggins)

Clam shells are those clear plastic containers that hold grocery store fruit and vegetables. They come in a variety of sizes and can be reused, which i do as guards to my growing fruit.

Reusable clam shells are those with lids that pinch together, right. (Photo by Charlotte Ekker Wiggins)

Reusable clam shells are those with lids that pinch together, right. (Photo by Charlotte Ekker Wiggins)

Since I buy fruit in small clam shells, I can collect a ready supply to use when fruit is growing on my dwarf fruit trees.

This year, I had my first Bing cherries ripening. One was red and consumed so I gently added clam shells around the rest of the growing cherries. I make sure not to damage leaves when I get the clam shell secured.

Clam shells now protecting some of my growing Bartlett pears. (Photo by Charlotte Ekker Wiggins)

Clam shells now protecting some of my growing Bartlett pears. (Photo by Charlotte Ekker Wiggins)

For the past few years, I have used clam shell guards to protect my growing Bartlett pears from resident squirrels. The clam shells worked well so now I am expanding their use on other dwarf fruit trees.

The clear clam shells allow sun to continue to ripen the fruit and protect at least a few fruits for your enjoyment.

Charlotte

June Gardening Chores

Two lovely purple clemantis are climbing my arbor, now to identify them. (Photo by Charlotte Ekker Wiggins)

Two lovely purple clemantis are climbing my arbor, now to identify them. (Photo by Charlotte Ekker Wiggins)

June Gardening Chores

If you don’t know what you see blooming, this is a good time to observe new plant growth so you can identify what it is later with the help of its blooms. These two lovely purple clematis came from a neighbor’s home site several years ago but they haven’t bloomed until this year. Lucky me that they are both purple and look good together!

June is also the last month when plants will benefit from spring rains to settle in so take advantage of the above average rain to plant new plants and move ones you want in other garden areas. I live in USDA Hardiness zone 5, which means we should move to hot conditions in just a few weeks. I say should because Memorial Day weekend was rainy with temperatures in the high 40s, a bit cold for this time of year.

Some other gardening chores for this month include:

1.        Keep asparagus beds weeded and let the green top ferns grow until they go brown; do not cut. Add compost.

2.        When mulching, leave 2-4 inches clear from the plant stem and the mulch ring no larger than 5 inches deep. More than that and you are smothering the plant.

3.        Leave spring bulb greenery to die off naturally. I gently remove only the yellow leaves if they bug me and plant summer annuals and perennials to cover them in the meantime. The key here is planting something on top with shallow roots so they don’t compete with the deeper-planted bulbs.

4.         Japanese beetles show up this month so hand pick and drop in a bucket of water with a few drops of dishwashing soap to drown them. Pick early in the morning when they are sluggish. Also treat your lawn with nematodes and milky spores, both will gradually help eliminate grubs. Add geraniums and tansies to your flower beds, they are natural Japanese beetle repellants.

5.         Trim lilacs immediately after they end flowering so growth the rest of this year will provide blooms next year. Same thing for iris and peonies.

6        Plant a new supply of vegetables every 2 weeks to give yourself a new crop through the season. Early spring crops are done but there is still time for tomatoes, green peppers, green beans, cucumbers, zucchini, squash, pumpkins and annual herbs.

7.  Get flower pots planted. Water the soil first, let drain, then add your flowers for better adjustment.

8.         Plant annual flower seeds such as zinnias, sunflowers, forget-me-nots, cosmos, marigolds and herbs. Some herbs can be moved inside later for winter use.

9.       When planting wildflowers, mark the beds where seeds have been added. Some wildflowers may take 2 years to germinate.

10.       For those of you with grass, don’t cut more than 1/3 of the grass down at one time.  For spots where grass doesn’t grow, plant flowers.

11.       When adding perennials, focus on native plants. Once established, they will require less water and care than non-natives and they will be food for native pollinators.

12.        Pinch mums once a week to encourage them to grow bushy for fall flowering. I take the pinched off pieces, gently push them into the ground and encourage more plants to grow.

13.        Feed roses and other plants compost to give them a good source of energy. Roses should be fed once a month. A quick pick me up is to dig your banana peels, egg shells and coffee grounds in around roses.

14.        Make sure to have a nice seating area in your garden so you can stop and smell the flowers.

15.    Take photos of your garden. Use the same photo spots you used in spring so you can see the changes from one season to the next.

Charlotte

Mark Surprise Lily Spots

This patch of surprise lily tops are starting to die off. (Photo by Charlotte Ekker Wiggins)

This patch of surprise lily tops are starting to die off. (Photo by Charlotte Ekker Wiggins)

Mark Surprise Lily Spots

If you like surprise lilies, also called Resurrection lilies, as much as I do, you will have them planted all over your garden. The challenge is that come mid-spring, the easy to spot green leaf tops start to die back, storing energy for mid-July when the surprise lilies will bloom, pink flowers on top of naked stalks.

In Missouri, these lovely hardy Amaryllis cousins are also called “naked ladies.”

To make sure you don’t dig into the spot full of surprise lily bulbs, this is a good time to mark those spots.

You can do it with sticks at corners with twine.

You can also do what I do and wait for all of the greenery to die off, then plant annuals with shallow roots such as zinnias and cosmos. By late summer, when the surprise lilies bloom, they will pop up in the middle of the blooming annuals making for a lovely floral combination.

These are surprise lilies in bloom mid-July where I live. (Photo by Charlotte Ekker Wiggins)

These are surprise lilies in bloom mid-July where I live. (Photo by Charlotte Ekker Wiggins)

What you don’t want to do is to put a shovel, or pick ax, into that pile of resting bulbs so whatever works to remind you to leave the bulbs undisturbed, this is a good time to do it.

Charlotte

Spring Pot Gardening

Lettuce and mixed greens are an excellent spring crop to grow in pots. (Photo by Charlotte Ekker Wiggins)

Lettuce and mixed greens are an excellent spring crop to grow in pots. (Photo by Charlotte Ekker Wiggins)

Spring Pot Gardening

Besides the sheer fun of saying you have a “pot garden,” growing food in pots is an easy and practical way to get yourself fresh produce.

Growing in pots allows each plant to have its own space, allows for easy pest control and helps you provide the right soil and other unique growing conditions. In addition, you can bring some pots such as herbs inside and extend the growing season over winter. I garden in USDA Hardiness zone 5 so for about 5 months some plants need to be protected inside.

To decide what to grow, here is a list of the basic five for spring pot gardening:

  1. Lettuce and mixed greens

  2. Radishes

  3. Peas

  4. Spinach

  5. Onions

All of these crops like cool spring weather.

Radishes, from the red bulbous root tot he greens, are excellent in salads. (Photo by Charlotte Ekker Wiggins)

Radishes, from the red bulbous root tot he greens, are excellent in salads. (Photo by Charlotte Ekker Wiggins)

A note about radishes. Add the top green to a salad, they are delicious.

If you have a crop you can’t get to, don’t toss it just yet, let it “bolt” or go to seed. If it’s not a hybrid you can save the seeds for next year and local pollinators will appreciate the flowers.

This spinach is going to seed and will become bee and butterfly flood. (Photo by Charlotte Ekker Wiggins)

This spinach is going to seed and will become bee and butterfly flood. (Photo by Charlotte Ekker Wiggins)

If you can’t use what you grow, compost. You can start by putting the unused greens in the bottom of the next pot you are making.

Once you pot herbs, you can have them year around. I’ve had this pot of parsley for a couple of years now, wintering it over inside.

Herbs are excellent plants to grow in pots; here I have parsley that wintered over inside. (Photo by Charlotte Ekker Wiggins)

Herbs are excellent plants to grow in pots; here I have parsley that wintered over inside. (Photo by Charlotte Ekker Wiggins)

One other crop you can grow in pots gets your ready for summer. I grow tomato starts in a pot, then move them to their individual pots to grow more before locating them in their final growing location. Because I have to start them in February, using a pot for their nursery works well.

Start new plants in pots; here cocktail tomatoes are getting an early start. (Photo by Charlotte Ekker Wiggins)

Start new plants in pots; here cocktail tomatoes are getting an early start. (Photo by Charlotte Ekker Wiggins)

Once starting to crowd in the pot, I carefully move them to either toilet paper pots or their own pots. I give them a few hours a day outside so they get used to the change in conditions before planting them permanently in my garden or leaving them in pots outside on my deck.

There’s a strategy to this. I have squirrels and chipmunks who have developed a taste for tomatoes. If they decide to eat those in the garden I can then bring in the pots to have tomatoes growing inside.

Cats may enjoy an empty pot for naps and dust baths. (Photo by Charlotte Ekker Wiggins)

Cats may enjoy an empty pot for naps and dust baths. (Photo by Charlotte Ekker Wiggins)

If you have inside cats, you may find they enjoy having an empty pot of soil to curl up in and take a dust bath.

A few last tips about gardening in pots:

Include a handful of compost at the bottom to keep your soil healthy.

Don’t dig up soil from your garden; start with new potting soil.

Wet soil down before adding seeds or plants.

You may also need small gardening tools to make the process easier.

Pot gardening allows you to grow your own in small spaces and have a healthy source of fresh produce all year. What are you going to grow in pots?

Charlotte

Shop Local Plant Sales

This year’s stash from the Phelps County Master Gardener annual sale. (Photo by Charlotte Ekker Wiggins)

This year’s stash from the Phelps County Master Gardener annual sale. (Photo by Charlotte Ekker Wiggins)

Shop Local Plant Sales

If you’re looking for a reliable source of local plants, try your local plant sales. Master gardeners, 4H clubs and other local groups hold them in the spring usually as fundraisers.

The advantages of buying local include that you are getting plants that will do well in your hardiness zone and you know how they were grown. Chances are the plants have not been exposed to chemicals or overuse of fertilizers to force their growth.

If you are just starting a garden, you will also get a good idea of what garden plants to add to your garden. Most of the volunteers at those sales are experienced gardeners and will be glad to answer questions.

If you are looking for bargains, circle back towards the end of the sale. Most plant sales will mark down remaining plants so they don’t have to take them home.

Charlotte