Compost Autumn Clematis

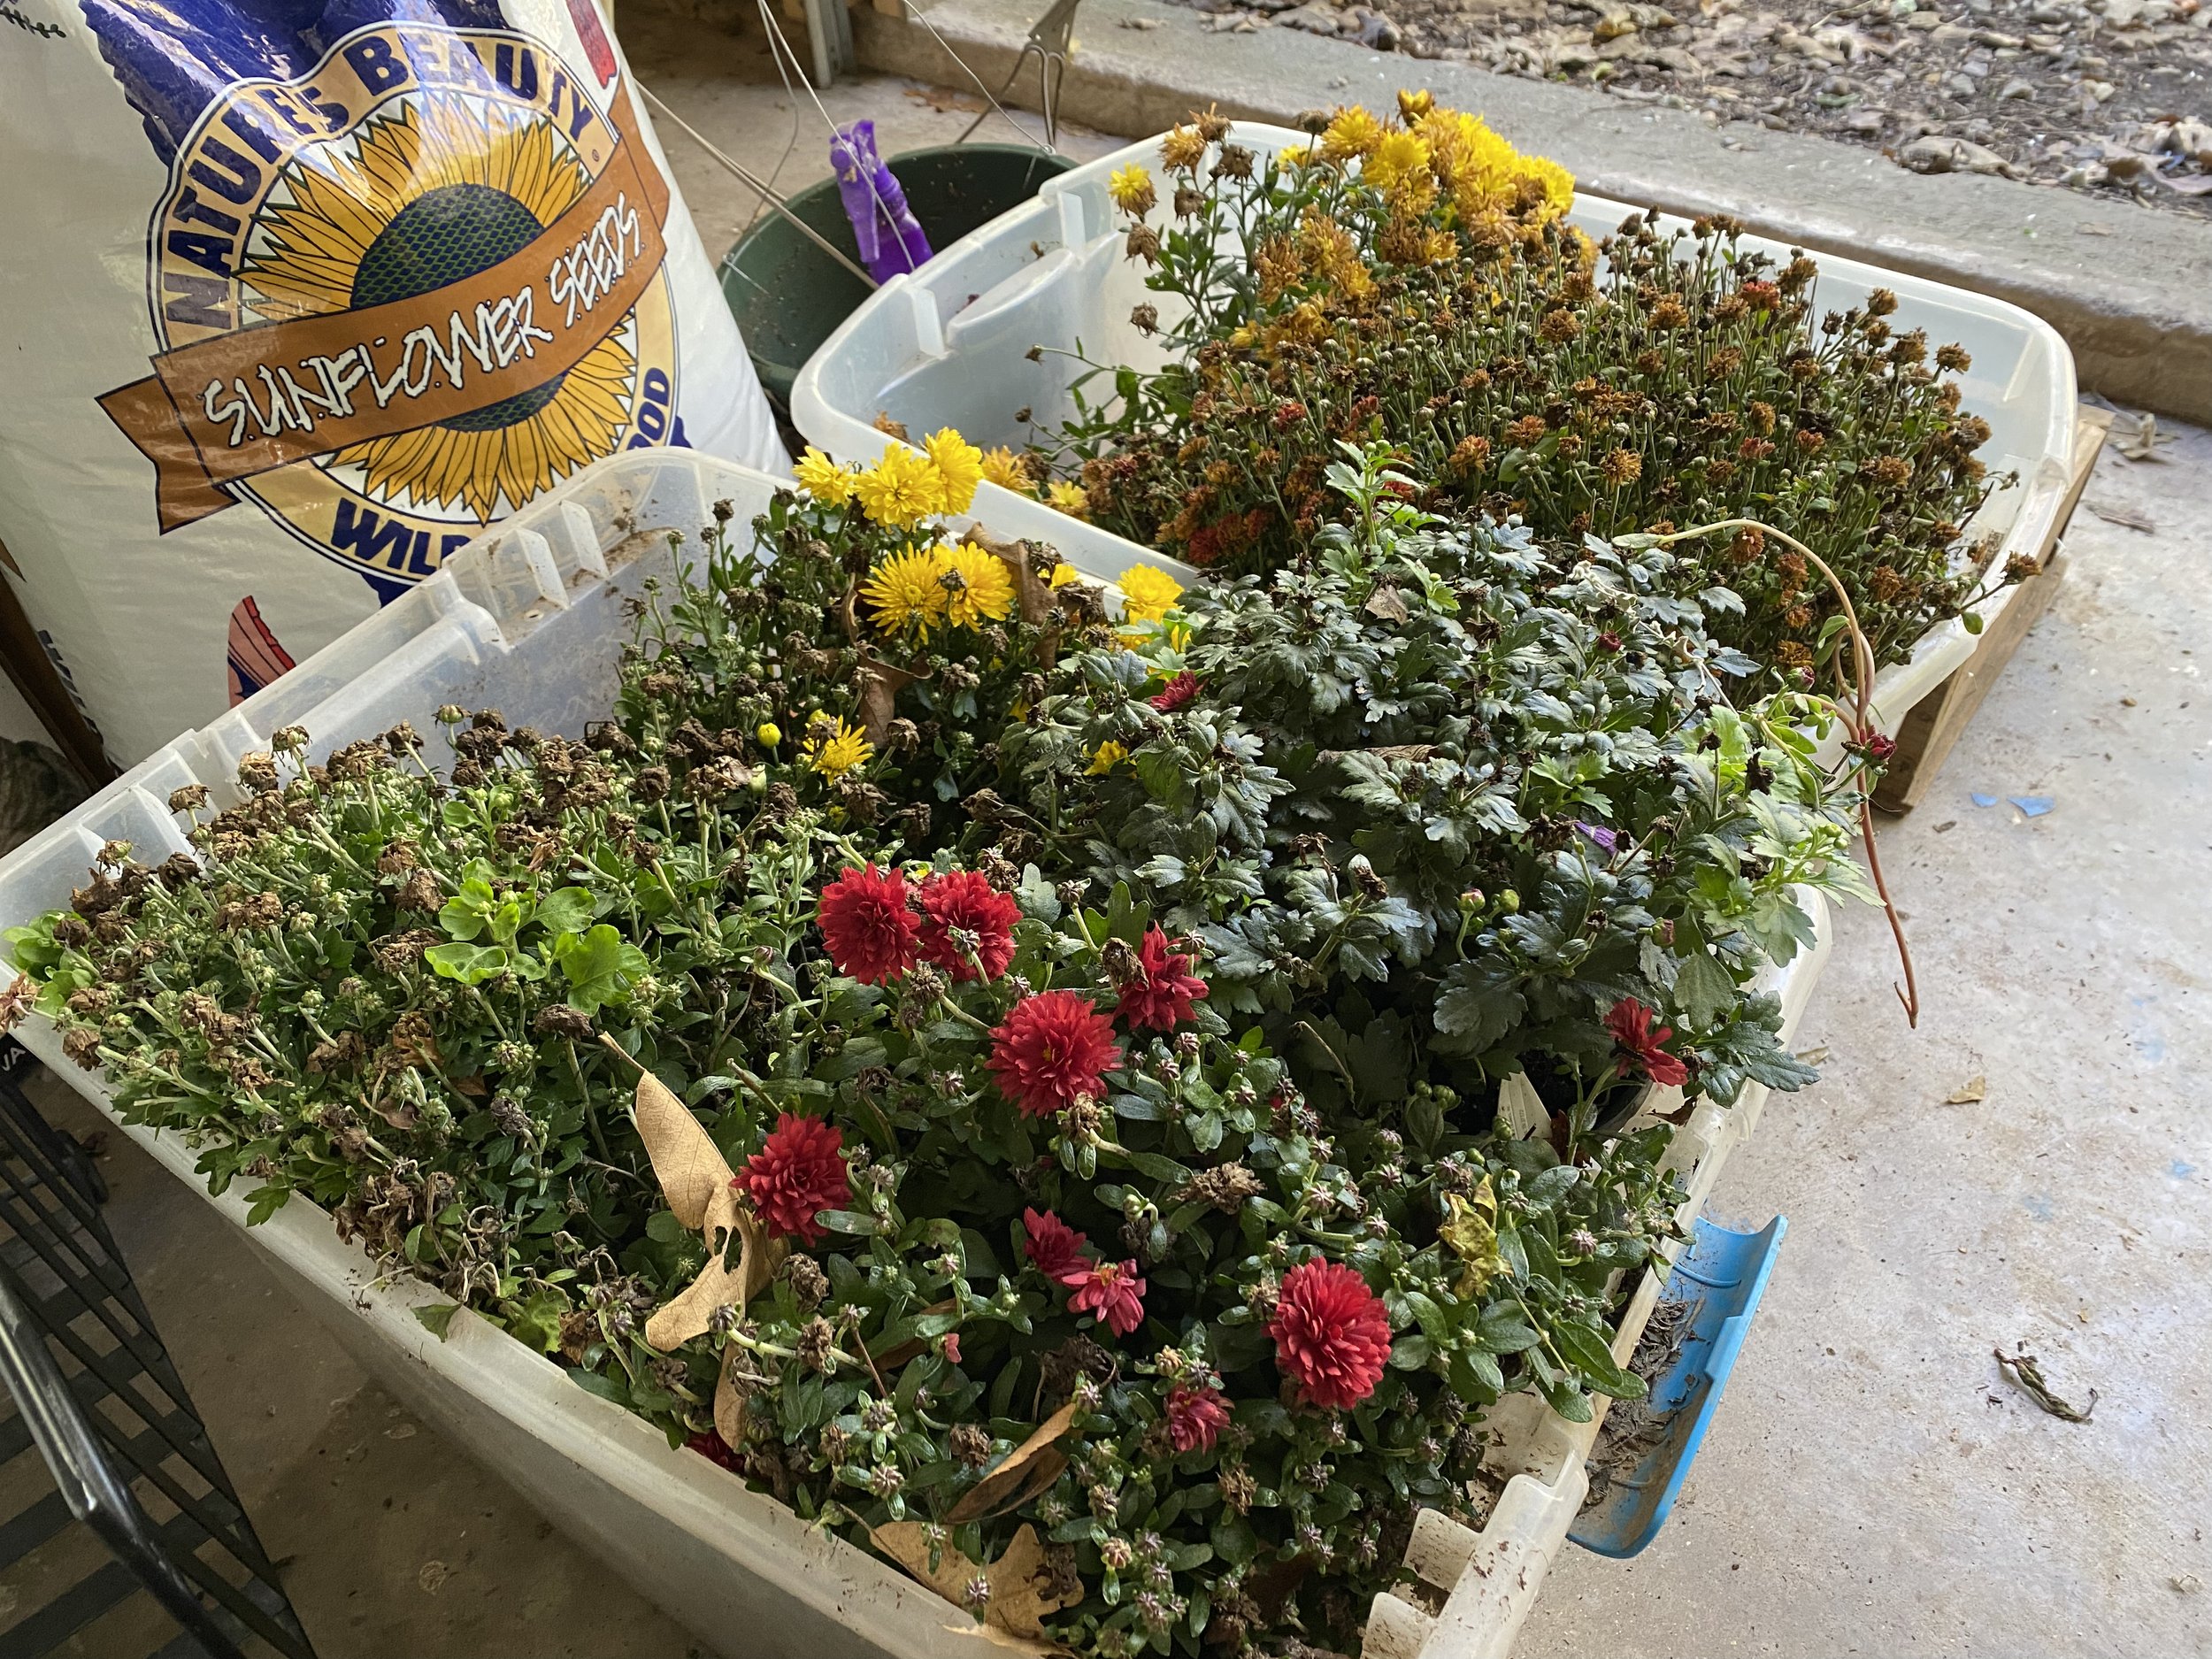
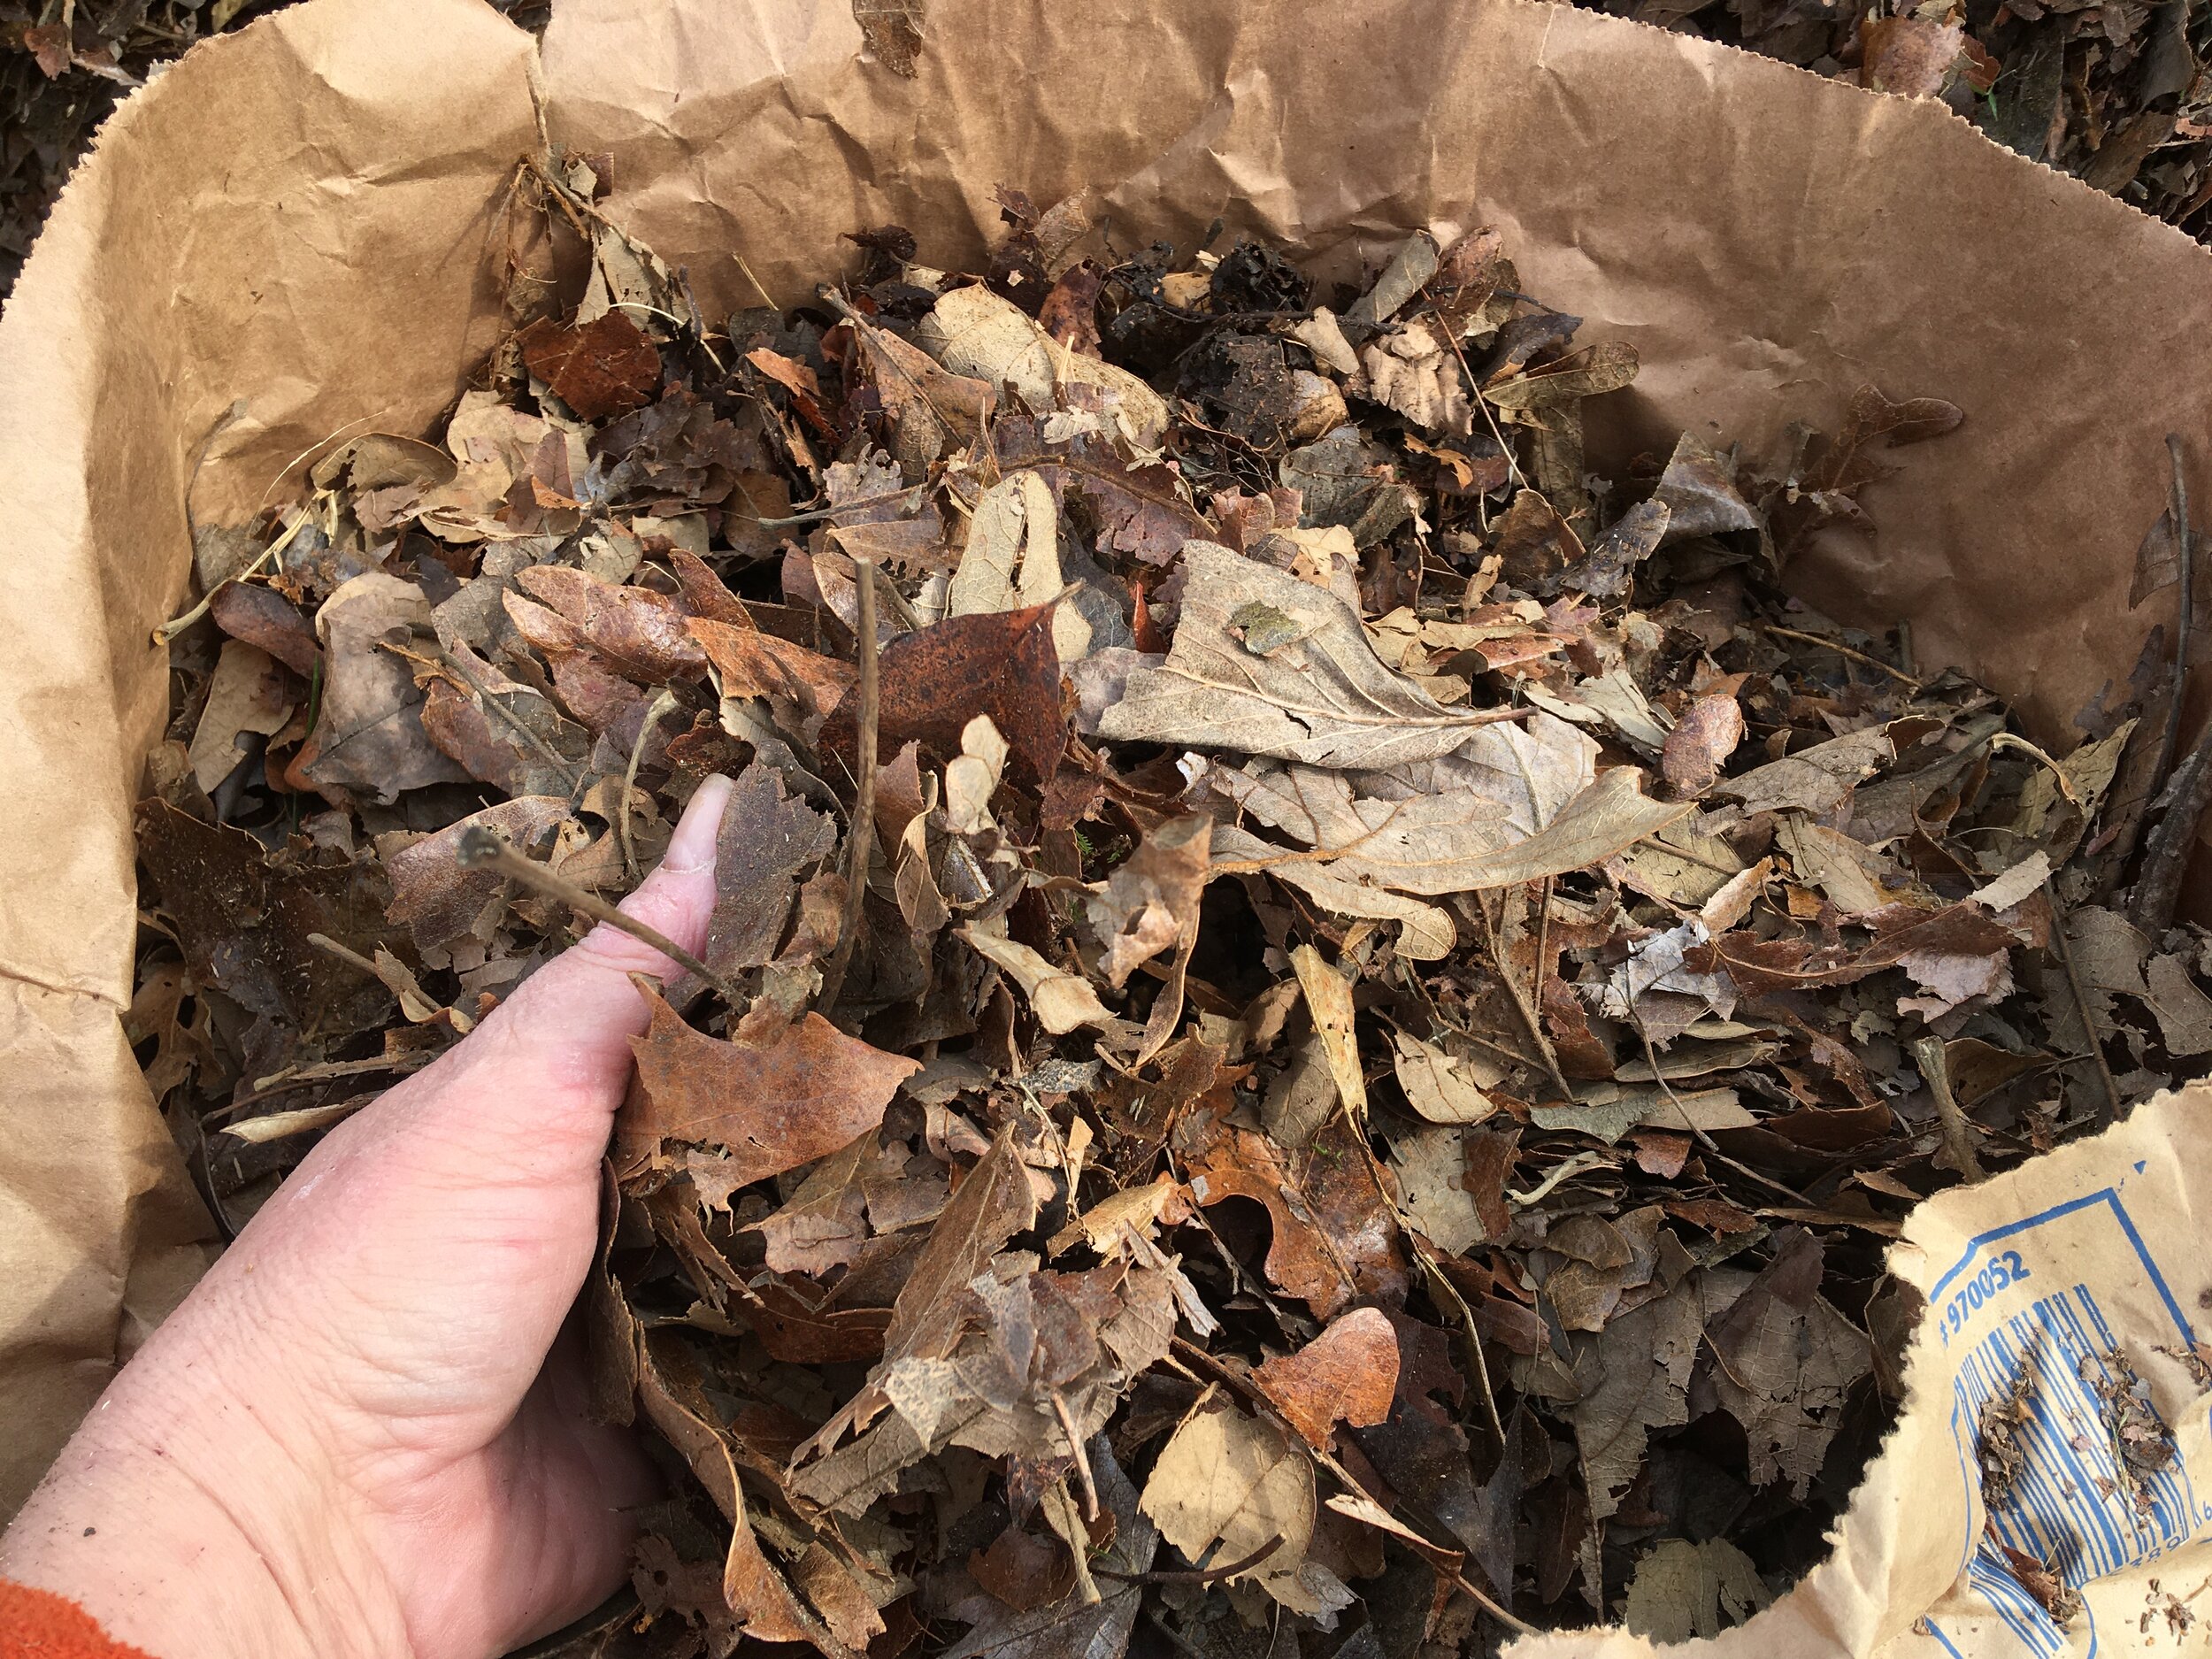
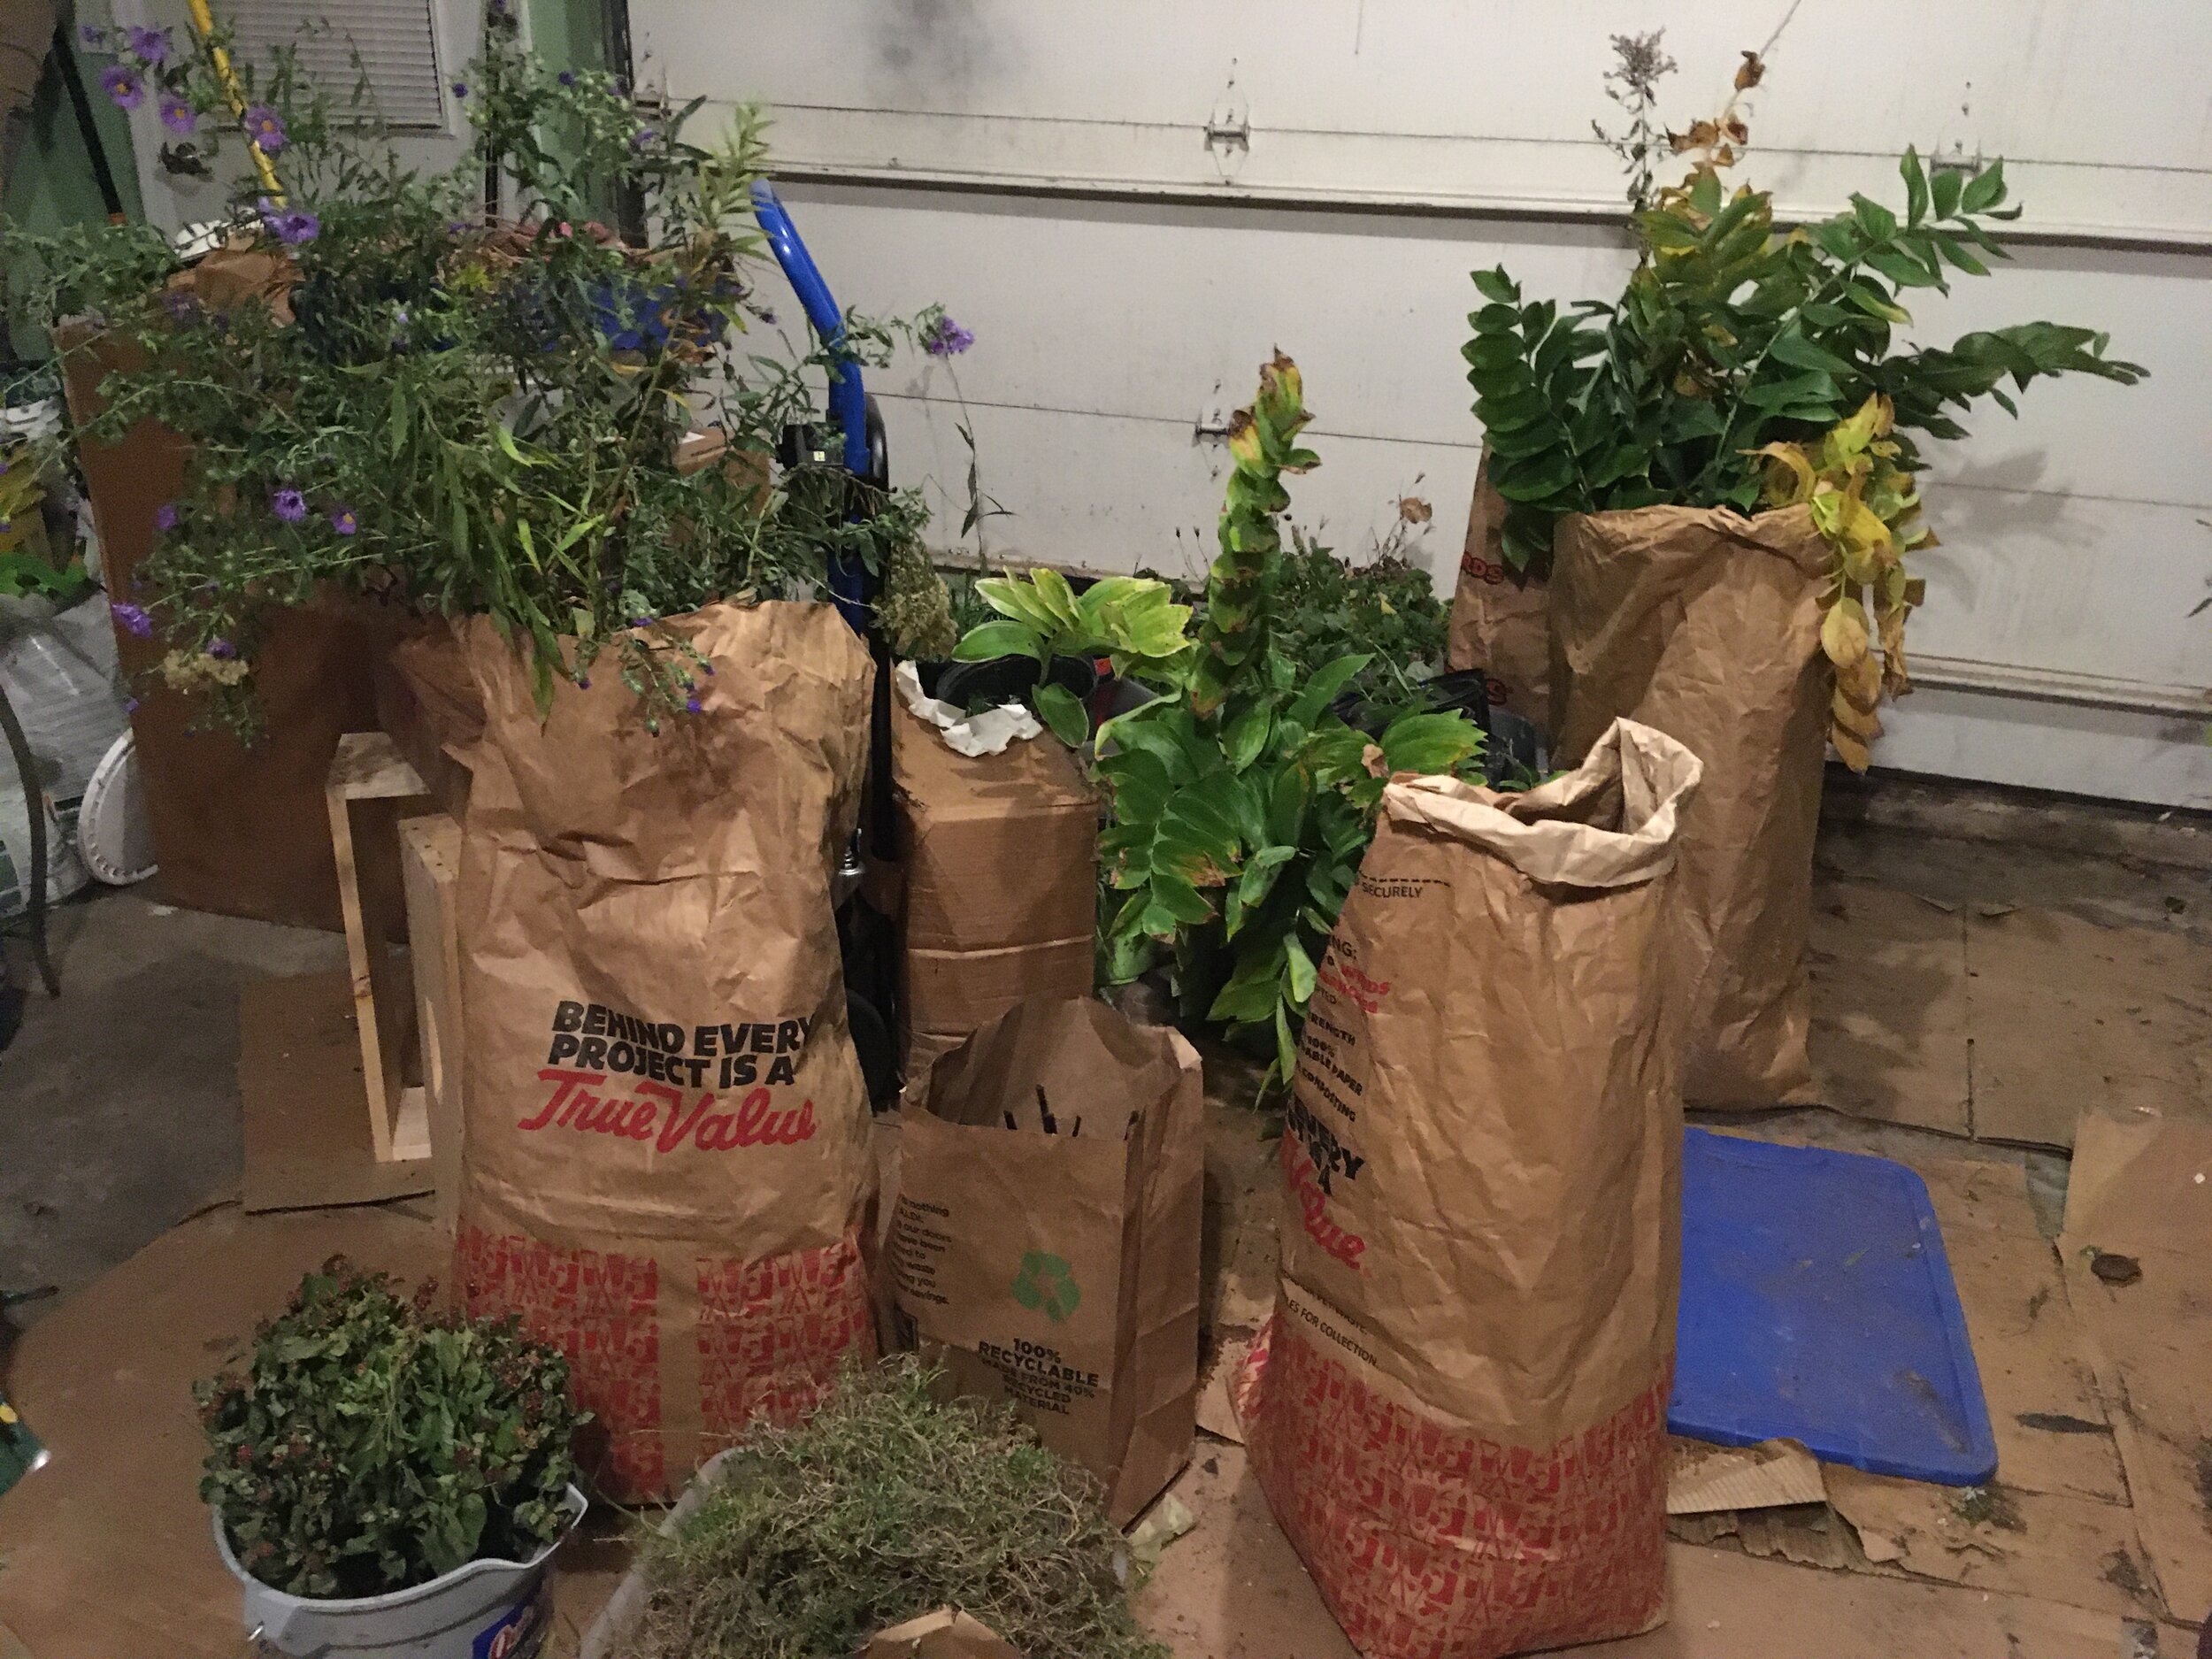
Autumn clematis vines in one of my composters. (Photo by Charlotte Ekker Wiggins)

Compost Autumn Clematis

I have a soft spot for climbers and especially the beauty and scent of autumn clematis. Although beautiful, they are not native to my Missouri USDA Hardiness zone 5 garden.

The challenge is that these hardy perennial vines can easily get out of hand and take over; I see hillsides covered in them mid-summer. As a responsible gardener, if I am going to plant them then I need to keep them in check.

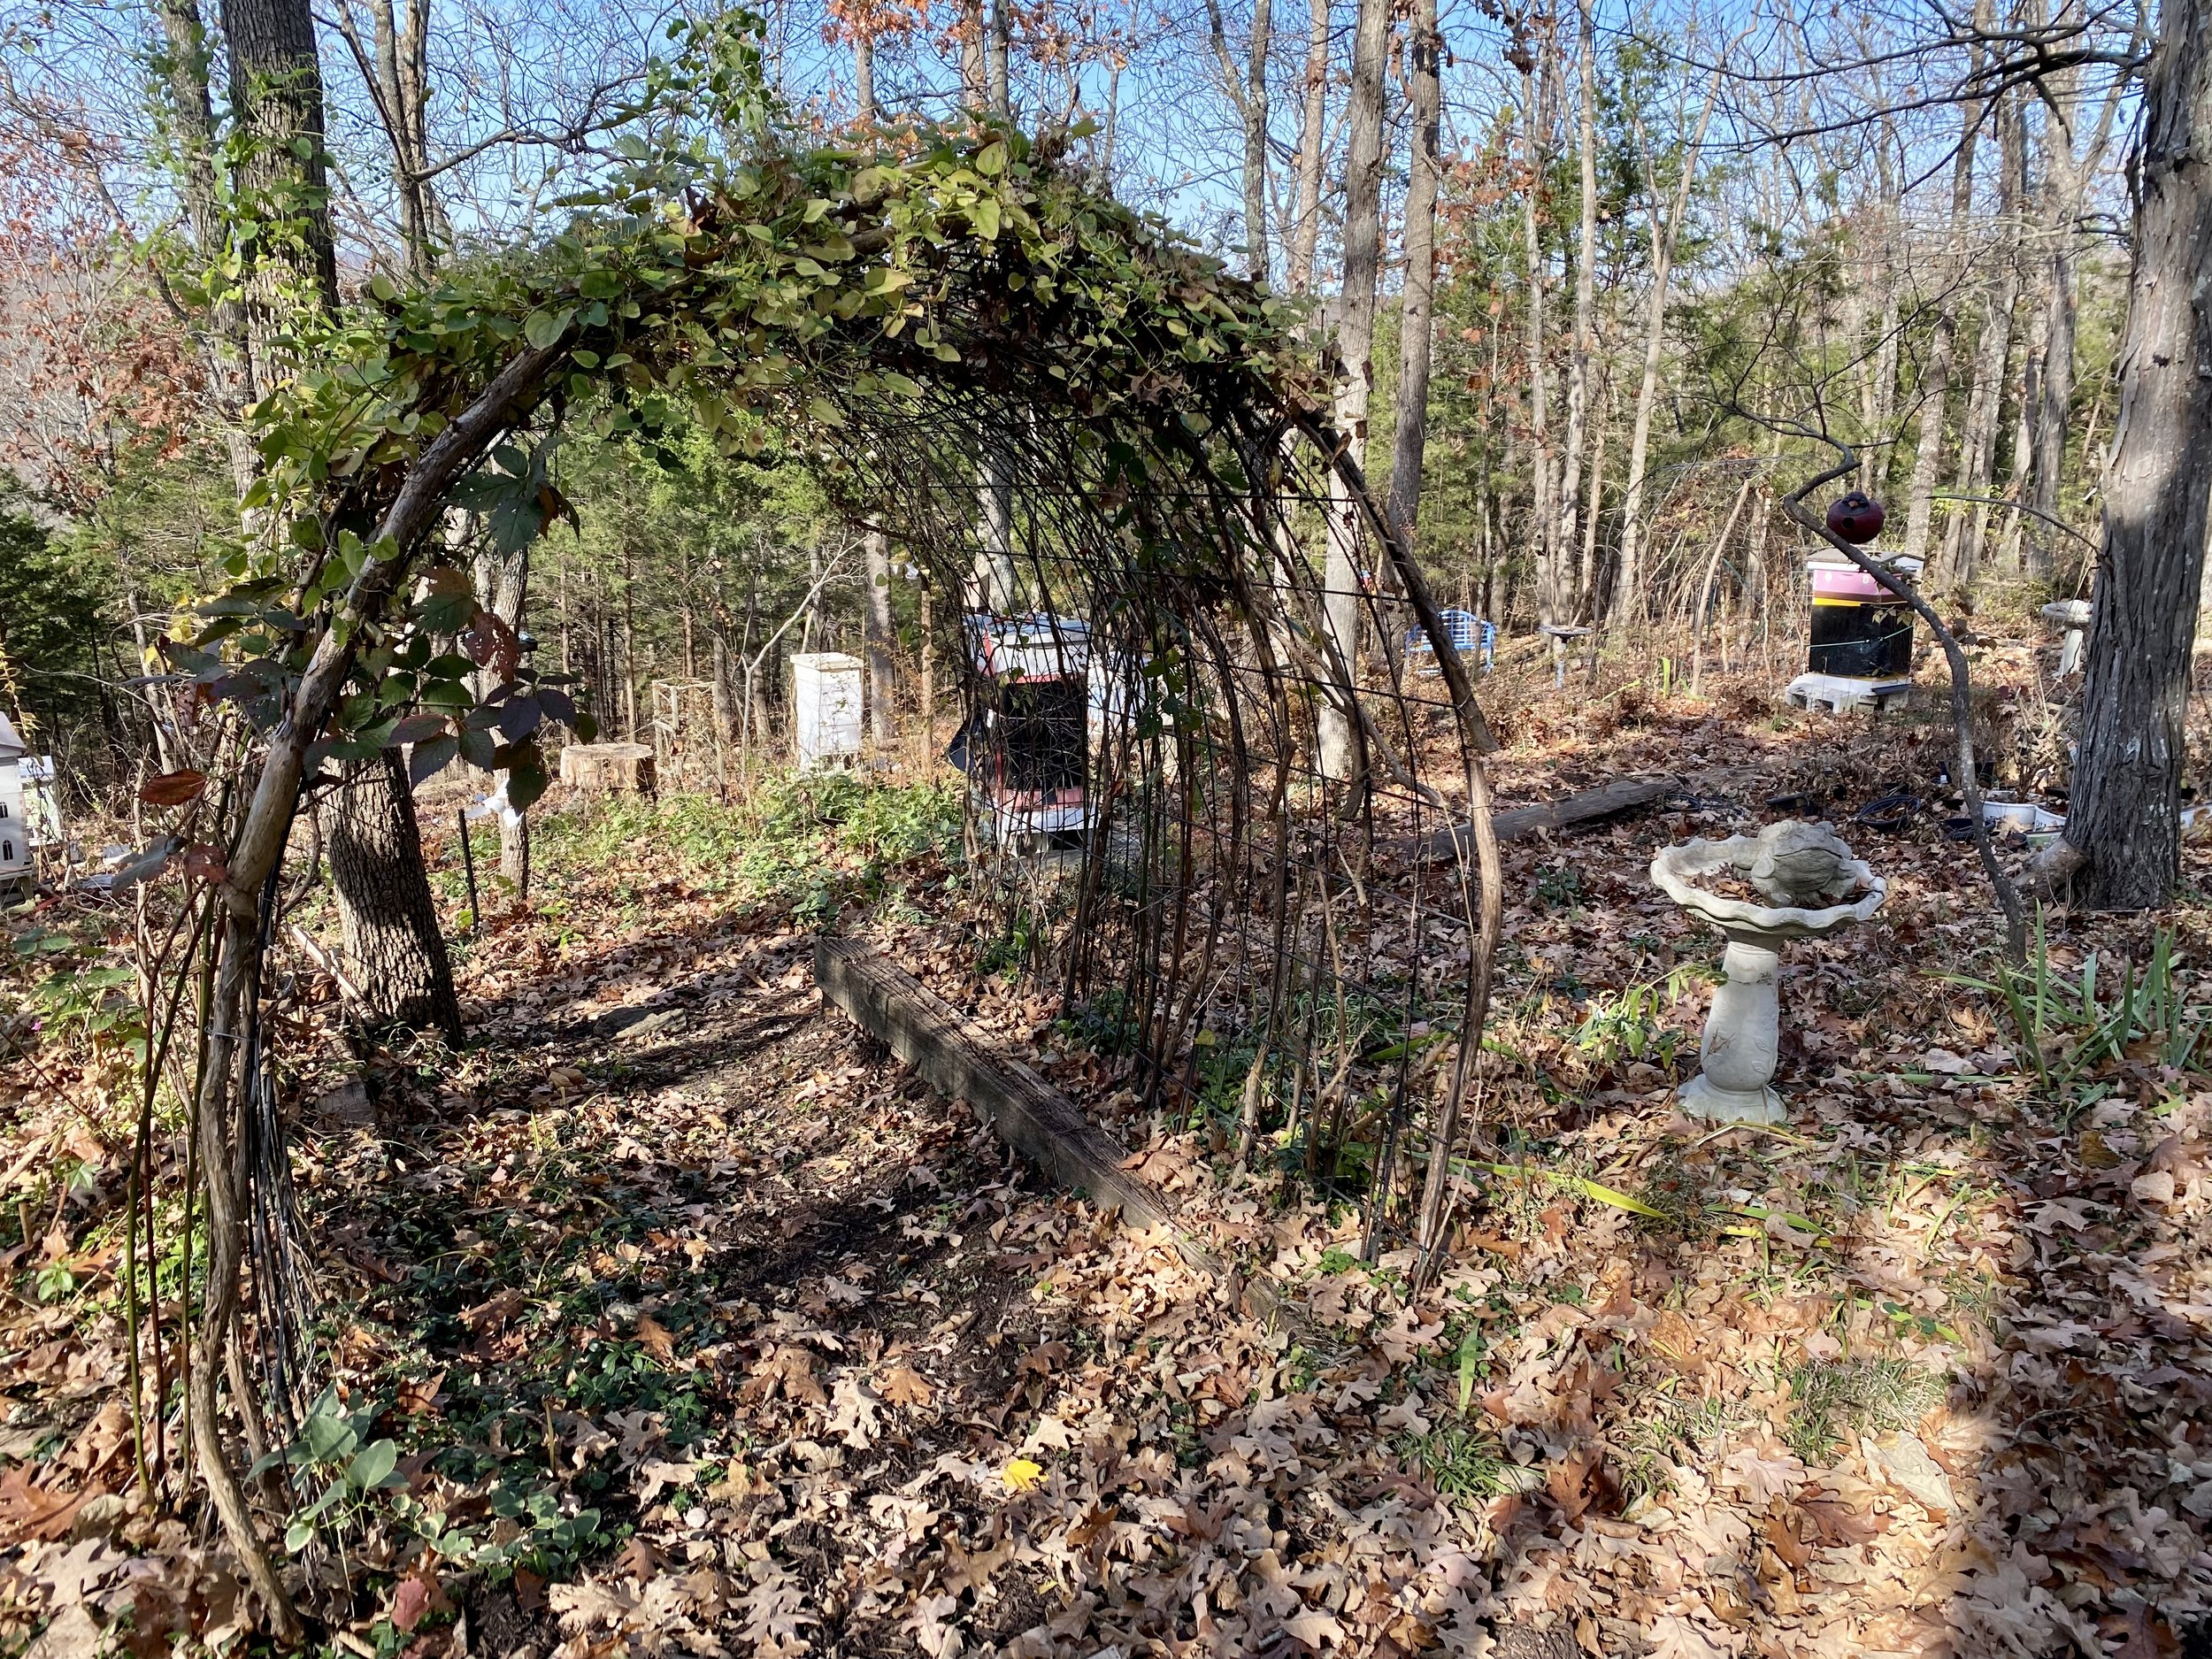
Autumn clematis growing on my cattle panel arbors. (Photo by Charlotte Ekker Wiggins


During the growing season, I keep them trimmed and bushy. They grow over several bent cattle panels forming arbors over hillside pathways.

Once they bloom and before they go to seed, I cut the autumn clematis vines to soil level and compost. The idea is to prevent them from spreading where they aren’t welcome.

The best option would be not to plant these at all and find something as pretty and interesting but less invasive.

Let’s see what I can find for next year.

Charlotte


November Gardening Chores

Time to get these transplanted mums back in the ground. (Photo by Charlotte Ekker Wiggins)

November Gardening Chores

If you’ve never been through a home remodel or reconstruction, trust me when I say there are so many unexpected ways it can impact a garden. Even being careful, construction crews will inadvertently break limbs and walk on plants, which is why I moved some of my chrysanthemums out of the way earlier this fall. I garden in USDA Hardiness Zone 5.

With most of the reconstruction now done, it’s time to get the plants back in the ground and mulched so they have a chance to get re-established. As long as the ground is not frozen, fall is an excellent time to plant trees, bushes, perennials and bulbs.

Now that all of my tropical plants are settled inside, I am still moving potted plants around to give them optimum light conditions. With my house heat on, plants are adjusting to the warm conditions by dropping leaves.

Tree leaves have also been busy, from changing color to making their way onto flower beds. I like to use mowed over leaves for a layer of mulch that decomposes into soil over the next few years. I will be adding wood chips from our local recycling center after the first hard frost. The combination will create a plantable bed by next spring.

Missouri’s native tree flowering dogwood leaves turn purple in fall. (Photo by Charlotte Ekker Wiggins)

Plants continue to need moisture; an inch a week is a good measure, especially for woody plants, such as azaleas and evergreens. When watering, check for damaged branches and remove. Once winter ice moves in, the ice will cause more damage than necessary on those weak and damaged limbs. I take pruners with me so I can also trim out suckers and branches that are too long, especially along where I regularly walk. No point in putting that off until later when the ground is covered in ice and snow.

If you haven’t done so already, this is a good time to empty most of your composters. Most likely candidates to get the new rich soil amendment include asparagus and strawberry beds.  I also added compost to my deck pots to get them ready for my next crops. I still have red onions growing so I may scatter some lettuce and spinach seeds.

Still need to mound my rose crowns with 6 inches of soil or so before the first frost. I have mounds of mulch already piled nearby to scatter on the plants after I add a layer of leaf mulch for extra insulation.

My purple coneflowers bloomed well this year so I have trimmed a few seed heads to plant in my nursery bed next year. The rest I leave for winter bird food.

Have grass to mow? You should be on the downside of the mowing season. Make the last cut when you see grass has stopped growing. Let clippings lie where they’ve been cut to restore Nitrogen to the soil. Have fun mowing over the leaves to shred and move them to flower beds.

Don’t forget to stop and enjoy the fall colors. Trees, shrubs and some perennials take on a different color in fall, changing gardens into new, sometimes surprising color palettes. Take note of something you like and plant more next year.

If you’ve enjoyed daffodils and tulips earlier this year, this is the time to get the bulbs planted. There is a variety of other spring bulbs to plant now including lilies and hyacinths. Check your local home and garden center for the varieties best for your area.

Charlotte

Flying Ghosts

One of my neighbors has these ghosts flying at her driveway entrance. (Photo by Charlotte Ekker Wiggins)

Flying Ghosts

When people say fall garden decor, it’s usually chrysanthemums on their mind unless it’s the kick off of the holiday season, Halloween. In the midwest where I live, people have become more and more engaged in Halloween decor, from painting hay bales with pumpkin faces to elaborate front yard scenes including black cats and tombstones.

In my neighborhood, we usually share seasonal garden flags and maybe a few pumpkins until this year. One of our neighbors went all out by setting up a Halloween scene including flying ghosts.

I stopped long enough to - yes, I peeked under the sheets.

The inside of the ghost has a simple foam head and shoulders. (Photo by Charlotte Ekker Wiggins)

Years ago, I made some similar flying ghosts out of foam styrofoam balls and clothing hangers repurposing old white t-shirts. Mine were smaller because I had them hanging inside in my dining room. These outside flying ghosts were larger but looked very similar in construction.

One other reason these are fun; they don’t require a lot of storage room so you can make several and keep everything in one box.

A hook at the top of the foam head makes hanging the ghost easy. (Photo by Charlotte Ekker Wiggins)

Here’s how the flying ghosts look as part of the Halloween scene at the entrance of the driveway. Our neighborhood kids have to pass the scene on their way home from the school bus stop.

As I was taking the photo, the black spider on the left startled me.

Here’s her whole Halloween scene; the black spider on the left got me! (Photo by Charlotte Ekker Wiggins)

I’m not a fan of horror movies or the scarier part of this holiday but the ghosts, and spiders, are fun to have in the garden.

Boo!

Charlotte

Ten Ways to Use Leaves

Leaves are starting to cover my mulched garden paths. (Photo by Charlotte Ekker Wiggins)

Leave the Leaves

For years neighbors would ask me why I left my leaves on the garden in the fall. Their main concern was that the leaves would turn the soil too acid for anything to grow.

Besides sitting on the side of a limestone hill surrounded by woods and not having any grass growing, the thought of trying to rake leaves was daunting. When I realized leaves decompose into organic soil conditioners, I was sold. Now more than 30 years since I started this practice, my latest soil test shows the soil - I’m just excited to be able to say I actually have some soil now - is close to the middle of the scale so leaving leaves does not necessarily acidify soil.

Ten Ways to Use Leaves

Since I have so many leaves, and have been known to haul more back home from our recycling center, reconsider bagging that ready powerhouse that you could easily use. Here’s how I use leaves on my hillside:

  1. Added to compost bins. Good compost is half green (kitchen scraps) and half brown (leaves). I stuff my composters full of dried leaves in fall. By the time I’m working my garden in the spring I have a ready source of compost waiting for me. Yes, it takes longer for compost to cook over fall and winter but I don’t need it then.

  2. I cover all of my flower beds with leaves to protect young plant starts and established perennials from winter ice. I prefer to use mulched leaves for this so I haul those back from our recycling center. By spring it’s amazing how few leaves are left because they slowly decomposed over fall and winter.

  3. The decomposed leaves also feed soil microbes, bacteria and mycelium and they, in turn, feed the plants.

  4. Flower beds also have open spots for ground nesting bumble bees so the leaves protect those nests. I also have ladybugs and other beneficial insects that depend on leaves for winter cover.

  5. If I am planting trees in fall, I line the bottom of the holes with wet leaves to help keep tree roots hydrated.

  6. When I remove a hillside limestone rock. I fill the holes with packed leaves so no one will fall into the hole. After a few years, that hole becomes an excellent planting hole full of decomposed leaves that have turned to soil food.

  7. In spring, I save whatever leaf pile is left and fill new plant holes with leaves. The leaves hold in water and keep feeding the surrounding soil which feeds my plants.

  8. When mulching my paths, which I do about every three years, I will first line the paths with leaves and cardboard, then add the mulch. The cardboard and leaves cuts down on plant growth although I do have some paths I had to move because native plants grew there.

9. If you live in a more urban environment and have a lawn mower, mow your leaves into smaller pieces and rake them onto flower beds. Leave some on your grass, too. The smaller pieces will decompose faster and will feed the soil that’s growing that expensive grass you planted. A good rule of thumb is about half an inch of shredded leaves.

10. Bag your leaves in black plastic bags and stash them where rain and sun will cook them. One of my brothers bagged leaves and forgot about them behind his garage. When I was visiting and helping him clean up the yard, we pulled the bags out and found lovely decomposed leaves that looked like compost. instead of having them hauled off, we spread the composted leaves all over his flower beds. He said the leaves had been sitting there for about a year.

If you don’t have leaves, invite your neighbors to bring over theirs.

The more you use them the more you will appreciate what leaves can do in your garden!

Charlotte

Wintering Tropical Plants

Tropical plants lining up for their fall trimming and spray before heading inside for winter. (Photo by Charlotte Ekker Wiggins)

Tropical plants lining up for their fall trimming and spray bath before heading inside for winter. (Photo by Charlotte Ekker Wiggins)

Wintering Tropical Plants

Plants look like they’re taking a number to wait in line, doesn’t it. In some ways, they are. The tropical and tender plants are getting sorted by size and lighting requirements before they spend the next 6 months inside. Our first hard frost in USDA Hardiness zone 5 is end of the October so these tropicals need to get settled where they can safely survive.

This is a hard time for me. I worry that I will run out of space before I run out of plants so I try to bring in as many as I can. It takes some planning to figure out what goes where for light requirements as well as easy access to those that need more frequent watering.

I try to get these inside before I turn on the house heat so they can adjust to their new space before the temperature changes. If I don’t, leaves fall and it takes longer for the plants to adjust to their new growing conditions. I try to give them at least 4 weeks to adjust inside before I turn on the heat.

Plants with long trunks and stems get tied up so they don’t take up so much room. (Photo by Charlotte Ekker Wiggins)

Plants with long trunks and stems get tied up so they don’t take up so much room. (Photo by Charlotte Ekker Wiggins)

To get potted plants ready for the move inside:

  1. Trim each plant of excess growth.

  2. Tie up long branches.

  3. Check for bugs.

  4. Spray with a solution of a quart of water with a squirt of Dawn liquid detergent while wiping off any visible bugs.

  5. Remove top 2 inches of soil; replace with new potting soil to remove any dormant bugs.

  6. Separate into lighting requirements.

  7. Clean bottom dish; replace with sturdy larger ones to help humidity those that need extra humidity.

  8. Add castors to bottom of heavy plants.

  9. Shake plant to remove hitchhikers like tree frogs, praying mantis and, one year, a chipmunk; that was exciting.

Most of my plants have been with me for a number of years so they have favorite wintering spots already reserved. Newcomers are harder to fit in to ensure they get sun so I sometimes set them on pot stands.

I do - grouse is a good word - as I move furniture to bring in the greenery, it can take me a good week or so. My cats enjoy finding hitchhikers but I would rather not be greeted by a lizard, or more commonly a frog, sitting on my kitchen counter.

One of my tropical fruit trees surprised me with a fresh lime; okay front of the line for you!  (Photo by Charlotte Ekker Wiggins)

One of my tropical fruit trees surprised me with a fresh lime; okay front of the line for you! (Photo by Charlotte Ekker Wiggins)

The tropical fruit trees are wonderful to have inside over winter. They tend to bloom in January and February, filing my rooms up with a lovely fresh scent.

This year we also have another very special addition, a pot of fresh catnip that needs to find a good sunny spot.

I don’t know what I was thinking, the fresh catnip lasted only a week inside. James A Mess now has the pot to sun in for the rest of winter. Note to self: plant catnip in hanging pots for next winter.

This is James A Mess’s favorite fresh catnip pot which will be coming inside with the rest. (Photo by Charlotte Ekker Wiggins)

This is James A Mess’s favorite fresh catnip pot which will be coming inside with the rest. (Photo by Charlotte Ekker Wiggins)

It’s a bit of a fuss right now but when that first snowfall starts, with temperatures in the single digits and I’m warm and surrounded by flowering greenery….that makes me very happy.

Charlotte

October Gardening Chores

Even though there’s little left, this catnip pot will be coming inside for winter. (Photo by Charlotte Ekker Wiggins))

Even though there’s little left, this catnip pot will be coming inside for winter. (Photo by Charlotte Ekker Wiggins))

October Gardening Chores

Of all of the plants that will transition from my deck inside for winter, I have one very sorry pot of catnip that is a must. My little tuxedo cat James A Mess claimed the pot earlier this spring and loves to roll in what remains of the catnip plant. I doubt poor catnip plant will survive winter being so well loved but it will get a prominent spot in the sun. And I’m sure James will continue to enjoy it.

Out of the four seasons in my garden, this is the most challenging. I have to decide which plants come inside to winter over and which ones I have to leave. And I don’t like to leave any of them!

Our weather forecast for USDA Hardiness Zone 5 is calling for a hard frost around Halloween. I’ve already started to bring the tropical hibiscus inside so they can get acclimated to changed conditions before the dry heat kicks on.

Some of the other good fall gardening tips this time of year include:

1. Pick herbs before they have flowered to capture the full flavor. Wait until after they have flowered and cut the new herb sprouts to dry for later use. Except for basil.

2. Besides harvesting, this is the time to freeze extras for later use.

3. Start pruning and checking for any hitchhikers on plants that are coming inside for winter. To cut down on leaf drop, bring plants in a month before turning on the heat, which is usually early October.

4. For single plants in separate pots, consider combining them, watering well and then bringing them inside. Even if they only last for a couple of months, they will help to extend the growing season.

5. Water. Perennials, established trees, evergreens and azaleas need one inch of water a week. Water into the ground so the water hydrates plant roots. Keep watering until our first hard frost. For our part of the country, that usually around Halloween.

6. Stop fertilizing and pruning. Wait until January-February to prune after the plants are dormant and you can better see their form.

The gift passion vine, left, and Little Hottie hydrangea, right, are ready and waiting to be planted outside. (Photo by Charlotte Ekker Wiggins)

The gift passion vine, left, and Little Hottie hydrangea, right, are ready and waiting to be planted outside. (Photo by Charlotte Ekker Wiggins)

7. If you have trees with fungus or other issues, collect those leaves and burn or bury into the ground. I leave most of my leaves on flower beds except for diseased ones, don’t want to spread that fungus. Those I bury in the ground.

8.If you haven’t cleaned up flower beds of spent plants, here’s your last chance to gather seeds. Leave some for the birds, they will eat them over winter. Leave the rest to clean up in spring. By then, most of the greenery will have broken down and become part of the garden mulch.

9. Plant spring bulbs. Add a little bone meal at the bottom of the hole to slowly feed the bulbs. Plant bulbs close together if you don’t mind digging them up in a couple of years to separate. If you would rather not, give them more space in between. Mark where you planted them so you don’t dig them up next year when planting something else.

10. Leave the falling leaves where they are. If you are worried about your grass, run the mower over them. Leaves return Nitrogen to the soil and make a wonderful amendment to flower beds and help retain moisture.

11. Plant trees and bushes; make sure to water daily until frost.

And yes, my two young cats love their fresh catnip! (Photo by Charlotte Ekker Wiggins)

And yes, my two young cats love their fresh catnip! (Photo by Charlotte Ekker Wiggins)

12. Stop long enough to enjoy the beauty of fall as leaves turn, native plants bloom and temperatures turn crisp and cool. A hot cup of tea with fresh honey sounds good about now, too!

Charlotte

Winter Flowers

Do you recognize these flowers? They are favorite summer bloomers. (Photo by Charlotte Ekker Wiggins)

Do you recognize these flowers? They are favorite summer bloomers. (Photo by Charlotte Ekker Wiggins)

Winter Flowers

There are many exotic plants that bloom over winter to give us flowers - moth orchids, Poinsettias and Amaryllis bulbs, even African violets. But you can also have a little bouquet of flowers if keep these two plants in pots inside: geraniums and vinca.

Both considered annuals where I live in mid-Missouri, these hardy plants are good bloomers through summer and fall outside. By the time the first frost hits our area, people tend to toss out the vinca and maybe store geranium roots in brown bags.

I bring both inside in pots and make sure they have a good amount of sunshine in southern windows. Over the years, these have been my continuously-blooming flowers through winter, giving me enough color to make small bouquets.

This red geranium adds interest contrast to the thicker traditional geranium petals, (Photo by Charlotte Ekker Wiggins)

This red geranium adds interest contrast to the thicker traditional geranium petals, (Photo by Charlotte Ekker Wiggins)

Studies show that flowers contribute to our sense of happiness and well being. Having even a little bouquet through winter is a good pick me up and can be a thoughtful gift in the middle of a cold spell.

These are a new geranium now starting to bloom. (Photo by Charlotte Ekker Wiggins)

These are a new geranium now starting to bloom. (Photo by Charlotte Ekker Wiggins)

This light pink geranium was a 25 cent purchase at the end of the season at one of our home and garden centers. I didn’t know what color it was but I knew the geraniums grow well for me potted inside.

These peach geraniums bloomed continuously earlier this summer. (Photo by Charlotte Ekker Wiggins)

These peach geraniums bloomed continuously earlier this summer. (Photo by Charlotte Ekker Wiggins)

Geraniums are available during the growing season in a wide range of colors from white to variegated. They are also used in both hanging baskets as well as containers making them quite versatile.

I have a gorgeous dark pink one that is setting buds in my office but not currently in bloom. i’ve had that geranium for more than 8 years. I give it new soil every fall so that it has a good boost to bloom through winter.

Pink vincas also bloom well inside over winter. (Photo by Charlotte Ekker Wiggins)

Pink vincas also bloom well inside over winter. (Photo by Charlotte Ekker Wiggins)

ere’s another surprise. The popular vincas will also grow well potted inside. These hot pink ones have been wintering over with me for several years.

Come spring, they get repotted in fresh soil and spend the summer outside on my deck.

So next time you have some favorite annuals in pots, bring them inside and give them the right light. You may also enjoy flowers all four seasons year around!

Charlotte

Best Leaf Mulch

Shredded leaves make excellent mulch and growing medium. (Photo by Charlotte Ekker Wiggins)

Shredded leaves make excellent mulch and growing medium. (Photo by Charlotte Ekker Wiggins)

Best Leaf Mulch

Over the years I have become very particular about the leaves I use for fall mulching. My favorite combination are the leaves ground up by lawn mowers and turned into small pieces.

I can usually find those shredded leaves in bags people haul to our local recycling center. Not every bag will work. Some have tiny pieces of grass mixed in. Others include small twigs and even seed pods. Nothing wrong with those additives for recycling but for my flower beds I want just the shredded fall leaves.

Some shredded leaves without anything else mixed in. (Photo by Charlotte Ekker Wiggins)

Some shredded leaves without anything else mixed in. (Photo by Charlotte Ekker Wiggins)

On warm fall days, I will look for a pile of dumped shredded leaves and fill brown bags full or the shredded leaf goodness.

Be careful, the dust of the leaves can get into your lungs if you get too close.

Here’s what one of the larger piles of dumped shredded leaves looks like. The taller pile makes it easier to fill brown bags.

Be still my heart, a pile of shredded leaves waiting for me at our local recycling center. (Photo by Charlotte Ekker Wiggins)

Be still my heart, a pile of shredded leaves waiting for me at our local recycling center. (Photo by Charlotte Ekker Wiggins)

Besides working as mulch, which keeps the soil temperature around plant roots from thawing and heaving, shredded leaves make an excellent planting medium in spring. By then the leaves have started to decompose and some plant roots will find their way into the decomposing leaves for nutrition and ease of growth.

In fall, i will cover roses, newly-planted perennials such as mums and any trees I may add with shredded leaves. The leaves will provide the new plants with protection as they settle into their new growing spots.

I also use shredded leaves to protect my hillside flower beds. Winter winds can dry out plants; by covering them with shredded leaves, they not only get protection from changing temperatures but also from damaging winds.

Shredded leaves return organic matter to soil, feeding the microscopic creatures that live there. (Photo by Charlotte Ekker Wiggins)

Shredded leaves return organic matter to soil, feeding the microscopic creatures that live there. (Photo by Charlotte Ekker Wiggins)

One more reminder about the role of leaves in our garden. There are many beneficial garden residents that winter over in leaves from gnats and spiders to butterflies, moths and salamanders.

I will continue to haul shredded leaves back to my garden until it’s too cold to spread them, and I can hardly wait to see how the garden will grow next year!

Charlotte

Coleus Flowers

These lovely blue flowers are among not often seen flowering coleus. (Photo by Charlotte Ekker Wiggins)

These lovely blue flowers are among not often seen flowering coleus. (Photo by Charlotte Ekker Wiggins)

Coleus Flowers

Most people recognize these plants when they see them. The general family of coleus plants features a wide range of colors and shapes, all provided by the varied leaves of this annual plant.

One of the features not often seen are coleus flowers. Once the plant blooms and goes to seed, the plant tends to not grow as vigorously. Many people pinch off the flowers to help extend the vigor and life of this easy and hardy summer gardening staple.

True blue flowers are rare in gardens so i was delighted to see that these inherited coleus flowers were indeed blue. Coupled with their colorful leaves, the blue flowers were a pretty combination.

Gardeners tend to select coleus more for their leaf color and shape than flower color. The leaves have a variety of shapes as well as color combinations.

There’s a wide range of coleus with different leaf shapes and colors. (Photo by Charlotte Ekker Wiggins)

There’s a wide range of coleus with different leaf shapes and colors. (Photo by Charlotte Ekker Wiggins)

In addition to interesting green leaves, coleus can also have other strong leaf shapes and color combinations, very similar to the range of mixed fabrics that can be found in handmade quilts like a Flower Garden Quilt. . Here are a couple of coleus plants now wintering over inside my house in a shade pot.

At least two different coleus wintering over in one of my shade pots. (Photo by Charlotte Ekker Wiggins)

At least two different coleus wintering over in one of my shade pots. (Photo by Charlotte Ekker Wiggins)

Growing outside, coleus provide a pop of color through the summer growing season usually in a shady spot.

Right now they are adding nice unexpected color inside in my living room.

Coleus plants blooming inside in my living room window. (Photo by Charlotte Ekker Wiggins)

Coleus plants blooming inside in my living room window. (Photo by Charlotte Ekker Wiggins)

Coleus can easily be grown from both seeds and from cuttings rooted in water.

My goal is to see if I can get these potted coleus to make it through winter inside so they have an earlier start in next year’s growing season.

Charlotte

November Gardening Tips

Dry leaves are a gardener’s best friend, excellent for composting and harboring good insects. (Photo by Charlotte Ekker Wiggins)

Dry leaves are a gardener’s best friend, excellent for composting and harboring good insects. (Photo by Charlotte Ekker Wiggins)

November Gardening Tips

We’re welcoming November this year with a couple of weeks of warm weather as opposed to the nippy cold rainy days we’ve had for the past two weeks. The raw weather brought us almost 3 inches of welcome rain but I still have some plants to get in the ground in USDA Hardiness 5.

i did get all of my plants inside to winter over. Now that they are all settled inside, I am still moving potted plants around to give them optimum light conditions. My heat is on so leaves are dropping, especially the ferns.

Tree leaves have also been making their way onto flower beds for mulch and a layer that hopefully decomposes into soil over the next few years. I will be adding wood chips from our local recycling center after the first hard frost.

If you want to plant shrubs and move trees, this is a good time. I prefer planting into final spots in spring so my seedlings are now in pots and heeled into the nursery garden bed. That will give me all winter to decide on their final destination.

Love my honey-colored hardy mums currently in bloom. (Photo by Charlotte Ekker Wiggins)

Love my honey-colored hardy mums currently in bloom. (Photo by Charlotte Ekker Wiggins)

It’s been very dry so remember to water. An inch a week is a good measure, especially for woody plants, such as azaleas and evergreens. When watering, check for damaged branches and remove. Once winter ice moves in, the ice will cause more damage than necessary on those weak and damaged limbs. I take pruners with me so I can also trim out suckers and branches that are too long, especially along where I regularly walk. No point in putting that off until later when the ground is covered in ice and snow.

If you haven’t done so already, this is a good time to empty most of your composters. Most likely candidates to get the new rich soil amendment include asparagus and strawberry beds.  I also added compost to my deck pots to get them ready for my next crops. I still have red onions growing so I may scatter some lettuce and spinach seeds.

Still need to mound my rose crowns with 6 inches of soil or so before the first frost. I have mounds of mulch already piled nearby to scatter on the plants after I add a layer of leaf mulch for extra insulation.

Have grass to mow? You should be on the downside of the mowing season. Make the last cut when you see grass has stopped growing. Let clippings lie where they’ve been cut to restore Nitrogen to the soil. Have fun mowing over the leaves to shred and move them to flower beds.

Love the red leaf color native dogwoods add to my hillside. (Photo by Charlotte Ekker Wiggins)

Love the red leaf color native dogwoods add to my hillside. (Photo by Charlotte Ekker Wiggins)

Don’t forget to stop and enjoy the fall colors. Trees, shrubs and some perennials take on a different color in fall, changing gardens into new, sometimes surprising color palettes. Take note of something you like and plant more next year.

Charlotte

Versatile Leaf Bags

Fall leaf bags are excellent for storing dug up plants. (Photo by Charlotte Ekker Wiggins(

Fall leaf bags are excellent for storing dug up plants. (Photo by Charlotte Ekker Wiggins(

Versatile Leaf Bags

There’s an excellent garden tool usually available in the fall but it’s not for gathering leaves.

Those large tall brown leaf bags make excellent temporary plant storage when you dig up plants. Fall is an excellent time to move peonies and daylilies as long as they have about a month to settle in their roots before a hard frost. Well even if there is a hard frost, they need warm soil for their roots and that can stay warm until January.

Back to the brown bags.

Brown bags can be used to collect compost additions from the garden. (Photo by Charlotte Ekker Wiggins)

Brown bags can be used to collect compost additions from the garden. (Photo by Charlotte Ekker Wiggins)

These brown paper bags are sold for leaf collection and are often used to haul leaf and grass clippings to our local recycling center.

The brown bags not only are double and triple thick but they can also be used to kill off hard to reach grassy areas where cardboard is hard to use. Once down, cover with wood chips to hold them in place.

Brown bags can also store plant trimmings for easy moving to compost piles.

If you are putting something with weight on it, add a piece of cardboard at the bottom to minimize the bags ripping from the weight.

If you happen to use these for leaves, dump the leaves and bring them back home. You can keep using them for many garden uses.

Now I haven’t decided when to introduce one of these to my cats as a cat toy. They love the smaller brown paper bags that hold groceries. What do you think are these too big?

Charlotte

Gardening Shoes

My favorite gardening shoes from Sloggers, comfortable and cute to boot. (Photo by Charlotte Ekker Wiggins)

My favorite gardening shoes from Sloggers, comfortable and cute to boot. (Photo by Charlotte Ekker Wiggins)

Gardening Shoes

If you have large feet like I do with broken little toes, the idea of a pair of cute, fun shoes is just plain out of the question. I feel lucky to find shoes with rounded tips and a width to accommodate my little crooked pinkies without falling off my ankle and often take what I can find regardless of color.

So it was with great delight that I found these gardening shoes from Sloggers. They were surprisingly heavy to the hand but the design and waterproof quality sold me on trying them. They retailed for $29. where I purchased them at a local home and garden center.

Once out in the garden, they are surprisingly comfortable and frankly lightweight. I usually change shoes when going from the garden to a retailer but I often forget I even have these on.

A friend who used to run a garden center said she had one in every color. They are practical for all sorts of soil conditions and garden seasons.

If you are looking for a gift for a gardener, these would be an excellent choice. I bought mine one size larger than the size I wear. If that’s an issue, keep your receipt so the gift recipient can trade them for a better size.

You should be able to find these online from a variety of retailers as well.

Charlotte

Mushroom Compost

Mushroom compost is an easy and inexpensive way to refresh soil. (Photo by Charlotte Ekker Wiggins)

Mushroom compost is an easy and inexpensive way to refresh soil. (Photo by Charlotte Ekker Wiggins)

Mushroom Compost

If there is one product to stockpile over winter it is mushroom compost. Mushroom compost is the easiest way to refresh potted soil and give your indoor plants a mid-winter pick me up without having to repot the plants.

A number of studies are confirming that mycelium, or the underground fungus network that lives in soil, is critical to the health of soil residents including plants.

To keep soil alive and healthy, gardeners feed the soil residents with compost, recycling kitchen scraps back into soil. As I like to say, we are all connected.

Enter mushroom compost, a product I discovered this year with the help of a local garden center. Although I still produce my own compost, I discovered mushroom compost is also handy to easily refresh potted soil.

This geranium has lived in my office for a good 8 years, getting new soil every spring. (Photo by Charlotte Ekker Wiggins)

This geranium has lived in my office for a good 8 years, getting new soil every spring. (Photo by Charlotte Ekker Wiggins)

This lovely geranium was an end of the season purchase a good 7 years or more ago. I moved it to my office so that I could keep it watered over winter and it has never left. I know when the soil needs help when the leaves start to dry up and the plant no longer flowers.

I remove the top 3-4 inches of potted plant soil and replace it with a mix of half new potting soil and 1/4 to half mushroom compost.

I have also just mixed the mushroom compost into the top two inches of existing potted soil and use mushroom compost when I plant shrubs and trees. I want to give those roots a good start.

The started using mushroom compost this summer on my deck plants. The new infusion of fresh soil and fungi compost has given my potted plants a wonderful new lease on life. I am stockpiling a supply for use mid winter. I will also be using mushroom compost in spring when I plant vegetables in pots.

There are a number of granulated products on the market that will do the same thing. These bags, at less than $4 a bag, are not only a good value but easy to store for later use.

Charlotte

October Gardening Tips

Time to enjoy a few more bouquets of cut garden flowers. (Photo by Charlotte Ekker Wiggins)

Time to enjoy a few more bouquets of cut garden flowers. (Photo by Charlotte Ekker Wiggins)

October Gardening Tips

Don’t know what to think yet but I had better get a start getting plants inside. Out of the four seasons in my garden, this is the most challenging. I have to decide which plants come inside to winter over and which ones I have to leave. And I don’t like to leave any of them!

Our weather forecast for USDA zone 5 is calling for an early first frost around October 21 instead of Halloween. The extended winter forecast is for a colder season with little precipitation so mulching will be important after the first frost.

Some of the other good fall gardening tips this time of year include:

1. Pick herbs before they have flowered to capture the full flavor. Wait until after they have flowered and cut the new herb sprouts to dry for later use. Except for basil.

2. Besides harvesting, this is the time to freeze extras for later use.

3. Start pruning and checking for any hitchhikers on plants that are coming inside for winter. To cut down on leaf drop, bring plants in a month before turning on the heat, which is usually early October.

4. For single plants in separate pots, consider combining them, watering well and then bringing them inside. Even if they only last for a couple of months, they will help to extend the growing season.

5. Water. Perennials, established trees, evergreens and azaleas need one inch of water a week. Water into the ground so the water hydrates plant roots. Keep watering until our first hard frost. For our part of the country, that usually around Halloween.

Hardy mums, right, start to bloom and add a dash of fall color. (Photo by Charlotte Ekker Wiggins)

Hardy mums, right, start to bloom and add a dash of fall color. (Photo by Charlotte Ekker Wiggins)

6. Stop fertilizing and pruning. Wait until January-February after the plants are dormant and you can better see their form.

7. If you have trees with fungus or other issues, collect those leaves and burn or bury into the ground. I leave most of my leaves on flower beds except for diseased ones, don’t want to spread that fungus. Those I bury in the ground.

8.If you haven’t cleaned up flower beds of spent plants, here’s your last chance to gather seeds. Leave some for the birds, they will eat them over winter. Leave the rest to clean up in spring. By then, most of the greenery will have broken down and become part of the garden mulch.

9. Plant spring bulbs. Add a little bone meal at the bottom of the hole to slowly feed the bulbs. Plant bulbs close together if you don’t mind digging them up in a couple of years to separate. If you would rather not, give them more space in between. Mark where you planted them so you don’t dig them up next year when planting something else.

10. Leave the falling leaves where they are. If you are worried about your grass, run the mower over them. Leaves return Nitrogen to the soil and make a wonderful amendment to flower beds and help retain moisture.

11. Plant trees and bushes; make sure to water daily until frost.

12. Stop long enough to enjoy the beauty of fall as leaves turn, native plants bloom and temperatures turn crisp and cool. A hot cup of tea with fresh honey sounds good about now!

Charlotte

Falling for Begonias

Rescued wax begonias keeping my retaining wall pretty. (Photo by Charlotte Ekker Wiggins)

Rescued wax begonias keeping my retaining wall pretty. (Photo by Charlotte Ekker Wiggins)

Falling for Begonias

I have to admit, I haven’t been terribly fond of begonias. Nothing personal. I have lived with an Angel Begonia in my living room for many years, the serrated leaves making way for lovely clusters of pink flowers midwinter.

It’s those little containers of wax begonias late spring at garden centers that I bypassed. They didn’t look very interesting and, as an annual that doesn’t winter over outside, I have to admit I didn’t even look at them.

Then two years ago, I rescued a pot of begonias late fall. I kept them inside over winter in a sunny window and they bloomed a lovely red. And kept blooming with very little care.

Love the color of these red wax begonias, so pretty close up. (Photo by Charlotte Ekker Wiggins)

Love the color of these red wax begonias, so pretty close up. (Photo by Charlotte Ekker Wiggins)

Once the danger of frost was over, I moved them outside, pinching a few branches off to add a splash of color to my deck and front porch.

I also started a couple of pots to keep one of my garden benches in shade company.

More wax begonias easily rooted in these pots by my garden bench. (Photo by Charlotte Ekker Wiggins)

More wax begonias easily rooted in these pots by my garden bench. (Photo by Charlotte Ekker Wiggins)

They have me hooked; I now can’t imagine my little garden without them. They are easy to root, bloom continuously and add an elegant dash of red.

According to Garden Design, begonias were first discovered in Brazil. Even more interesting, the flowers are high in Vitamin C and edible. The leaves are also used in several traditional Chinese dishes, which suggests they have travelled the world.

Growing Wax Begonias

Wax begonias are extremely easy to grow. The only challenge is that their fleshy stems can easily be broken off so be careful when moving them and brushing against them.

Can you tell that the wax begonias on left get more sun than the ones on right? (Photo by Charlotte Ekker Wiggins)

Can you tell that the wax begonias on left get more sun than the ones on right? (Photo by Charlotte Ekker Wiggins)

Mine grow well in dappled sunshine and shade in pots with potting soil and compost.

The ones in pots on my front porch, facing east, have different colored leaves depending on the amount of sunshine they received. The pot on the left gets more morning sun. The pot on the right doesn’t get any direct sun.

I am switching the two pots to equalize the amount of sun they have been getting.

If left in full sun all day, the leaves will be burnt. The traditional wax begonias do best in shade. There are some new varieties that tolerate sun.

I water every other day depending on the temperature. These red ones have bloomed continuously since May.

And yes, I will bringing these inside not only to overwinter but to cheer me up during our cold Missouri winter months.

Charlotte


Christmas Ferns

Leaflets from one of my ferns wintering over inside in my dining room. (Photo by Charlotte Ekker Wiggins)

Leaflets from one of my ferns wintering over inside in my dining room. (Photo by Charlotte Ekker Wiggins)

Christmas Ferns

When we think of Christmas, we may think of model trains, eggnog, being with family but I doubt you think of a fern.

Tropical ferns are often offered for sale late fall for inside winter plants. Or they get tossed after a full season in the garden because people don’t want to mess with the dropped leaves when they are in dry conditions.

The tropical ferns are relatives of the ones we have growing naturally in Missouri. You probably have walked by them on a nature trek. You certainly have driven by them along shady Missouri country roads because I have. They are native Polystichum acrostichoides one of the few plants that hold on to their color through cold, sleet and snow.

Also known as Christmas and Holly Ferns, these plants are remnants of dinosaur days, which comes to mind most of the times I see these plants. I I find that pretty awesome. And is something I think about now quite often since I love their green fullness and have them scattered through my house overwintering. Yes, they do drop leaves. Yes, my cats love to play among their drooping leaflets. What is even more mind boggling is that these plants lived before there were bees, butterflies and other pollinators. So how did these plants reproduce?

Ferns like moisture so it’s a challenge to keep a house humidified in winter. (Photo by Charlotte Ekker Wiggins)

Ferns like moisture so it’s a challenge to keep a house humidified in winter. (Photo by Charlotte Ekker Wiggins)

Most of these ferns have two types of leaves: ones that produce spores underneath and ones that don’t produce any spores. The leaves with spores are smaller than the larger, sterile leaflets. The larger ones as the ones that last through winter hugging the ground.

If you look closely, the fern’s lance-shaped leaflets are spiny-toothed with briste tips, which is where they get their comparison to holly leaves.

Spores on the back of leaflets is how ferns reproduce. (Photos by Charlotte Ekker Wiggins)

Spores on the back of leaflets is how ferns reproduce. (Photos by Charlotte Ekker Wiggins)

Underneath, the spore clusters are in neat rows of circular, umbrella-like structures. The spores get carried off by wind and water, which partially explains why these plants are found in shady, moist soil.

According to Missouri Department of Conservation, when the spores germinate, they become tiny, flat, green heart or kidney-shaped plants that produce eggs and sperm. ‘the sperm has to swim to reach eggs so water must be present for fertilization. T”he fertilized eggs then develop into another sporophyte plants and the cycle starts all over.

The leaves are not edible. Their role in the ecosystem is more to prevent erosion and stabilize slopes, which is where they are often found. Unless they are sitting in my den and dining room, wintering over until they can go back outside during the growing season.

I have them in hanging and decorative pots on casters so I can easily move them into shade. Or next to a dinosaur, whichever comes first!

Charlotte

Tree Spikes

A weed remover makes adding fertilizer spikes easy after a good fall rain. (Photo by Charlotte Ekker Wiggins)

A weed remover makes adding fertilizer spikes easy after a good fall rain. (Photo by Charlotte Ekker Wiggins)

Tree Spikes

No, I’m not talking about anything metal. These tree spikes are time released fruit tree fertilizer shaped into a spike. They come with a small plastic top one is supposed to place on the blunt side of the spike, then it is pushed into the ground by pounding the plastic.

Tree spikes are a bit controversial. Because they are concentrated in one spot once placed in the ground, tree roots may not have access to the fertilizer nourishment evenly. A granular fertilizer will provide more even fertilizer along the tree drip line, more evenly encouraging root growth.

However.

I garden on a Missouri limestone hillside. The chances that my granular fertilizer will stay in place long enough to integrate with the soil in spring during heavy spring rains is pretty low to poor. Even so, I will spend a good day in spring making small trenches around the dwarf fruit trees and giving them a good supply of compost to feed them through the upcoming growing season.

In fall, I hedge my bets by placing fruit tree spikes around my fruit trees. With the ebb and flow of fall temperatures and rain, the fruit spikes will decompose and integrate themselves into the soil. The trees are dormant but these should provide my fruit trees with a good start next spring.

Push the tree spike in next to the weeder, then push into the ground. (Photo by Charlotte Ekker Wiggins)

Push the tree spike in next to the weeder, then push into the ground. (Photo by Charlotte Ekker Wiggins)

In other words, the tree spikes won’t be carried down the hill in the next fall rain.

I use these mostly for my young dwarf fruit trees. They need all of the help they can get in my garden to get strong roots established so they can grow next spring.

Charlotte

December Gardening Chores

Time to get my last spring bulbs in the ground with a sprinkle of bone meal. (Photo by Charlotte Ekker Wiggins)

Time to get my last spring bulbs in the ground with a sprinkle of bone meal. (Photo by Charlotte Ekker Wiggins)

December Gardening Chores

The ground where I live in USDA Hardiness zone 5b is still workable early December so I am hoping the moisture will replenish depleted water tables and still let me do a little last-minute garden work. We had record cold temperatures last month for a couple of days and, by the third day, I was bundled up and trying to get some garden work done. If this winter is as bad as forecast, it’s going to be a very long cold few months for me, love being in my garden; garden dreaming about it when I can’t.

I still have some spring garden bulbs to get in the ground. Sprinkled with bone meal in the hole before placing the bulb, these new garden additions will be fun to see in bloom in only a few months.

Get broken branches and limbs trimmed before ice hits, or before someone runs into them visiting for the holidays. You know where they are but people new to your property are bound to run into them.

 As soon as a hard frost hits, it will be time to mulch. Mulching maintains the soil at an even temperature. During winter, the point of mulching is to keep plants in hibernation. If you still have leaf piles, move those into flower beds, those will also make good mulch.

 To mulch trees, make a well around the tree trunk and leave an area the width of a tire between the tree trunk and the mulch. When mulching, don’t pile mulch up to the trunk or you will create an area for diseases. Leaving a little moat around the tree also reduces girdling.

 Have empty pots, garden carts, rakes leaning against the side of the house? It’s time to clean them off and store them for the season. The rakes, in particular, you don’t want to step on the tines and hit yourself on the side of the head.

Getting fruit tree spikes in the ground up the hill from the trees. (Photo by Charlotte Ekker Wiggins)

Getting fruit tree spikes in the ground up the hill from the trees. (Photo by Charlotte Ekker Wiggins)

A warm fall day after a rain is a good day to feed fruit trees with tree spikes. Since I live on a hill, applying fertilizer means I am feeding plants at the bottom of the hill. With tree spikes, I can insert them in the ground p hill, allowing the fertilizer to leach through soil down hill.

Leave the dry flowers for now. Birds will eat the seeds and the dry greenery will provide protection for the young shoots growing at the base of the plant.

 Did you plant mums this fall? Remember to water them every couple of weeks this first year. Once they make it through their first winter, mum roots will become established and won’t require regular watering through winter.

 If you saved seeds, this is the time to make sure they are marked and stored in a dry, cool place. Some people store them in a refrigerator. I use an old ice cooler in my garage to keep mice from snacking on the bags through winter.

 Still have trees you haven’t planted? There’s still time so get them in the ground and water well.  If you are getting a live Christmas tree, dig the hole now so you can pop it in the ground right after Christmas.

 Let tap water settle overnight before using on house plants. Tap water can be too cold and may have additives that need to evaporate before being exposed to indoor plants. I fill my recycled milk jugs and let them stand overnight before pouring on inside plants.

 Have bulbs ready to bloom through winter? Paper white narcissus, hyacinths and Amaryllis  are all good choices to bloom when it’s cold outside. The first two can also be permanently planted outside and Amaryllis are repeat bloomers.

 Make sure to make notes in your garden diary for next year projects, I seem to remember them this time of year as I am putting things away.

 Charlotte


Carrion Flowers

My neighbor Elaine shared a couple of her carrion flowers with me. (Photo by Charlotte Ekker Wiggins)

My neighbor Elaine shared a couple of her carrion flowers with me. (Photo by Charlotte Ekker Wiggins)

Carrion Flowers

If you have a ghoulish bent as a gardener, you probably track when botanical garden corpse flowers finally bloom. Those unusual flowers put off a scent similar to that of rotting bodies. Not one of my favorite flowers but I became fascinated when a neighbor shared a couple of her carrion flowers with me.

Carrion flowers (genus Stapelia),  include about 44 species of succulent plants of the milkweed family, native to tropical areas of southern Africa. They are named for the unpleasant carrion odor of their large flowers which attracts certain insects to pollinate the plants and lay their eggs there. A few species are cultivated as ornamentals.

The one my neighbor shared with me is one of them. What makes them different?

First, they appear to have fur.

The furry water-collecting aspects of a carrion flower. (Photo by Charlotte Ekker Wiggins)

The furry water-collecting aspects of a carrion flower. (Photo by Charlotte Ekker Wiggins)

Secondly, they have a deep center well to collect rain water.

The deep center of carrion flowers collect rain water. (Photo by Charlotte Ekker Wiggins)

The deep center of carrion flowers collect rain water. (Photo by Charlotte Ekker Wiggins)

Carrion flowers have thick four-sided grooved stems, often coloured or covered with outgrowths.

The plants lack true leaves but have scales or spines.

The flowers have purple, red, or yellow bars and markings and are often hairy or textured. The colors are typical fall leaf colors, similar to the colors some tree leaves turn when autumn comes.

The fruit is a follicle.

The lovely tiny center of a carrion flower. (Photo by Charlotte Ekker Wiggins)

The lovely tiny center of a carrion flower. (Photo by Charlotte Ekker Wiggins)

So back to the scent. We may not like how it smells but the plant doesn’t care, they are trying to attract pollinators that will help them reproduce. In the case of carrion flowers, they are after attracting the second largest of the pollinators, flies.

I have one more word to say about this flower. Fascinating!

Charlotte

Saving Marigold Seeds

An old paint pan makes a nice marigold seed-drying pan. (Photo by Charlotte Ekker Wiggins)

An old paint pan makes a nice marigold seed-drying pan. (Photo by Charlotte Ekker Wiggins)

Saving Marigold Seeds

I have to confess, I fell out of interest in marigolds several years ago when the original bug-deterring plants seem to be less and less successful at keeping bugs at bay. Some bugs, like ladybugs, are good to have around. Other bugs, however, damage plants and need to be discouraged.

The reason marigolds are no longer effective is simple enough. Plant breeders have bred the insect-repelling pheromone out of some of the newer varieties, in part because some people don’ t like the unique marigold scent. I myself love the pungent scent, which is what used to make them good plants to have around vegetable gardens.

This year, a friend gave me a couple of her dried marigold plants. I was startled to note the strong scent and asked her where she had picked up the seeds. From my grandmother, she said.

As it was snowing outside, I found myself picking off the flower heads to dry. There were two marigold colors, one yellow and one all orange. Once the plants were cleaned of most of their seeds, I spread the seeds in an old paint pan to dry.

After they are all dry, I will store them in bags ready for planting next spring.

And I will share some with other gardening friends. There is little gardeners like more than free seeds.

Charlotte