Amaryllis Care

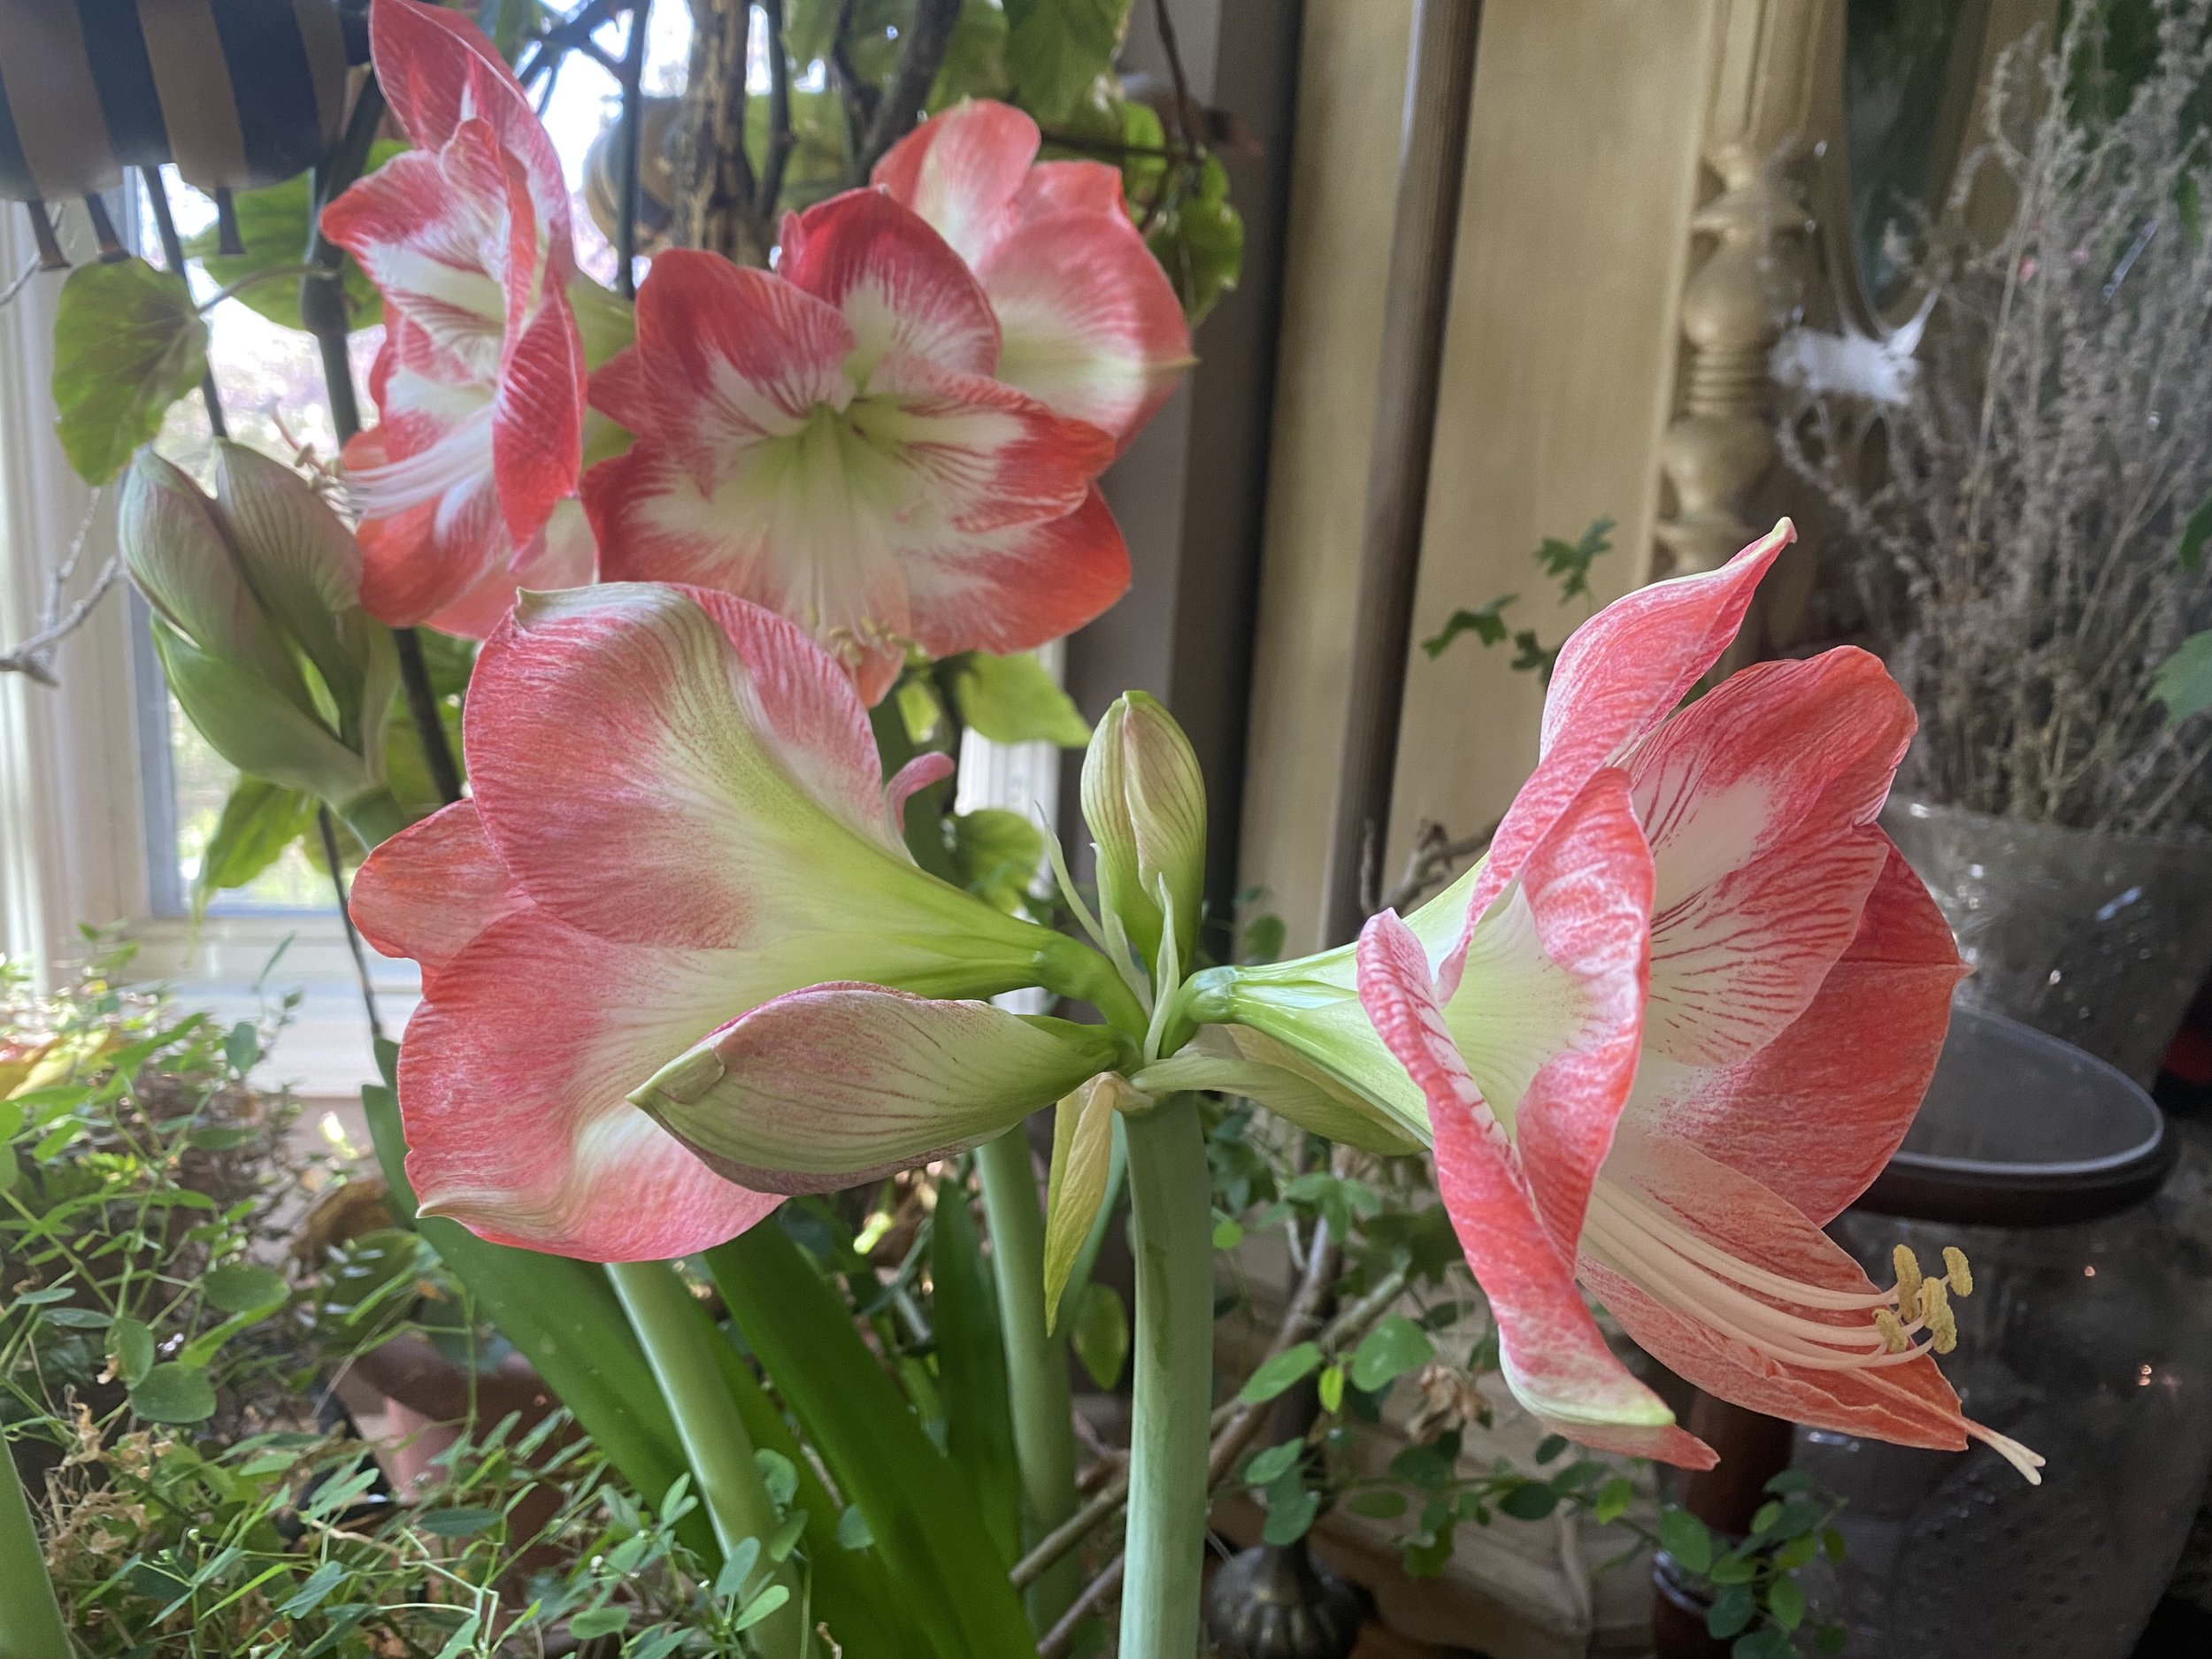
apple blossom amaryllis bulbs, some I’ve had for years, re-blooming. (charlotte ekkek wiggins photo)

Amaryllis Care

Amaryllis bulbs are popular for their large, colorful flowers and ease of care, especially during the winter months. Here's a step-by-step guide on how to plant and care for amaryllis bulbs:

Planting Amaryllis Bulbs:

1. Choose a Bulb: Select a healthy, firm bulb. Larger bulbs generally produce more flowers.

2. Select a Pot: Choose a pot that is 1-2 inches wider than the diameter of the bulb. Make sure it has drainage holes at the bottom.

3. Planting Depth: Fill the pot about one-third to one-half full with well-draining potting soil. Place the bulb in the center of the pot and add more soil, leaving the top third of the bulb exposed.

4. Watering: Water the bulb thoroughly after planting. Be careful not to overwater; excess water can lead to rotting. Let the top inch of the soil dry out before watering again.

Caring for Amaryllis Bulbs

1. Light: Place the pot in a bright, sunny location. Amaryllis plants need bright, indirect light to grow and bloom properly.

2. Temperature: Keep the plant in a room where the temperature is around 60-70°F (15-21°C). Cooler temperatures can prolong the bloom time.

3. Watering: Water the plant sparingly until you see the stem and leaves emerging. Then, water more regularly, keeping the soil evenly moist but not waterlogged.

4. Support: As the flower stalk grows, it might need support to prevent bending or falling over. You can use a stake or decorative support to keep it upright.

5. Fertilization: Once the flower buds appear, you can feed your amaryllis with a balanced liquid fertilizer every 2-4 weeks. Follow the package instructions for the proper dilution and application.

6. Deadheading: Remove spent flowers to encourage the plant to put more energy into developing new blooms.

7. After Blooming: After the flowers fade, cut the flower stalk about an inch above the bulb but leave the foliage. Continue to water and fertilize the plant as usual. Amaryllis can be encouraged to bloom again next year.

8. Dormancy: In late fall, stop watering and let the plant go dormant. Store the pot in a cool, dark place for 6-8 weeks. After this dormancy period, bring the plant back into the light, resume watering, and the cycle can begin again.

These bulbs are easy to grow and even easier to get to regrow. Some of mine are now 15 years old and big!

For more tips on gardening, beekeeping, cooking and easy home decor, subscribe to my weekly Garden Notes.

Charlotte

December Gardening Jobs

time to finish mulching flower beds with shredded oak leaves. (charlotte ekker wiggins photo)

December Gardening Jobs

I will be planting the last of my new plant arrivals this month, hopefully a good 5 weeks before a hard frost. Last year, our soil never froze; the year before it was January. The rapid changes in our climate are showing up in my USDA Hardiness zone 5 garden.

I still have some spring garden bulbs to get in the ground. Sprinkled with bone meal in the hole before placing the bulb, these new garden additions will be fun to see in bloom in only a few months. Or so I remind myself; I miss my green garden wintertime.

Here are some other December gardening jobs:

Get broken branches and limbs trimmed before ice hits, or before someone runs into them visiting for the holidays. You know where they are but people new to your property are bound to run into them.

 As soon as a hard frost hits, it will be time to mulch. Mulching maintains the soil at an even temperature. During winter, the point of mulching is to keep plants in hibernation. If you still have shredded leaf piles, move those into flower beds, those will also make good mulch.

 To mulch trees, make a well around the tree trunk and leave an area the width of a tire between the tree trunk and the mulch. When mulching, don’t pile mulch up to the trunk or you will create an area for diseases. Leaving a little moat around the tree also reduces girdling.

 Have empty pots, garden carts, rakes leaning against the side of the house? It’s time to clean them off and store them for the season. The rakes, in particular, you don’t want to step on the tines and hit yourself on the side of the head.

Mulch-covered mums showing new growth; keep them watered over winter. (Charlotte Ekker Wiggins photo)

If you are planting mums this fall, make sure to get them mulched and regularly watered over the cold months. Leave the dead growth, it will protect the young shoots growing in the plant center.

Empty composters into flower beds. Leave enough to get a new batch started.

Clean out and organize your garden implements so you know which ones need repairs including sharpening. Winter is a good time to get those done.

Did you save seeds this year? Get them in containers and labelled; store seeds in a cool dry space.

Keep an eye out for plant sales. Bulbs are usually half off this time of year and seasonal plants get marked down after the holidays.

Give gardening gifts for the gardeners on your gift list starting with these wonderful gardening gloves with honey.

Finally remember to rest and start planning for next year. If you haven’t already, make notes of what worked well this growing season and what you want to try next year. Before you know it, it will be spring!

Charlotte

Hardy Garden Mums

Pink daisy-like hardy garden Mums were planted last fall, survived winter and made it through our record hot summer. (Charlotte Ekker Wiggins photo)

Hardy Garden Mums

Have you ever wondered why some mums make it through winter but others do not?

Getting mums through their first winter in a garden can be challenging. There are a couple of reasons why including that there are two different types of mums.

The perennial, fall-flowering form is Chrysanthemum x morifolium and are the best to add to gardens. These are the ones that come back year after year once they get established. By comparison, the annual variety is Chrysanthemum x multicaule. These tend to be sold as gift plants in grocery stores and florists and don’t do well outside of a greenhouse.

If your plant has no identification, here’s how to easily tell them apart. Annual mums have thinner, strappy leaves that are not as toothed as the perennials, which are wide and deeply notched.

How to Plant Hardy Garden Mums

Make sure the root ball is nicely hydrated. I will place them in a bucket of water overnight to ensure they have all of the water they need. Sometimes they can get dry sitting in a pot at a garden center and only watered with a sprinkler.

Secondly hardy garden mums in USDA Hardiness zone 5 like at least 6 hours of sun a day.

Hardy garden mums make great plants for flower bed corners and mixed in with other perennials. You can keep them short by pinching them once a week mid-spring until July 4 weekend to keep them bushy.

I let mine grow tall so they are easier to cut for flower arrangements.

More hardy garden mums starting to bloom. (Charlotte Ekker Wiggins photo)

Why Plant Hardy Garden Mums

There are many reasons I plant mums. First they are a natural bug repellent. As a matter of fact many of the “safe” bug sprays are made from pyrethrin which is “eau de mum.”

Secondly, hardy garden mums are easy to grow once they are established. It’s better to buy them in spring if you can find them but most hardy garden mums are available for purchase in the fall. If you plant in fall, plan to give them a gallon of water a month through winter to help their roots get established. If you can mulch with leaves or wood chips that will help protect them as well.

Finally I love having mums because they are one of the longest-lasting cut flowers. As the growing season wanes, having blooming hardy garden mums provides a source of fresh flowers easily through the holidays.

I keep small fresh flower bouquets in several spots around my house. In the photo, besides mums there are pink vincas, red yarrow, dark pink geraniums, yellow mums and blue lavender.

Charlotte

December Gardening Chores

Shredded and small dried leaves make good winter mulch. (Photo by Charlotte Ekker Wiggins)

December Gardening Chores

At least this year my overwintering nursery won’t get new additions; I will be planting the last of my new plant arrivals this month, hopefully a good 5 weeks before a hard frost. Last year, our soil never froze; the year before it was January. The rapid changes in our climate are showing up in my USDA Hardiness zone 5 garden.

I still have some spring garden bulbs to get in the ground. Sprinkled with bone meal in the hole before placing the bulb, these new garden additions will be fun to see in bloom in only a few months. Or so I remind myself; I miss my green garden wintertime.

Here are some other December gardening chores:

Get broken branches and limbs trimmed before ice hits, or before someone runs into them visiting for the holidays. You know where they are but people new to your property are bound to run into them.

 As soon as a hard frost hits, it will be time to mulch. Mulching maintains the soil at an even temperature. During winter, the point of mulching is to keep plants in hibernation. If you still have shredded leaf piles, move those into flower beds, those will also make good mulch.

 To mulch trees, make a well around the tree trunk and leave an area the width of a tire between the tree trunk and the mulch. When mulching, don’t pile mulch up to the trunk or you will create an area for diseases. Leaving a little moat around the tree also reduces girdling.

 Have empty pots, garden carts, rakes leaning against the side of the house? It’s time to clean them off and store them for the season. The rakes, in particular, you don’t want to step on the tines and hit yourself on the side of the head.

Mulch-covered mums showing new growth; keep them watered over winter. (Photo by Charlotte Ekker Wiggins)

If you are planting mums this fall, make sure to get them mulched and regularly watered over the cold months. Leave the dead growth, it will protect the young shoots growing in the plant center.

Empty composters into flower beds. Leave enough to get a new batch started.

Clean out and organize your garden implements so you know which ones need repairs including sharpening. Winter is a good time to get those done.

Did you save seeds this year? Get them in containers and labelled; store seeds in a cool dry space.

Keep an eye out for plant sales. Bulbs are usually half off this time of year and seasonal plants get marked down after the holidays.

Give gardening gifts for the gardeners on your gift list starting with these wonderful gardening gloves with honey.

Finally remember to rest and start planning for next year. If you haven’t already, make notes of what worked well this growing season and what you want to try next year. Before you know it, it will be spring!

Charlotte

Flying Ghosts

One of my neighbors has these ghosts flying at her driveway entrance. (Photo by Charlotte Ekker Wiggins)

Flying Ghosts

When people say fall garden decor, it’s usually chrysanthemums on their mind unless it’s the kick off of the holiday season, Halloween. In the midwest where I live, people have become more and more engaged in Halloween decor, from painting hay bales with pumpkin faces to elaborate front yard scenes including black cats and tombstones.

In my neighborhood, we usually share seasonal garden flags and maybe a few pumpkins until this year. One of our neighbors went all out by setting up a Halloween scene including flying ghosts.

I stopped long enough to - yes, I peeked under the sheets.

The inside of the ghost has a simple foam head and shoulders. (Photo by Charlotte Ekker Wiggins)

Years ago, I made some similar flying ghosts out of foam styrofoam balls and clothing hangers repurposing old white t-shirts. Mine were smaller because I had them hanging inside in my dining room. These outside flying ghosts were larger but looked very similar in construction.

One other reason these are fun; they don’t require a lot of storage room so you can make several and keep everything in one box.

A hook at the top of the foam head makes hanging the ghost easy. (Photo by Charlotte Ekker Wiggins)

Here’s how the flying ghosts look as part of the Halloween scene at the entrance of the driveway. Our neighborhood kids have to pass the scene on their way home from the school bus stop.

As I was taking the photo, the black spider on the left startled me.

Here’s her whole Halloween scene; the black spider on the left got me! (Photo by Charlotte Ekker Wiggins)

I’m not a fan of horror movies or the scarier part of this holiday but the ghosts, and spiders, are fun to have in the garden.

Boo!

Charlotte