World's Largest Seed Catalog

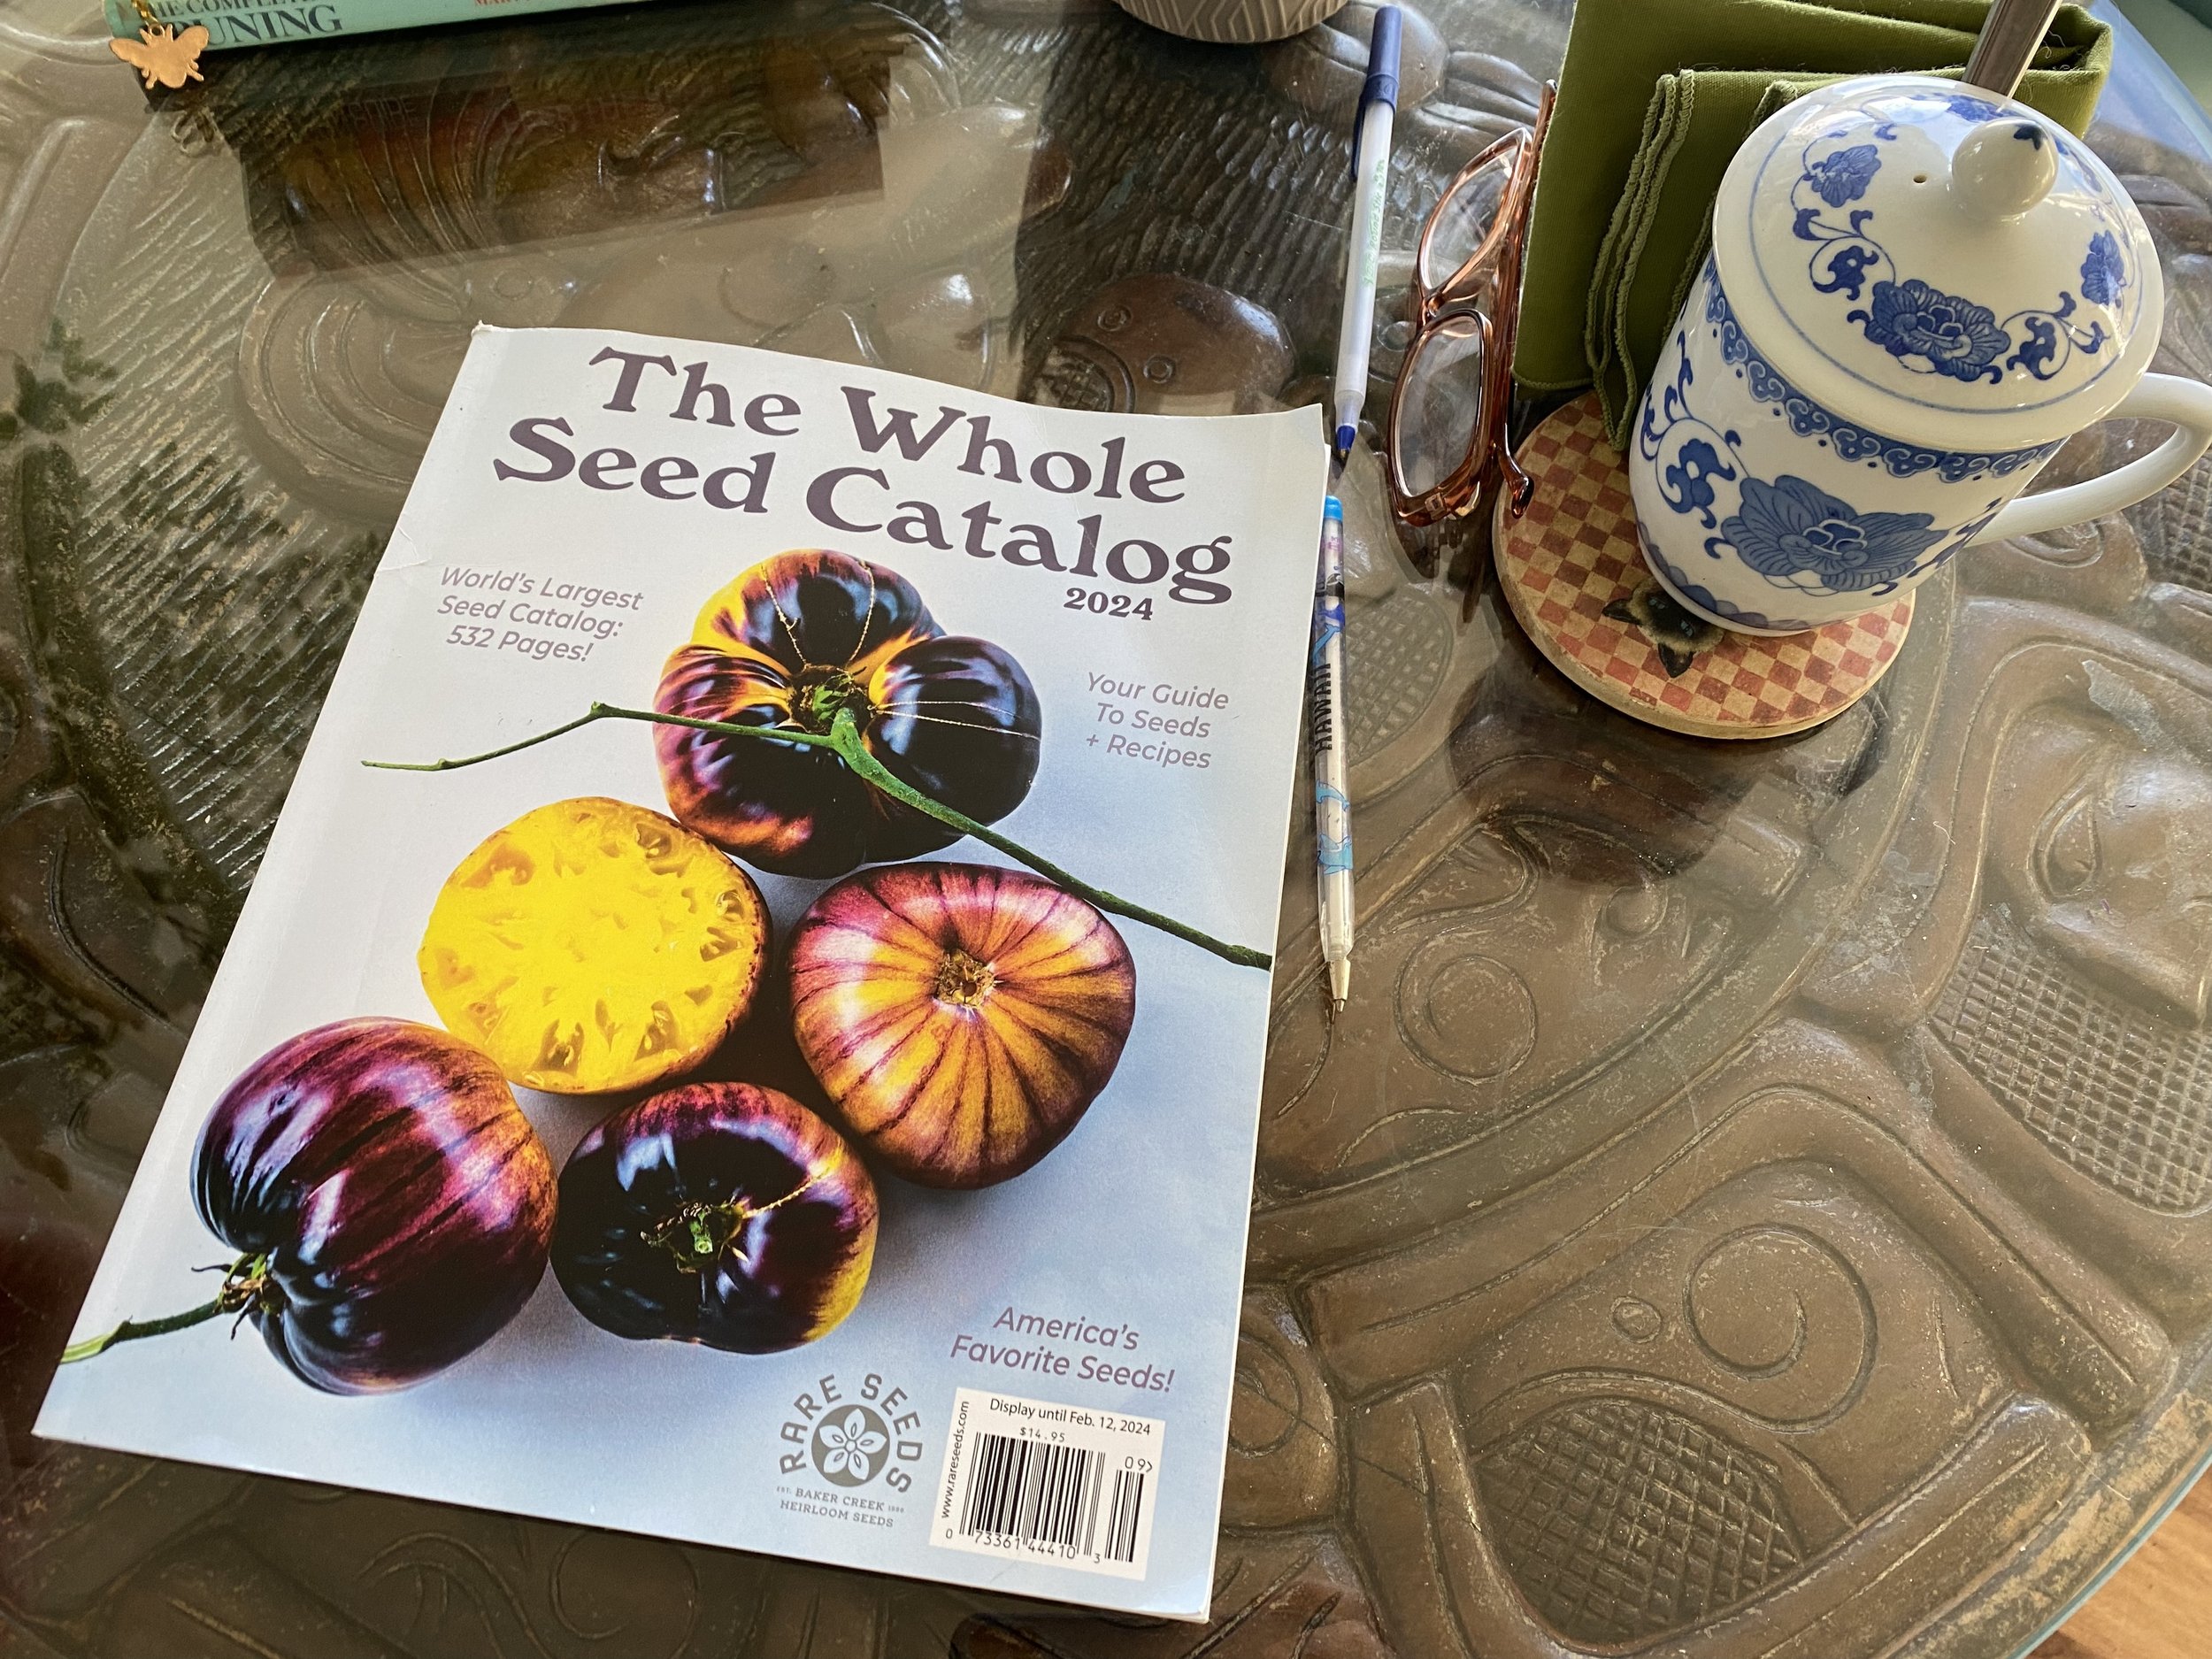
My birthday gift to myself this year was paying $14.95 for a seed catalog. This isn’t just any seed catalog, it’s the world’s largest seed catalog. (charlotte ekker wiggins photo)

World’s Largest Seed Catalog

One of the ways gardeners prepare for a new season is by getting catalogs. Even in years when I didn’t have much time for my garden, my cold winters were brighter curled up with a pile of garden catalogs.

This year, I treated myself to the world’s largest seed catalog, more than 500 pages of beautiful plant photos sprinkled with recipes.

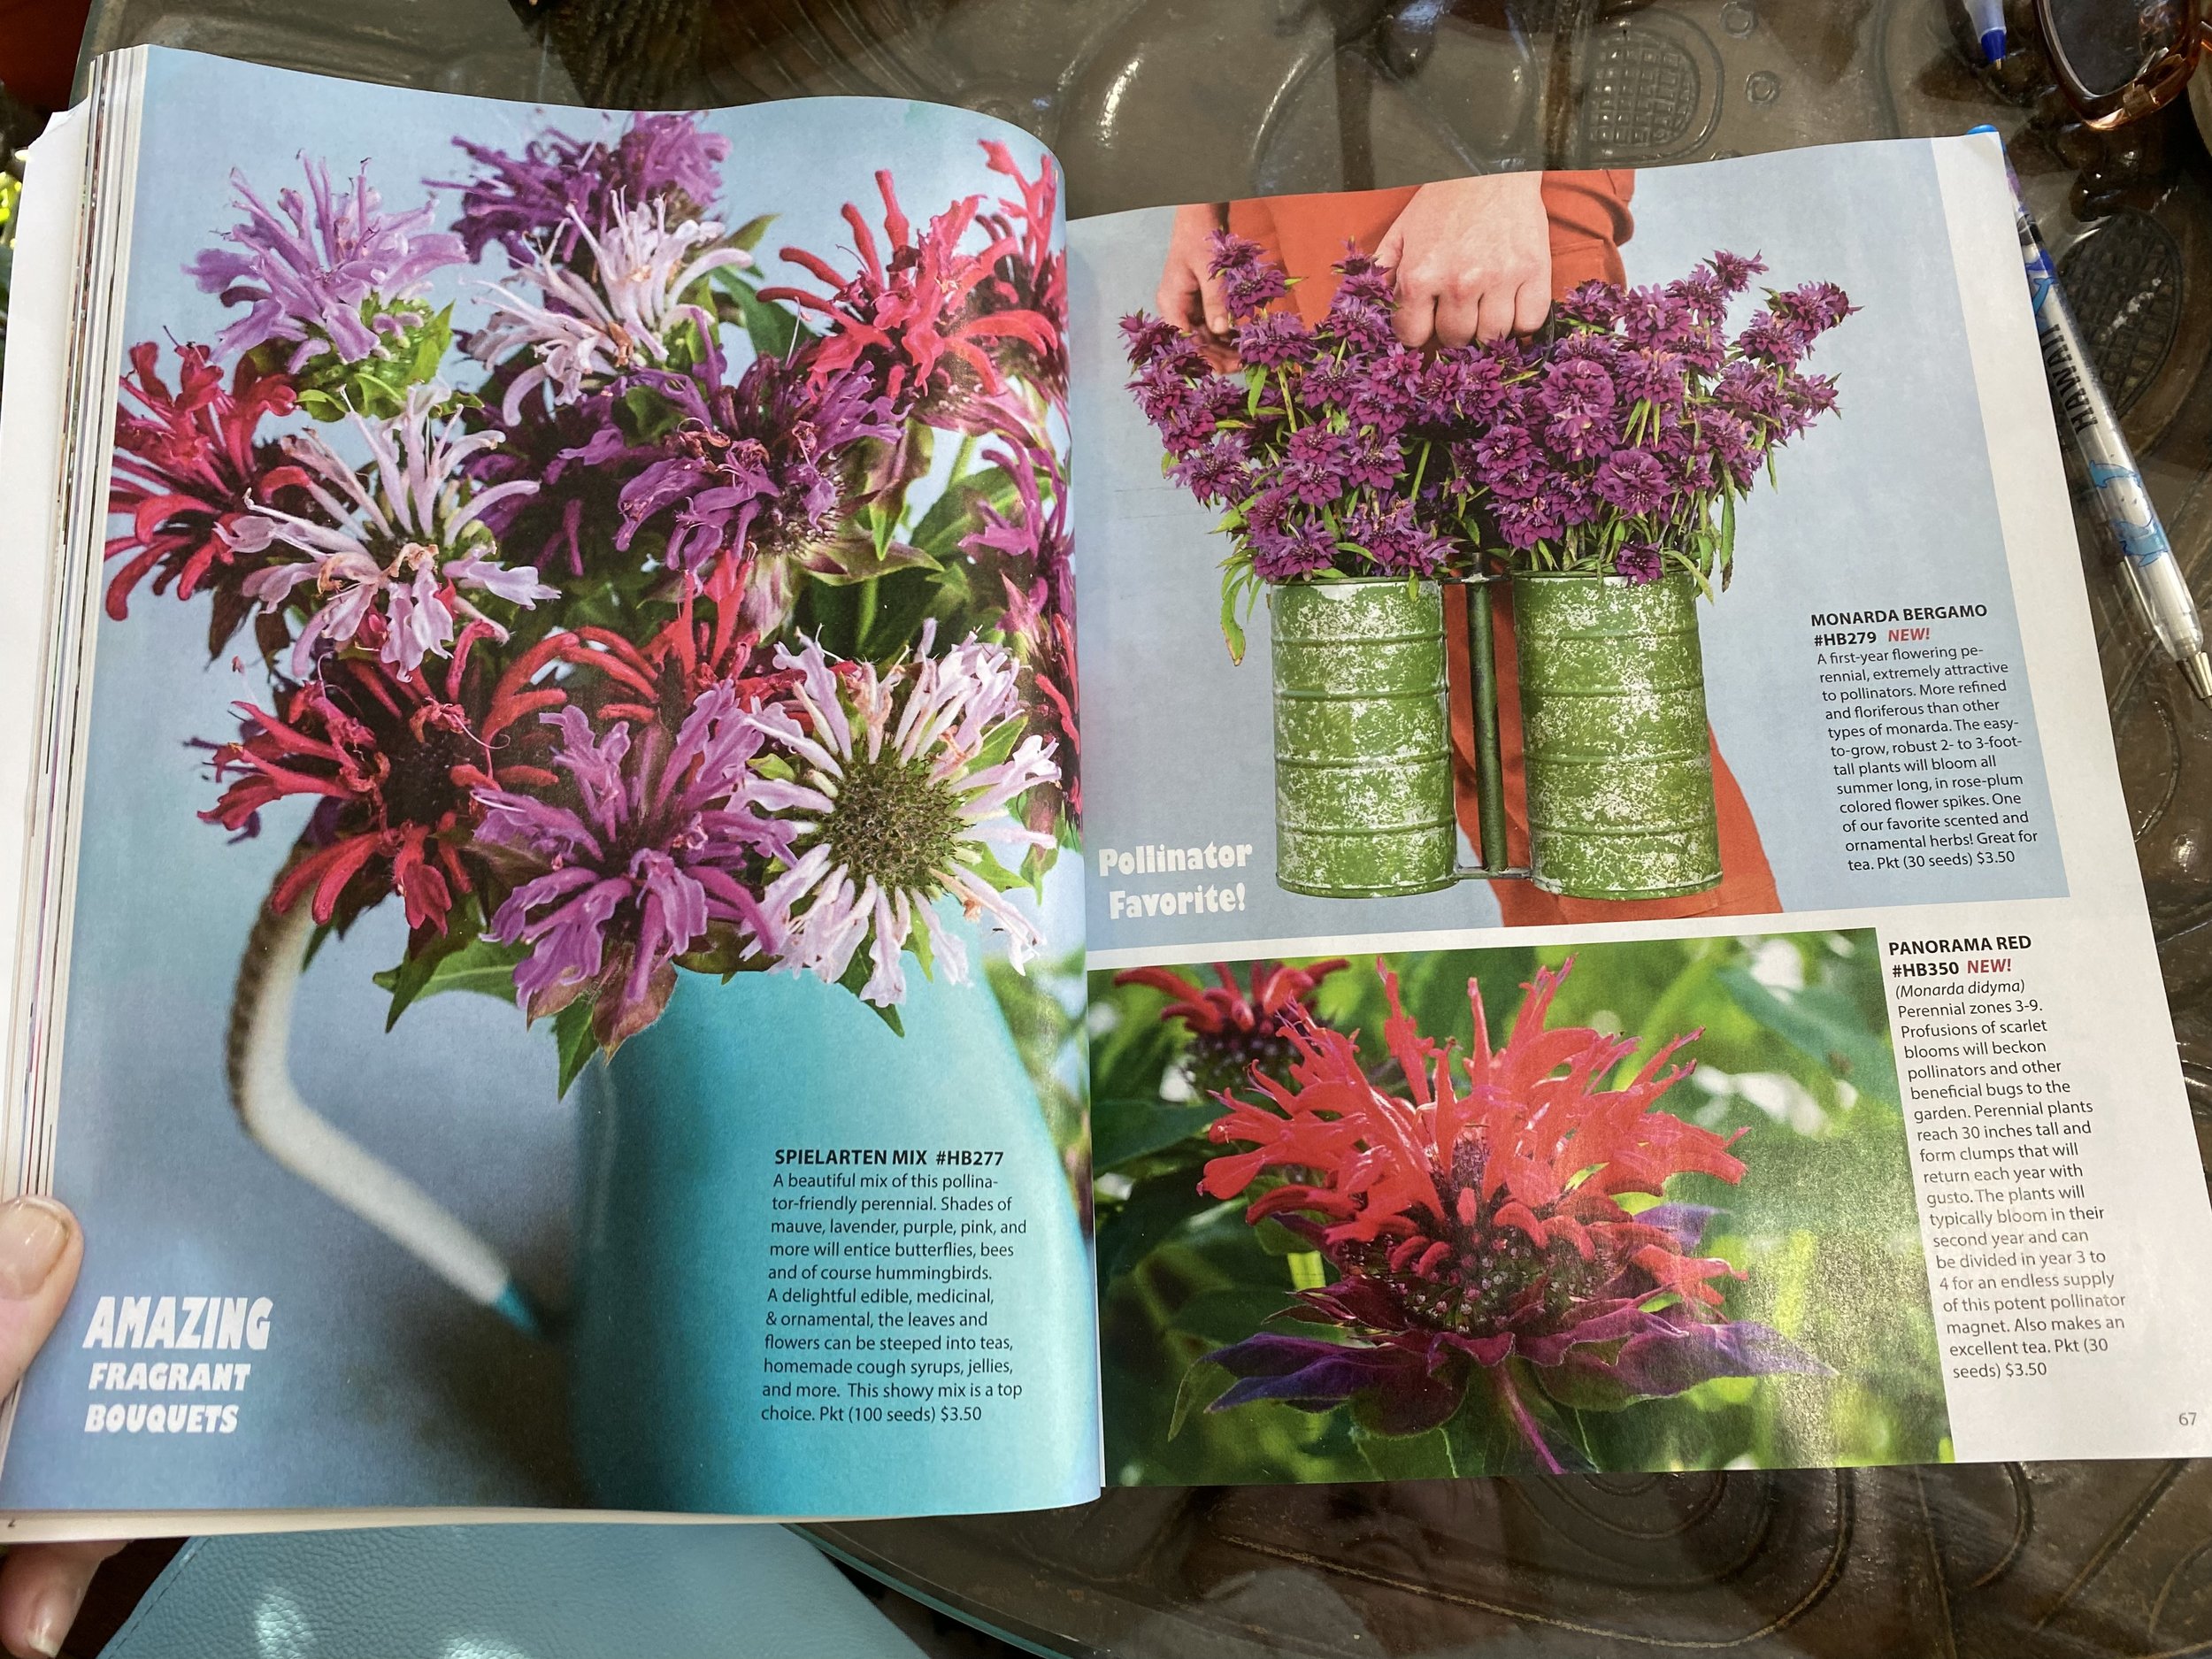
one of the hallmarks of this catalog is their lovely photography. (charlotte ekker wiggins photo)

The catalog is from Baker Seed Company, a Missouri business focused on offering heirloom seeds from around the world. Based in Mansfield, Missouri, the company sponsors a yearly festival in May, which is usually the last hard frost of the season for our area.

From their website:

“Founder Jere Gettle started Baker Creek Heirloom Seed Co. in 1998 as a hobby, and though it has since grown into North America's largest heirloom seed company, we've never lost our passion for growing and sharing heirloom varieties. Baker Creek offers one of the largest selections of 19th century heirloom seeds from Europe and Asia, and our catalogs now feature about 1,000 stunning heirloom varieties.”

some of the nectar-producing plant seeds baker creek offers. (charlotte ekker wiggins photo)

To no one’s surprise, I check for plants that provide bees and pollinators food.

If you have someone in your circle interested in getting started gardening this year, Baker Creek also offers a smaller, 163-page free catalog. It’s a great addition to a basket with gardening gloves, pruners and a couple of seed packets to cultivate the gardening interest.

For more gardening, beekeeping, cooking and easy home decor tips, subscribe to Garden Notes.

Charlotte

Winter Sowing

Forecasters are calling for more snow and below 0 Fahrenheit temperatures so good time to get those native seeds winter sown. (Charlotte Ekker Wiggins photo)

Winter Sowing

Winter sowing is a way to start seeds outdoors during winter months, allowing them to naturally germinate when conditions are right in the spring. It’s also an excellent way to give seeds that need cold exposure that cold treatment they need to germinate, such as purple coneflowers and black-eyed susans, both excellent pollinator plants.

Here's a guide on how to winter sow in repurposed milk jugs using Black-Eyed Susan seeds:

What you will need

  1. Empty, clean plastic milk jugs or bottles

  2. Utility knife or scissors

  3. Potting soil

  4. Black-eyed susan seeds (or purple coneflower seeds)

  5. Spray bottle with water

  6. Tape (as in duck tape)

  7. Marker

    How to get milk jugs ready


    As you collect milk jugs, wash them thoroughly, allow to dry and store. I kept mine in plastic garbage bags so they didn’t take up a lot of storage room.

    Pierce or cut several drainage holes in the bottom of the bottle first. Use a nail, heated skewer, or the tip of your scissors or knife. Be careful not to puncture your hand.

    Then use a utility knife or scissors to cut the bottles horizontally around the middle, leaving the handle intact on one side. It’s hard to punch holes in the bottom once the milk jug is cut in half. The bottom half will serve as a mini greenhouse.

    Add a layer of potting soil into the bottom section of the bottle, filling it about one-third of the way.

remove lids if you haven’t already, you won’t need them. (charlotte ekker wiggins photo)

Plant black-eyed Susan seeds

I confess, I saved a lot of seeds earlier in the season so I was ready to plant. If you don’t have seeds, check your local home and garden center, most have a supply all year.

Break up black-eyed susan seed heads and sprinkle over the soil surface. I’m always surprised at how many seeds come out of one little flower head. You can lightly press them into the soil but don’t bury them too deeply. These seeds require light to germinate.

Dust the seeds with soil.

Close the top part of the bottle over the bottom, securing it with tape. This creates a miniature greenhouse effect. Remove milk jugs lids; you won’t need them.

Label the container with the plant name and the date of sowing using a marker. I just add an initial so that I know which seeds I planted.

Place milk jugs outdoors

Find a suitable outdoor location that receives partial sun to full sun. An area protected from harsh winds is ideal.

Set the prepared milk jugs on the ground. You can also bury them halfway in the soil to stabilize them.

Check the containers occasionally to ensure the soil remains slightly moist but not waterlogged. If the soil appears dry, spray water over it just to keep it moist.

As the temperatures increase in the spring, the seeds will naturally germinate when conditions are favorable.

Transplanting Seedlings

Once the seedlings have grown a few inches tall and have developed several sets of leaves, they can be carefully transplanted into larger pots or directly into the garden bed. I wait until after the last frost to transplant directly into the garden.

For more gardening, beekeeping, cooking and easy home decor tips, subscribe to Garden Notes.

Charlotte

Snow Pros and Cons

gardens turn gray and dark during and after snow storms. (charlotte ekker wiggins photo)

Snow Pros and Cons

Today's topic is a different way to look at snow and ice. I live in mid-Missouri, the bellybutton of the state, and USDA Hardiness zone 6A. The hardiness zone is used by gardeners to help select plants that will survive in our particular temperatures. We have been getting progressively warmer over the years amidst a continuing drought so having rain, and snow, in our upcoming forecast, is cause to celebrate. 
The challenge with snow where I live is that it can start out as rain; as temperatures drop turn to ice, then rain turning to snow covers ice. I stay home during these storms, stocked up with books, cat food and hot chocolate. A dear friend lost her husband 31 years ago driving in ice; I remember her loss every time we have ice in the forecast.
But winter precipitation is more than danger and inconvenience, it's actually an important part of a garden's winter season. Here's how:

Insulation: Snow acts as a natural insulator, providing a layer of protection to plants, soil, native bees and bees in hives, from extreme cold temperatures. This insulation can help prevent frost damage to plants' roots, protect native bees hibernating in the ground and keep bees in their hive clusters.
Protective Cover: Snow can also act as a protective cover for certain plants, shielding them from harsh winds and reducing the chances they dry out. I think of snow as white mulch.
Dormancy: Some plants require a period of cold temperatures to go through dormancy, and snow helps to facilitate this process, promoting healthier growth when spring arrives.
Nutrients: Snow contains trace amounts of nutrients that are beneficial to plants. As it melts, these nutrients are released into the soil, providing a natural fertilizing effect.
Moisture: As snow melts, it also adds moisture to the soil. This can be beneficial, especially in regions where water is scarce during the winter months. The slow melting process also allows the moisture to deeply penetrate the soil, helping to supplement the low water tables.

On the other hand, ice and snow has its garden challenges.

Excess Moisture: In some cases, heavy or prolonged snowfall can lead to excess moisture in the soil, causing problems such as root rot in certain plants that are sensitive to waterlogged conditions. It can also kill hibernating native bees inn soil. If moisture gets into bee hives, it can kill the colonies. Bees don't die from cold but they do perish from moisture.
Compaction: Snow can contribute to soil compaction, especially if it becomes densely packed. Compacted soil restricts root growth and hampers water infiltration. You don't want people walking over flower beds when snow is melting.
Disease: Snow cover can create conditions conducive to the development of certain plant diseases, especially if the snow remains for an extended period. Think fungal infections.
Weight on Branches: Wet, heavy snow can accumulate on tree branches, causing them to bend or break under the weight. This can lead to damage to trees and shrubs. Another reason to carefully prune fruit trees after their third year of growth; the right pruning can help branch development.
Delayed Spring: In regions with prolonged snow cover, the arrival of spring may be delayed. This can impact the growing season including native and honey bees.

For more gardening, beekeeping, cooking and easy home decor tips, subscribe to Garden Notes.

What else can you think of in terms of pros and cons of snow and ice?

Charlotte

Winter Mulch; Protecting Plants

A new supply of free recycling center wood chips are wintering over for next year use. (charlotte ekker wiggins photo)

Winter Mulch; Protecting Plants

Winter is a resting time for both gardeners and gardens. One of the last garden activities should be to mulch, which can be the difference between surviving and thriving in spring. Mulching during winter is more than a routine task; it's a strategic defense mechanism that shields your garden from harsh elements while nurturing soil beneath the frosty surface.

Here are crucial steps to effectively mulch your garden over winter and why they're vital for a spring flourishing garden.

  1. Apply a Layer of Compost: Before mulching, apply a thin layer of compost to provide additional nutrients to the soil. Compost enriches the soil, supporting microbial activity and enhancing overall soil health.

  2. Select the Right Mulch Material: Choose appropriate mulch materials such as straw, shredded leaves, wood chips, or pine needles based on your garden's needs. Different materials offer varying insulation, moisture retention, and nutrient benefits.

  3. Mulch Around Plants and Trees: Apply mulch around the base of plants, leaving a small gap between the mulch and plant stems or trunks. This helps retain moisture, regulates soil temperature, and inhibits weed growth.

  4. Layer Mulch Appropriately: Layer mulch at a sufficient depth (typically 2-4 inches) to provide insulation without smothering plants. Thicker mulch layers insulate better but ensure proper air circulation to prevent issues like rot.

  5. Focus on Vulnerable Areas: Pay extra attention to vulnerable areas, such as newly planted trees or shallow-rooted plants. These areas require thicker mulch layers to protect them from freezing temperatures.

  6. Avoid Mulch Piling against Stems: Ensure that mulch doesn’t directly touch the stems or trunks of plants and trees. Direct contact can invite pests and diseases while potentially causing stem rot.

  7. Monitor and Refresh Mulch as Needed: Periodically check the mulch throughout winter. If it thins out due to weather conditions or decomposition, add a fresh layer to maintain adequate protection.

  8. Reap the Benefits in Spring: Understand that these steps aren't just about surviving winter but setting the stage for a vibrant garden in spring. Mulching conserves moisture, prevents soil erosion, and promotes healthy soil, ensuring a bountiful growing season ahead.

The careful application of mulch during winter is an investment in the future health and beauty of your garden.

For more gardening, beekeeping, cooking and easy home decor tips, subscribe to Garden Notes.

Charlotte