Peony Support

Peonies at full height getting ready to bloom. (Photo by Charlotte Ekker Wiggins)

Peonies at full height getting ready to bloom. (Photo by Charlotte Ekker Wiggins)

“…my peonies fall over especially when blooming. Is there a way to keep them upright?” — Sue

Peony Support

Hi Sue, you can find peony support cages at home and garden centers designed to help hold up those flower-heavy peony stems.

The trick to using them is to have them on the plants when they first start coming out of the ground. I tried to wrestle a teenage peony plant into one a few years back; don’t recommend it.

Peony cages help hold peony leaves off the ground. (Photo by Charlotte Ekker Wiggins)

Peony cages help hold peony leaves off the ground. (Photo by Charlotte Ekker Wiggins)

Before I found these peony cages I used tomato cages cut in half. You will need wire cutters to snip the metal but short of muscle to cut those work well, too.

I have also seen wooden stakes, 3 or 4 per plant, with twine that can hold the peony leaves and flowers off the ground.

Charlotte

Bending Daffodils

These old-fashioned double daffodils often fall over after a rain. (Photo by Charlotte Ekker Wiggins)

These old-fashioned double daffodils often fall over after a rain. (Photo by Charlotte Ekker Wiggins)

“Help, my daffodils won’t stand up, they are all falling over. How do I get them to stand up?” — Sally

Bending Daffodils

Hi Sally, I have some daffodils that get too lanky to stand up as well.

Most daffodils need to be planted a good 6-8 inches. On my Missouri limestone hillside, I don’t have that depth of top soil so I often have daffodils that don’t stand up, especially after a rain.

As I walk through my garden, I will often select the falling over daffodils for cut flowers.

If you have good soil and want to help your daffodils stand up, wait until after they stop blooming. Dig up the bulbs and replant them at a deeper depth.

Another option is to add top soil and mulch, thereby making the top soil level deeper. Just be careful with what is growing around the daffodils or you can kill off other plants.

When I thin out my daffodils, I do try to replant them in garden spots with more and better top soil.

Charlotte

Incoming Snow Damage?

I also have buds on my fruit trees in mid-Missouri. (Photo by Charlotte Ekker Wiggins)

I also have buds on my fruit trees in mid-Missouri. (Photo by Charlotte Ekker Wiggins)

“Charlotte, I’m SO worried. Groundhog said early spring. I already have budding fruit trees and snow on the way. Will it hurt the trees?” — Alison

Incoming Snow Damage?

Hi Alison,

I just checked my garden. It was 72F on Groundhog Day in mid-Missouri, sunny and calm, a perfect day to putter around the garden.

You didn’t mention where you are located but we also have snow in the forecast this week. Hard to believe until one remembers that major temperature fluctuations are part of the impact of our current rapidly changing climate emergency.

I’m not sure we’ve even had temperatures cold enough here to freeze soil, which makes our plants dormant for a period. Tulips, daffodils and other spring bulbs need that cold period to set the bulbs for blooming. I’m already seeing tulips popping up so if they bloom I will know they had enough cold.

Lower temperatures also impact trees, shrubs and flowers. Some even depend on the colder temperatures to help them get ready for a new growing season.

Here’s the good news about snow. Snow won’t hurt your plants; it may even help them by returning nutrients to the soil.

If there is something you want to do for your trees, mulch them especially after a hard frost, when you know the soil is frozen.

Even if your soil is not frozen, mulch. Mulch will not only help improve your soil but it will protect your plant roots from the heaving and freezing fluctuating temperatures cause.

Leaves keeping my strawberry plants protected from fluctuating temps. (Photo by Charlotte Ekker Wiggins)

Leaves keeping my strawberry plants protected from fluctuating temps. (Photo by Charlotte Ekker Wiggins)

The other thing about mulch; it will make the garden look finished.

If you live where I live, you can get free mulch at our local recycling center. If you live somewhere else, check to see if your local municipality has a recycling center with a mulch pile.

Charlotte

When to Mulch

Shredded leaves cover one of my flower beds this winter. (Photo by Charlotte Ekker Wiggins)

Shredded leaves cover one of my flower beds this winter. (Photo by Charlotte Ekker Wiggins)

“…I get confused, when am I supposed to mulch? I love how the garden looks after I get it covered in mulch….” — Lilie

When to Mulch

Hi Lilie, I love the way my garden looks after I have mulched it as well, a friend in the landscaping business calls mulch his secret weapon.

Mulch, however, is more than aesthetics to a garden or, more specifically, the plants growing in the garden. Mulch helps to protect plant roots from the heaving and thawing caused by fluctuating temperatures, which is why the traditional recommendation is to mulch after the first hard frost.

By that hard frost, the ground is solid and mulching will help maintain that temperature so plants can enjoy a period of dormancy.

With our rapidly changing climate, though, our temperatures in mid-Missouri can shift from record cold to record hot in just a matter of days.

I still wait to put my garden to bed after the first hard frost, that way I know the roots are getting put to bed for the season. With these recent record warm temperatures, I have been mulching with shredded leaves from our local recycling center. I then cover the shredded leaves with the wood mulch.

You can also mulch in spring, when you want the soil to remain cool before hot temperatures move in.

Frankly if you keep your plants mulched throughout the growing season, you will be doing the roots a favor and help soil retain moisture as well.

Charlotte

Dead Mums Good?

Three of my “dead” mums on one of my flower beds. (Photo by Charlotte Ekker Wiggins)

Three of my “dead” mums on one of my flower beds. (Photo by Charlotte Ekker Wiggins)

“…what’s the big deal about mums? I do like them. It’s trouble to have to water them through winter. Dead mums look bad. What do they do in garden?” — Andy

Dead Mums Good?

Hi Andy, oh, my, where to start. They are practical, they are easy to grow, they are pretty AND they are long-lasting. And there’s a good reason why you should appreciate them when the top is dead.

First, there’s no getting around that dead chrysanthemums (also called mums) in a garden are not pretty. Unless they are covered in snow, and then they are quite sweet-looking, little mounds of white scattered throughout my hillside. The value of the dead chrysanthemums is that they are protecting new growth developing underneath, at the heart of the plant.

If you have some in your garden, go out in daylight and take a peek. These three mums in the photo were planted last fall and photographed January 9, 2020. I have been ensuring their roots were hydrated by periodically watering them, which also gave me an excuse to walk through my garden and see how things were doing.

If we had rain, or snow, I didn’t bother because nature was taking care of watering duties. In general, plants need an inch of rain a week.

Natural Bug Deterrent

My goal is to have mums scattered throughout my garden. Mums are a natural bug deterrent. Most of the “safe” garden insecticides you find currently on the market are made with pyrethrins, which is essentially essence of mums.

By having mums scattered around, you are using them for bug deterrence as well as enjoying some of the longest lasting fall flowers, when most of the color comes from deciduous tree leaves changing color.

And as an added benefit, mums are also one of the longest lasting cut flowers you can find in any garden. That’s why you will find florists using mums in flower bouquets.

Checking Mums for Growth

So what are you looking for when you peek through the dead mums? As you approach, it may seem like there is no sign of life. Be patient, and gentle. Look into the mum at the bottom of the center.

This is the first mum, bottom right in the photo. See the green growth in the center?

A mum planted last fall is showing new growth dead center. (Photo by Charlotte Ekker Wiggins)

A mum planted last fall is showing new growth dead center. (Photo by Charlotte Ekker Wiggins)

What still amazes me is how a little patch of green in winter can turn into a full blooming plant by the next summer.

If you were to dig up and separate this little patch of green, you will find several plants growing together.

Here is the second mum, mid level on the left of my hill. See anything?

New growth is farther along in this mum planted last fall. (Photo by Charlotte Ekker Wiggins)

New growth is farther along in this mum planted last fall. (Photo by Charlotte Ekker Wiggins)

This one also has new growth a little farther along than the first one photographed. If I had to guess, this will have a good half dozen plants started if they all make it until spring.

And no, I won’t cut off the dead mums from last year. Those dead stems are protecting the new growth from cold and wind, which can kill them.

One more mum to check, the top left one.

Top left mum is also showing new growth at the base. (Photo by Charlotte Ekker Wiggins)

Top left mum is also showing new growth at the base. (Photo by Charlotte Ekker Wiggins)

This mum developed new growth later than the middle one, maybe about the same time as the bottom one. I thought I had planted all three about the same time but maybe not.

All three are showing good new growth so far so I will keep an eye on them as winter unfolds, making sure their roots are hydrated and growth protected with shredded leaves and wood mulch. The mulch will help keep the soil from heaving and thawing, which stresses out young plant roots.

Come spring, I will start the vigil of pinching growth when it reaches about 4 inches. I just tuck the extra growth in the ground next to the mother plant and let that piece root on its own.

By fall, this is what I should have again along my garden paths, mums in bloom.

Some of the yellow mums in bloom last fall in my garden. (Photo by Charlotte Ekker Wiggins)

Some of the yellow mums in bloom last fall in my garden. (Photo by Charlotte Ekker Wiggins)

Mums are definitely among my top 10 must have garden plants for any garden. Once established, they take very little effort to grow and they are helpful as well as pretty and long-lasting. My kind of flower!

Charlotte

Poinsettias Fading

One of my poinsettias with fading leaves. (Photo by Charlotte Ekker Wiggins)

One of my poinsettias with fading leaves. (Photo by Charlotte Ekker Wiggins)

…saw you taking several sale poinsettias home. Mine are fading. What did I do wrong?” — Mary

Poinsettias Fading

Hi Mary,

Yes, it can be tricky buying plants on sale but that rarely stops me. If you know what you are buying, and have a little patience, you can continue to enjoy them, especially poinsettias.

Don’t know if you heard me but I insisted as I was checking out that the poinsettias be covered in plastic before I took them outside. Poinsettias are not only from a tropical zone but are raised in greenhouses. They are not acclimated to our colder mid-Missouri temperatures. At all.

When taking them outside, they need to be protected if exposed to 60F and below. I also left them in the store and pulled the car as close to them as I could, wrapping them in a blanket to move them from the store to the warm car.

If you didn’t do that, being exposed to cold can shock them and make them easily drop leaves. Keep them in a warm spot off the cold floor and they should adjust after a few days. Some of the colored bracts may be normally turning yellow and dropping so give them time to adjust.

Secondly, when choosing your poinsettia, look for the tiny yellow flowers in the center. The bracts that provide the color are actually leaves. If you find some that still have little yellow flowers in the center, that poinsettia is going to last longer than one with the center flowers faded and gone.

These are the small yellow poinsettia flowers in the center. (Photo by Charlotte Ekker Wiggins)

These are the small yellow poinsettia flowers in the center. (Photo by Charlotte Ekker Wiggins)

Nothing wrong with ones that are faded like this one, it just means the plant is farther along in its development and may loose its leaves earlier than one that is still in bloom.

This Pure Glow poinsettia no longer has tiny yellow flowers in the center. (Photo by Charlotte Ekker Wiggins)

This Pure Glow poinsettia no longer has tiny yellow flowers in the center. (Photo by Charlotte Ekker Wiggins)

Where you place your poinsettia once home is important. You want them in indirect light where they are warm so they can get used to their new conditions. Even close proximity to a window can be too cold for them so I place mine towards the center of a room.

Also don’t place them on the floor unless you know the spot is warm. If you can place them on a raised area like something with castors or even a container with legs, that should keep them away from cold. I moved one poinsettia from a coffee table to the center of another room on the floor and watched them drop leaves over two days. Moved back to their original spot, the leaves stopped falling and they are now growing new ones. Very sensitive to changes in temperature!

I have severals baskets of on sale poinsettias now adjusting to their new spots. I remove the dropped leaves to compost and check that their soil is moist; not too wet and not dry. Often times poinsettias get too much water and that causes them to drop leaves. Check the soil moisture before watering by placing a finger in the soil on the plant edge.

Once spring arrives and all danger of frost is over, mine will get slowly settled outside in shade and trimmed back so they will grow bushy again.

I remember them in Mexico, their native habitat where they can grow the size of small Missouri dogwood trees. Yes, I have some thought of trying to grow at least one into a larger plant.

Pink and white poinsettias keeping me company in my kitchen. (Photo by Charlotte Ekker Wiggins)

Pink and white poinsettias keeping me company in my kitchen. (Photo by Charlotte Ekker Wiggins)

With Valentine’s Day just around the corner, the red bracts and pink and white poinsettia colors are fitting in quite nicely!

Charlotte

Growing Peruvian Lilies

These red Peruvian lilies just started to bloom in my inside winter garden. (Photo by Charlotte Ekker Wiggins)

These red Peruvian lilies just started to bloom in my inside winter garden. (Photo by Charlotte Ekker Wiggins)

“Seriously. Did you grow those red Peruvian Lilies ….inside??’ — Evelyn

Growing Peruvian Lilies

Hi Evelyn, absolutely! Once I found out Peruvian lilies are one of the longer, if not longest-lasting cut flowers, I plotted to add some to my inside winter garden. That’s basically my living and dining rooms turned over to tropical plants that can’t make it outside through mid-Missouri’s cold winters.

For many years I have wintered over inside tropical hibiscus, geraniums, salvia and herbs. With a little care not to forget to water them, and to provide moisture when they need it, these plants have successfully moved in and out of my house through many seasons. There is something quite nice about having a tropical jungle inside when it is cold and snowy outside.

It’s also handy to have stalwart bloomers. The red begonias in particular take a little breather when they first come inside and then pick up where they left off at the end of summer, giving me a nice flush of flowers all through winter.

Peruvian lilies (Alstroemeria spp) are used as bouquet fillers, sometimes sold as a bouquet all by themselves. I gave some to an office colleague several years ago and, after 6 weeks, she asked when the flowers were planning to die. That put them on my “I must grow some myself list” thinking of long, cold, snowy winters warmed up by a bouquet of long-lasting cut flowers.

There’s science, you know. Not that I had any doubt but there are studies that show having cut flowers lift spirits and contribute to a happier environment, which may explain why we send flower bouquets to people in hospitals and who need cheering up.

So this spring, when I spotted several Peruvian lilies growing in pots at one of our local garden centers, the stalking began. One pot of Peruvian lilies retailed for $25 so I decided to wait until the price came down. My gardening buddy Tom was also asked to patrol the sales; he would intermittently report when he saw a price reduction.

Finally late summer all of the red ones were marked down to $3 each and I took two plants home.

Potted Peruvian lilies spending winter in a sunny window. (Photo by Charlotte Ekker Wiggins)

Potted Peruvian lilies spending winter in a sunny window. (Photo by Charlotte Ekker Wiggins)

They were repotted into larger pots with compost at the bottom and are now in a sunny window. I will monitor the temperature to make sure it stays over 60F in their window spot and provide watered down fertilizer once a month.

I just cut a little sprig of blooms off and added them to some yellow mums and the last of my miniature yellow roses. It was snowing outside as I snipped the mums, the last ones to be blooming in my garden this year.

Now the race is on to see which ones will last the longest, mums are also long-lasting cut flowers. What do you think, which ones will last the longest in a vase?

Charlotte


Can I Still Plant Spring Bulbs

Uh-oh, ran out of warm weather before I planted my spring bulbs this year. (Photo by Charlotte Ekker Wiggins)

Uh-oh, ran out of warm weather before I planted my spring bulbs this year. (Photo by Charlotte Ekker Wiggins)

“Yikes, it’s snowing and I don’t have all of my spring bulbs in the ground. When is it too late to plant them?” — Ralph

Can I Still Plant Spring Bulbs

Hi Ralph, welcome to the club. I also ran out of time to get some of my spring bulbs in the ground before snow and cold weather moved into mid-Missouri. The good news is that there still is time to get them in the ground.

Tulips, daffodils and most other spring bulbs need a good 12 weeks planted in the ground to trigger growth. Considering that most of our soil starts to thaw out early March, that gives us all until the end of November and beginning of December to get these vintage flower bulbs in the ground.

The key is when does your soil freeze for winter. I’m in USDA Hardiness zone 5b/6a so our soil tends to stay workable until December. Even if you wait that late, you can still get spring bulbs in the ground so that they bloom next spring but the earlier you get them in, the better for the bulbs.

And yes, I have been seen out in my garden in full winter garb with my handy pick ax in blowing snow getting a few last spring bulbs in the ground. Especially when I find them on sale at the end of the fall season. A few bulbs may have dried up by the time they are discounted but most packages still have viable bulbs.

Remember to add a little bone meal at the bottom of the holes, the bone meal will help feed the bulbs when they are ready to grow.

And ah, bundle up!

Charlotte

Mums Dead or Alive

Mums are favorite fall flowers often tossed after they bloom. With a little care, they can get established. (Photo by Charlotte Ekker Wiggins)

Mums are favorite fall flowers often tossed after they bloom. With a little care, they can get established. (Photo by Charlotte Ekker Wiggins)

“…you said something at the last lecture about Mums being natural bug deterrents. I planted several but now I can’t tell if they are dead or alive. What’s the secret?” — Lisa

Mums Dead or Alive

Hi Lisa, if you couldn’t tell, Mums are one of my favorite all time flowers. In addition to being long-lasting as cut flowers, they are a great bug deterrent and so easy to grow.

it helps to understand a little about how Mums grow. Mums, or chrysanthemums for short, are pinched during spring growth to make them bush out into the round shape we are used to seeing, and buying, in fall. I have several in my garden I miss pinching so I know how long and leggy they can grow. I don’t mind, though, because those are easier to add to a vase to bring inside and enjoy by themselves or with other cut flowers.

The round, bushy shape makes it hard to see new growth, which takes place at the base of the plant. Growth can also occur when you sneak a branch into soil and roots develop at the growing nodes, which are the bumps you feel along the plant stem.

So take a look at this Mum and tell me if you think it’s dead or alive:

Red mum covered in snow in my Missouri hillside garden. (Photo by Charlotte Ekker Wiggins)

Red mum covered in snow in my Missouri hillside garden. (Photo by Charlotte Ekker Wiggins)

It looks dead, doesn’t it. And yes, it was cold and windy when I took this picture to show you looking at the plant is not how you determine if it’s surviving. Gently push the dead stems apart and look at the base. If the Mum is still alive, you should see tiny green growth:

New growth at the base of the dead-looking Mum. (Photo by Charlotte Ekker Wiggins)

New growth at the base of the dead-looking Mum. (Photo by Charlotte Ekker Wiggins)

Be careful when you move the dead branches, it’s easy to break them. If it’s too cold to move them, peer through the top and see if you spot any green at the bottom.


I’ve been known to sneak peeks at the base of my new Mums through winter as I water them. There is something magical about seeing the dead top and then spy new growth underneath at the root. Leaving the dead branches also provides the new shoots protection from winter elements.

Why bother? Besides being pretty and easy to grow, Mums are bug deterrents. Many of the “organic” and “safe” insect sprays these days are made with pyrethrins, basically essence of Mums. By adding a few Mums throughout your garden you can help deter insects and still enjoy pretty fall flowers.

Yellow fall Mums join a sprig of red Peruvian lilies, both long-lasting cut flowers. (Photo by Charlotte Ekker Wiggins)

Yellow fall Mums join a sprig of red Peruvian lilies, both long-lasting cut flowers. (Photo by Charlotte Ekker Wiggins)

Just remember to water them a couple of times a month through winter to help the roots get established.

if you want that fall round shape, pinch them through spring growing season once very 4 inches. When I pinch mine, I just stick the cut off portion back in the soil to grow new roots. Or move that bunch of pinched branches to another spot and push them into the ground for a new mum. It may take a couple of years in my rough hillside soil but they do grow quite nicely.

We are having our first snow of the season today. Time to start dreaming about next year’s garden!

Charlotte


How to Dry Zinnias

This is a new stash of zinnia seed heads getting dried in a brown box. (Photo by Charlotte Ekker Wiggins)

This is a new stash of zinnia seed heads getting dried in a brown box. (Photo by Charlotte Ekker Wiggins)

These zinnia seeds rotted instead of drying out for next year planting. (Photo by Charlotte Ekker Wiggins)

These zinnia seeds rotted instead of drying out for next year planting. (Photo by Charlotte Ekker Wiggins)

“Charlotte, something is wrong with my zinnia seeds. I tried to dry some and they look gray and yucky. What did I do wrong?” — Melissa

How to Dry Zinnias

Hi Melissa, do they look something like the ones in the photo? If so, they didn’t dry, they rotted from too much moisture. As you can see, I have some as well.

I had a little stash of drying zinnia flower heads in an old planter but it didn’t get enough air to dry out the seeds. The idea is to give them time to dry but not rot. I also didn’t place a paper towel under the seeds to absorb moisture, which is also why they rotted.

On the other hand, my big stash of zinnia seeds were properly dried and I’m on my second seed collection so this is how it should look as you get started.

You need a brown bag or newspaper to help absorb moisture. Paper towels will also work. I am using a brown cardboard liner that came with the brown cardboard box. Remember there’s a hole in the bottom of these boxes or you might spill your zinnias all over the place.

Spread the zinnia seed heads across the bottom so they are flat. If you have more zinnia flower heads than space, spread them out in a second box. You want to keep them one flower head deep so they can dry.

I turn them every time I walk by, ensuring air gets through them as they dry. It also helps me determine whether they are ready for storage.

This is how they should look when they are dry and ready to save.

I save the flower seed heads intact, takes too much time to separate them. (Photo by Charlotte Ekker Wiggins)

I save the flower seed heads intact, takes too much time to separate them. (Photo by Charlotte Ekker Wiggins)

In case this was your one and only zinnia seed stash, let me know, I will be glad to share some of mine.

Zinnias make excellent pollinator food. Although they are not native wildflowers to mid-Missouri, I try to plant some every year. They are easy to grow, pretty to have in the garden and nice cut flowers in addition to feeding a wide range of pollinators.

I think of them as gateway flowers. Once you plant them, you will be encouraged to keep planting flowers and we need all we can get.

Ok, try again, they are worth it!

Charlotte


When To Cut Down Flowers

Cut off dried peony flowers and buds after their blooming season but leave the leaves until they die back. (Photo by Charlotte Ekker Wiggins)

Cut off dried peony flowers and buds after their blooming season but leave the leaves until they die back. (Photo by Charlotte Ekker Wiggins)

“Just double checking before I do it, my iris and peonies are finished blooming so I can cut them down now, right?” — Lorri

When to Cut Down Flowers

Hi Lorri, here’s a good rule of thumb. If a plant has finished blooming, that’s a good time to both cut off the spent flowers and move it.

However, don’t cut the entire plant down to the roots. Plants need their leaves to collect sunlight they change into sugar to feed themselves and store energy before they go dormant. I know the dried up flowers and yellowing stems are not exactly appealing but the plants need that greenery.

Here’s a favorite iris that bloomed this year and is ready to have the dried flower heads cut off:

Cut off the dried flowers but leave the green leaves on the rhizomes. (Photo by Charlotte Ekker Wiggins)

Cut off the dried flowers but leave the green leaves on the rhizomes. (Photo by Charlotte Ekker Wiggins)

If you aren’t sure of when to trim, wait until you see the beginning of seed pods growing, then you will know it’s a good time to cut them. If I want a plant to expand, I leave the seed heads on.

Also in the fall, you may want to leave seed heads on so birds will have food over winter.

If you don’t like how they spent flowers look after their blooming season, plant other plants in front and around them to cover up the yellowing leaves. Monkey grass is a nice border plant, as are self heal, Autumn sedum and Stella D’Oro Day lilies.

Charlotte

Does Missouri Have Big Trees?

Humongous tree left at our local recycling center. (Photo by Charlotte Ekker Wiggins)

Humongous tree left at our local recycling center. (Photo by Charlotte Ekker Wiggins)

“…you said in your presentation Missouri doesn’t have old trees any more. Does that mean Missouri doesn’t have big trees?” — Lucas

Does Missouri Have Big Trees

Hi Lucas,

What I said was Missouri has experience re-establishing natural communities and local ecosystems because at the turn of the 1900, most of Missouri’s trees were cut down for the railroad expansion out west. The trees were used for railroad ties and whiskey barrels. The world’s largest saw mill was in Grandin, Missouri.

At the same time, Missouri’s wildlife populations were hunted out of extinction; wild turkey, grouse, river otters among other species have been re-introduced over the past decades.

During the 1930s, both the federal government and state of Missouri made a concerted effort to replant Missouri’s forests. The effort created Missouri’s Department of Conservation and USDA Forest Service’s Mark Twain National Forest, both organizations that continue the restoration work.

Having said all that, let me share with you that there are still “big trees” in Missouri on private property. I personally saw one at our local recycling center, reminding me of the concept of a tree of life.

The main trunk was a good 7-8 feet across. I tried to count the tree rings but lost my way, this tree was very old.

This is one of the tree trunks measuring about 7 hands across. (Photo by Charlotte Ekker Wiggins)

This is one of the tree trunks measuring about 7 hands across. (Photo by Charlotte Ekker Wiggins)

The size of this tree qualifies for the very technical term “humongous.”

Except for the sequoia trees in California Muir woods, I can’t recall seeing trees this big in North America.

I’m sure there is a reason why it was cut down but I can’t help but think what a shame.

Charlotte


Wildflower Planting

Bruce yard.jpg

Hi Charlotte. The spot of higher grass I would like to replant in native wildflowers. I'm going to check with my extension office to come up with the best plan. Short-plan, kill the grass, edge the outline with heavy cardboard and weed fabric and wood mulch on top. Is this reasonable for a 18" outline all the way around? Haven't decided about middle but I wouldlike to sow seeds in fall before winter. Is this an okay start to developing this site? — Bruce

Wildflower Planting

Hi Bruce,

Excellent start!

If you can put something along the horizontal bottom like a brick edging or a 2x4 in the ground to at least temporarily hold in cardboard and mulch that would also help. It's a little tough to keep cardboard and mulch on that incline during a windy rainstorm. 

 The spot looks sunny so you should be able to grow some wonderful native wildflowers like purple coneflowers, black eyed susans and New England asters, all perennials that have long blooming times and are excellent bee flowers. Shooting stars, a light blue bushy plant, would also work well there...what fun to "go shopping" for what you can add there.

Do you have a Missouri Native Wildflowers catalog? They have great suggestions based on the growing conditions.

Charlotte

What Can I Do About Climate Change?

Food.jpg

“How can I help with our climate change. I don’t garden but I want to pitch in. Any suggestions?” — Carla

What Can I Do About Climate Change?

Hi Carla,

You can start recycling the estimated 40% of food that collectively gets tossed out uneaten and unused in the US.

There are several ways you can do that, starting by saving your rotting produce in a bag in the freezer. Once the bag is full, move it outside and bury in a garden hole.

Once you get the habit of saving the produce, you can move to a small recycled plastic container with holes on the bottom and a lid. Mix the food with dried leaves, add a dash of water and close the lid. Here’s what it looks like right after it goes into a composter, which I keep outside but close enough to make it easily accessible.

You will find a variety of composters on the market from small ones to this one that rotates on rollers.

Kitchen scraps, plants pulled from the garden and dried leaves in one of my composters. (Photo by Charlotte Ekker Wiggins)

Kitchen scraps, plants pulled from the garden and dried leaves in one of my composters. (Photo by Charlotte Ekker Wiggins)

Don’t put meat and bones in but most other kitchen scrap can be mixed and exposed to heat to turn it into compost.

Within months, the produce and leaves will turn into compost you can then scattered back on your yard.

Still amazes me when compost is done and ready for use. (Photo by Charlotte Ekker Wiggins)

Still amazes me when compost is done and ready for use. (Photo by Charlotte Ekker Wiggins)

Compost is basically food for the millions of microorganisms that make up soil. Those microorganisms provide food for the soil that feeds plant roots, which in turn feeds us.

Yes, it can be unpleasant at first. That’s why freezing it will cut down on unpleasant odors. Also taking it outside and either buying it or placing it in a composter will mean you won’t have to deal with unappealing odors. As a matter of fact, once it doesn’t smell is one of the indicators that the produce, garden weeds and dead leaves have turned into compost.

Soil is a non-renewable resource. The better we treat the soil we have, the better off we will all be.

Do another thing. Get yourself one plant - an herb would be a good start, something you would like to include in your diet. I love spearmint, adding the leaves to water is a wonderful summer treat and they are an easy herb to grow.

Another good one for a pot is parsley or rosemary, they grow well both inside and out. Observing a plant will help you better understand how we are all connected.

Thanks for doing your part, let us know what you decide to do!

Charlotte

When Can I Move Daylilies?

Dug up daylilies will turn yellow but once planted, will turn green again. (Photo by Charlotte Ekker Wiggins)

Dug up daylilies will turn yellow but once planted, will turn green again. (Photo by Charlotte Ekker Wiggins)

“When can I move daylilies? I have a batch that is now in the middle of my new driveway but I don’t want to lose them….” - Emily

When Can I Move Daylilies

Hi Emily,

My rule of thumb is the best time to move something is right after it has bloomed. In your case, however, the good news is that daylilies are hardy and can be moved almost any time in the growing season. They may not bloom this year but they should recover enough to give you flowers next year.

Since they are currently sitting in the middle of your new driveway, I would dig them up with soil around the roots and set them aside until you can find a new location for them. The soil will help reduce their moving stress and buy you a little time to find them a new home.

Daylilies prefer full sun and can grow in almost any soil type.

If you dig them up and they start turning yellow, that’s an indication they are not photosynthesizing sun into energy because their roots are exposed. If you can’t get them planted, give the roots soil and water and place them in shade to minimize stress.

I have dug up daylilies and moved them directly to a new hole without them missing a beat so if you can move them quickly, that would be best. Remember to water them after you re-plant them and keep them watered nicely until you see them re-established. A blanket of mulch will help keep water in the soil as well.

I recently moved some daylilies in between rain storms and they seem to be settling in quite nicely. Mine had a short detour in the garage for a week because of thunderstorms. The rain softened the soil so getting them planted was easy. Now it’s up to them to settle in.

Charlotte

What Is This Bush?

The telltale, native Missouri Paw Paw tree chocolate brown flowers. (Photo submitted)

The telltale, native Missouri Paw Paw tree chocolate brown flowers. (Photo submitted)


”Charlotte, I wondered if you knew the name of this bush. It might grow into a tree, but it is a large bush in front of my river cabin.” - Elaine

What Is This Bush

Hi Elaine, that is a native Missouri tree, the Paw Paw. Those dark chocolate flowers are a dead giveaway fro the identification and bloom March through May. The paw paw fruits are edible so if you see fruit, enjoy, just don’t eat the seeds.

The Paw Paw trees remind me of a Tree of Life for Missouri. Paw Paws grow well in Missouri and are seeing a comeback among restaurant chefs. They can be grown in deep pots but are best in the ground since they can grow very tall.

According to Missouri Botanical Garden, Asimina triloba, commonly called pawpaw, is a Missouri native small understory tree or large shrub which typically grows 15-20' tall (sometimes to 30') and occurs in low bottom woods, wooded slopes, ravines and along streams.

Pawpaw often spreads by root suckers to form colonies or thickets. Large, slightly drooping, elliptical, medium green leaves (6-12" long) retain green color well into fall before turning to a bright (but sometimes undistinguished) yellow. Cup-shaped, purple flowers (3 green sepals and 6 purple petals in two tiers) appear in spring, and give way to edible, oblong, yellowish green fruits which mature in early autumn to a dark brown. Flavor and fleshy consistency of the sweet-flavored fruits resembles bananas. Fruits are frequently eaten raw or used in ice creams or pies, although they can produce nausea in some people.

Wildlife (e.g., raccoons, squirrels and opossums) eagerly seek out the fruits and often beat humans to the harvest. Early Americans made a yellow dye from the pulp of the ripened fruit.

Genus name comes from the Latinized version of the French form of the Indian name for this North American genus.

The back of the paw paw tree flowers are chartreuse green. (Photo submitted)

The back of the paw paw tree flowers are chartreuse green. (Photo submitted)

I may try to grow some on my hillside as a bush once I find a wet spot since they like more moist areas.

Charlotte

What Plant Is This?

Mystery Plant 1.jpg

“I have had this plant for nearly 30 years and at the time I received it it was a large mature plant. (Several years ago I subdivided it and repotted it.) This plant has only bloomed for me just a handful of times and then it was during July-August. The blooms were half again as long as my Thanksgiving cactus, more of a reddish-orange in color and the individual petals were longer and curled back more giving the blossoms a more "frilly" look.

 What do I have here? Is it a Christmas Cactus that has a mind of its own re. blooming? 

 I now live in FL and there are no large shade trees I can put this under during spring through fall. I keep it inside with indirect sunlight. I know temp and lighting conditions are not of the type to induce blooming.

 Any thoughts or suggestions? Thank you!’ — Linda

What Plant Is This?

Mystery plant 2.jpg

Hi Linda,

You have a genuine, no longer on the market Christmas cactus. A couple of years ago someone gave me their 35-year plant  (see photos) that is currently blooming.

See how the leaf pads of my Christmas cactus is the same as yours? (Photo by Charlotte Ekker Wiggins)

See how the leaf pads of my Christmas cactus is the same as yours? (Photo by Charlotte Ekker Wiggins)

Christmas cactus like to be crowded to bloom so re-potting may have interfered with their blooming cycle. They also prefer sandy soil. Since they are so shallow-rooted, the sand makes it easier for them to grow.

 Since you are in Florida, their light requirements may have interfered with their blooming cycle. To get them to bloom, they need to be placed in the dark for a few weeks. You can place them in a dark room or cover with a box or bag for at least 12 hours a day for a month. Once tiny buds appear, you can give them light again.

Their darkness requirements are similar to Poinsettias, originally from Mexico, that also require being in the dark for a few weeks in fall so their bracts turn red by Christmas.

So if you want them to bloom around Christmas, put them in the dark in September or October and you should have flowers by December.

My Christmas cactus currently in bloom. (Photo by Charlotte Ekker Wiggins)

My Christmas cactus currently in bloom. (Photo by Charlotte Ekker Wiggins)

These plants originated from the Espirito Santo area of Brazil. The Thanksgiving cactus has taken over the retail market as a "Christmas cactus" since they have been bred to have a variety of colors and the original "Christmas cactus" is no longer sold.

Thanksgiving cactus, by the way, has little spikes on the end of their pads, like little horns. The original Christmas cactus pads are long and smooth.

Thanksgiving cactus have little spikes on their fleshy pads. (Photo by Charlotte Ekker Wiggins)

Thanksgiving cactus have little spikes on their fleshy pads. (Photo by Charlotte Ekker Wiggins)

Let me know if this works for you, it has kept my variety of both Christmas, Thanksgiving and Easter cacti continuously blooming!

 Charlotte

What To Do About Loosing Our Planet

Earth.jpg


“Charlotte, I’m so depressed over the UN report on climate change, the world has 10 years to change and no one seems to be paying attention. What can I do to help?” – Meghan

Hi Meghan,

The United Nations report was dire, indeed, but there are things we can all do. All will require some planning and habit changes, which some may not want to do but since this is our home we are loosing, hopefully most will pitch in. The following are 15 suggestions:

1.     Walk more. We are too reliant on fossil fuels including coal, oil and gas. By planning to walk more, we can reduce using gas for our cars and improve our health. Just 15 minutes outside will get us all the minimum daily requirement of vitamin D and also kick off the endorphins that makes us all feel better.

 2.     Consolidate car trips. Again designed to reduce our use of gas, better plan trips so that you’re not using as much gas. Besides reducing the fossil fuel load, you will save money.

 3.     Ride a bike. If you have a community that has bike lanes and safe drivers, dust off that bike and start riding it.

 4.     If you are buying a car, look at hybrids and electric cars.

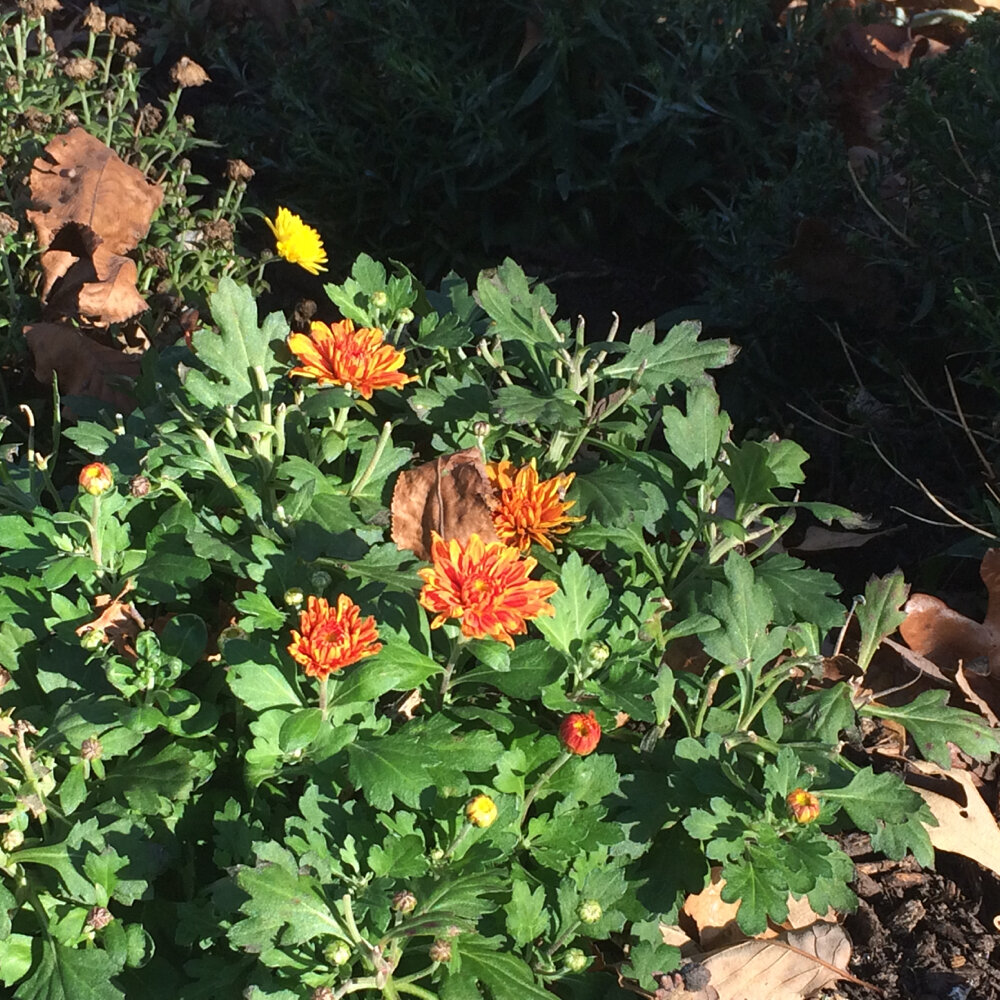
 5.     Save water. If you keep your faucet running when you brush your teeth, turn the faucet off until you need water again. Use a dishwasher, it uses less water than hand washing; set it on the economy setting. Plant plants that don’t need constant watering such as natives to your area.

 6.     Install rain barrels on your gutter system. Rain water is better for plants and will help cut down on your water bill.

 7.     If installing and replacing a heating and cooling system, pick a heat pump.

 8.     When replacing your water heater, install a solar-powered one.

 9.     Re-think your diet. Reduce eating red meat once a week, then slowly cut back a second day. Less red meat consumption will reduce methane gas production.

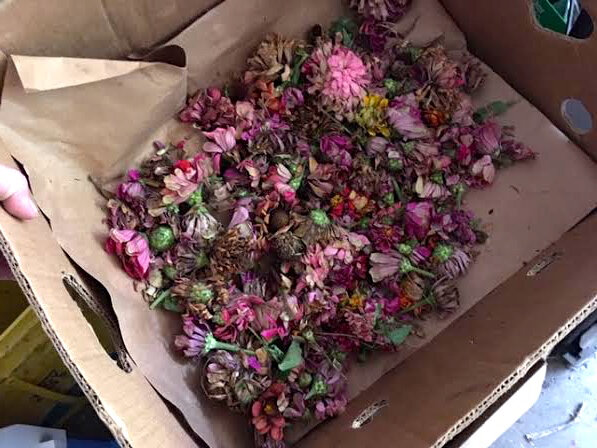
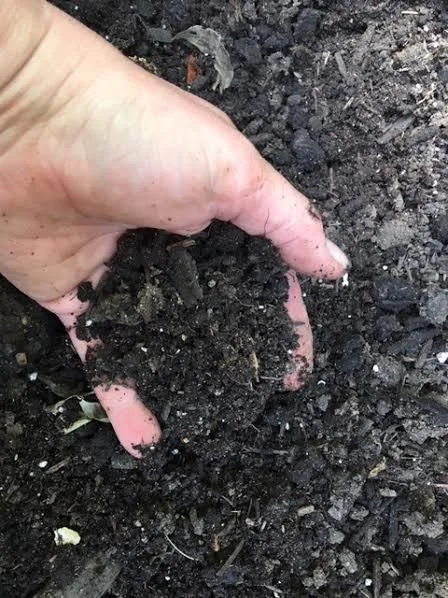
 10. Buy less food. Nationally, US residents throw away 40% of the food they buy so be more deliberate with food shopping. Freeze what you can’t eat, plan for leftovers and make sure to compost what you don’t want to eat. Composting  helps keep soil healthy and soil keeps our plants, and us, healthy.

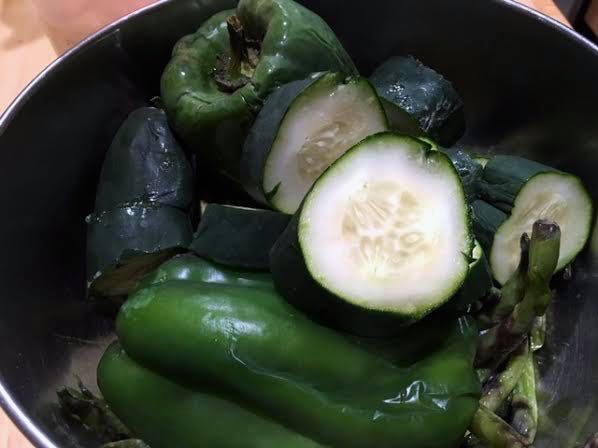
 11.  Buy local produce. Farmer’s markets, grocery stores and local farmers all offer locally-grown produce that is less fertilizer and pesticide-intensive to grow. And it tastes better, too.

 12. Choose items made from renewable and easily sustainable bamboo.

 13. Dust off your grandmother’s china and start using real dinnerware and utensils, no more plastic.

 14. Carry a set of reusable bags to carry groceries and other items instead of store plastic bags.

 15. When voting, select candidates who recognize the threat and commit to working together to change our country’s direction.

 What else can you think of doing to reduce your carbon foot print?

 Charlotte

Do You Want to Keep Ash Trees with Borers?

Emerald ash borer exit hole on the side of one of my former ash trees. (Photo by Charlotte Ekker Wiggins)

Emerald ash borer exit hole on the side of one of my former ash trees. (Photo by Charlotte Ekker Wiggins)

“Charlotte, I read that you now have emerald ash borers in your trees and you are using the cut down ones for flower borders. Will keeping the cut down tree trunks on your property spread emerald ash borers? I am also thinking of using the cut down trees as flower bed borders but I don’t want to encourage the destructive bugs….” — Peter

Do You Want to Keep Ash Trees with Borers?

Hi Peter, I had the very same question for our Missouri Department of Conservation. I live in Phelps County in mid-Missouri. one of the 114 counties in the state. Most are now reporting emerald ash borers. Here was the answer they gave me:

“Your area is known to have a building population of emerald ash borer (EAB). By keeping the trees on your property, you aren't spreading this insect. If your trees were infested prior to being cut, then it's likely that some of the EAB larvae that are currently in the trees will finish their lifecycle this spring and chew out as adult beetles in May. The beetles won't re-infest your ash wood, however, so your ash wood won't continue to be a source of food for EAB. You may notice lots of other native borers that attack the wood, since many of our native species help with decomposing dead trees on the forest floor. When I use ash in my garden and flower beds, I usually get about 2 years out of a large chunk before the native borers break it down to the point where it isn't useful to me.

You might extend the life of the wood by applying a product to prevent borers, like BoraCare or TimBor, or even sealing the wood with an outdoor wood sealer. 

Since the only food source for EAB is ash trees, you have effectively discouraged this pest from your yard by removing your ash. If you have other ash on the property that you hope to keep alive, then I would recommend treating them with insecticide. More information can be found in this treatment guide: https://mdc.mo.gov/sites/default/files/downloads/mo_eab_management_guide.pdf 

Robbie Doerhoff
Forest Entomologist”

Insecticides are out of the question for me since I keep bees so I am resolved that I will lose the rest of my ash trees and am already planning what to plant in their stead.

Charlotte

When to Plant Mums

Chrysanthemums are popular fall flowers to plant for color. (Photo by Charlotte Ekker Wiggins)

Chrysanthemums are popular fall flowers to plant for color. (Photo by Charlotte Ekker Wiggins)

“Hello, we recently bought mums to plant in the flower beds around our home. What time of year should we plant mums? And what else can we do to guarantees they come back every year? Thank you.” — Alyssa

When to Plant Mums

Hi Alyssa,

It's getting late in the season to plant mums but as long as the ground is not frozen you should be able to still get them in. Make sure they, and the soil you are planting them in, is well-watered before you add the plants. Once in, add mulch to keep their soil temperature from fluctuating. A nice blanket of wet dried leaves will work if you don't have anything else handy.

The key to pulling mums through winter is to keep them regularly watered. I take 2 old milk jugs full of water out to my garden twice a month and water my mums if we haven't had rain and/snow. You are basically keeping the roots hydrated so they can establish themselves.

Don't cut off the dry flowers, those will protect the new growth that will start at the bottom in the center.

If you want to add more mums, spring is a good time to get starts, that way the plant has all growing season to establish itself and grow. To maximize blooms, pinch off the starts every week until July 4, that will keep their shape rounded and bushy.

If you have any other questions, please let me know. Good luck!

Charlotte