Planting Onions

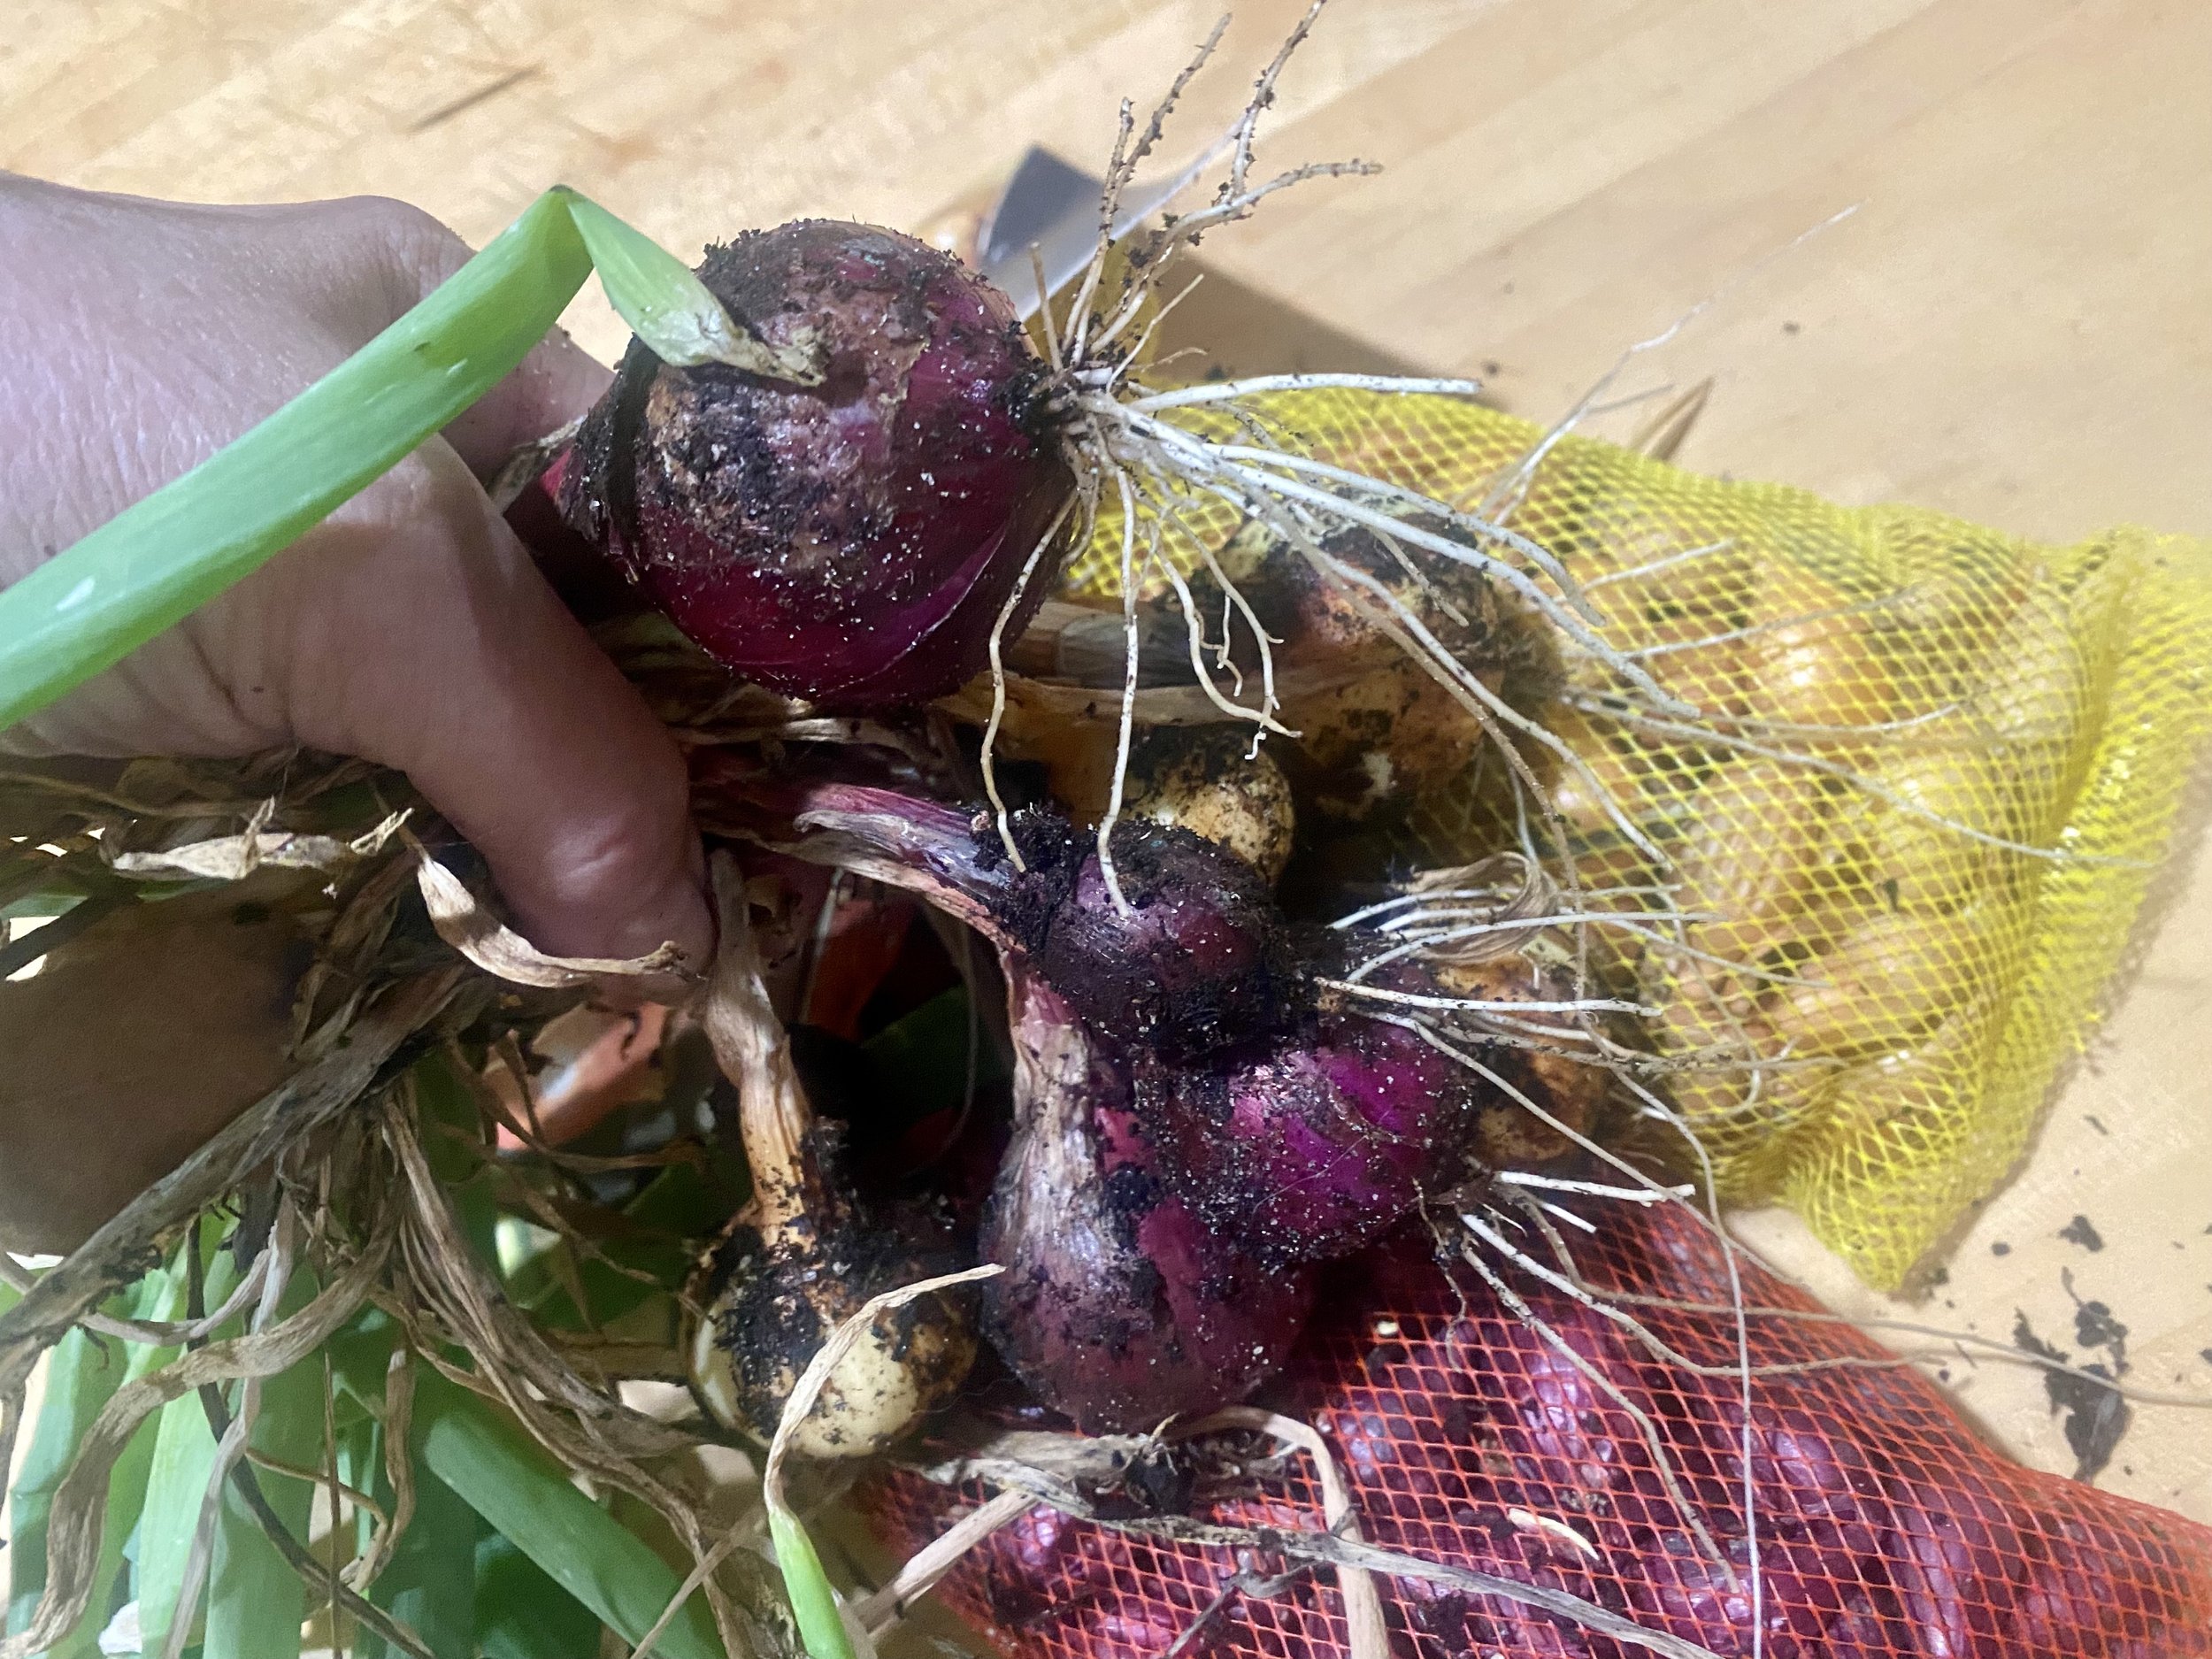
my first batch of homegrown onions, ready for the crisper. (charlotte ekker wiggins photo)

Planting Onions

I start the growing season in my USDA Hardiness Zone 6A by planting onions. It helps that I use a lot of onions in my home cooking from soups to salads.

Onions are also excellent companions to roses, keeping bugs off those edible flowers.

I look for bags of onion sets late January and early February. You can find them in home and garden centers and even grocery stores. Some farm centers offer onion sets by weight.

I focus on growing my favorites, red onions, and then yellow onions. Two pots of each so that I can enjoy the onion greens fresh; then dig up bulbs later in the season.

How to Plant Onion Sets

Onion sets are easy to plant. I wait for a good rain, then make holes in a circle around the pot. I don’t plant onions in the same pot two years in a row so I rotate my pot garden as well.

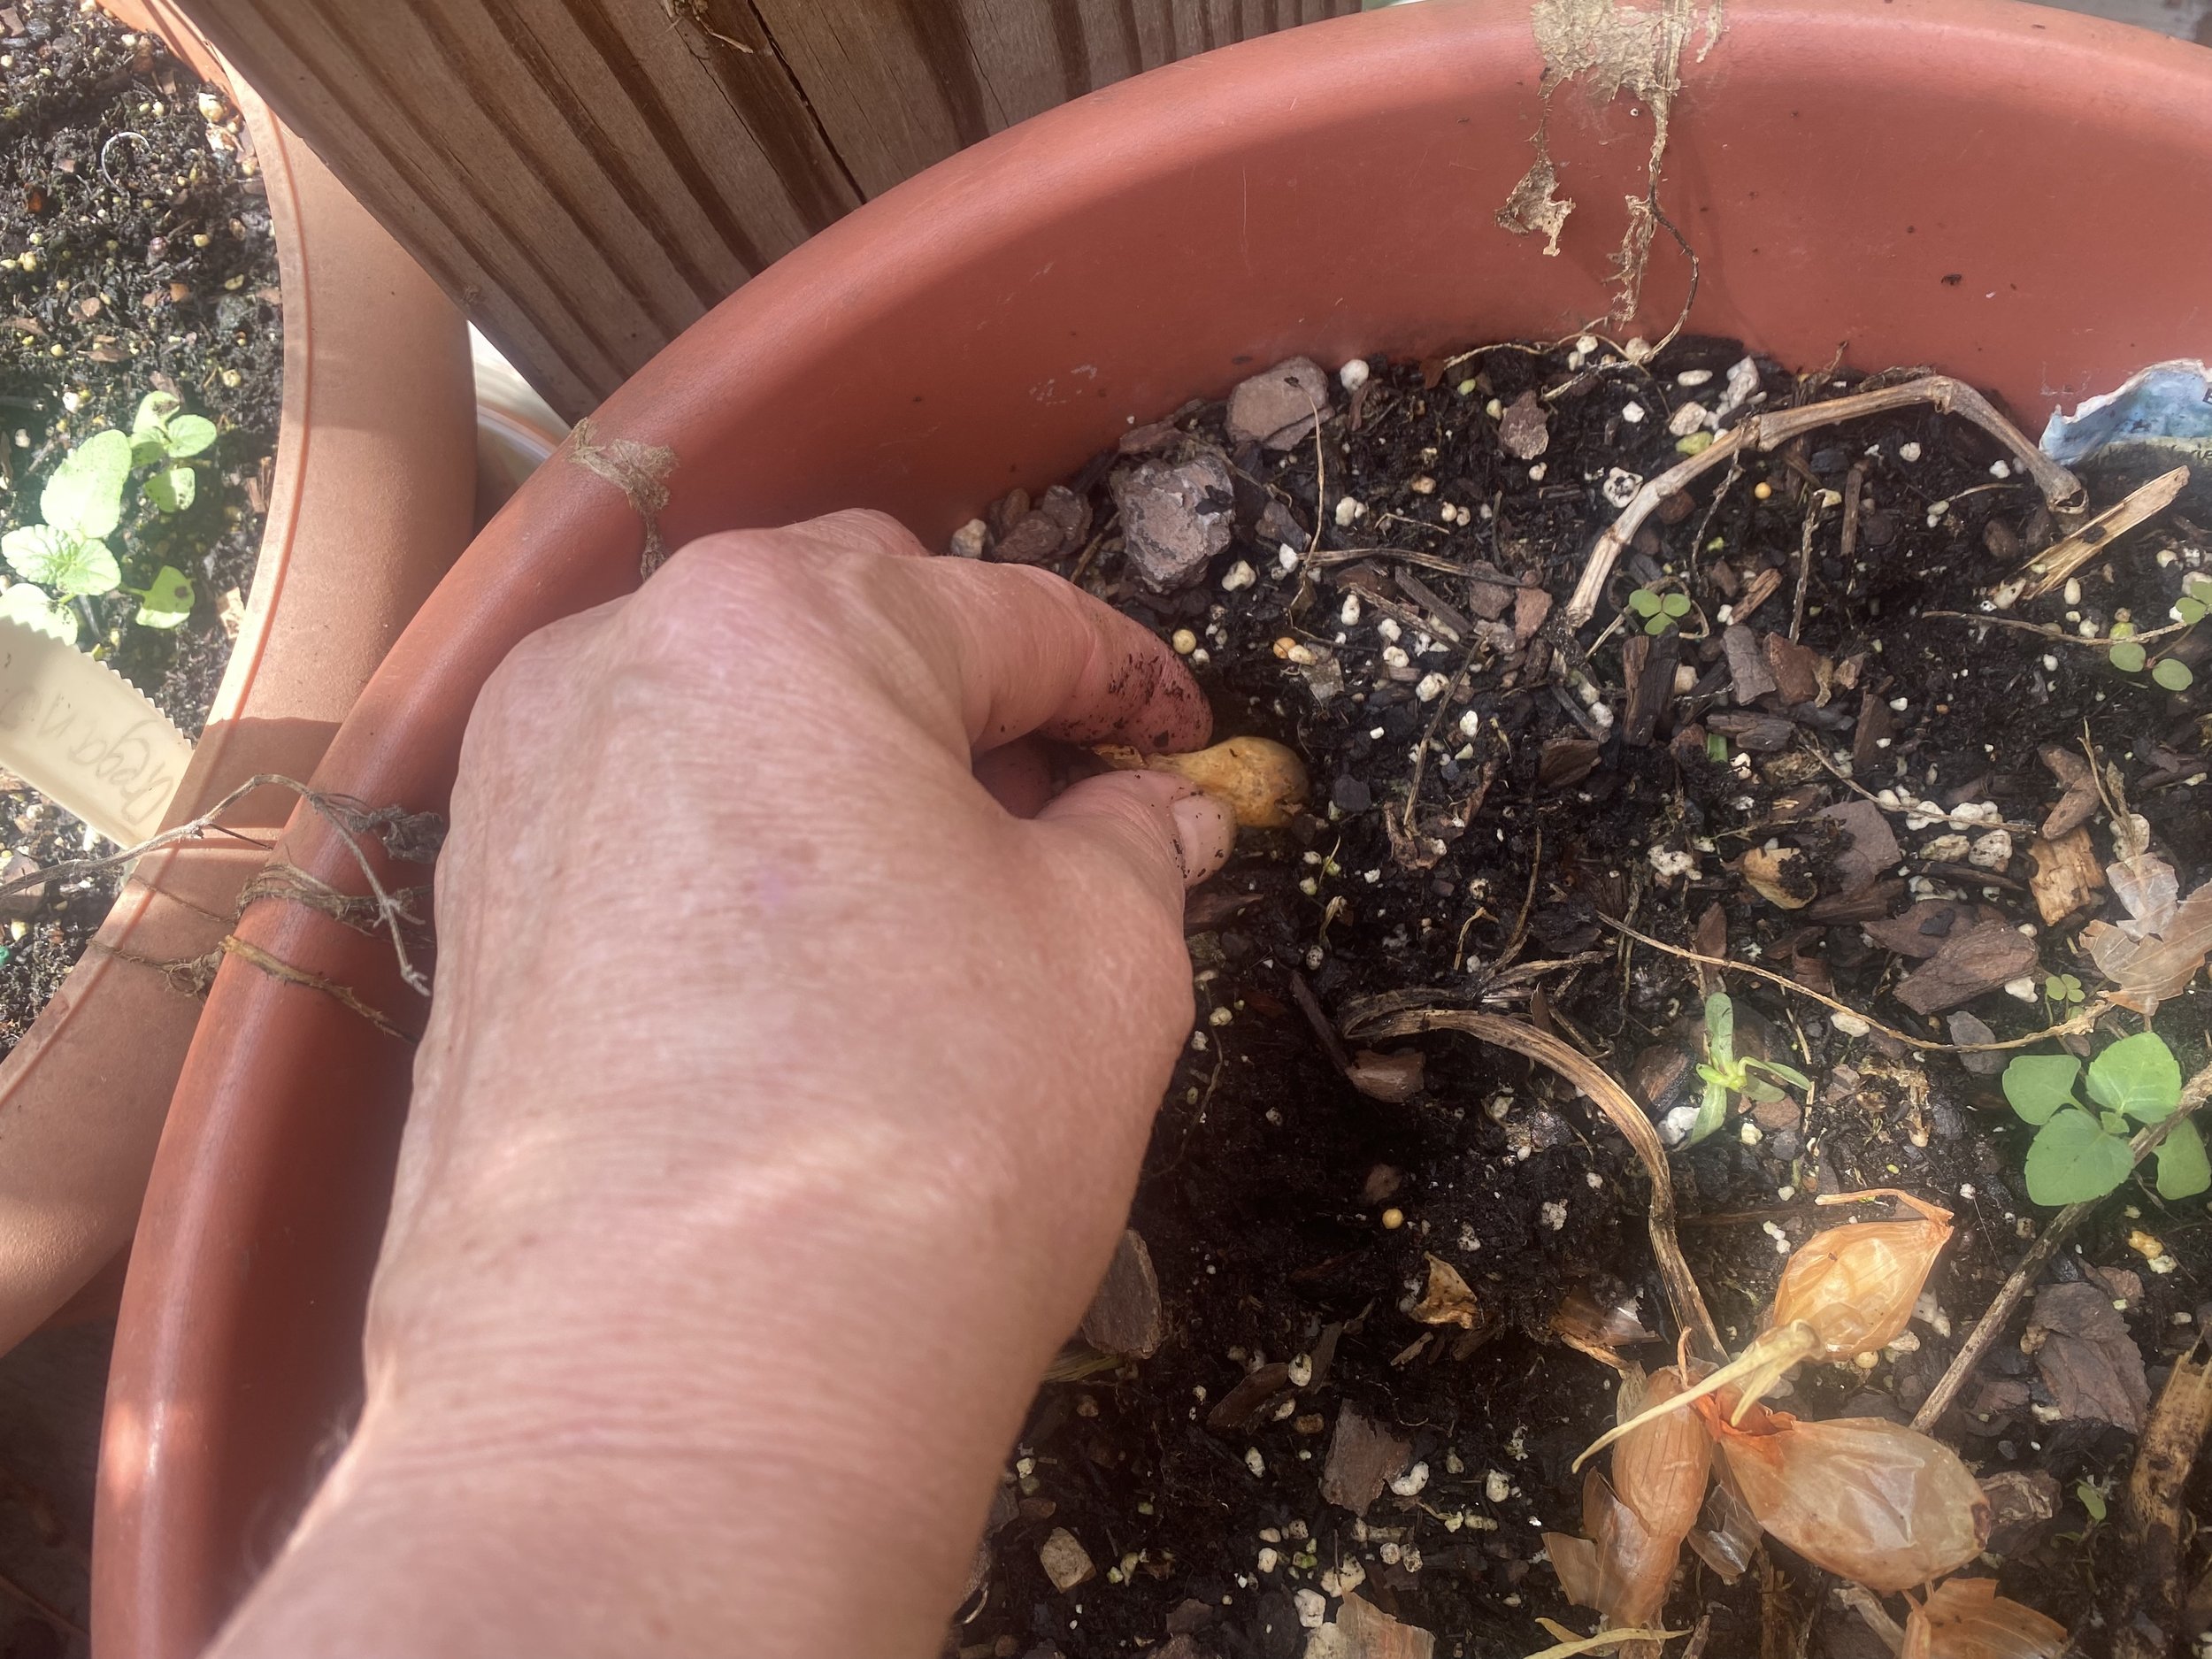
onion sets are easy to plant. make a hole and place one set up to the top. (charlotte ekker wiggins photo)

Once I have the holes made, I plop in an onion set in each, then make sure they are covered with soil.

It takes a couple of weeks for the first onion greens to show up; and maybe three months for the greenery to die back, which is a sign its time to dig up the onion bulbs.

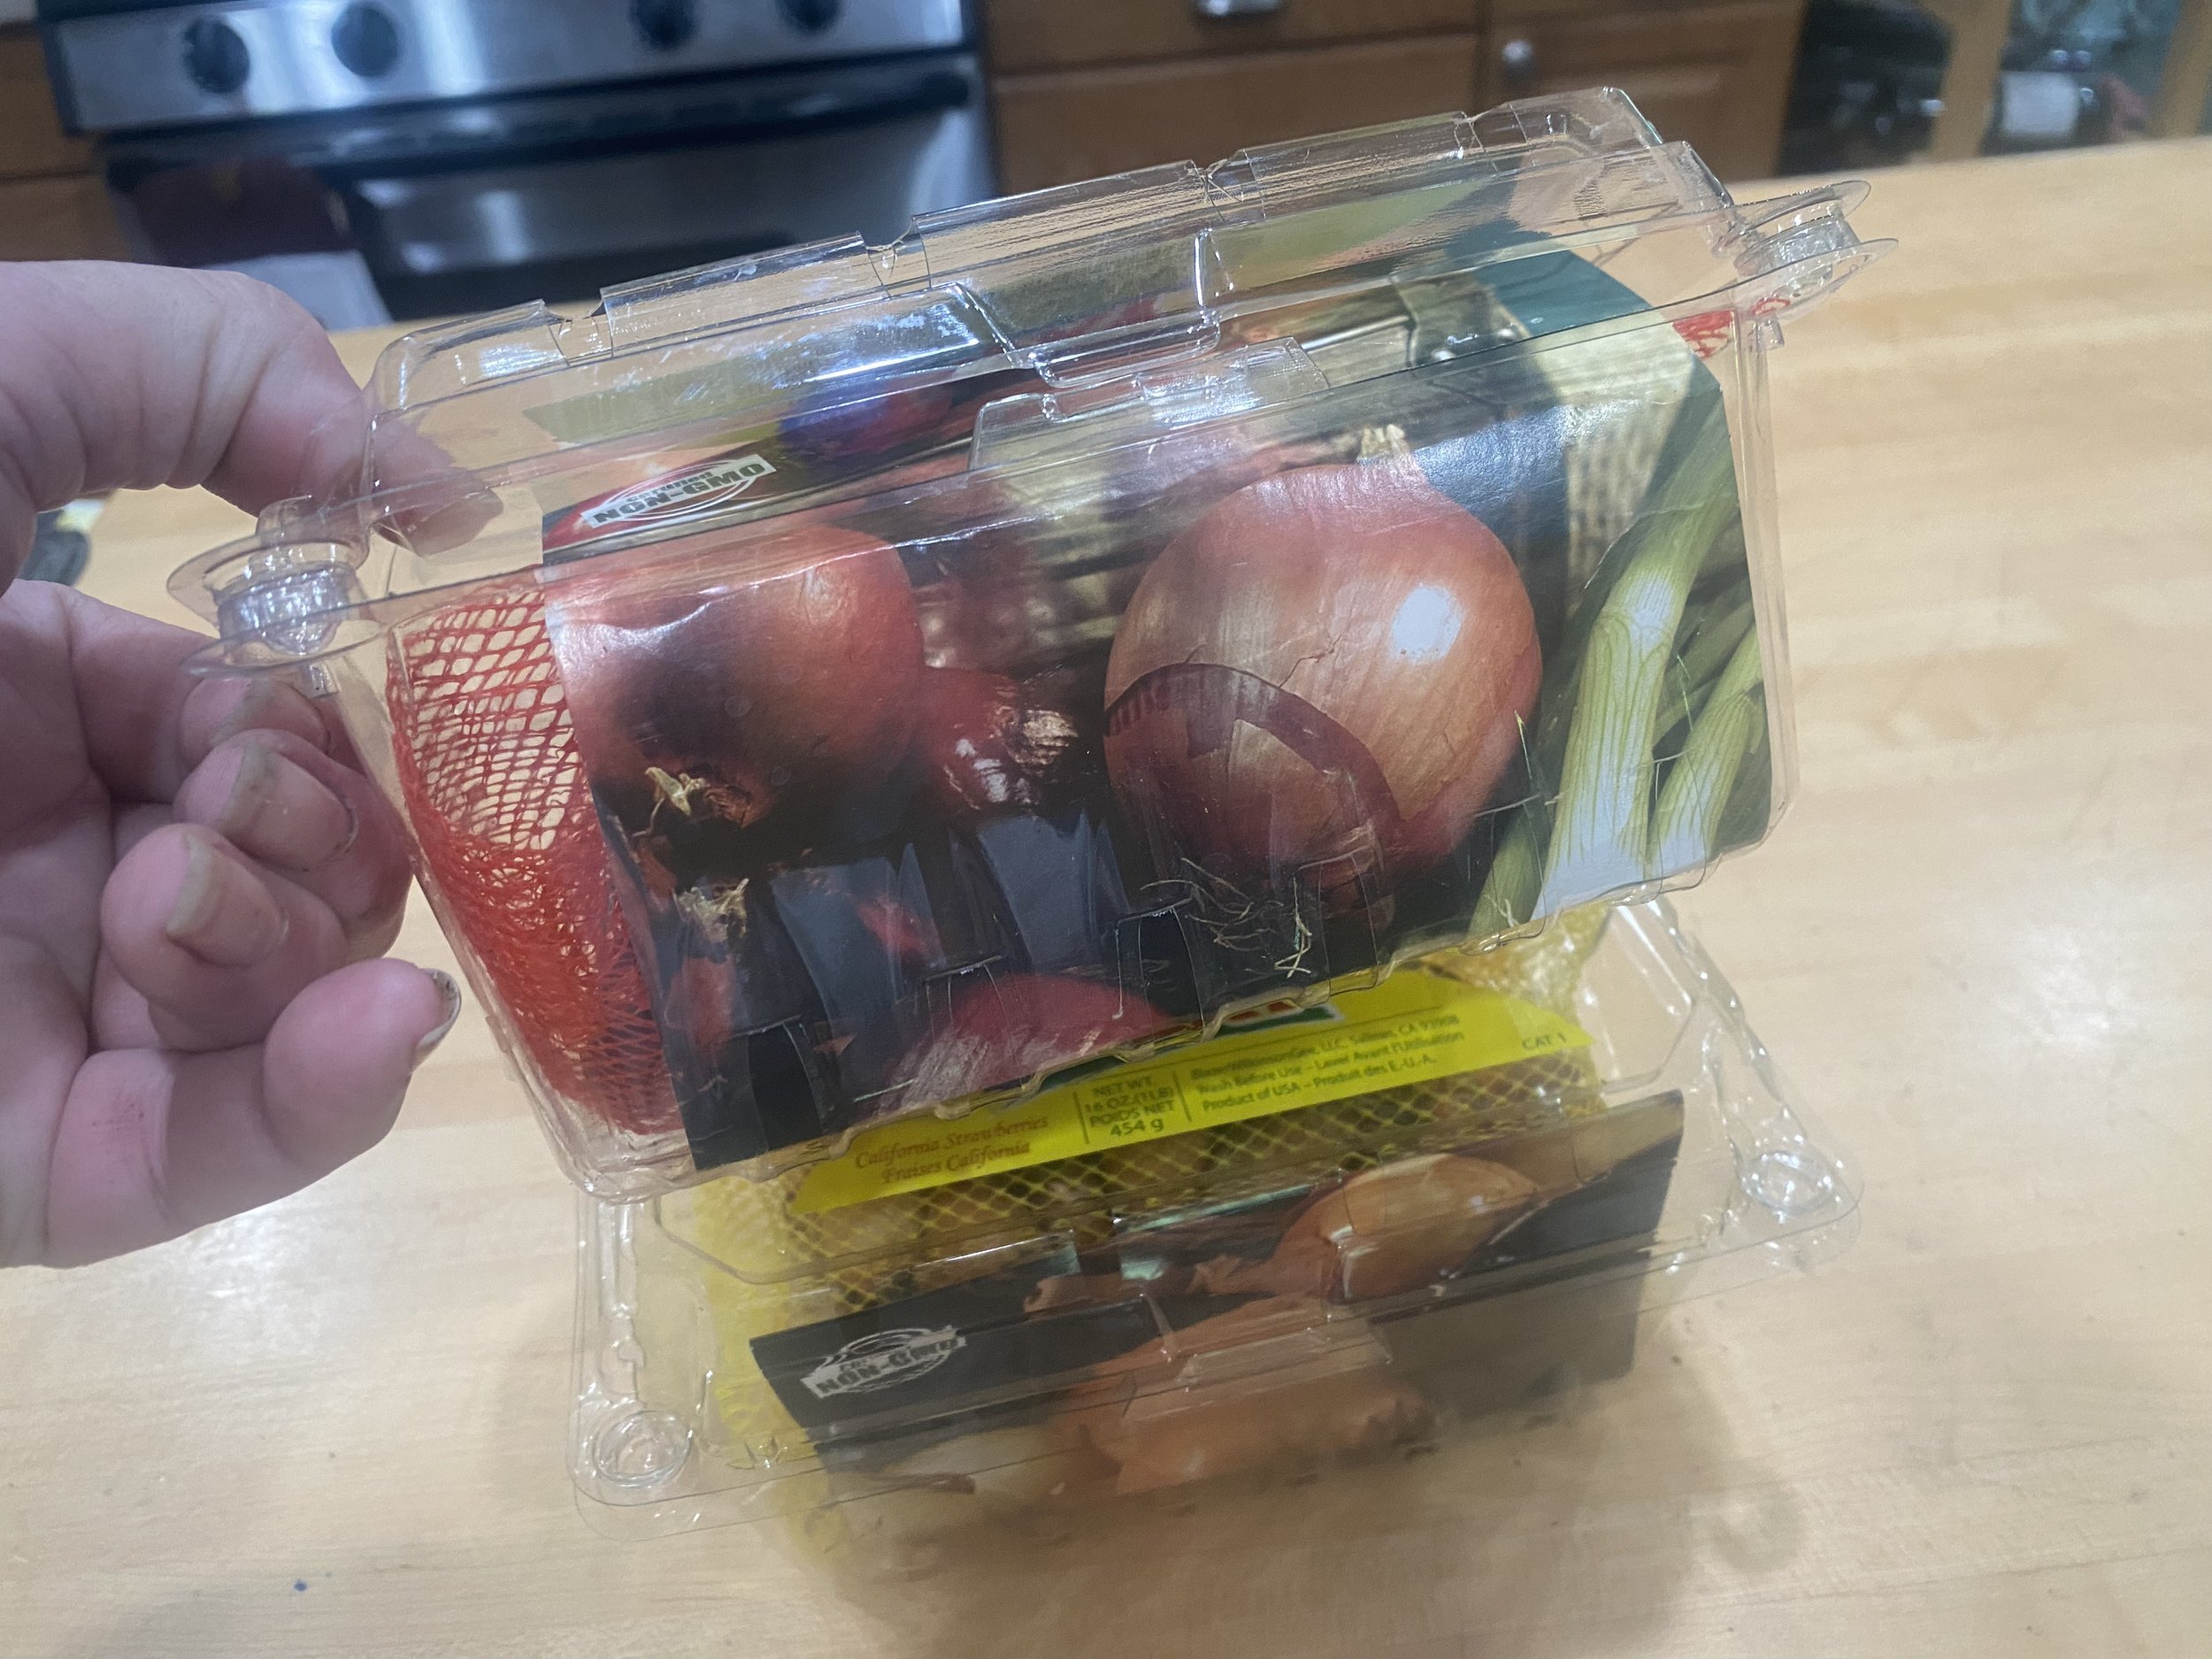
recycled clam shells work to store onions and onion sets. (charlotte ekker wiggins photo)

How to Store Onions

You can recycle the bags that held the original onion sets. If you’re like me, though, you will plant a few onion sets every couple of weeks so you’ll need those mesh bags for the onion sets.

I keep mine in recycled clear clam shells with the cardboard tag. When I run out of onion sets to plant, I then use the mesh bag for storing the onion bulbs in the crisper.

In the meantime, the recycled clam shells also work well for holding the finished onion bulbs in your refrigerator.

Onions are easy to grow and can add flavor to most dishes so give them a try!

Charlotte

Cucumber Cages

One of my cucumbers growing over a traditional metal tomato cage. (Photo by Charlotte Ekker Wiggins)

One of my cucumbers growing over a traditional metal tomato cage. (Photo by Charlotte Ekker Wiggins)

Cucumber Cages

The end of the growing season is a good time to pick up supplies for next year. One of my favorite items to get on sale are “tomato cages,” something I use for a variety of crops.

This year, my tomato cages easily turned into cucumber cages. This is my first year to grow cucumbers in my edible deck garden and one plant in particular escaped my attention. I planted it in an empty pot late in the season. This is a 55-day variety so it still had enough time to deliver cucumbers before our first hard frost mid to late October.

One of my cats likes to play with the cucumber leaves from the catnip pot. (Photo by Charlotte Ekker Wiggins)

One of my cats likes to play with the cucumber leaves from the catnip pot. (Photo by Charlotte Ekker Wiggins)

By the time I found one of my cats entangled in the cucumber vine, the plant was not only well-established but needing support as it grows.

I was easily able to place a tomato cage close to the plant roots and then carefully wind the vines around each of the tomato cage sides. For next year I plan to use the larger tomato cage for cucumbers because of the weight of the ripe cucumbers.

And yes, I’ve harvested cucumbers from this pot and two other pots where I’ve been growing cucumbers. And the pot has been moved away from the catnip pot, where one of my young cats likes to nap.

Charlotte

Bolting Plants

This yellow onion from my refrigerator crisper is now in bloom. (Photo by Charlotte Ekker Wiggins)

This yellow onion from my refrigerator crisper is now in bloom. (Photo by Charlotte Ekker Wiggins)

Bolting Plants

One of my earliest gardening recollections is of a neighbor in Illinois complaining about her garden “bolting.” She had a small garden to the side of her house facing ours. I remember peeking at what she was doing when I got off the school bus. Some days she would invite me to come over to harvest - a cucumber here, a handful of tomatoes there.

One day she was fussing about her radishes and lettuce “bolting.” I couldn’t possibly imagine how rooted plants could take off so she had my full attention. What she meant was the typically spring plants we grow for their tender leaves and roots were putting their energy into reproduction. They were growing flowers that turned to seeds. She was of that gardening generation that thought they should be able to control, or at least manage, what their plants were doing.

If you don’t know what bolting is, you probably have seen it if you’ve ever grown lettuce. Those young early spring leaves are mild and tender compared to leaves grown later in the season. I have a pot of spring lettuce that kept delivering for months until it decided to try to bloom.

The spring lettuce crop is trying to produce flowers and leaf taste is now bitter. (Photo by Charlotte Ekker Wiggins)

The spring lettuce crop is trying to produce flowers and leaf taste is now bitter. (Photo by Charlotte Ekker Wiggins)

I sampled the older lettuce leaves again last week and, sure enough, they were tough and bitter, like some people I know who are older. If you look closely, there are some young lettuce shoots on the side I can still use for salads.

The top photo is another example. That yellow onion was growing in my refrigerator crisper so I decided to pot it and let it live out it’s life naturally. The onion is now blooming, taking all of the energy from the bulb and putting it into producing the stem and flowers. I will not get another onion from this but I will get seeds.

So in my world, bolting is a good thing. I used to call this plant phase “going to seed,” which if you are growing heirloom and non-hybrid plants will provide “free” seeds for planting next year.

Good for Bees

As a beekeeper, bolting plants are also a good development. The flower production produces nectar that entices bees, which in turn move pollen from one plant to the next and increase the fruit and seed yield.

One other thought. As our weather grows increasingly unpredictable, the ability to manage plants will be more challenging. We may need to consider ways to mitigate weather fluctuations to be able to grow some of the foods we like to eat.

In the meantime, think twice about moaning and groaning about it. The plant is taking steps to survive by producing flowers and then fruit or seeds; bees get nectar they use for flight fuel and pollen for baby food, and you will benefit from being able to collect seeds and grow it again next year. It’s a win, win, win!

Charlotte

Tomato Arbor

These two Early Girl tomatoes are now growing over arbor. (Photo by Charlotte Ekker Wiggins)

These two Early Girl tomatoes are now growing over arbor. (Photo by Charlotte Ekker Wiggins)

Tomato Arbor

I love the intersection of pretty and practical and this is one of my latest contributions to that category.

These are Early Girl indeterminate tomato plants, which will continue to grow until frost. In other words, they can grow as tall as trees and become ungainly. it would require very large and sturdy tomato cages or some way to keep them easy to access.

As it is, it takes large planters to give them enough soil and nutrients for healthy growth.

Early Girl tomato plants growing in pots and up an arbor. (Photo by Charlotte Ekker Wiggins)

Early Girl tomato plants growing in pots and up an arbor. (Photo by Charlotte Ekker Wiggins)

This year I decided to let them also grow on an arbor. The arbor helps to anchor the main plant and makes access easier to the ripening tomatoes.

It also keeps the plant from falling over and breaking during rain storms.

Most arbors usually have two sections connected together on the sides. Here I am using one of the two pieces to form the arch for the plants. The tomato plants have been tied to the varies arbor sections and encouraged to grow up to the top.

Tomato cages hold up the Early Girl tomato plants at the bottom. (Photo by Charlotte Ekker Wiggins)

Tomato cages hold up the Early Girl tomato plants at the bottom. (Photo by Charlotte Ekker Wiggins)

Each tomato plant also has a large tomato cage that is holding the bottom part of the plant in place. The arbor is providing support to the top plant section that no longer fits in the tomato cage.

Not only is this practical but it adds a vertical gardening space to the pot garden along the steps.

Charlotte

Growing Tomatoes

Blossom end rot can be fixed with regular and even watering. (Photo by Charlotte Ekker Wiggins)

Blossom end rot can be fixed with regular and even watering. (Photo by Charlotte Ekker Wiggins)

Growing Tomatoes

Of all of the vegetables home gardeners can grow, tomatoes to me are the taste of summer. This year, record hot and humid conditions have made tomato growing challenging so here are some typical issues, and tips, on how to fix growing tomato problems.

Proper Fertilizer

Tomato plants taller than their growers usually means tomato plants may be getting too much nitrogen fertilizer. Nitrogen encourages the green growth that spurs plants to unnatural heights.A balanced plant meal requires nitrogen for growth, phosphorous for moving energy through the plant, and potassium for stress tolerance.  Our Ozark soil can provide nitrogen but the other two fertilizer elements usually need a boost. 

Soil testing through a local University of Missouri Extension office will help determine what is missing. A test costs $15 and includes not only what is in your soil but what you need to do to amend it.

Even Watering

The other delicate part of raising tomatoes is watering. Blossom end rot, where the bottom of the tomato starts to decompose, is usually caused by calcium deficiency, Calcium is usually present in soil but without water, tomato plants can’t take it up from the soil.

The best way to prevent blossom end rot is to regularly and evenly water tomatoes,. This means watering them every day at the same time with the same amount of water.

Tomato roots in open ground can grow to 5 feet deep. Tomatoes even grown in containers prefer to be evenly moist so with temperatures, and humidity, either at record levels or varying widely, requires careful monitoring.

I have sunken plastic bottles with holes in pots keeping my tomatoes company so that I can better keep the roots moist.

I also use a paint stick propped into the side and moved over an inch to check how wet the soil is before I water.

Temperatures Over 86F

Another challenge to raising tomatoes is temperatures over 86F. Tomatoes go into survival mode at 86F and higher so the tomatoes will not ripen on the plant. If temperatures remain that hot, pick the tomatoes while still green and allow them ripen in your kitchen.

Remove suckers of the growth in between branches to keep tomatoes focused on growing fruit. (Photo by Charlotte Ekker Wiggins)

Remove suckers of the growth in between branches to keep tomatoes focused on growing fruit. (Photo by Charlotte Ekker Wiggins)

Remove Suckers

One last tip: remove the growth in between tomato branches to keep the plant focused on producing the fruit we all enjoy.

Charlotte

Picking Homegrown Blackberries

The first ripe blackberries on my cattle panel arbor. (Photo by Charlotte Ekker Wiggins)

The first ripe blackberries on my cattle panel arbor. (Photo by Charlotte Ekker Wiggins)

Picking Homegrown Blackberries

I have been thinking about doing this for years.

The garden dream was to set up arbors of some sort where I could grow blackberries and pick the fruit as I walked under the arbors.

Two years ago, I put up two cattle panels to guide visitors into my hillside apiary. I covered some of the panels with cedar boughs to cover some of the metal. At the same time, I planted thornless Navajo blackberries on either side so the blackberry canes could grow over the cattle panels.

The cedar boughs add extra support for the vines as they make their way over the cattle panels.

Two cattle panels covered in cedar boughs have blackberries nestled along the sides. (Photo by Charlotte Ekker Wiggins)

Two cattle panels covered in cedar boughs have blackberries nestled along the sides. (Photo by Charlotte Ekker Wiggins)

It’s hard to estimate how long plants will provide fruit on my Missouri hillside garden. My semi-dwarf pear tree took almost 30 years before it grew my first Bartlett pears. A limestone hill is difficult for root systems to get established.

At the end of July, I started to see the beginning of blackberries. They tend to flower in May, when the nectar flow starts where I live. Once the flowers finish blooming, the plant turns them into fruit, which contains the seeds.

As I started to spot ripe blackberries, my dream came through. I would walk through the archway and pick a handful of berries.

Two more blackberries ready for picking as I walk through! (Photo by Charlotte Ekker Wiggins)

Two more blackberries ready for picking as I walk through! (Photo by Charlotte Ekker Wiggins)

There truly is nothing better than picking blackberries and eating them straight off the plants!

I don’t use chemicals or pesticides in my garden so I can freely pick the fruit without being concerned about their exposure.

These are also thornless blackberries, so reaching through the cattle panels to pick the fruit is quite easy.

I will be adding compost mixed in mulch this fall, getting the blackberry plants ready for more blooming, and fruiting, next year.

Love it when a plan comes together!

Charlotte

Removing Daylily Stems

Daylily stems after flowering and still green. (Photo by Charlotte Ekker Wiggins)

Daylily stems after flowering and still green. (Photo by Charlotte Ekker Wiggins)

Removing Daylily Stalks

The daylily blooming season is wrapping up here in Missouri USDA Hardiness zone 5b/6a. The season started with the traditional single orange daylilies blooming. These edible plants were originally brought over from Europe by our settlers in the 1600s and now are considered one of Missouri’s native wildflowers, featured on this Native Wildflowers handmade quilt. The daylily season starts mid-May. They are now nude tall green stems, some with seed heads.

There is a tendency to want to grab clippers and go cut them down but I suggest waiting. In a couple more weeks, the stalks will dry on their own, making it very easy to gently pull them out of the leaves without having to bend over and cut them at the bottom.

Every day I see more and more of these dried stems among my flower beds.

When daylily stalks dry out, they can easily be removed. (Photo by Charlotte Ekker Wiggins)

When daylily stalks dry out, they can easily be removed. (Photo by Charlotte Ekker Wiggins)

The dried out daylily stalks are now hollow, making them lightweight and easy to remove.

If you compost them, cut them up into smaller pieces so they can mix into the other green items. They will count as a “brown” in the green/brown mixture in your composter.

I have also considered whether the dried stalks can be used to weave something. A basket comes to mind but a floor mat would probably be a better project to try.

Let me just add that to my “to do in winter when I have nothing else to do” list.

Charlotte


Missouri's Daylily Season

Tiny grasshopper visits one of my orange daylilies. (Photo by Charlotte Ekker Wiggins)

Tiny grasshopper visits one of my orange daylilies. (Photo by Charlotte Ekker Wiggins)

Missouri’s Daylily Season

It’s still amazing to me when I think about our European ancestors. They packed up only a few belongings to travel the Atlantic to make a new home in North America, carrying with them dandelions and Hemerocallis fulva, what we today call Missouri’s Orange daylilies. Actually some in Missouri call these “ditch lilies” because that’s where they can sometimes be found but in general, they are often considered a nuisance or a “weed.”

Not to our European ancestors. They depended on these daylilies for food and on the dandelions for medicine.

As someone who “discovered” these lovely perennials many decades ago, I find them handy in my Missouri hillside garden for a number of reasons.

First, since I garden on an acre where my neighbors told me “nothing would grow,” I use Missouri’s orange daylilies to help me hold in soil. Missouri’s orange daylilies will grow in almost any condition and soil including gravel and clay. They also nicely will help hold in soil, not so easy when one is gardening on land that has an incline.

One of my limestone hillsides covered in Missouri’s orange daylilies.(Photo by Charlotte Ekker Wiggins)

One of my limestone hillsides covered in Missouri’s orange daylilies.(Photo by Charlotte Ekker Wiggins)

In addition to holding in soil, I use Missouri’s orange daylilies to help mark paths since once the blooming period is over, the greenery helps to cover plants that may die back behind them.

Missouri Orange Daylilies on the way to one of my apiaries. (Photo by Charlotte Ekker Wiggins)

Missouri Orange Daylilies on the way to one of my apiaries. (Photo by Charlotte Ekker Wiggins)

Missouri’s orange daylilies are quite versatile, they will grow well in both sun and dapled shade, like this flower bed with my “cats” in the garden.

My garden “cats” sitting in the middle of Missouri orange daylilies. (Photo by Charlotte Ekker Wiggins)

My garden “cats” sitting in the middle of Missouri orange daylilies. (Photo by Charlotte Ekker Wiggins)

Last but not least, Missouri’s orange daylilies are entirely edible. These Missouri native wildflowers are still grown in European kitchen gardens precisely because the plants are edible. The newly-growin stalks are called “poor man’s asparagus” and the flower buds are delicious in salads.

Since I don’t use chemicals in my Missouri hillside garden, I can pick orange daylilies with confidence but I would not try that on a batch of orange daylilies from the side of a road - or a ditch.

Orange daylilies line one of my paths down the hill. (Photo by Charlotte Ekker Wiggins)

Orange daylilies line one of my paths down the hill. (Photo by Charlotte Ekker Wiggins)

Missouri’s orange daylilies may not be the best cut flowers because the flowers only last a day. If you pick some with buds, the buds will open on the second and third days so you can mix them with other fill in flowers for a bouquet.

I frankly enjoy a cut bouquet of just orange daylilies. I pick off the dead flowers every day and watch the buds unfold.

If you look closely, these often overlooked Missouri wildflowers are actually quite lovely.

A close up of Missouri’s orange daylilies. (Photo by Charlotte Ekker Wiggins)

A close up of Missouri’s orange daylilies. (Photo by Charlotte Ekker Wiggins)

Add a few to your garden and see for yourself!

Charlotte

More Growing Tomato Woes

Blossom end rot can be fixed with even watering. (Photo by Charlotte Ekker Wiggins)

Blossom end rot can be fixed with even watering. (Photo by Charlotte Ekker Wiggins)

More Growing Tomato Woes

Summer is a time when local farms sometimes share their extra produce, assuming conditions have been good for growing. This year, record hot and humid conditions have made tomato growing challenging.

Proper Fertilizer

Tomato plants taller than their growers usually means tomato plants may be getting too much nitrogen fertilizer. Nitrogen encourages the green growth that spurs plants to unnatural heights.A balanced plant meal requires nitrogen for growth, phosphorous for moving energy through the plant, and potassium for stress tolerance.  Our Ozark soil can provide nitrogen but the other two fertilizer elements usually need a boost. 

Soil testing through a local University of Missouri Extension office will help determine what is missing. A test costs $15 and includes not only what is in your soil but what you need to do to amend it.

Even Watering

The other delicate part of raising tomatoes is watering. Blossom end rot, where the bottom of the tomato starts to decompose, is usually caused by calcium deficiency, Calcium is usually present in soil but without water, tomato plants can’t take it up from the soil.

The best way to prevent blossom end rot is to regularly and evenly water tomatoes,. This means watering them every day at the same time with the same amount of water.

Tomato roots in open ground can grow to 5 feet deep. Tomatoes even grown in containers prefer to be evenly moist so with temperatures, and humidity, either at record levels or varying widely, requires careful monitoring.

I have sunken plastic bottles with holes in pots keeping my tomatoes company so that I can better keep the roots moist.

I also use a paint stick propped into the side and moved over an inch to check how wet the soil is before I water.

Temperatures Over 86F

Another challenge to raising tomatoes is temperatures over 86F. Tomatoes go into survival mode at 86F and higher so the tomatoes will not ripen on the plant. If temperatures remain that hot, pick the tomatoes while still green and allow them ripen in your kitchen.

Remove Suckers'

One last tip, remember to remove suckers or the growth in between branches. That will keep your tomatoes focused on growing the fruit we all enjoy as the taste of summer.

Charlotte

How to Pick Blackberries

There are so many fruits available in summer from cherries to watermelon. One of my favorites are so tempting, little dark berries at the tips of arching shrubs available in north America mid-summer. Little does one realize how thorny these plants can be!

Blackberries grow in almost all continents, a plant so flexible it has adopted to a wide range of climates. Regardless of where you are planning to pick them, make sure you are:

  • Wearing a thick pair of pants to catch thorns before they hit skin.
  • Boots if you're walking into a blackberry patch after a rain. Some plants grow shoots that can't be seen above soil but you sure can feel them when you step on them.
  • Don't wear a long sleeve shirt, it will just get caught in thorns.
  • Gloves are optional but if you do wear them, select a pair with good finger dexterity.

When picking, go slowly and focus on berries at the ends, away from thorns. Some berries look ripe but may not be so make sure you have good lighting on the plants.

Worth the effort?

You bet!

Charlotte