"Coral Charm" Peonies

This salmon coral color is eye-catching in all stages of bloom. (Photo by Charlotte Ekker Wiggins)

This salmon coral color is eye-catching in all stages of bloom. (Photo by Charlotte Ekker Wiggins)

“Coral Charm” Peonies

I finally found the name for these fascinating, color-changing peonies, “Coral Charm.”

The peonies were a gift from another garden, typical of most of the plants i have. i usually know what kind of plant it is but rarely the color.

One morning, as i was making my daily garden walk, the bud color startled me. I’m used to pink, white an burgundy peonies, not a peach-colored one.

“Coral Charm” peonies in bud form before they bloom. (Photo by Charlotte Ekker Wiggins)

“Coral Charm” peonies in bud form before they bloom. (Photo by Charlotte Ekker Wiggins)

There was delicious anticipation every morning as I watched this peony open. Once it was fully open, it then made a second change. As the petals faded, so did the color.

Coral Charm peonies as their coral color starts to fade to white. (Photo by Charlotte Ekker Wiggins)

Coral Charm peonies as their coral color starts to fade to white. (Photo by Charlotte Ekker Wiggins)

My garden is a mix of natives and traditional garden plants. It was fun to have several plants blooming this spring for the first time, then even more fun researching to identify them.

If you’re wanting “Coral Charm” peonies in your garden, now you can shop for them by name.

Charlotte

Clam Shell Guards

My first Bing cherries getting clam shell guards to protect them from birds. (Photo by Charlotte Ekker Wiggins)

My first Bing cherries getting clam shell guards to protect them from birds. (Photo by Charlotte Ekker Wiggins)

Clam Shell Guards

If you grow fruit, or try to grow fruit, you know it can be challenging to get to the ripe fruit before the birds and squirrels. There are a variety of items on the market to help, from netting to fencing if deer are an issue.

Since I can’t get netting over my trees or get fencing into my limestone hillside, I needed to find another alternative. That’s where clam shells came in.

Small clam shell protecting more growing Bing cherries. (Photo by Charlotte Ekker Wiggins)

Small clam shell protecting more growing Bing cherries. (Photo by Charlotte Ekker Wiggins)

Clam shells are those clear plastic containers that hold grocery store fruit and vegetables. They come in a variety of sizes and can be reused, which i do as guards to my growing fruit.

Reusable clam shells are those with lids that pinch together, right. (Photo by Charlotte Ekker Wiggins)

Reusable clam shells are those with lids that pinch together, right. (Photo by Charlotte Ekker Wiggins)

Since I buy fruit in small clam shells, I can collect a ready supply to use when fruit is growing on my dwarf fruit trees.

This year, I had my first Bing cherries ripening. One was red and consumed so I gently added clam shells around the rest of the growing cherries. I make sure not to damage leaves when I get the clam shell secured.

Clam shells now protecting some of my growing Bartlett pears. (Photo by Charlotte Ekker Wiggins)

Clam shells now protecting some of my growing Bartlett pears. (Photo by Charlotte Ekker Wiggins)

For the past few years, I have used clam shell guards to protect my growing Bartlett pears from resident squirrels. The clam shells worked well so now I am expanding their use on other dwarf fruit trees.

The clear clam shells allow sun to continue to ripen the fruit and protect at least a few fruits for your enjoyment.

Charlotte

June Gardening Chores

Two lovely purple clemantis are climbing my arbor, now to identify them. (Photo by Charlotte Ekker Wiggins)

Two lovely purple clemantis are climbing my arbor, now to identify them. (Photo by Charlotte Ekker Wiggins)

June Gardening Chores

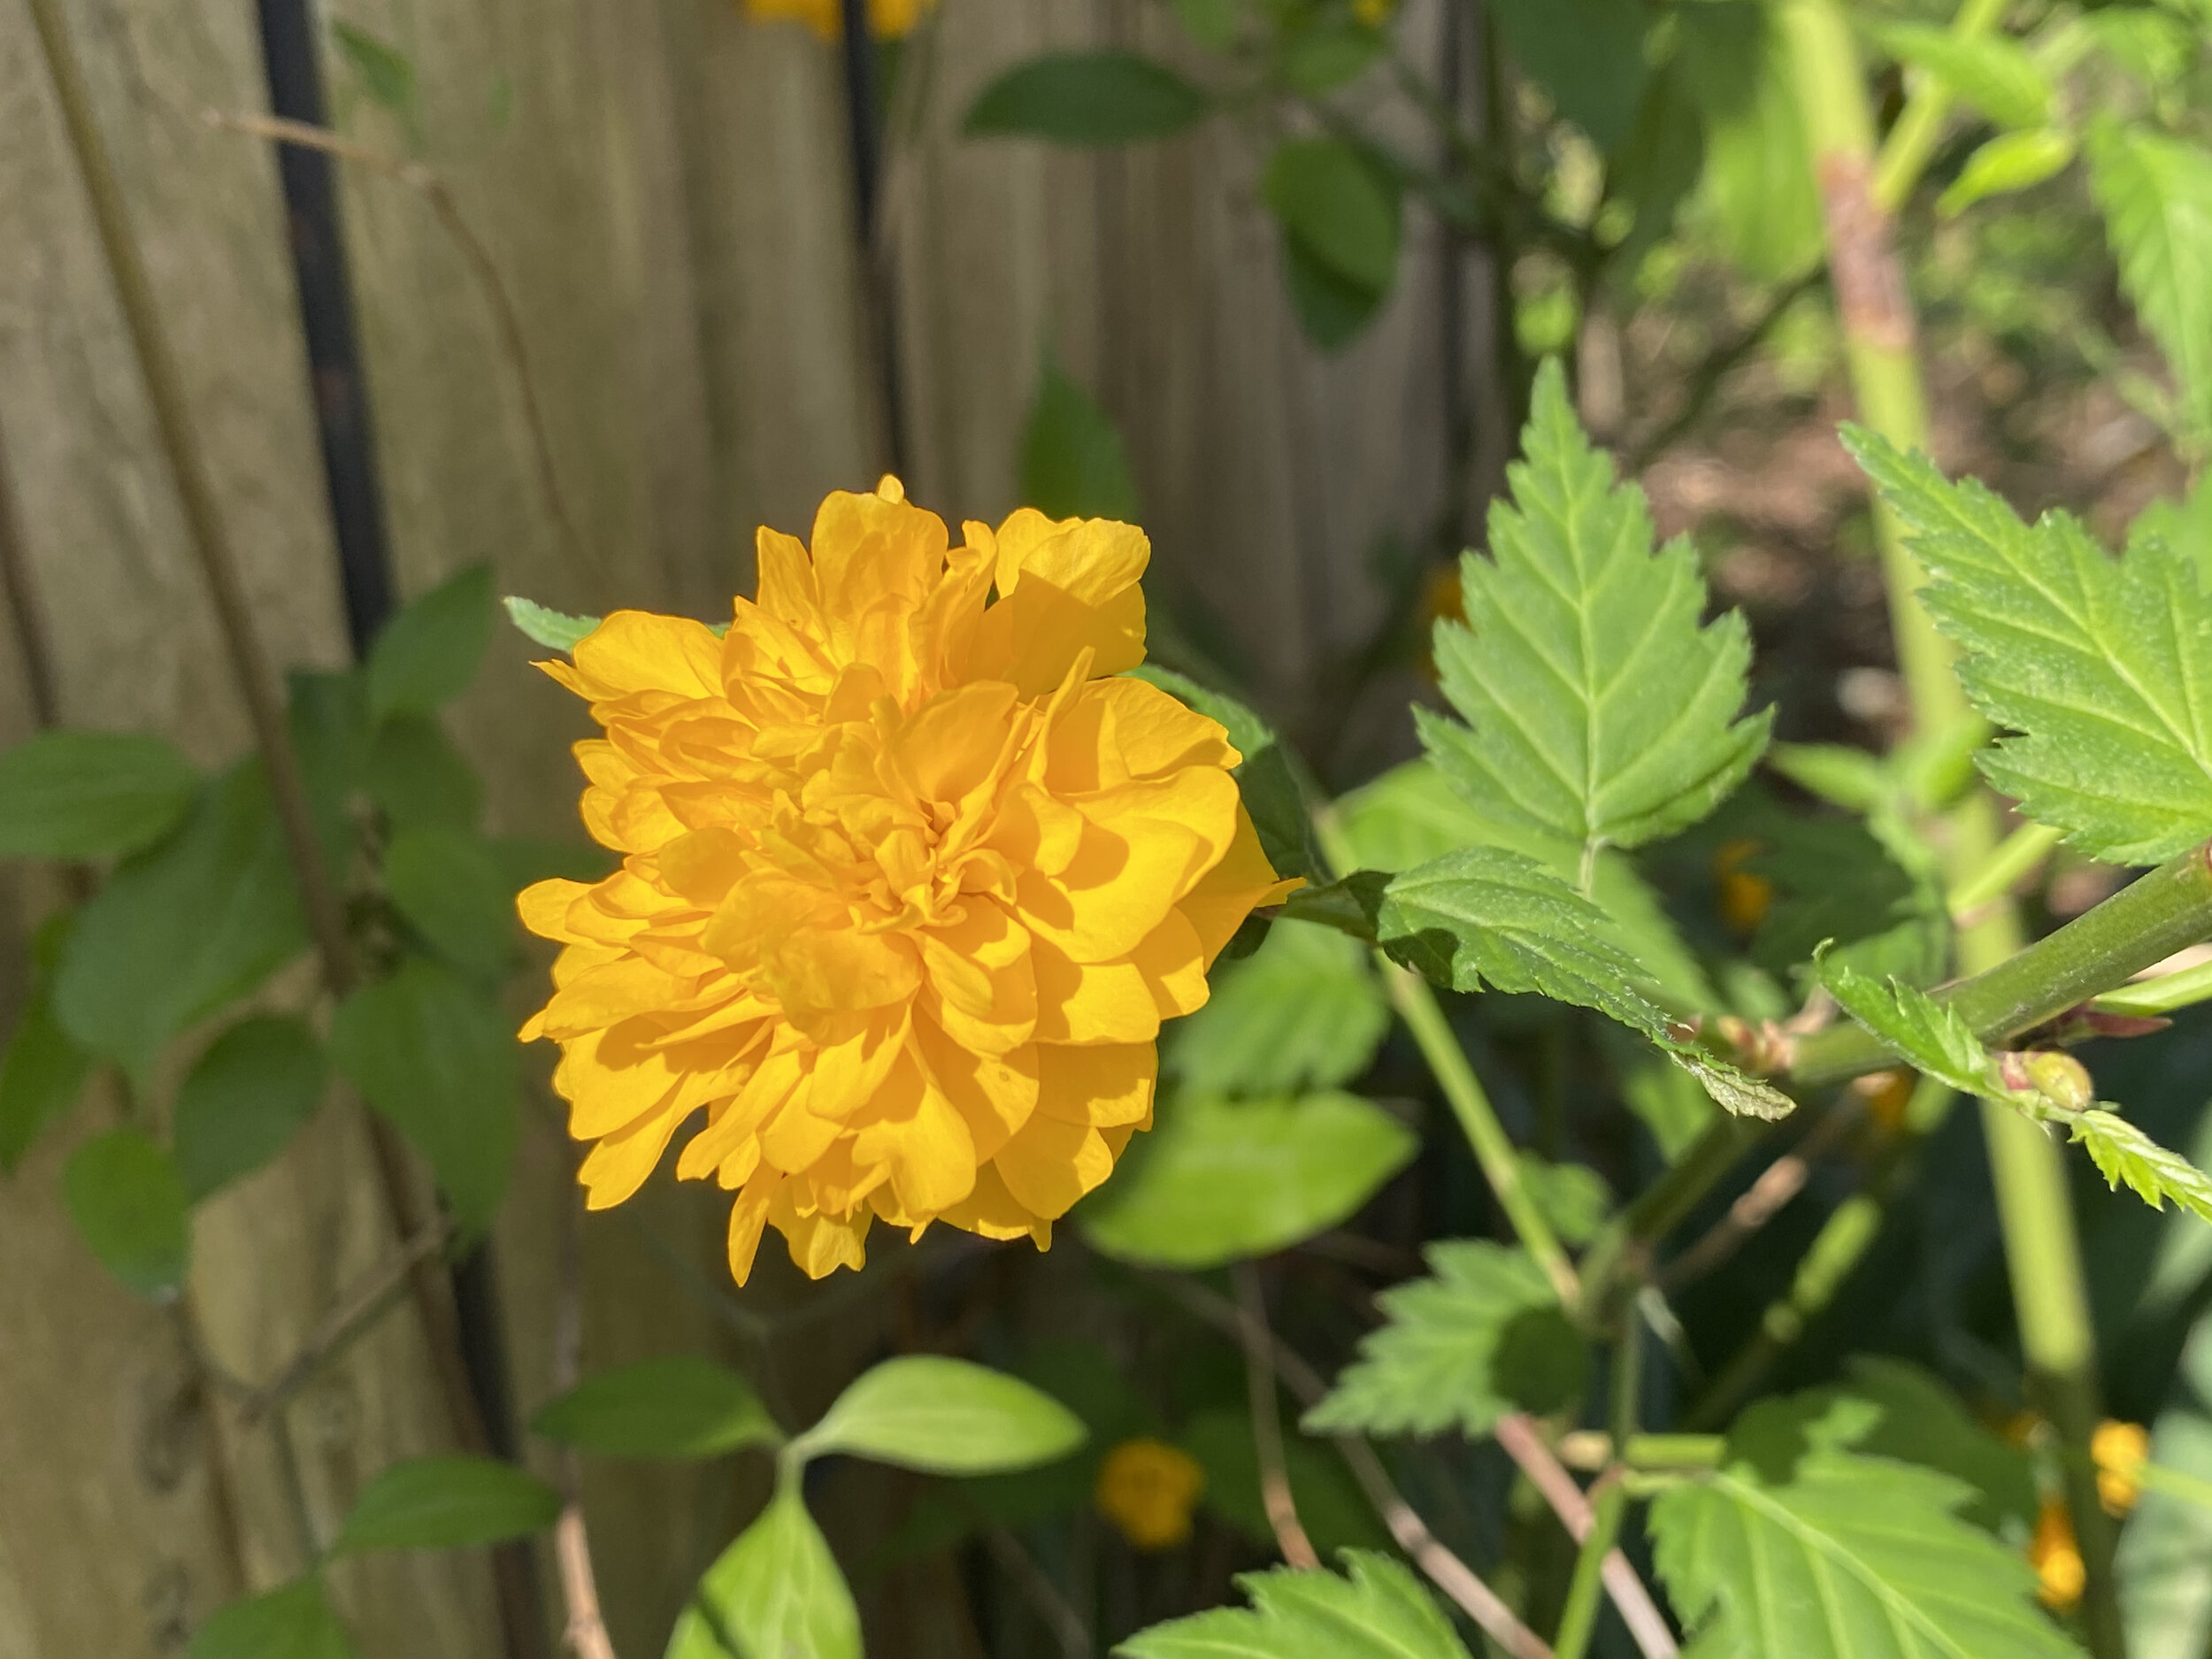
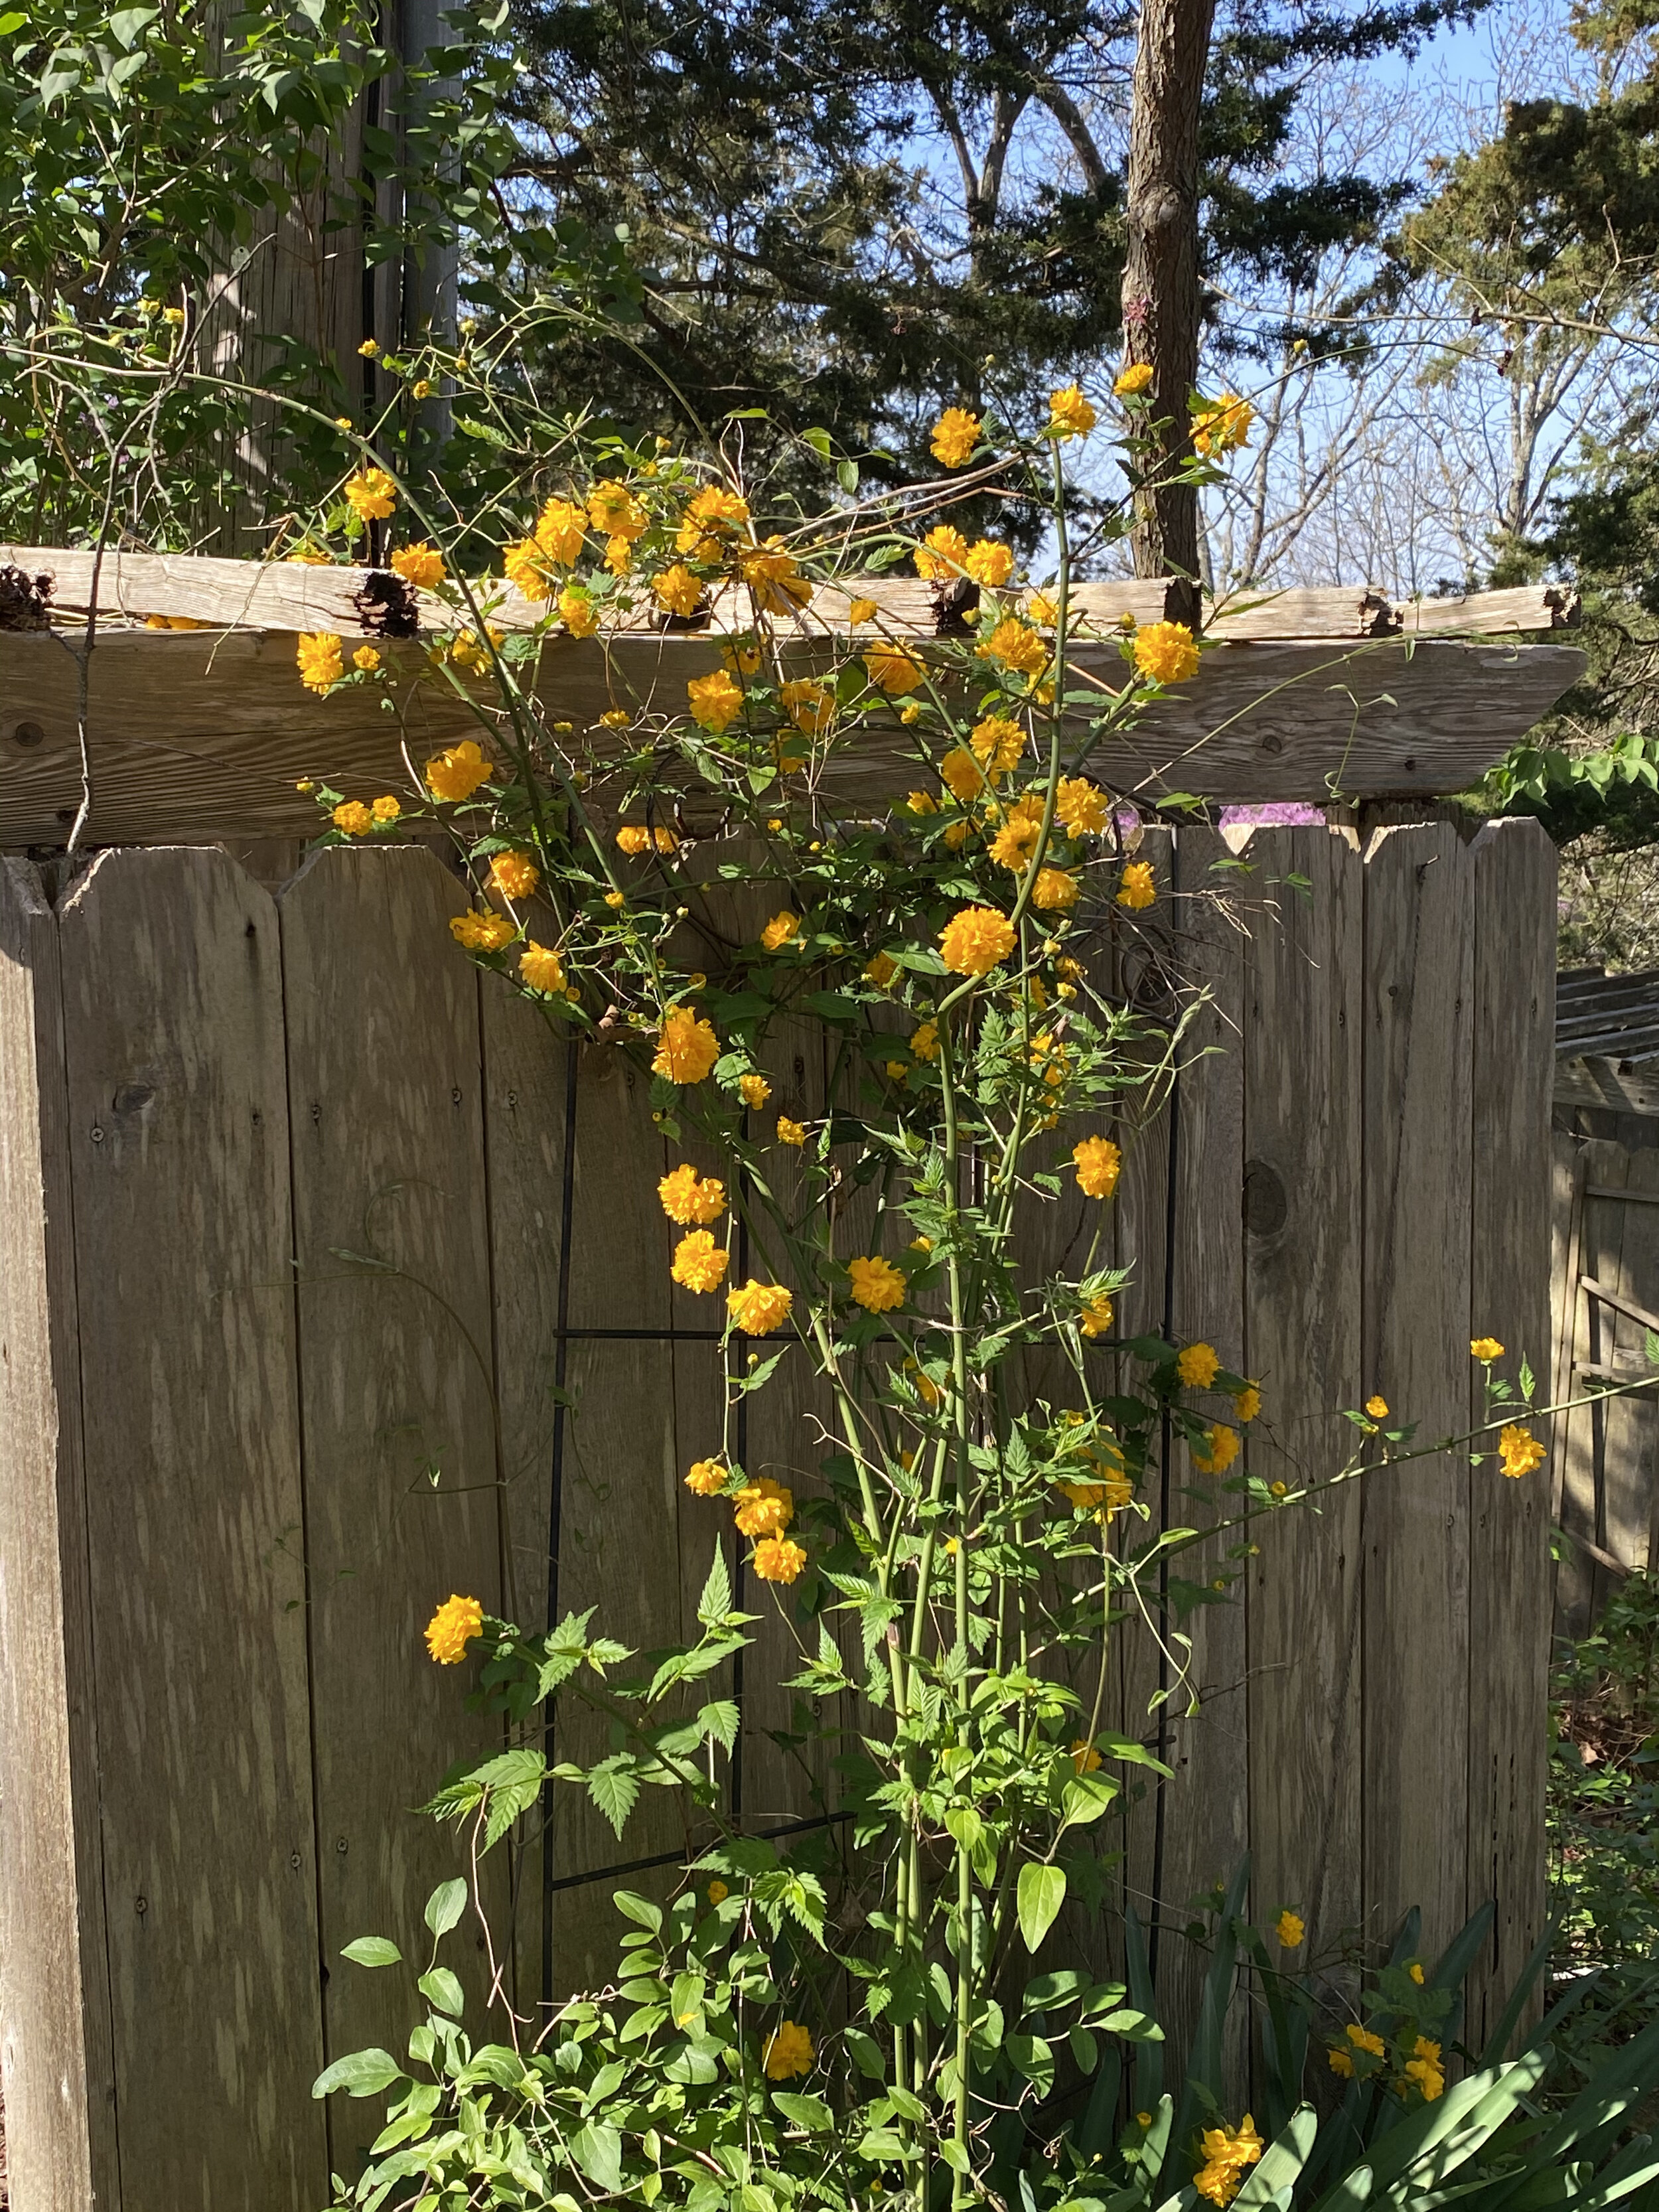
If you don’t know what you see blooming, this is a good time to observe new plant growth so you can identify what it is later with the help of its blooms. These two lovely purple clematis came from a neighbor’s home site several years ago but they haven’t bloomed until this year. Lucky me that they are both purple and look good together!

June is also the last month when plants will benefit from spring rains to settle in so take advantage of the above average rain to plant new plants and move ones you want in other garden areas. I live in USDA Hardiness zone 5, which means we should move to hot conditions in just a few weeks. I say should because Memorial Day weekend was rainy with temperatures in the high 40s, a bit cold for this time of year.

Some other gardening chores for this month include:

1.        Keep asparagus beds weeded and let the green top ferns grow until they go brown; do not cut. Add compost.

2.        When mulching, leave 2-4 inches clear from the plant stem and the mulch ring no larger than 5 inches deep. More than that and you are smothering the plant.

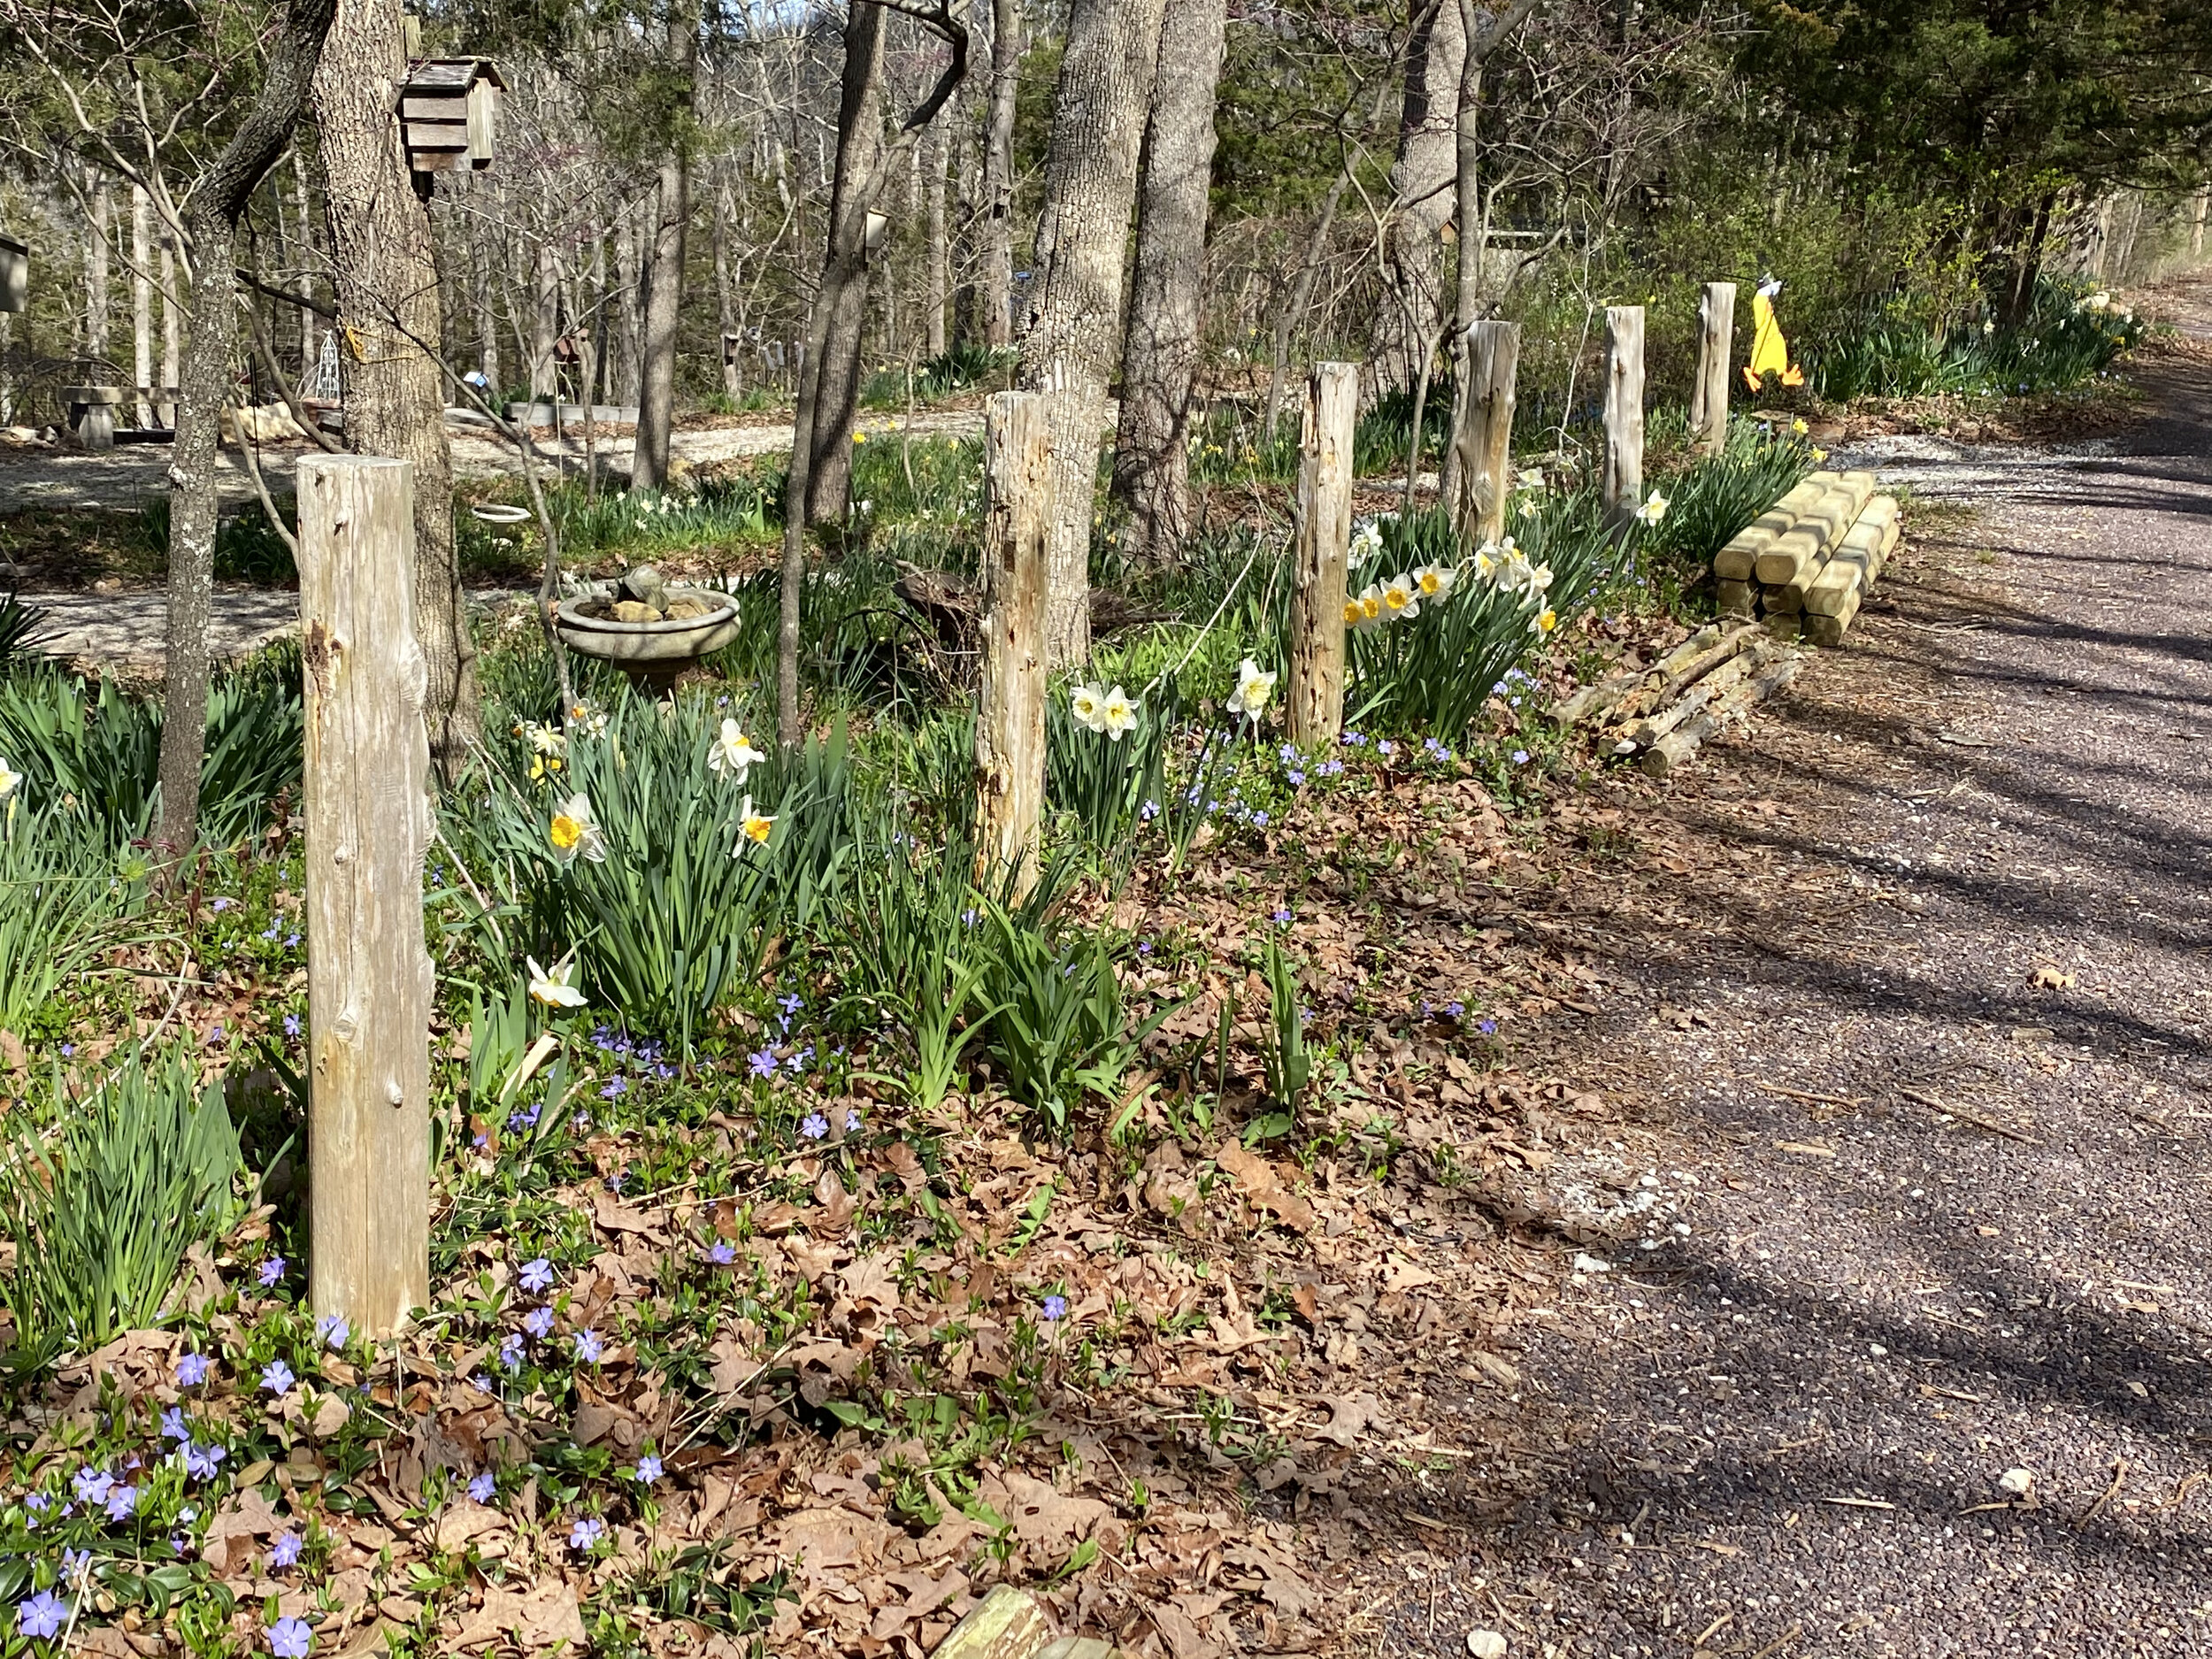
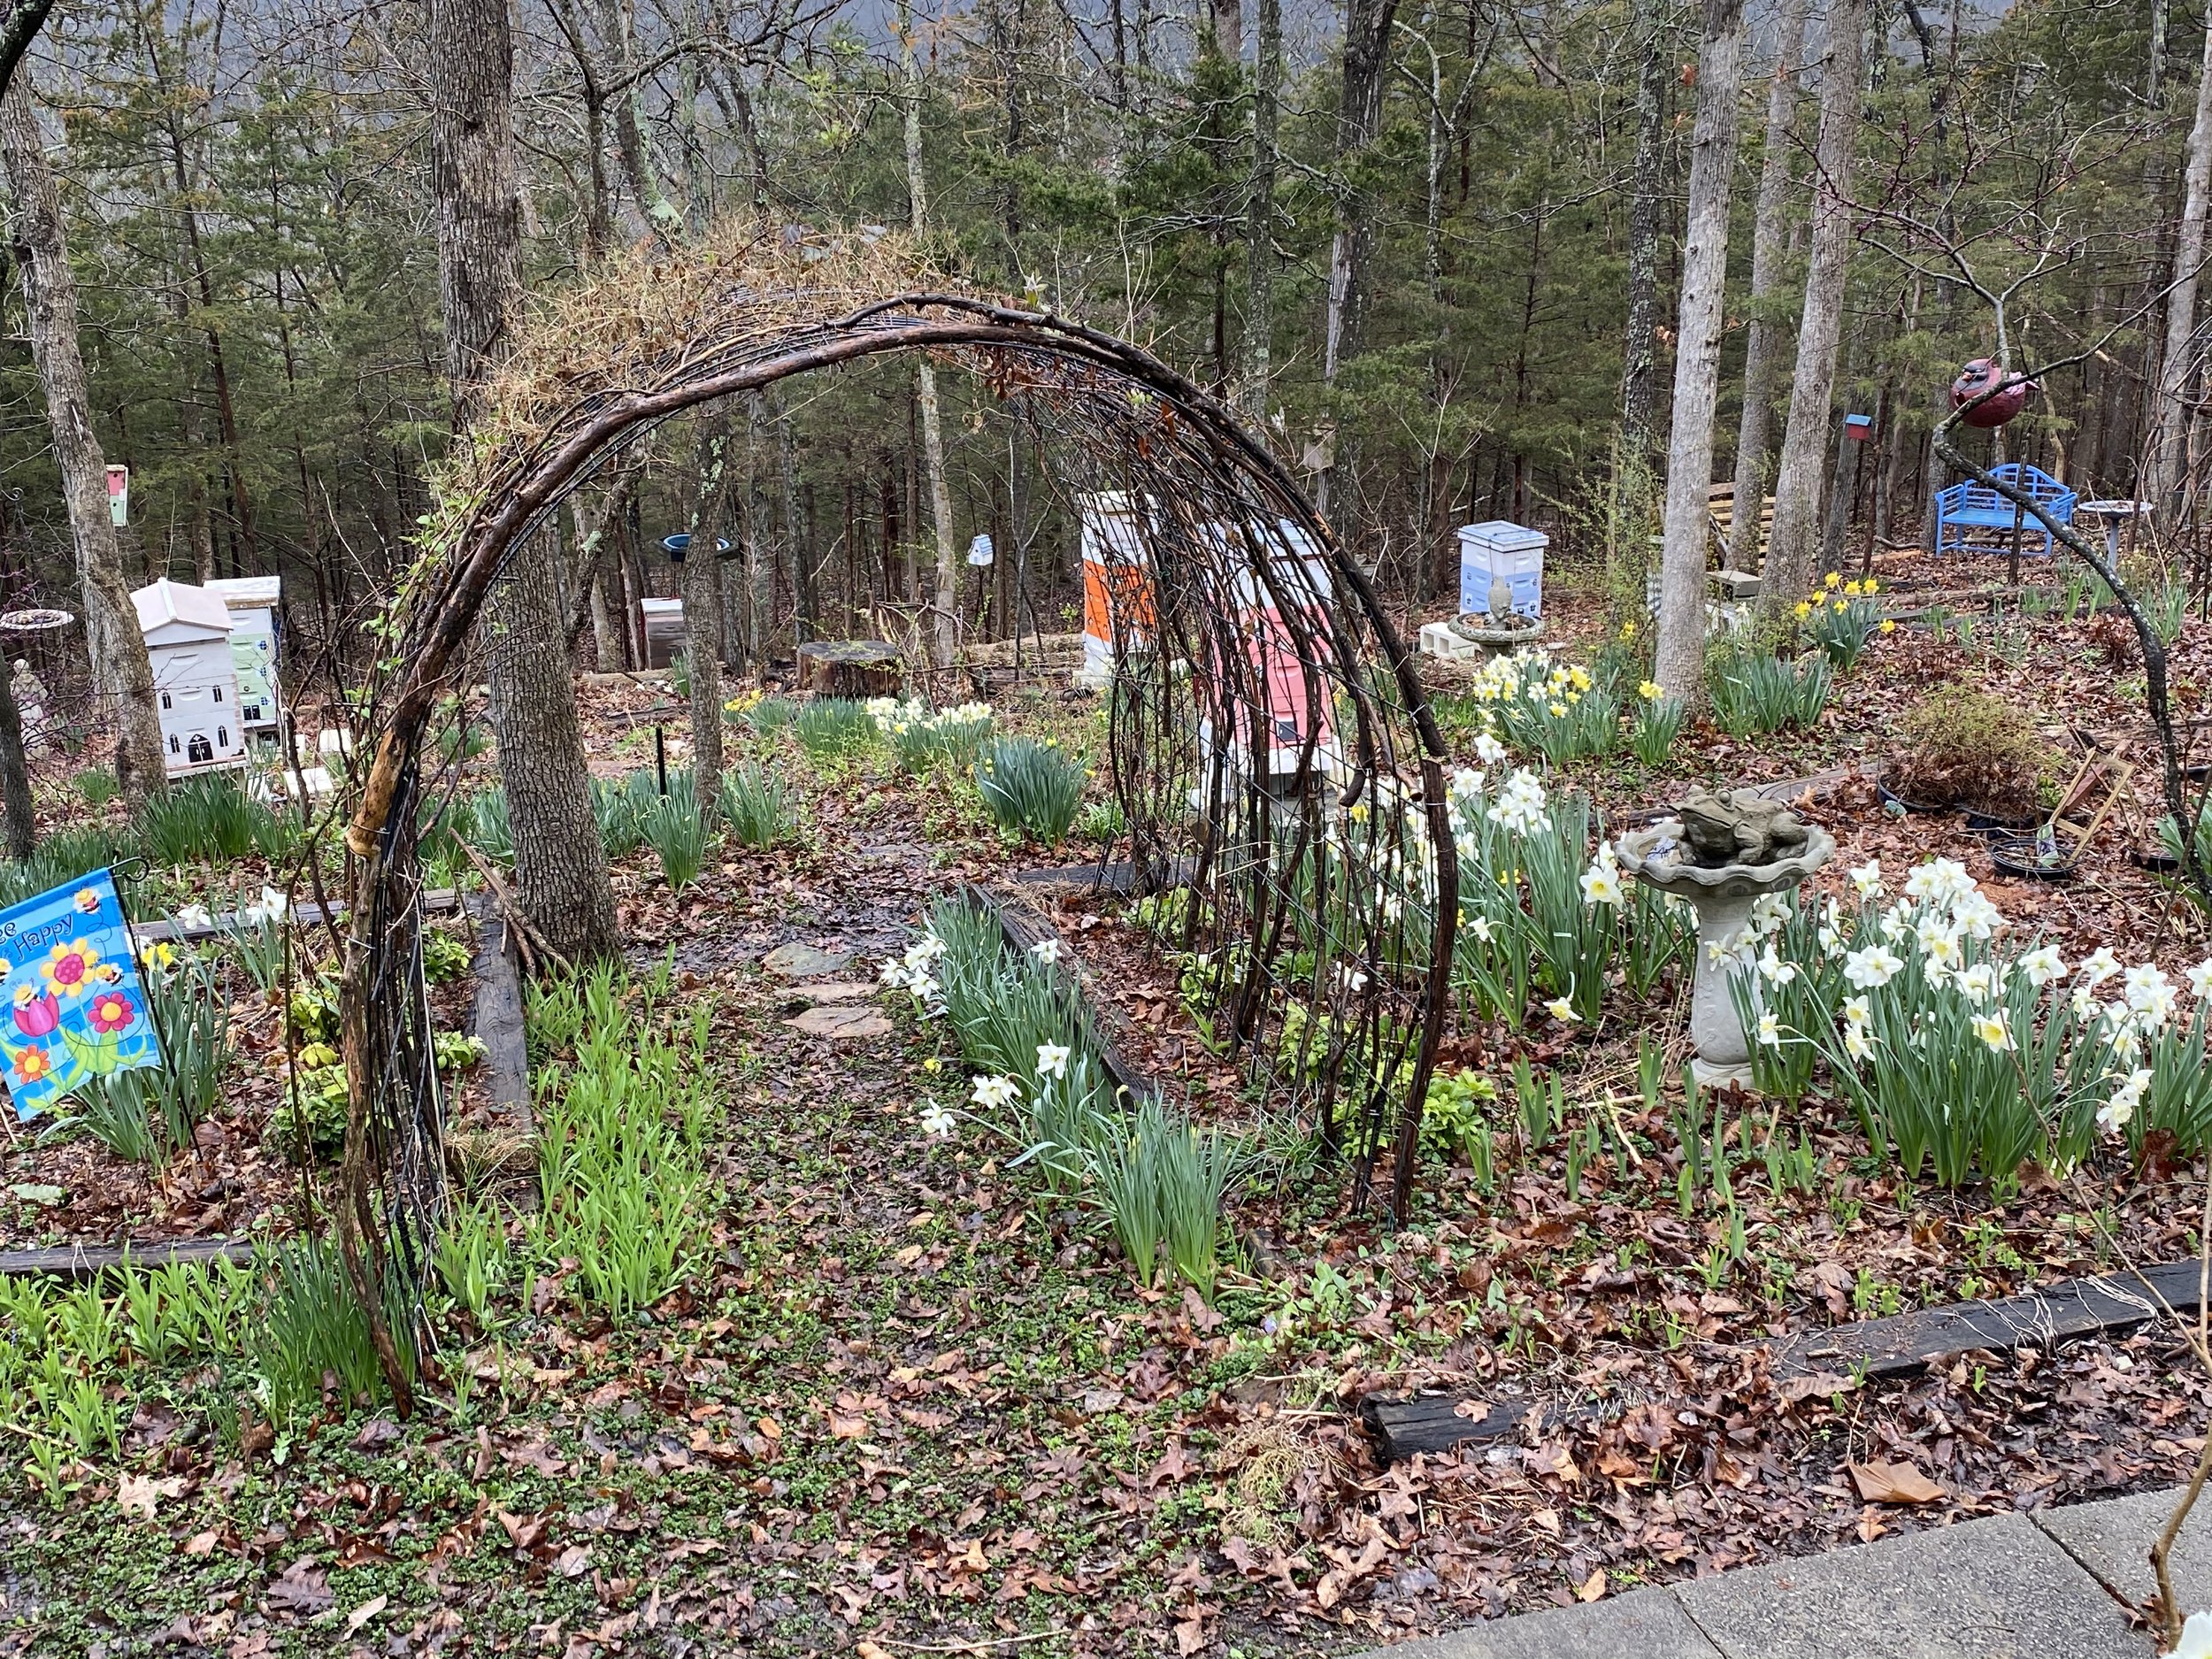
3.        Leave spring bulb greenery to die off naturally. I gently remove only the yellow leaves if they bug me and plant summer annuals and perennials to cover them in the meantime. The key here is planting something on top with shallow roots so they don’t compete with the deeper-planted bulbs.

4.         Japanese beetles show up this month so hand pick and drop in a bucket of water with a few drops of dishwashing soap to drown them. Pick early in the morning when they are sluggish. Also treat your lawn with nematodes and milky spores, both will gradually help eliminate grubs. Add geraniums and tansies to your flower beds, they are natural Japanese beetle repellants.

5.         Trim lilacs immediately after they end flowering so growth the rest of this year will provide blooms next year. Same thing for iris and peonies.

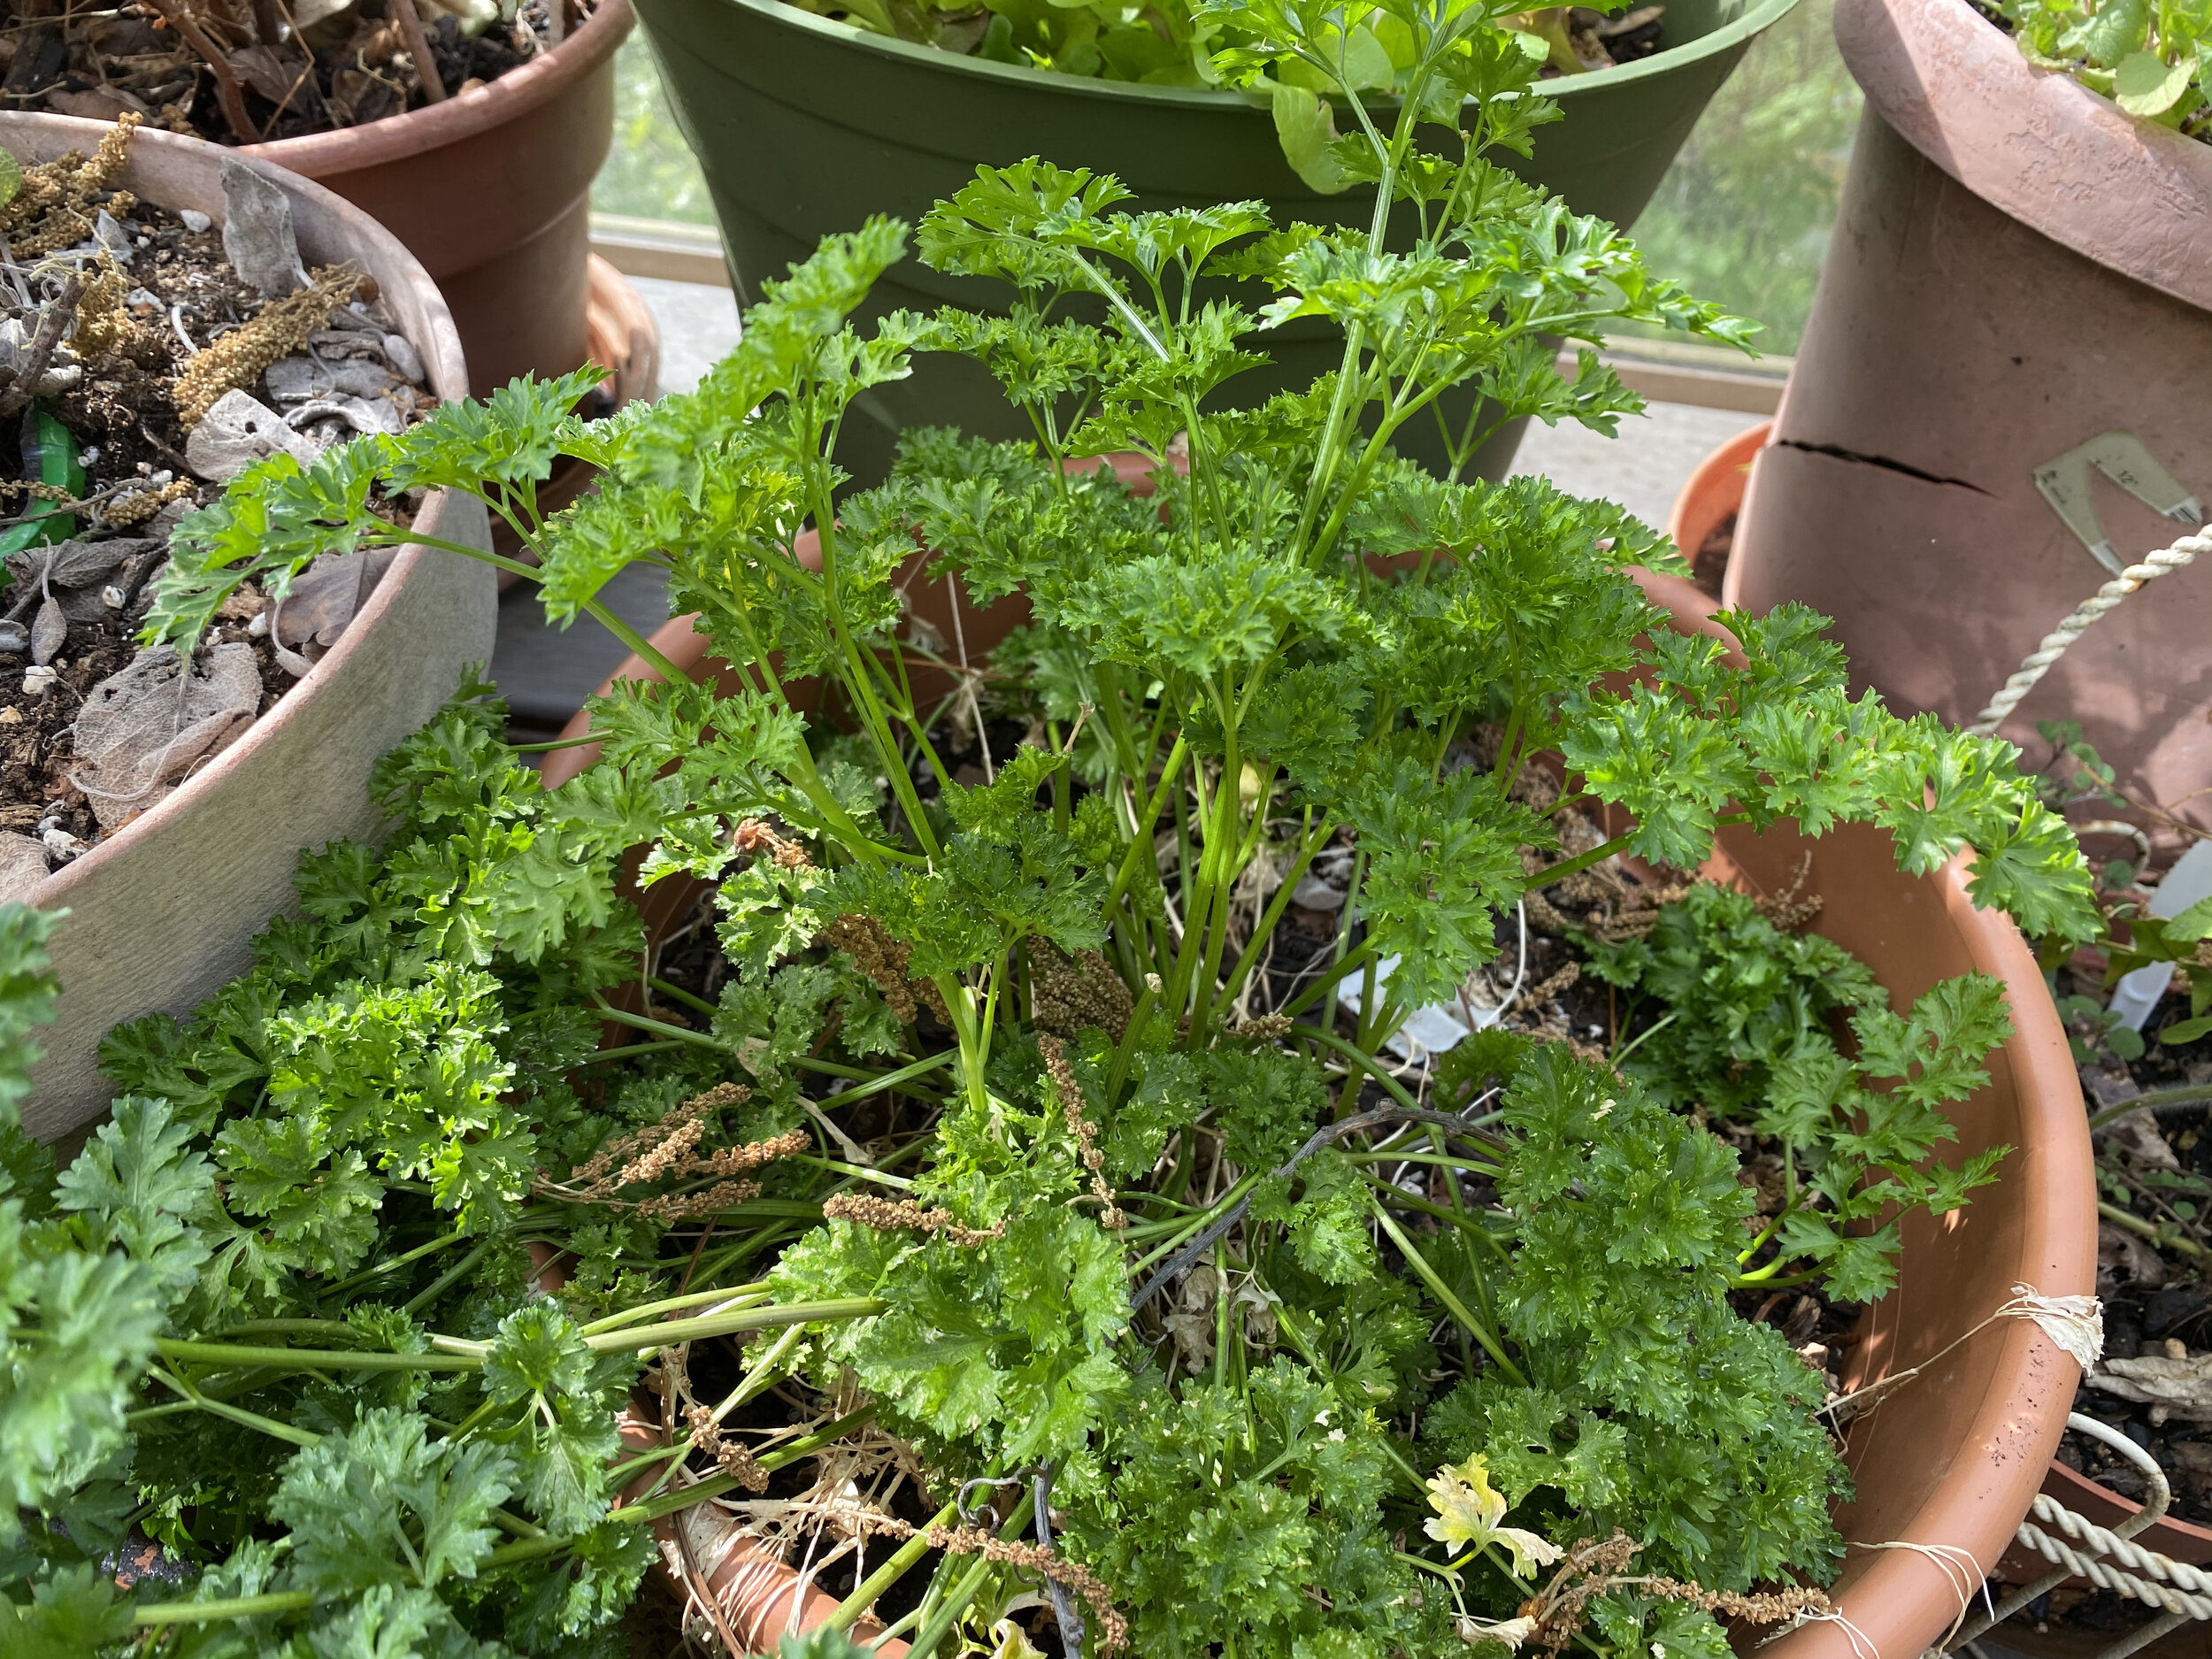
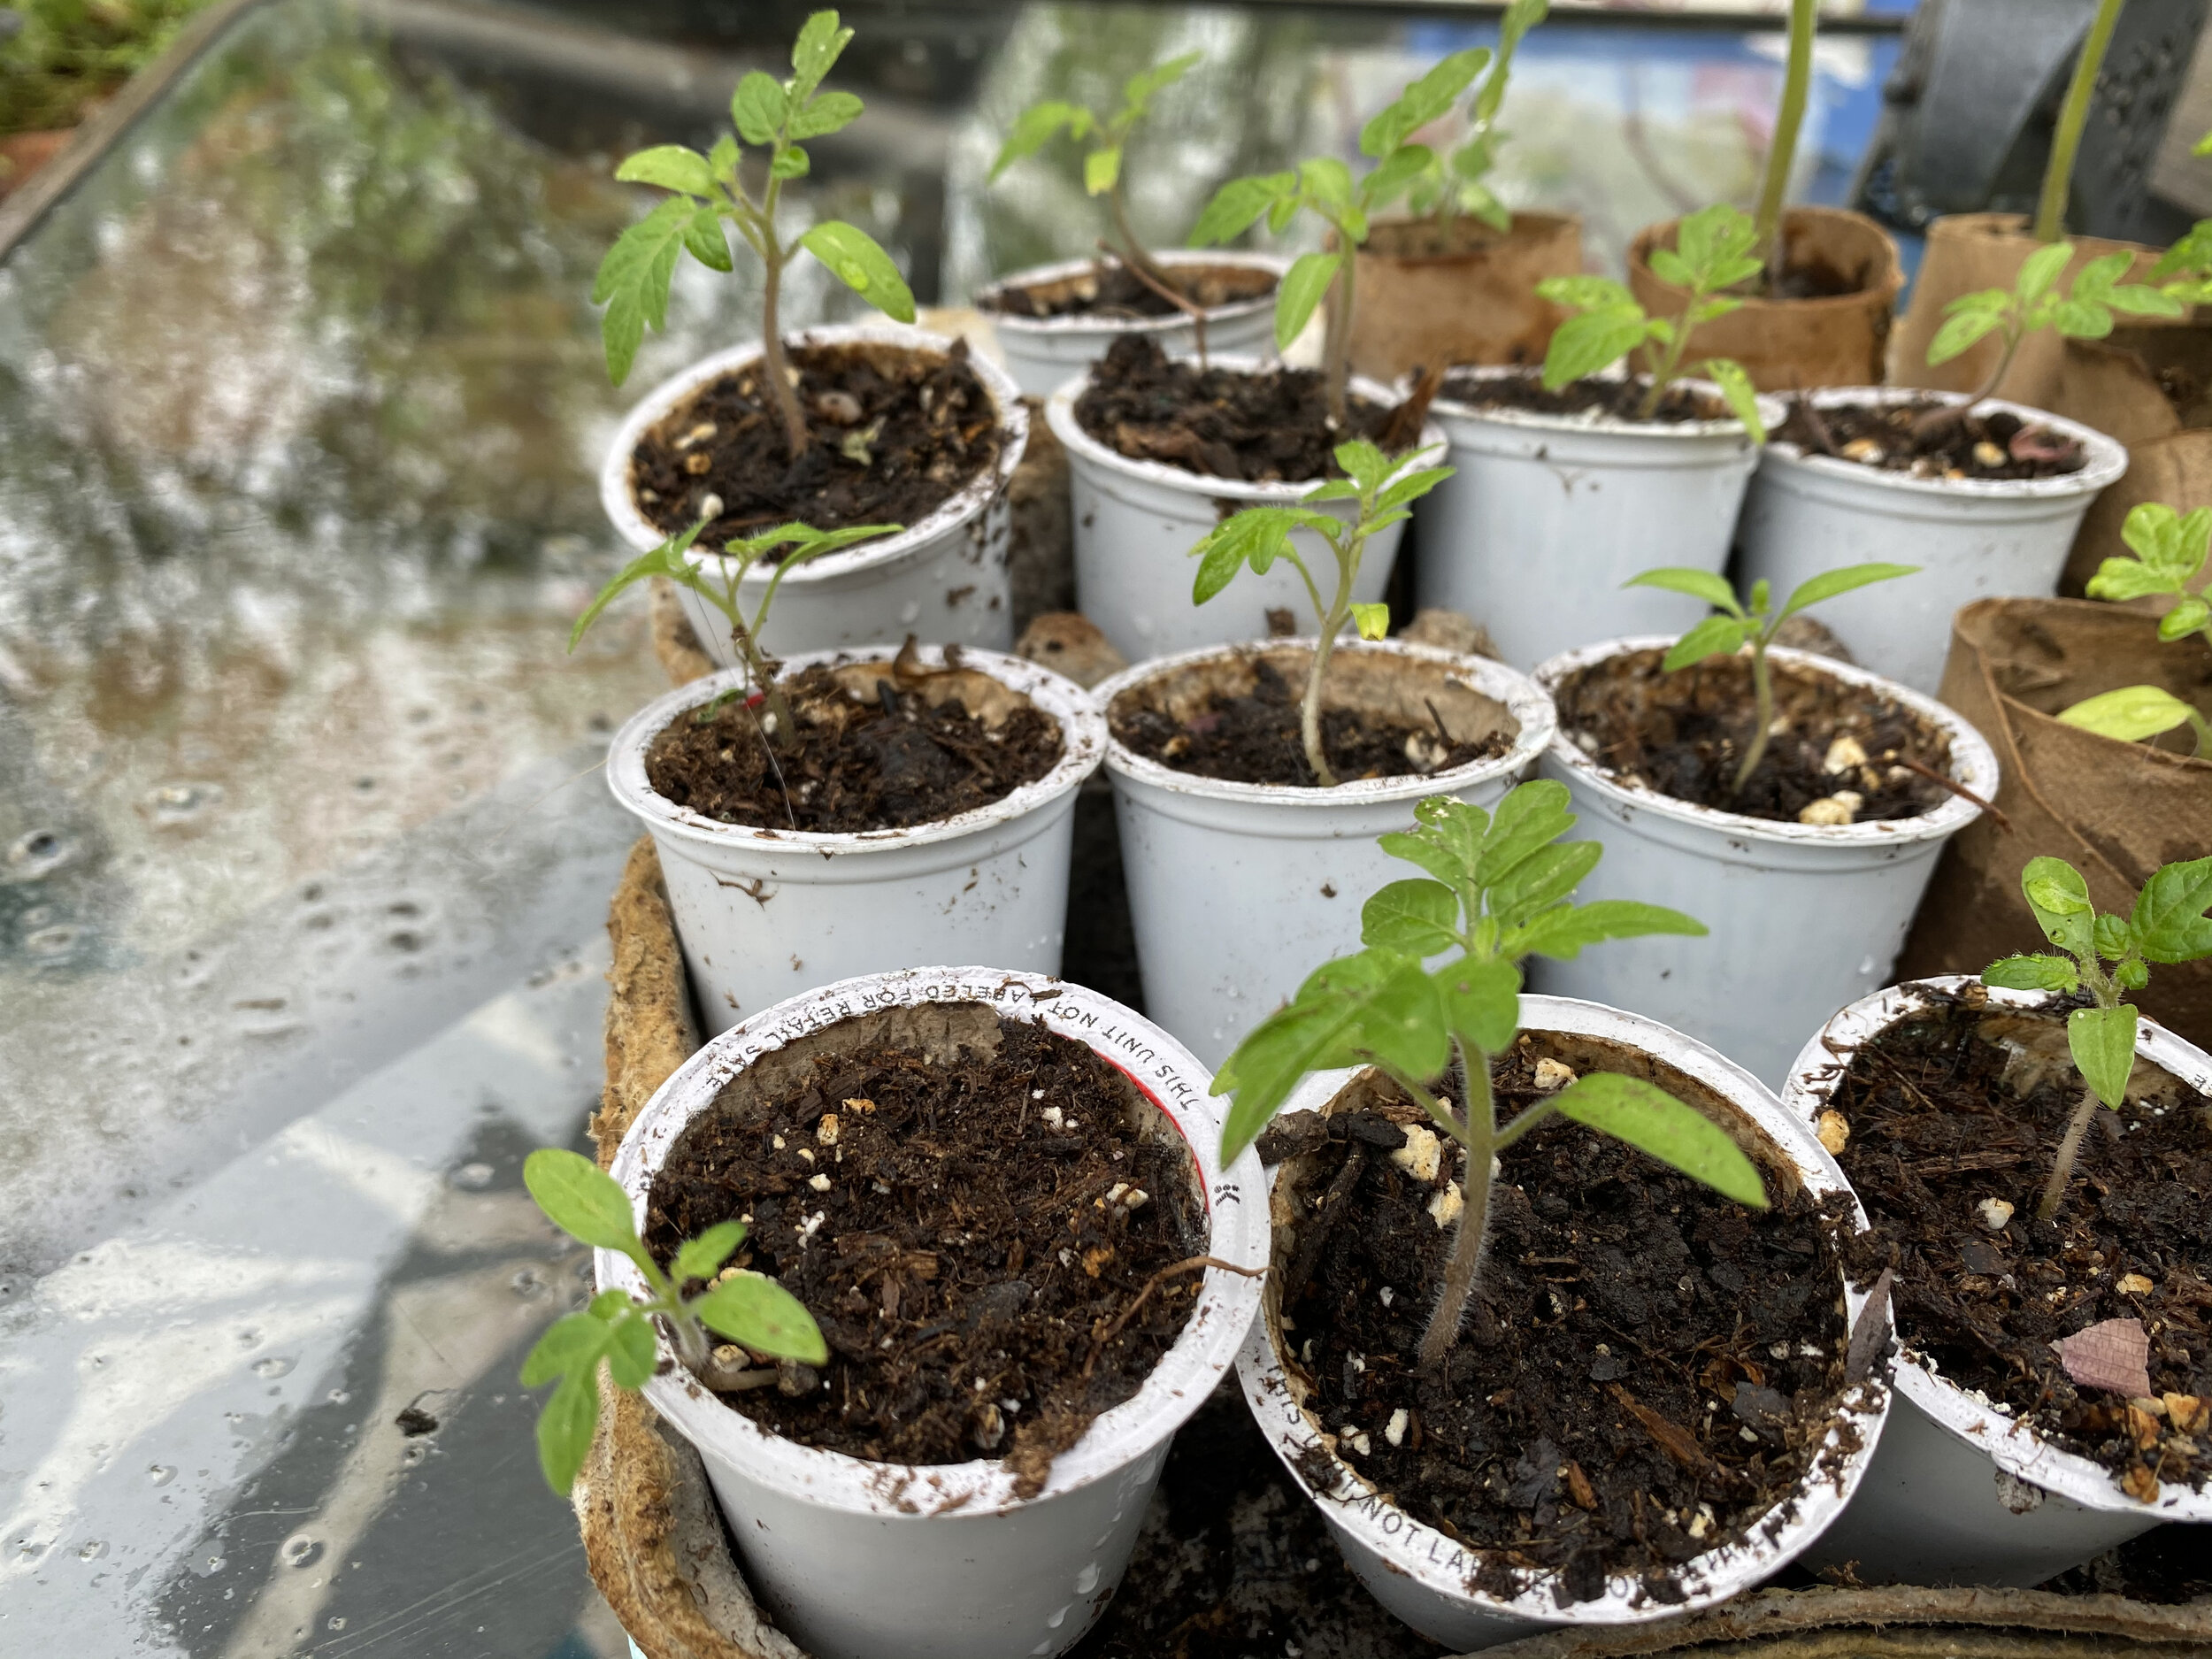
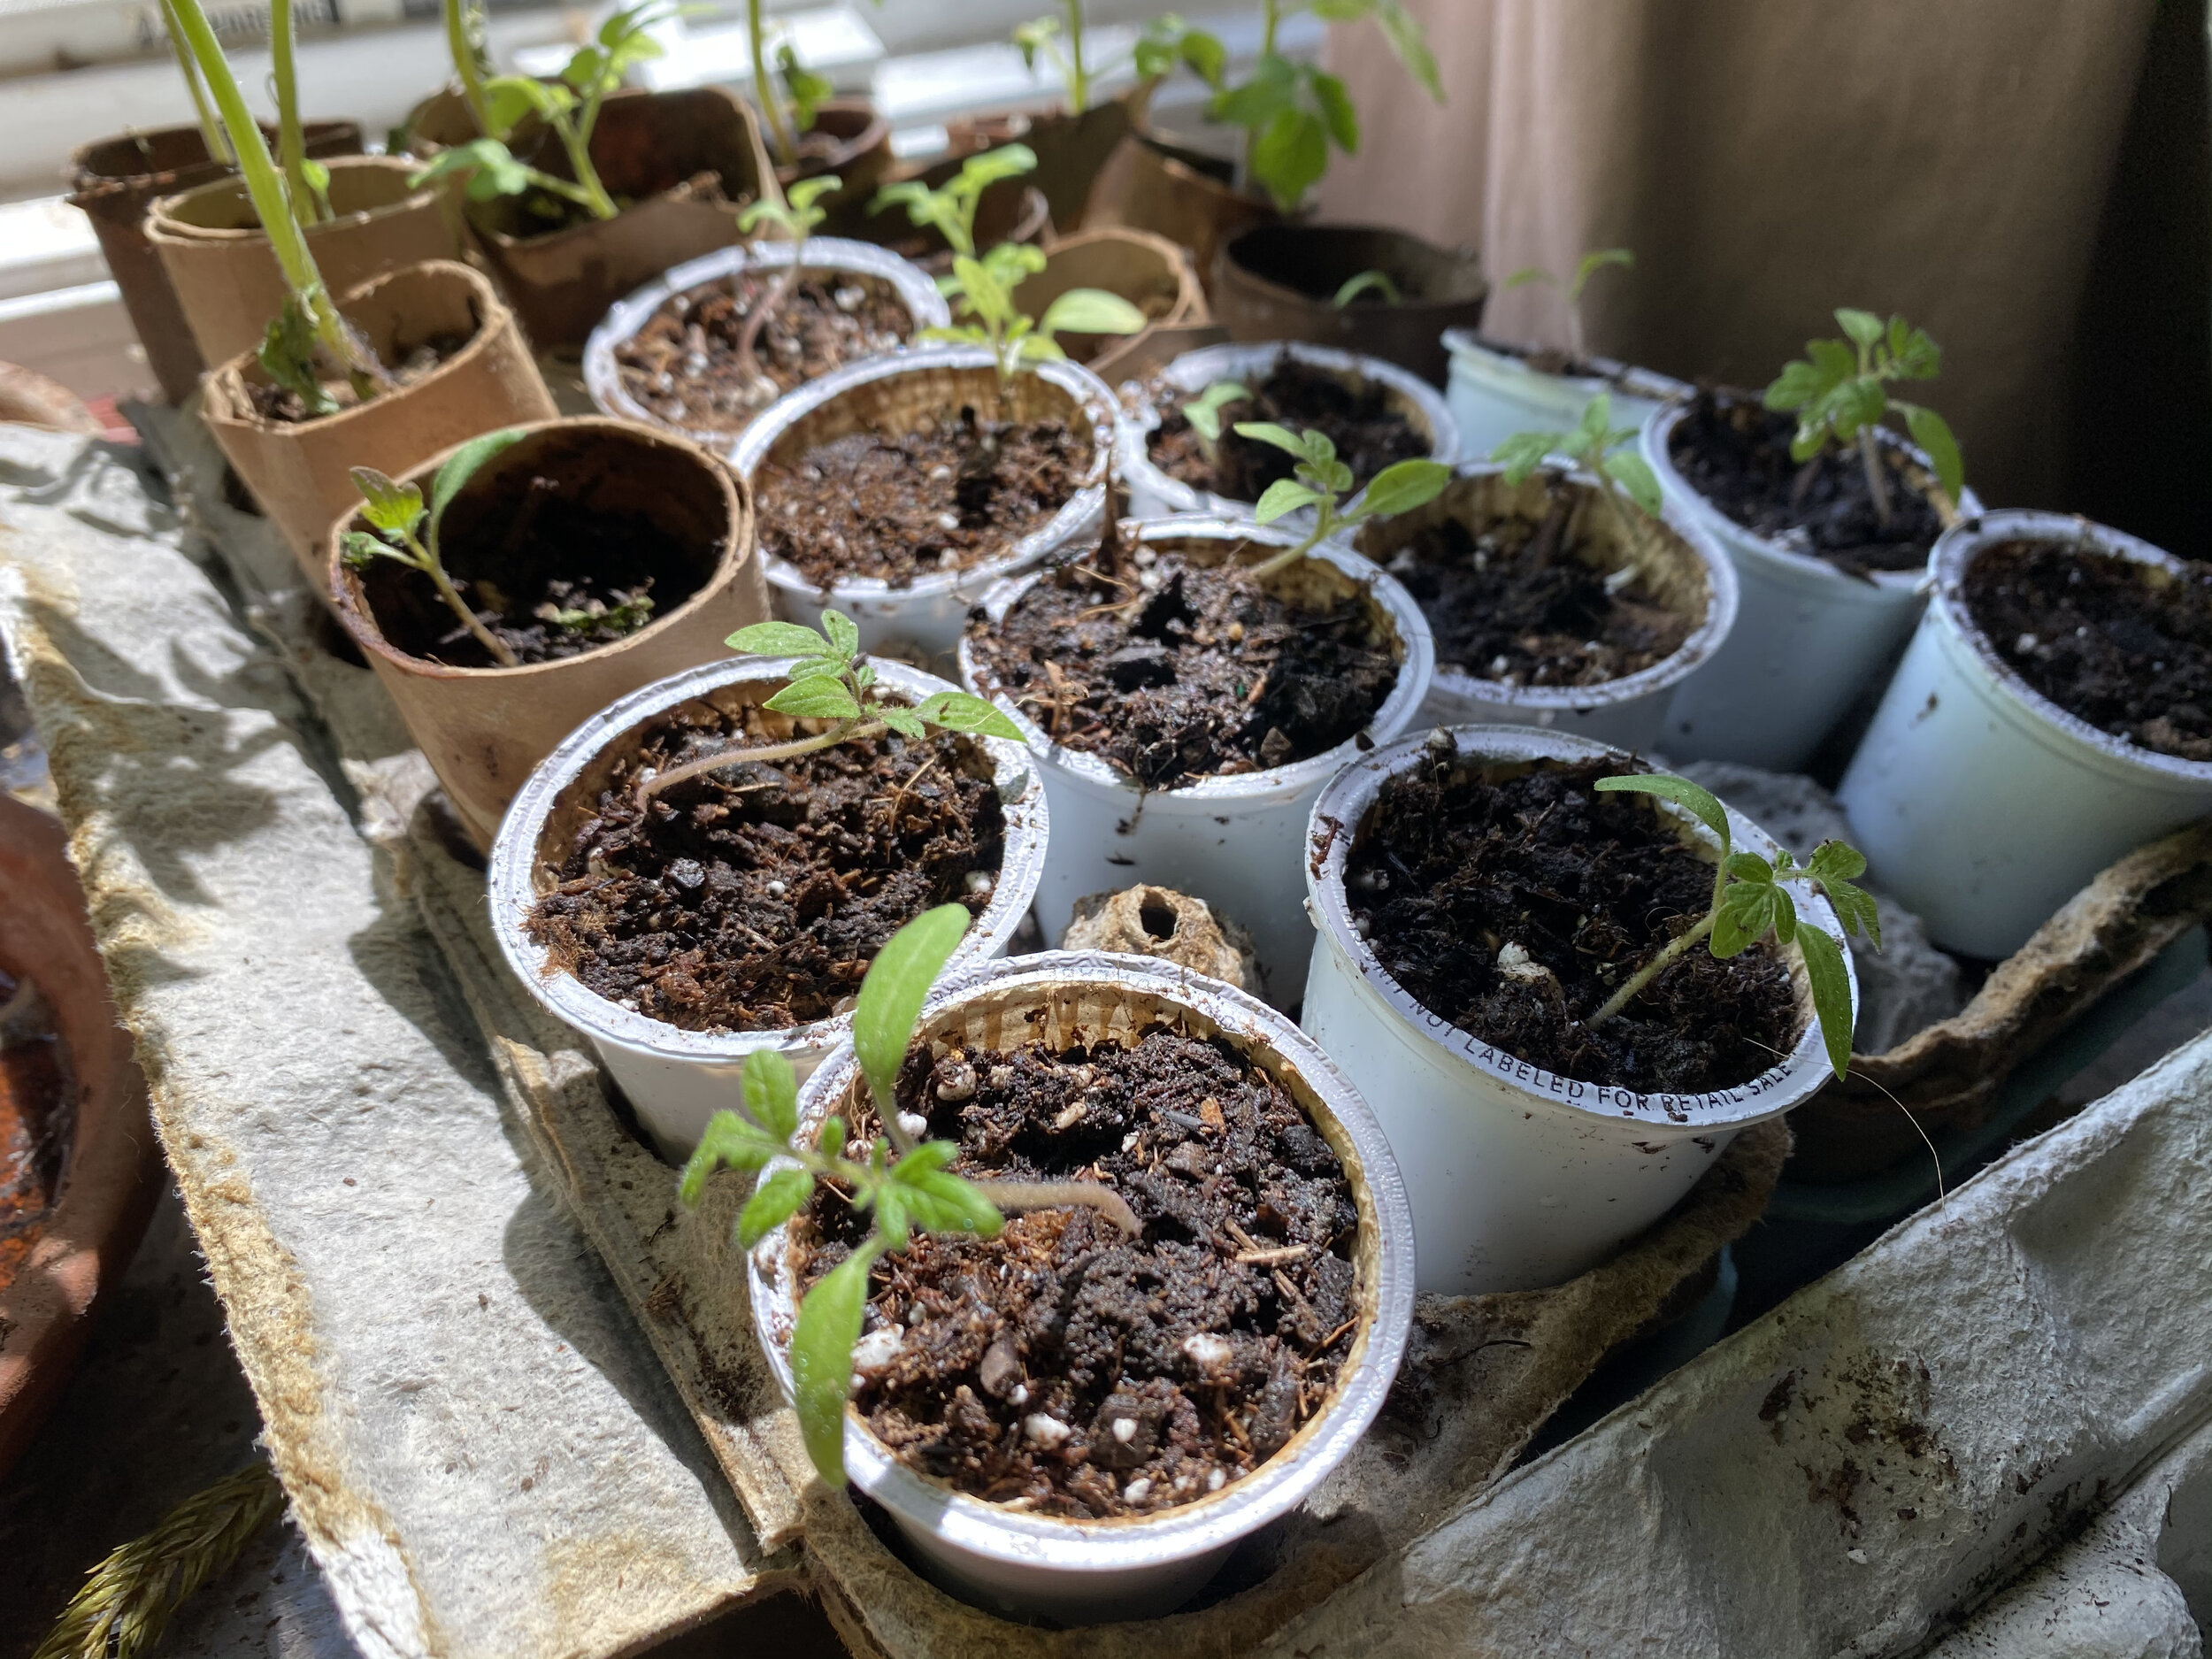
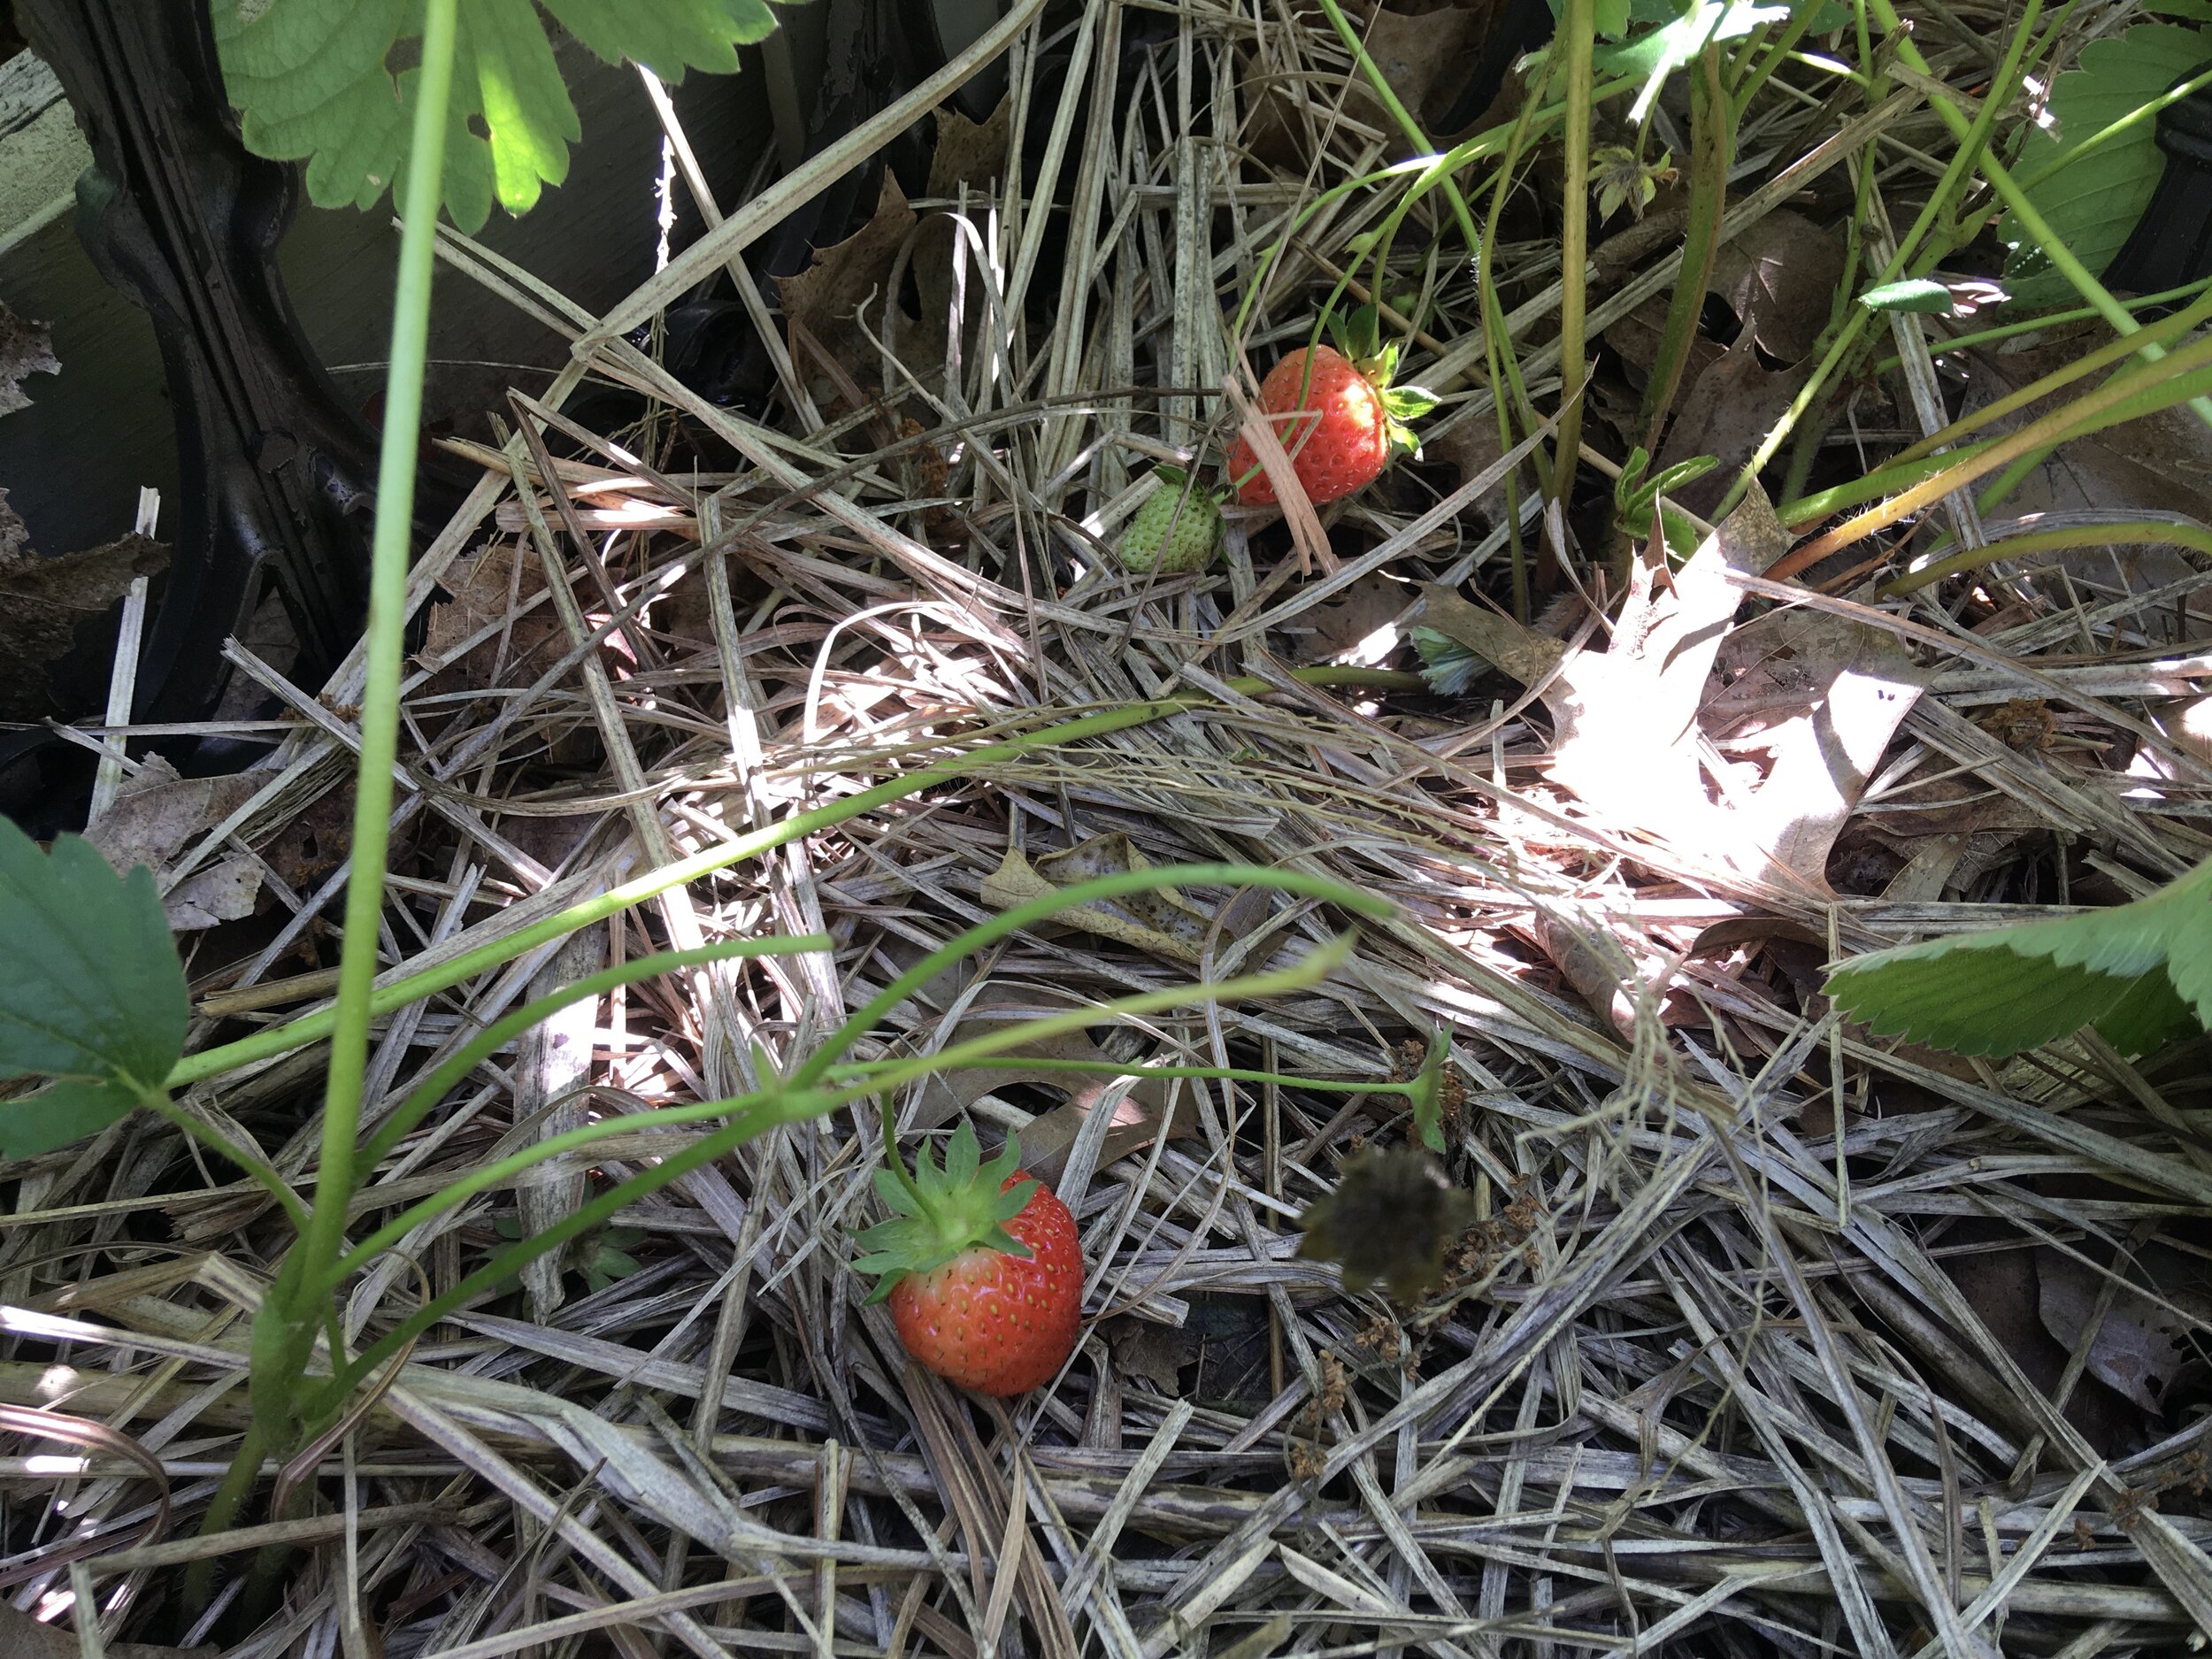
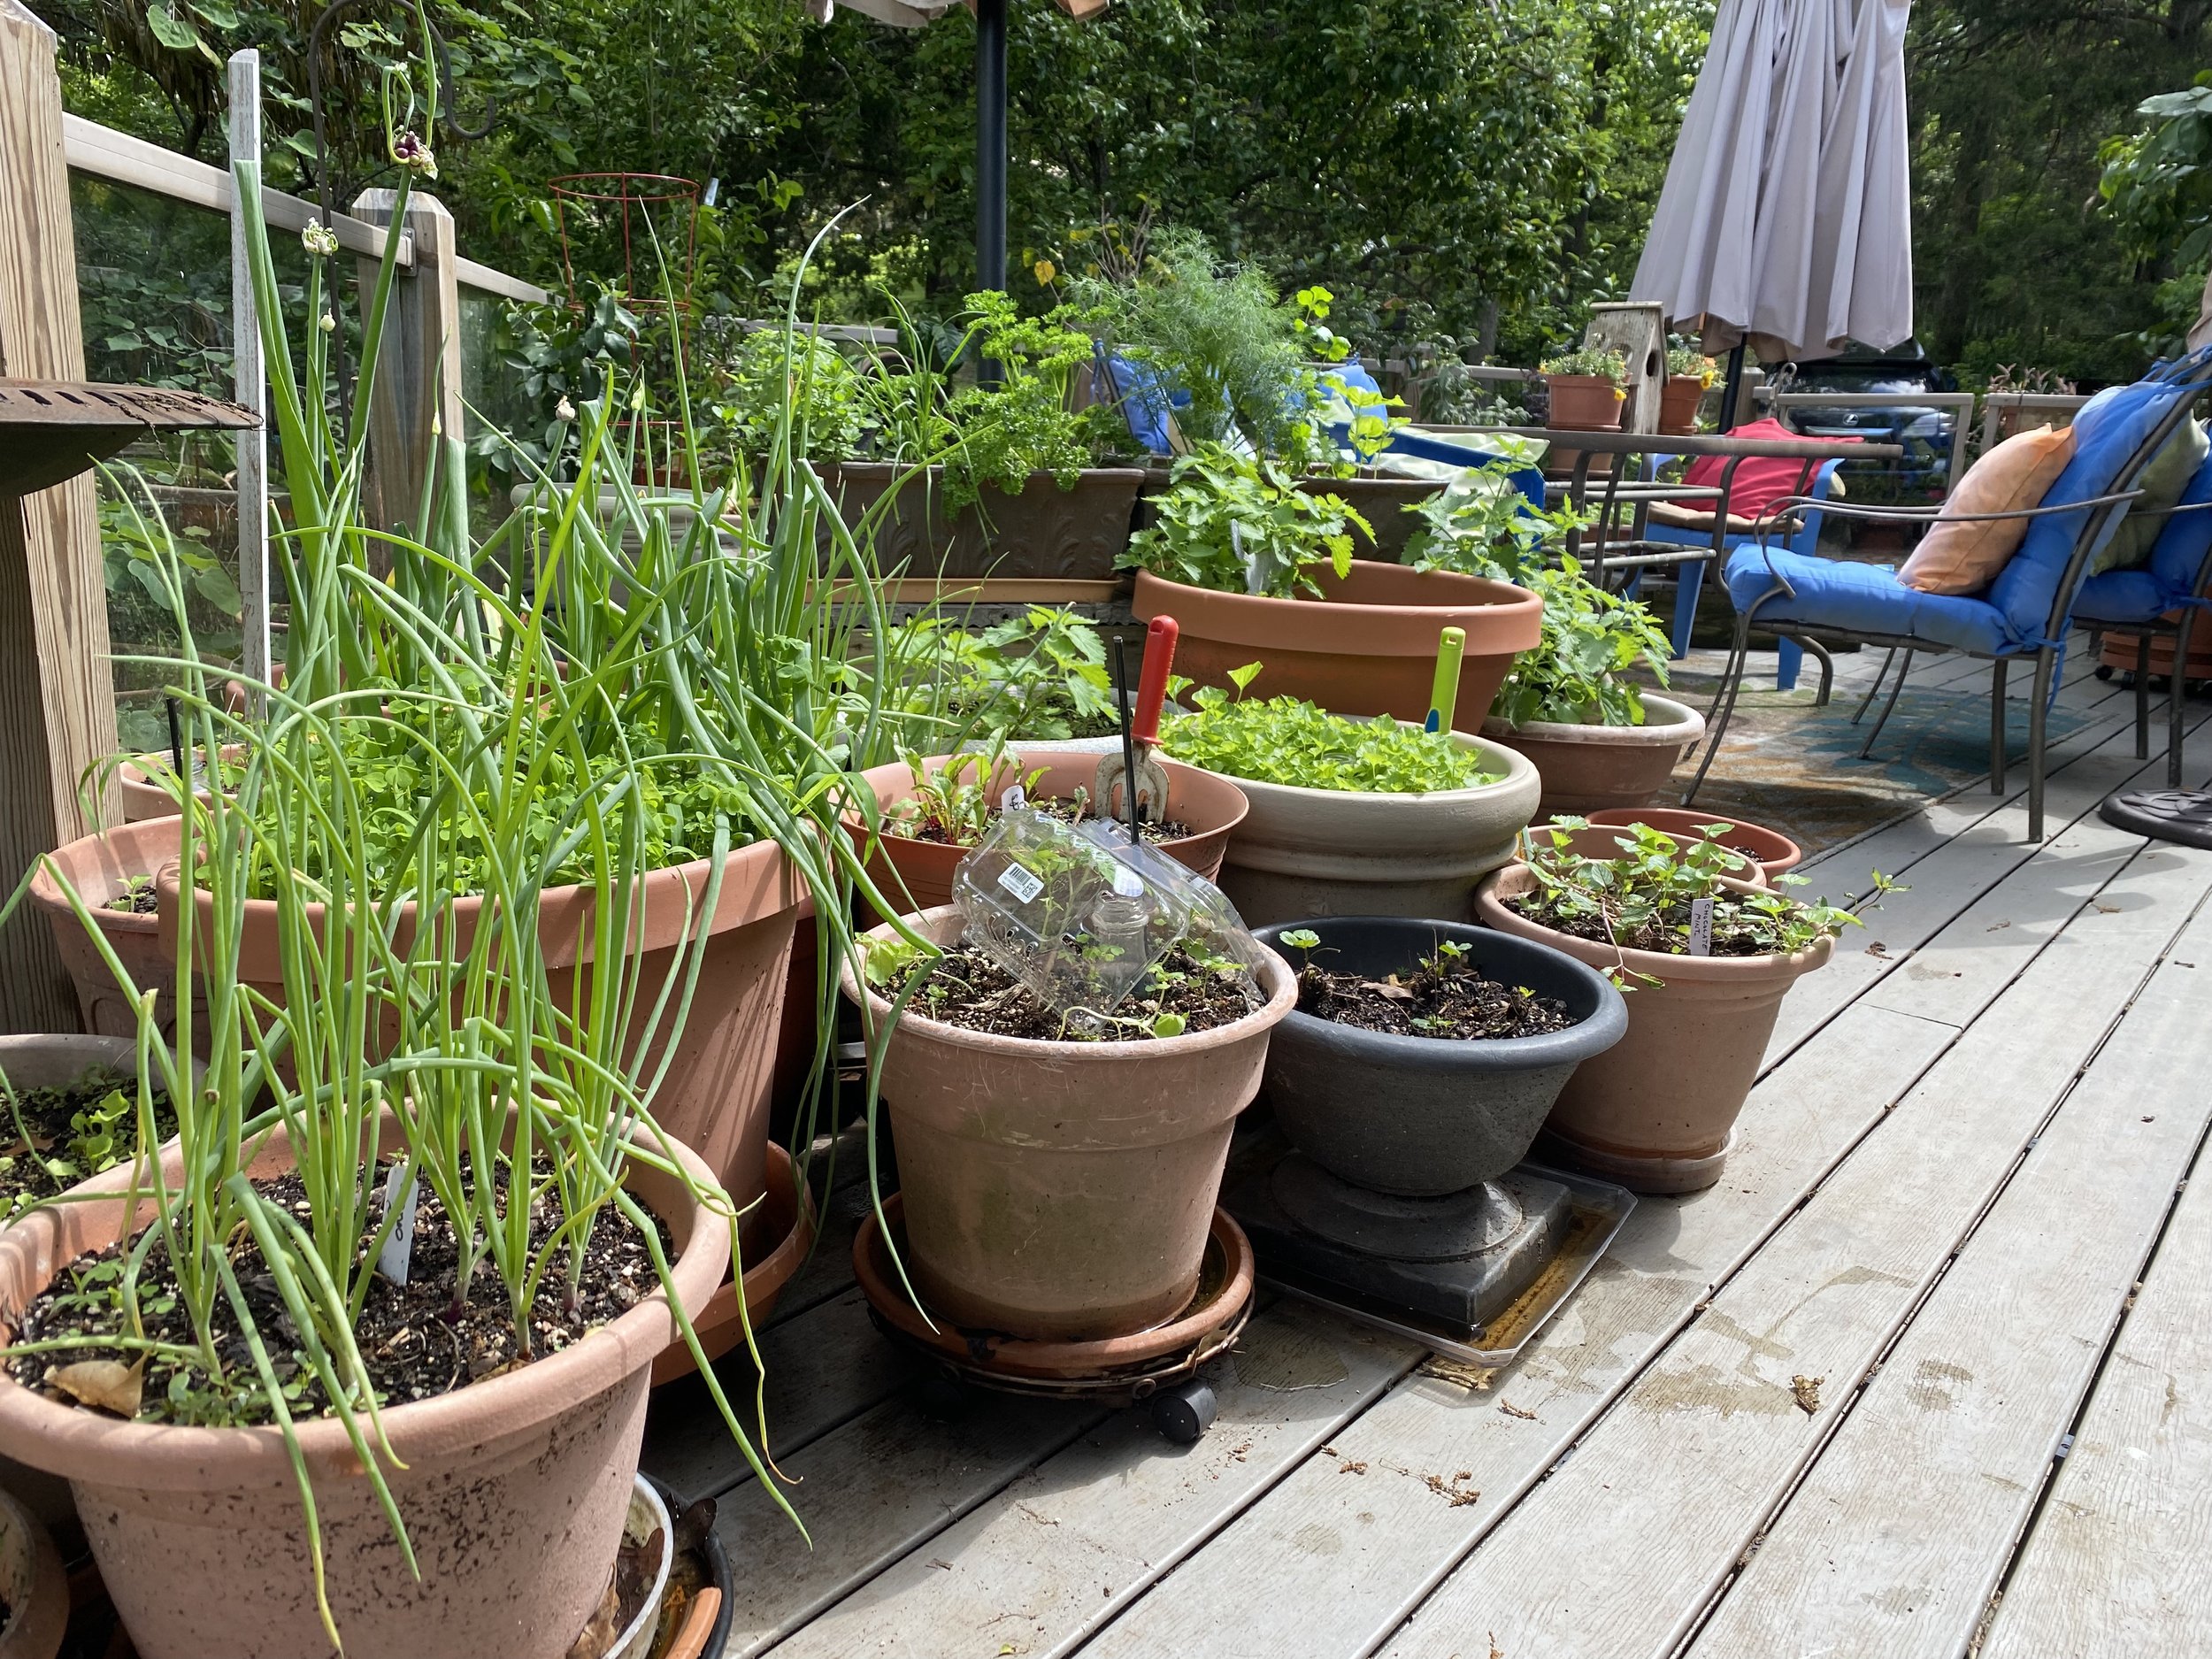
6        Plant a new supply of vegetables every 2 weeks to give yourself a new crop through the season. Early spring crops are done but there is still time for tomatoes, green peppers, green beans, cucumbers, zucchini, squash, pumpkins and annual herbs.

7.  Get flower pots planted. Water the soil first, let drain, then add your flowers for better adjustment.

8.         Plant annual flower seeds such as zinnias, sunflowers, forget-me-nots, cosmos, marigolds and herbs. Some herbs can be moved inside later for winter use.

9.       When planting wildflowers, mark the beds where seeds have been added. Some wildflowers may take 2 years to germinate.

10.       For those of you with grass, don’t cut more than 1/3 of the grass down at one time.  For spots where grass doesn’t grow, plant flowers.

11.       When adding perennials, focus on native plants. Once established, they will require less water and care than non-natives and they will be food for native pollinators.

12.        Pinch mums once a week to encourage them to grow bushy for fall flowering. I take the pinched off pieces, gently push them into the ground and encourage more plants to grow.

13.        Feed roses and other plants compost to give them a good source of energy. Roses should be fed once a month. A quick pick me up is to dig your banana peels, egg shells and coffee grounds in around roses.

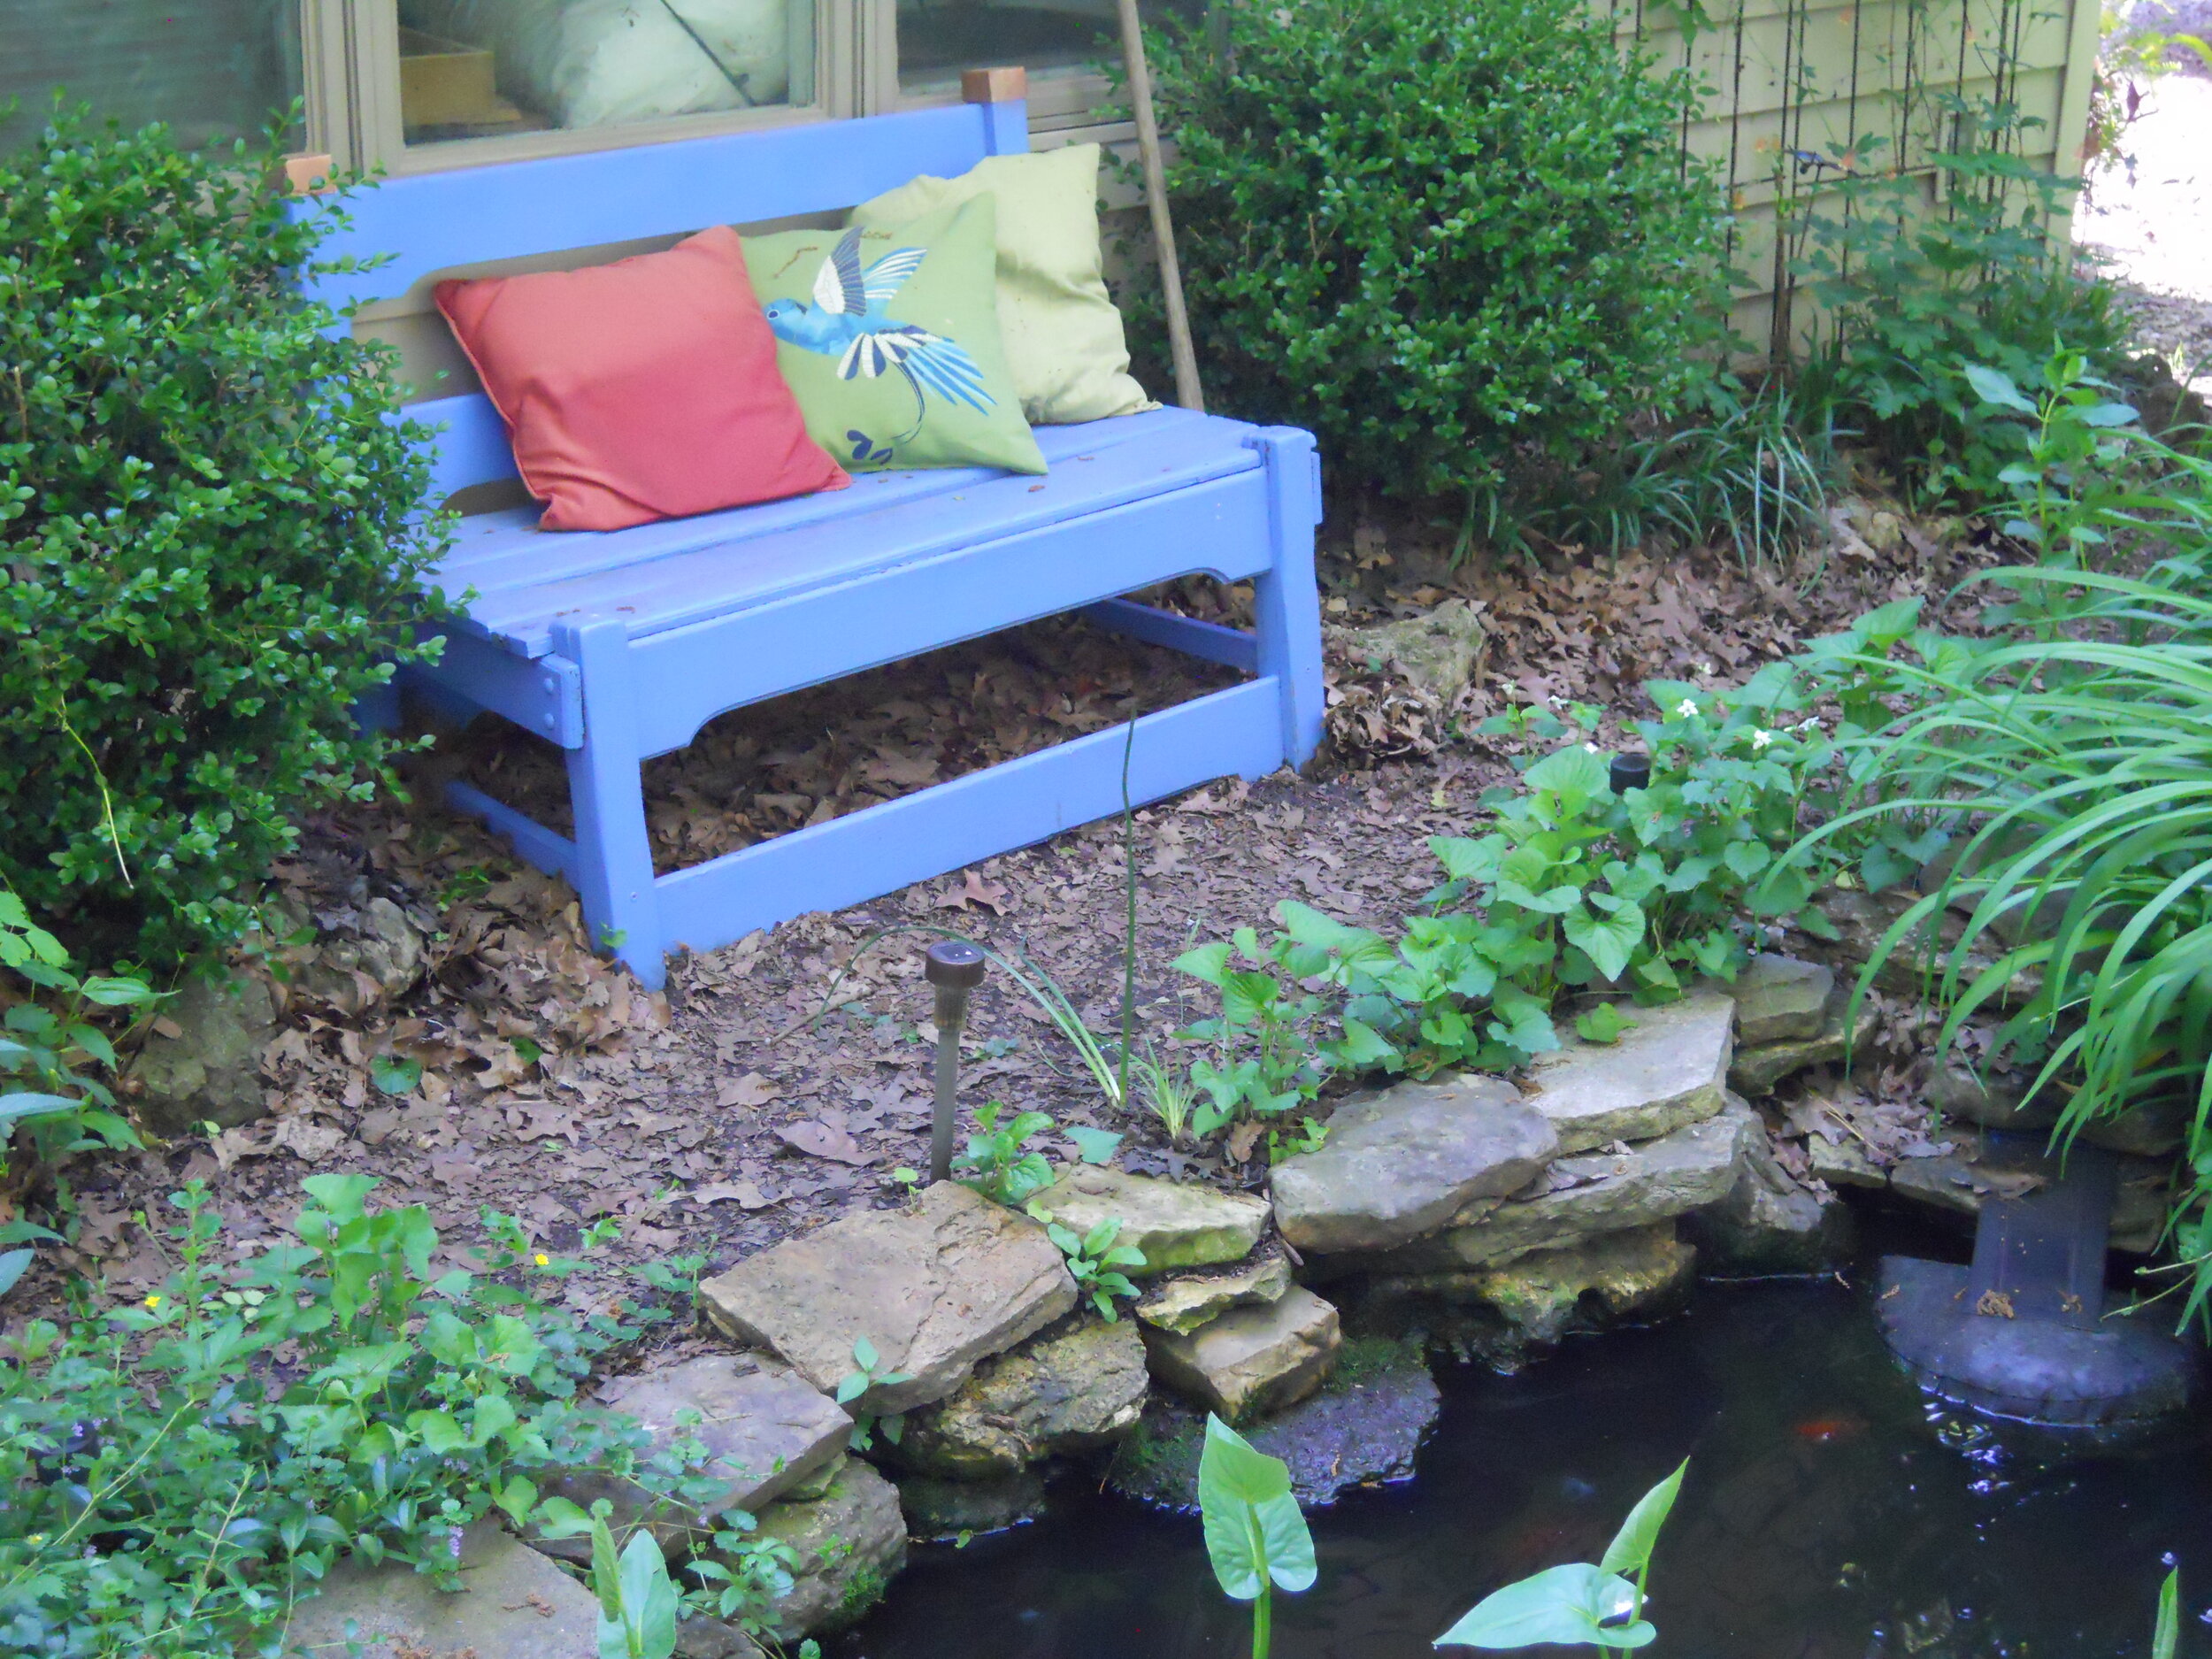
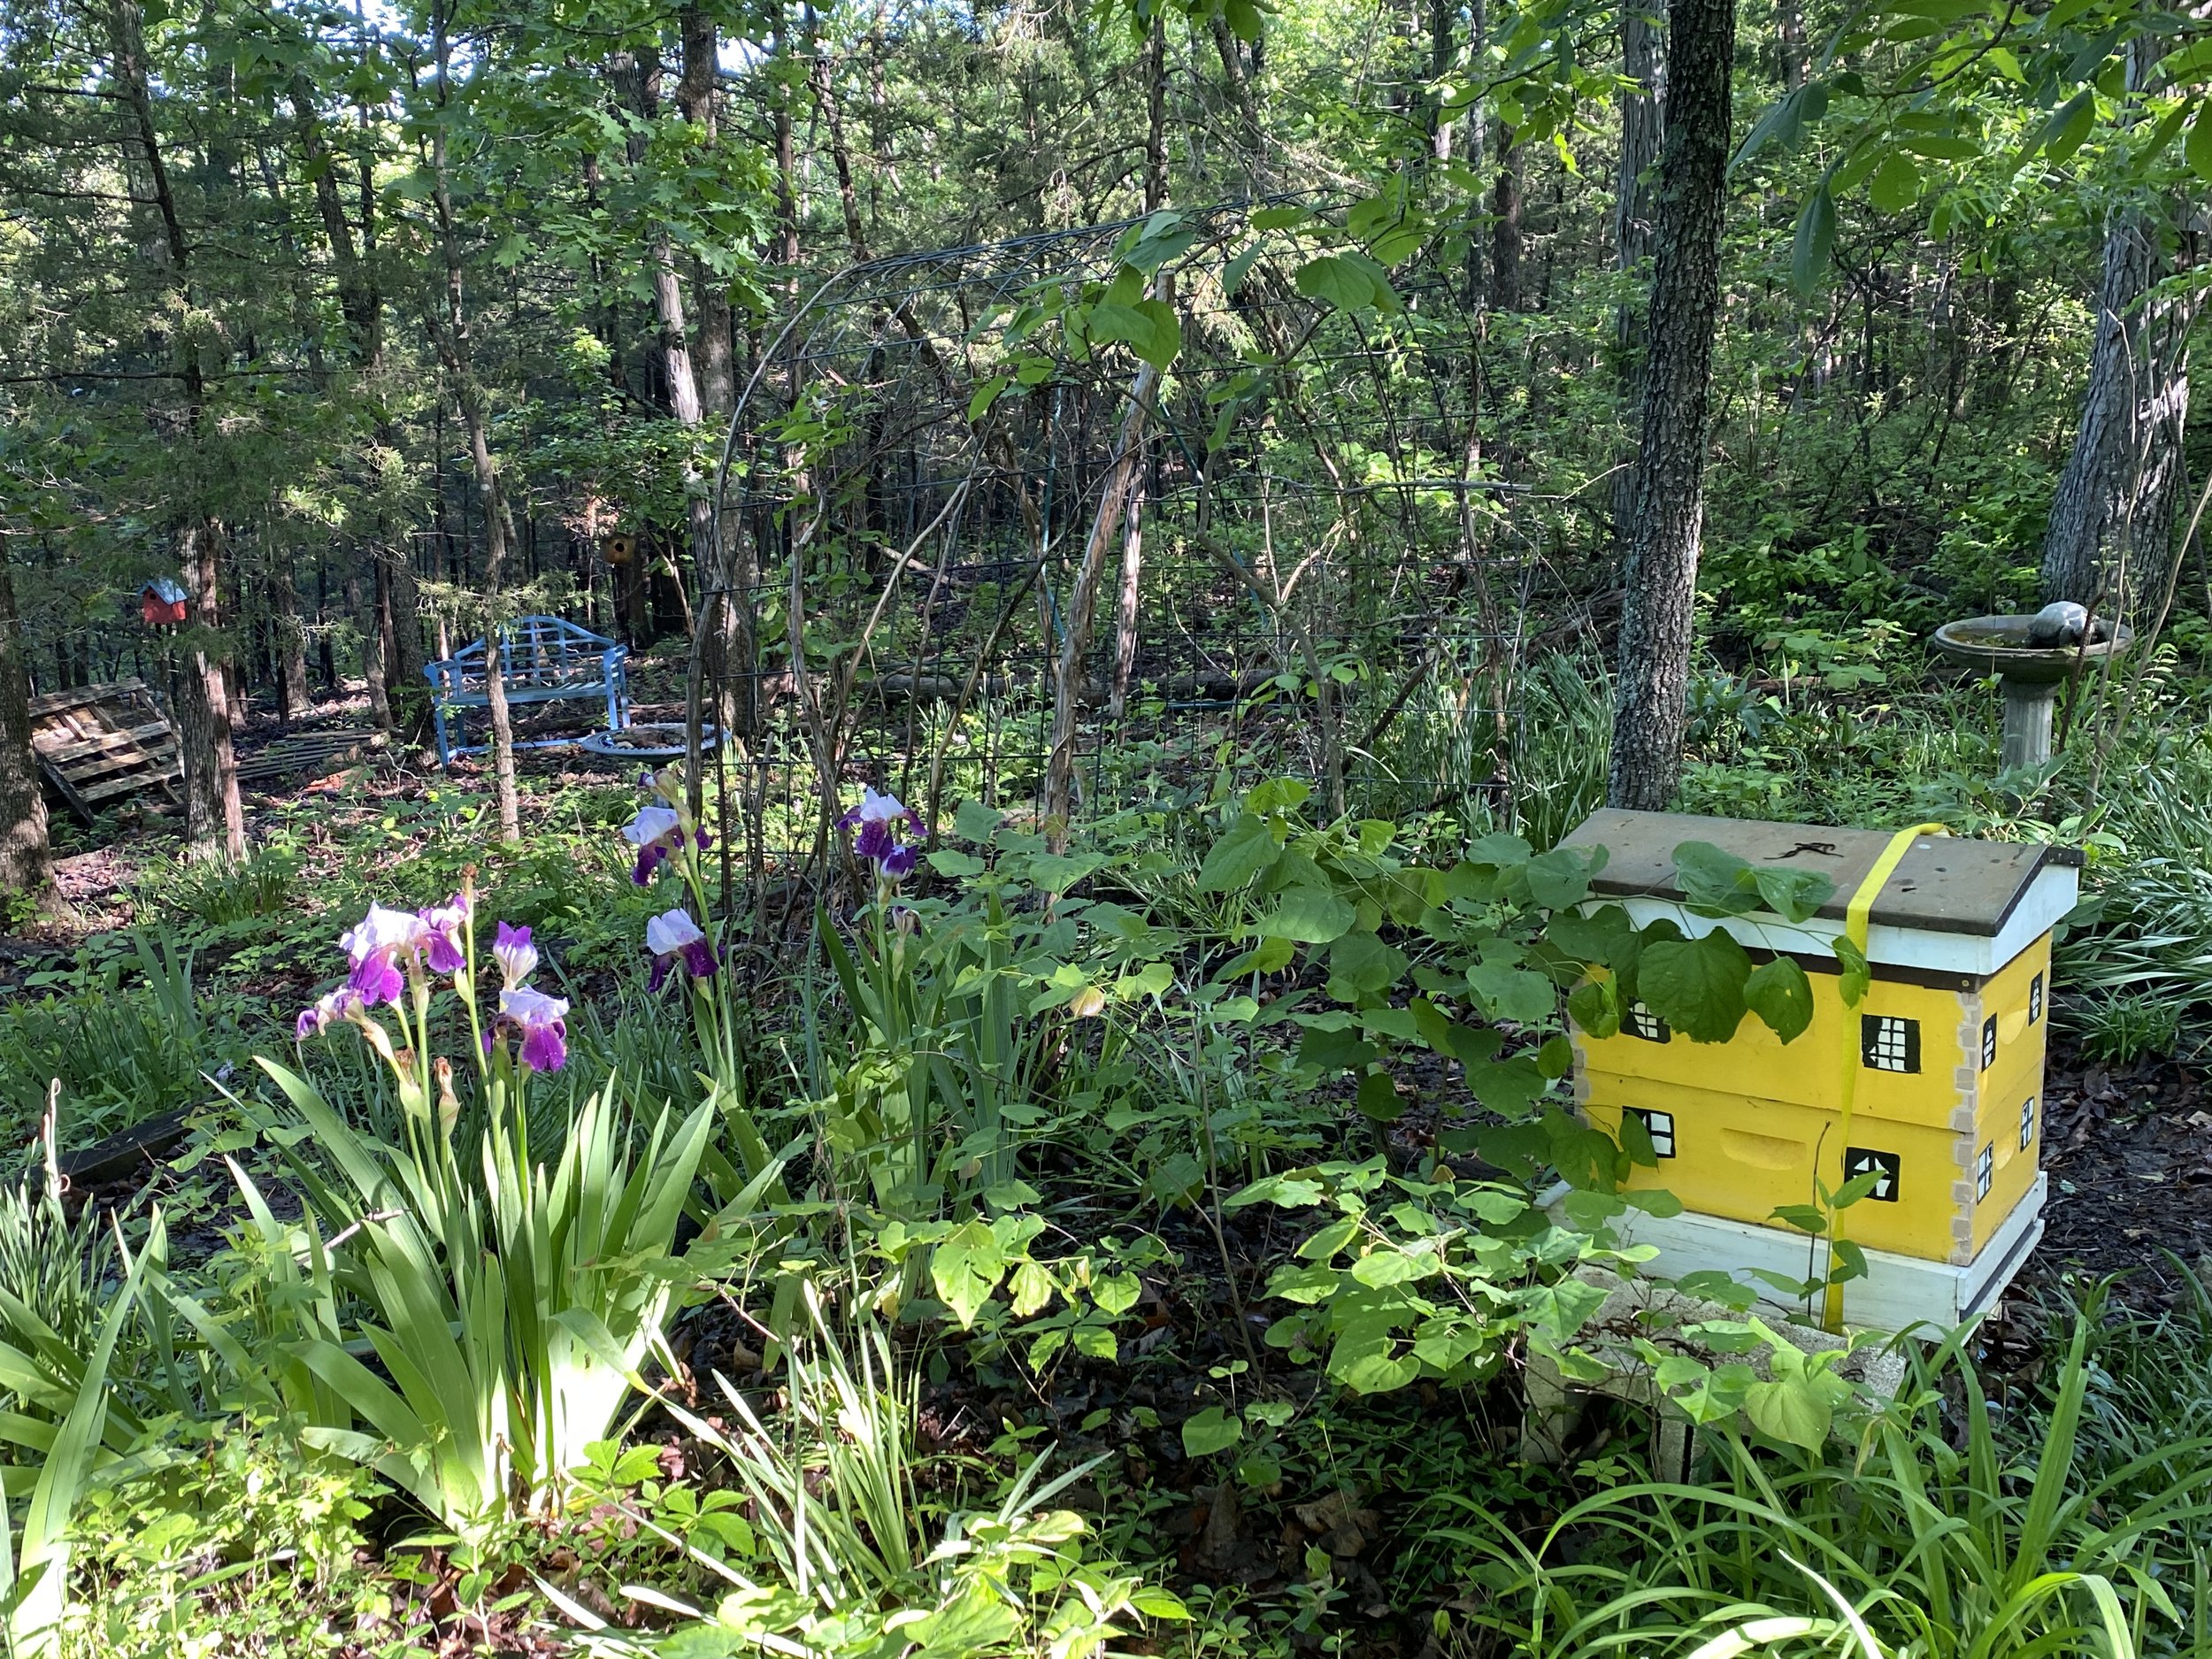
14.        Make sure to have a nice seating area in your garden so you can stop and smell the flowers.

15.    Take photos of your garden. Use the same photo spots you used in spring so you can see the changes from one season to the next.

Charlotte

Mark Surprise Lily Spots

This patch of surprise lily tops are starting to die off. (Photo by Charlotte Ekker Wiggins)

This patch of surprise lily tops are starting to die off. (Photo by Charlotte Ekker Wiggins)

Mark Surprise Lily Spots

If you like surprise lilies, also called Resurrection lilies, as much as I do, you will have them planted all over your garden. The challenge is that come mid-spring, the easy to spot green leaf tops start to die back, storing energy for mid-July when the surprise lilies will bloom, pink flowers on top of naked stalks.

In Missouri, these lovely hardy Amaryllis cousins are also called “naked ladies.”

To make sure you don’t dig into the spot full of surprise lily bulbs, this is a good time to mark those spots.

You can do it with sticks at corners with twine.

You can also do what I do and wait for all of the greenery to die off, then plant annuals with shallow roots such as zinnias and cosmos. By late summer, when the surprise lilies bloom, they will pop up in the middle of the blooming annuals making for a lovely floral combination.

These are surprise lilies in bloom mid-July where I live. (Photo by Charlotte Ekker Wiggins)

These are surprise lilies in bloom mid-July where I live. (Photo by Charlotte Ekker Wiggins)

What you don’t want to do is to put a shovel, or pick ax, into that pile of resting bulbs so whatever works to remind you to leave the bulbs undisturbed, this is a good time to do it.

Charlotte

Spring Pot Gardening

Lettuce and mixed greens are an excellent spring crop to grow in pots. (Photo by Charlotte Ekker Wiggins)

Lettuce and mixed greens are an excellent spring crop to grow in pots. (Photo by Charlotte Ekker Wiggins)

Spring Pot Gardening

Besides the sheer fun of saying you have a “pot garden,” growing food in pots is an easy and practical way to get yourself fresh produce.

Growing in pots allows each plant to have its own space, allows for easy pest control and helps you provide the right soil and other unique growing conditions. In addition, you can bring some pots such as herbs inside and extend the growing season over winter. I garden in USDA Hardiness zone 5 so for about 5 months some plants need to be protected inside.

To decide what to grow, here is a list of the basic five for spring pot gardening:

  1. Lettuce and mixed greens

  2. Radishes

  3. Peas

  4. Spinach

  5. Onions

All of these crops like cool spring weather.

Radishes, from the red bulbous root tot he greens, are excellent in salads. (Photo by Charlotte Ekker Wiggins)

Radishes, from the red bulbous root tot he greens, are excellent in salads. (Photo by Charlotte Ekker Wiggins)

A note about radishes. Add the top green to a salad, they are delicious.

If you have a crop you can’t get to, don’t toss it just yet, let it “bolt” or go to seed. If it’s not a hybrid you can save the seeds for next year and local pollinators will appreciate the flowers.

This spinach is going to seed and will become bee and butterfly flood. (Photo by Charlotte Ekker Wiggins)

This spinach is going to seed and will become bee and butterfly flood. (Photo by Charlotte Ekker Wiggins)

If you can’t use what you grow, compost. You can start by putting the unused greens in the bottom of the next pot you are making.

Once you pot herbs, you can have them year around. I’ve had this pot of parsley for a couple of years now, wintering it over inside.

Herbs are excellent plants to grow in pots; here I have parsley that wintered over inside. (Photo by Charlotte Ekker Wiggins)

Herbs are excellent plants to grow in pots; here I have parsley that wintered over inside. (Photo by Charlotte Ekker Wiggins)

One other crop you can grow in pots gets your ready for summer. I grow tomato starts in a pot, then move them to their individual pots to grow more before locating them in their final growing location. Because I have to start them in February, using a pot for their nursery works well.

Start new plants in pots; here cocktail tomatoes are getting an early start. (Photo by Charlotte Ekker Wiggins)

Start new plants in pots; here cocktail tomatoes are getting an early start. (Photo by Charlotte Ekker Wiggins)

Once starting to crowd in the pot, I carefully move them to either toilet paper pots or their own pots. I give them a few hours a day outside so they get used to the change in conditions before planting them permanently in my garden or leaving them in pots outside on my deck.

There’s a strategy to this. I have squirrels and chipmunks who have developed a taste for tomatoes. If they decide to eat those in the garden I can then bring in the pots to have tomatoes growing inside.

Cats may enjoy an empty pot for naps and dust baths. (Photo by Charlotte Ekker Wiggins)

Cats may enjoy an empty pot for naps and dust baths. (Photo by Charlotte Ekker Wiggins)

If you have inside cats, you may find they enjoy having an empty pot of soil to curl up in and take a dust bath.

A few last tips about gardening in pots:

Include a handful of compost at the bottom to keep your soil healthy.

Don’t dig up soil from your garden; start with new potting soil.

Wet soil down before adding seeds or plants.

You may also need small gardening tools to make the process easier.

Pot gardening allows you to grow your own in small spaces and have a healthy source of fresh produce all year. What are you going to grow in pots?

Charlotte

Shop Local Plant Sales

This year’s stash from the Phelps County Master Gardener annual sale. (Photo by Charlotte Ekker Wiggins)

This year’s stash from the Phelps County Master Gardener annual sale. (Photo by Charlotte Ekker Wiggins)

Shop Local Plant Sales

If you’re looking for a reliable source of local plants, try your local plant sales. Master gardeners, 4H clubs and other local groups hold them in the spring usually as fundraisers.

The advantages of buying local include that you are getting plants that will do well in your hardiness zone and you know how they were grown. Chances are the plants have not been exposed to chemicals or overuse of fertilizers to force their growth.

If you are just starting a garden, you will also get a good idea of what garden plants to add to your garden. Most of the volunteers at those sales are experienced gardeners and will be glad to answer questions.

If you are looking for bargains, circle back towards the end of the sale. Most plant sales will mark down remaining plants so they don’t have to take them home.

Charlotte

May Gardening Tasks

May is when my tropical plants move back outside to my deck. (Photo by Charlotte Ekker Wiggins)

May is when my tropical plants move back outside to my deck. (Photo by Charlotte Ekker Wiggins)

May Gardening Tasks

What a lovely spring we’ve had so far. I garden in USDA Hardiness zone 5b although we didn’t have much of a winter. Until mid-April, when a last gasp snow storm blanketed us for several days, a last hurrah off sorts of the cold season.

Where I live in mid-Missouri, the last frost date is usually around Mother’s Day. If your spring crops didn’t make it, try again; there still should be time for at least one sowing of lettuce, spinach and radish seeds.

And onions, it is always a good time to plant onions. I grow several crops throughout the growing season. Onion sets planted around roses make good bug deterrents and are fun to harvest as long as you remember to leave a couple on bug patrol. And can find your roses!

The forecast is that we will have a wet May so take the opportunity to get tree seedlings planted.

This is also a good time to divide and move perennials. Be careful of disturbing newly emerging, self-sowing annuals. Learn to distinguish the sprouts of bachelor buttons and other carefree annuals so they can regrow all on their own.

Mark daffodils you want to dig up and move later this fall.

May is a wonderful time to stop and enjoy lovely sunsets. (Photo by Charlotte Ekker Wiggins)

May is a wonderful time to stop and enjoy lovely sunsets. (Photo by Charlotte Ekker Wiggins)

As daffodils and tulips continue to fade, don’t mow the leaves down with the lawn mower until they turn yellow. The bulbs turn sun into sugar stored in their bulbs. If you cut down the greenery too early, they will gradually become smaller and you will not have any more blooms. If you don’t like the fading greenery, plant something to hide it like daylilies.

See ants on your blooming peonies? Gently shake them off if you want to bring cut flowers inside, otherwise leave them alone.

If you don’t compost, this is a good month to start. Place a small grocery bag in your freezer and add kitchen scraps. When full, take outside and bury in a garden corner. As you get into the habit of saving kitchen scraps, it will be easier to then make your own compost area or buy one, then start adding leaves and grass clippings to the kitchen scraps, some water, and mix. After a few weeks, you will have black compost ready to add to your flowerbeds.

Summer plants started inside in containers can start to spend a few hours a day outside on warm, sunny days before you transplant them into your outside garden.

Shop for natives to add for mid to late summer flowers. Good choices include Purple Coneflowers, Black eyed Susan, New England Asters and any plants with low water requirements.

If you don’t have grass planted, plant clover instead. If you do, consider how to minimize the golf course-look greenery and add more varieties of blooming flowers through the growing season. Better yet, start a vegetable plot in your front yard, they can look amazing. Add flowers like zinnias to encourage pollinators.

Charlotte

Coffee Pod Pots

Cocktail tomato starts in coffee pod pots getting ready to move outside. (Photo by Charlotte Ekker Wiggins)

Cocktail tomato starts in coffee pod pots getting ready to move outside. (Photo by Charlotte Ekker Wiggins)

Coffee Pod Pots

A neighbor last year gave me a little collection of her used coffee pod pots. She said she thought they would make good starter pots for plants, and she was right. To give them a test, I grew one of my favorite vegetables, tomatoes.

And not just any tomatoes, these are the pricey cocktail tomatoes, a semi-determinate variety of cherry-like tomatoes that grows only one foot tall and one foot wide. These are the perfect tomatoes to grow inside. i picked one up last year but it didn’t make it through winter so I planted the last little tomato in the mother pot to get a new start.

Once big enough, I moved the starts into the individual coffee pod pots. To ensure they were settling in, I first poured water into the potting soil, then used stick to make a hole in the center where I could easily add the tiny plants.

Now I don’t drink coffee so coffee pod pots are hard to find in my kitchen. Instead, I make planting pots out of toilet paper rolls, which gives me a similar sized planting pot for new starts. The challenge with the toilet paper ones is that they tend to fall apart before I get them in their permanent spot in the ground.

The coffee pod pots will need to be separated from the outer shell before planting.

Cocktail tomatoes are nicely growing in these repurposed coffee pods. (Photo by Charlotte Ekker Wiggins)

Cocktail tomatoes are nicely growing in these repurposed coffee pods. (Photo by Charlotte Ekker Wiggins)

You can buy a variety of planting pots but why do so if you can recycle what’s already in your kitchen.

Charlotte

Japanese Rose

Japanese Kerria, also called Japanese rose, has lovely double yellow flowers. (Photo by Charlotte Ekker Wiggins)

Japanese Kerria, also called Japanese rose, has lovely double yellow flowers. (Photo by Charlotte Ekker Wiggins)

Japanese Rose

Of all of the plants I share online and through my blogs, this is the one I get the most questions about. Kerria japonica, commonly known as Japanese rose or Japanese kerria, is a deciduous shrub in the rose family Rosaceae. It is native to China, Japan and Korea and grows well in my USDA Hardiness zone 5 limestone hillside garden.

Just as bright and cheery as Yellow Standing Cats Quilts, Japanese kerria brighten the spring landscape with their yolk yellow flowers.

The double yellow flower are delicate but last long as a cut flower. (Photo by Charlotte Ekker Wiggins)

The double yellow flower are delicate but last long as a cut flower. (Photo by Charlotte Ekker Wiggins)

This lovely, shrub with double flowers that resemble roses, is named after William Kerr, who introduced the cultivar 'Pleniflora'. It is the sole species in the genus Kerria.

Japanese rose can be trained to grow over a lattice. (Photo by Charlotte Ekker Wiggins)

Japanese rose can be trained to grow over a lattice. (Photo by Charlotte Ekker Wiggins)

Now this was given to me a couple of decades ago by a local landscaper as a vine. I do grow it over a couple of arbors and my garbage can surround but it’s a better free-standing shrub. In addition to blooming a couple of times a year, the shrub has branches that maintain their green color through winter.

The other advantage of this lovely shrub is that it’s happy to bloom in shade.

The most challenging part about this shrub is keeping the plant from expanding. Since my garden is informal, the bushiness of the plants fit right in.

Japanese rose is a shrub that can be kept small by removing the outside growth. (Photo by Charlotte Ekker Wiggins)

Japanese rose is a shrub that can be kept small by removing the outside growth. (Photo by Charlotte Ekker Wiggins)

Japanese rose bloom about the same time as forsythia, another favorite yellow spring bloomer, and sometimes confused for each other.

Charlotte

Fence Me In

The final “new” fence from repurposed composite decking. (Photo by Charlotte Ekker Wiggins)

The final “new” fence from repurposed composite decking. (Photo by Charlotte Ekker Wiggins)

Fence Me In

There are a number of reasons for a fence. Some are for privacy, others are decorative. A good friend said a house is not complete without a fence but a white picket fence didn’t fit my property. My fence is for decoration but it’s more there to give my growing vines a place to grow.

This is my second fence in front of my house. The original fence was built more than a couple of decades ago out of cedar cut down as we cleared my hillside property. At that time I didn’t know cedar does not last in our humid Missouri weather so it soon started to deteriorate. All that was left this spring were the original cedar posts and a few of the fence pieces.

The old cedar fence posts from trees cut off my property a couple decades ago. (Photo by Charlotte Ekker Wiggins)

The old cedar fence posts from trees cut off my property a couple decades ago. (Photo by Charlotte Ekker Wiggins)

Even the cedar posts were not doing well so my handyman convinced me to replace them with treated landscaping timbers. He suggested we reuse composite decking from my old deck, already nicely weathered, and I agreed.

We also thought we could use the original cedar posts holes. It wasn’t easy for the original fence builder to get those holes into a limestone hillside so no one thought it would be any easier now.

Not all plants understand fences and fence lines! (Photo by Charlotte Ekker Wiggins)

Not all plants understand fences and fence lines! (Photo by Charlotte Ekker Wiggins)

Now for the design. After looking through a number of fence ideas online, we decided on the basic design: simple slats allowing the plants to grow through them.

The final design concept for this new fence reusing my old deck composite. (Photo by Charlotte Ekker Wiggins)

The final design concept for this new fence reusing my old deck composite. (Photo by Charlotte Ekker Wiggins)

Getting a start on the original design with slats. (Photo by Charlotte Ekker Wiggins)

Getting a start on the original design with slats. (Photo by Charlotte Ekker Wiggins)

My wonderful handyman Robert got the fence started. Then the next day he showed me two options: a fence with the slats or one with a cut, wired cattle panel that opened the fence to the garden below.

I have several cattle panel arbors through my property so the cattle panels tied those into the overall landscape.

Decisions, decisions, do I want the slats or the open cattle panels. (Photo by Charlotte Ekker Wiggins)

Decisions, decisions, do I want the slats or the open cattle panels. (Photo by Charlotte Ekker Wiggins)

That was a tough call because I liked them both.

I didn’t want the feeling of being locked in that solid slats gave me from the house side but all arbor seemed to defeat the purpose of even having something to mark the property.

After talking to a friend who said “why not do both,” that’s what we did.

I decided to do both, giving my climbing plants a good place to grow. (Photo by Charlotte Ekker Wiggins)

I decided to do both, giving my climbing plants a good place to grow. (Photo by Charlotte Ekker Wiggins)

The slats give the fence structure; the wire sections open up the fence and give my climbing flowers good support.

The fence line itself is a little crooked because using dynamite to make the post holes seemed a little excessive but we were, after all, still trying to build a fence on a limestone hillside. Robert tried to straighten it out as much as he could and we called it good.

Didn’t have long to wait, these Japanese roses helped themselves. (Photo by Charlotte Ekker Wiggins)

Didn’t have long to wait, these Japanese roses helped themselves. (Photo by Charlotte Ekker Wiggins)

I love this fence design. It gives glimpses of my garden through the open cattle panel sections and structure to my growing vines. It’s also low maintenance using repurposed decking. And as an unexpected extra bonus, the fence top is wide enough to easily lean on for neighborly chats.

I can’t wait to see this new fence through the four seasons, it will have a different look as the various plants come and go.

Charlotte

April Gardening Task

April Gardening Tasks

It’s “daffodil land” days in my Missouri garden, the name one of my former neighbors gave to my limestone hillside garden currently populated by a number of these wonderful spring bulbs. I didn’t buy most of them; they were either rescued, with permission, from old home sites or frequent flyer bulbs, bulbs that came from family gardens in other parts of the country.

We had what-I-hope-was our last cold spell earlier this week. Eastern redbuds and native Missouri flowering dogwoods may be showing their colors once again at the same time this year. I have to confess I have gardening tasks to complete but I tend to dilly-dally and enjoy the spring weather. But when I get focused:

Clean out composters and add to flower beds and fruit trees. Mix with existing soil for now; you will mulch this later. Leave a good bucket of finished compost as starter for the next compost batch and start adding leaves, grass clippings if you have them, kitchen scraps and water. Don’t forget to mix.

Put up your birdhouses if you haven’t already. Songbirds are natural pest control and add so much interest to our gardens. 60% of all bird species depend on insects for their food so if you have a lot of birds, you should naturally have less pests.

Prune lilacs immediately after they bloom. If you wait until later in the season, you will be cutting off next year’s blooms.

Continue to sow lettuce, spinach and radish seeds every 10 days or so for fresh spring salads in your pot garden. Call it your garden in pots, if you prefer.

If you like to grow peas, this is the last month to plant sugar snap peas and snow peas, they prefer cooler weather conditions. To keep their roots happy, mulch with cardboard to keep them cool, then add a layer of wood chips.

As daffodils and tulips continue to grow and bloom, sprinkle compost around them to keep the bulbs well fed. When the flowers fade, remove them by snipping off the flower heads. Leave the greenery until it turns yellow; the green leaves help the bulbs store energy for next season’s blooms. Don’t mow the leaves down with the lawn mower until they turn yellow or the bulbs will gradually become smaller and you will not have any more blooms next spring.

If you have a vegetable garden area, this is a good time to add cardboard to kill off any growth prior to summer planting. Don't till, the prevailing thought now is that tilling damages the soil ecosystem. Kill the plants you don’t want, make holes to plant the ones you do, or make trenches to plant seeds, and cover. Easy peasy. Who doesn’t like easy gardening??

Start your summer plants inside in containers you can transplant outside later; tomatoes, peppers, watermelons, squash, pumpkins, cucumbers, zucchini.

Don’t forget companion plants to reduce crop damage; basil is a good bug deterrent for a lot of plants and grows easily from seed.

Plant for pollinators as well. I love zinnias and so do butterflies and bees. Native plants such as New England Asters, yarrow and purple coneflowers are good choices for pollinators because they have long blooming seasons. For another good annual, try sunflower seeds. Birds will love the seeds in the fall.

Plant more native trees along with compact dwarf fruit trees. Although planting native flowers is still good for pollinators, trees provide better, and more reliable, pollen sources for bees. The smaller fruit trees are good pollen sources as well and, when pollinated by bees, will also give you easily accessible fruit to pick.

Charlotte

My Latest Favorite Catalog

Baker Creek claims to be the world’s largest seed catalog: 500 pages. (Photo by Charlotte Ekker Wiggins)

Baker Creek claims to be the world’s largest seed catalog: 500 pages. (Photo by Charlotte Ekker Wiggins)

My Latest Favorite Catalog

I can’t believe this sat in my magazine basket for so long without my spending time wandering through the lovely pages. I remember when it came in, I quickly leafed through it and said to myself, well the pictures are larger than I remember.

Actually this Whole Seed Catalog 2021 from Baker Seed out of Mansfield, Missouri has added more interesting information and tidbits about their seeds including some history, a few recipes and these truly delicious photos.

I started perusing the catalog looking for a picture of Trifolium incarnatum, which is crimson clover, to show previous beekeeping students who were given seeds at earlier beginning beekeeping classes.

Red crimson clover is an excellent soil conditioner and bee food source. (Photo by Charlotte Ekker Wiggins)

Red crimson clover is an excellent soil conditioner and bee food source. (Photo by Charlotte Ekker Wiggins)

After finding what I needed, I got side tracked by the other lovely photos. From beautiful staple vegetables to unusual varieties, I got caught up in the page descriptions.

Cucumbers and pickles, who isn’t ready for a taste of summer? (Photo by Charlotte Ekker Wiggins)

Cucumbers and pickles, who isn’t ready for a taste of summer? (Photo by Charlotte Ekker Wiggins)

Half way through this page that included several hyssop varieties, a bee favorite, I decided it was perhaps best for my pocketbook that I had not discovered this catalog in the middle of winter.

As it is, I have a rule that I can only bring one pack of seeds home per home and garden center visit. It’s amazing now how many things need fixing around the house.

Hyssop is an excellent source of bee food. (Photo by Charlotte Ekker Wiggins)

Hyssop is an excellent source of bee food. (Photo by Charlotte Ekker Wiggins)

I may need to try one of those this year.

Not only did Baker Creek have unusual varieties but some even included interesting essays. I mean who doesn’t want to know what kind of pumpkin Cinderella ended up with for her coach?

This is the background to Cinderella’s pumpkin. (Photo by Charlotte Ekker Wiggins)

This is the background to Cinderella’s pumpkin. (Photo by Charlotte Ekker Wiggins)

In addition to the marvelous photos, there are recipes sprinkled throughout so if you want to try an unusual variety you have something you can do with it once you grow it.

Gardening catalogs fall in the same category as recipe books for me. I may not grow, or make, some but I sure do enjoy reading about them!

One other reason to order this catalog; it’s an excellent free reference source. Now excuse me, I need to finish the article on Cinderella’s pumpkins.

Charlotte

Grow Strawberries

My home grown everbearing strawberries almost ready to pick. (Photo by Charlotte Ekker Wiggins)

My home grown everbearing strawberries almost ready to pick. (Photo by Charlotte Ekker Wiggins)

Grow Strawberries

Summer is officially here when I start seeing locally-grown strawberries, usually several weeks before the official start of summer. In USDA Hardiness zone 5B, where I live, strawberry season begins in June. Or maybe I should say strawberry shortcake season. It continues for several weeks, or months, depending on the strawberry variety.

My family goes back several generations as Hungarian strawberry farmers. That may explain why most of us siblings love strawberries just as they are. Commercially-grown, strawberries usually end up on the top 10 list of plants raised with harmful chemicals so growing them at home is an excellent option.

Types of Strawberries

There are a number of strawberry varieties. Here are the two most popular types of strawberries:

  • June-bearing strawberries provide strawberries for 5-6 weeks starting in June.

  • Ever-bearing strawberries bloom 3-6 months starting in June.

For example, the ever popular Quinault and Ozark strawberries are ever-bearing strawberries.

How to Plant Strawberries

Strawberries are heavy feeders, which means they take a lot of resources out of the soil. To get ready for my first strawberry plantings, I added both compost and manure to ensure the soil microbes were reinforced.

For those flower beds where I used strawberries as border plants, they also were given extra mulch and compost.

Strawberry plants can easily be used on flower borders. (Photo by Charlotte Ekker Wiggins)

Strawberry plants can easily be used on flower borders. (Photo by Charlotte Ekker Wiggins)

Last year, I planted a good 60 or so new ever-bearing strawberry plants as flower bed borders. This way I can easily pick strawberries as I walk by.

Strawberry plants in their first year can appear small. It normally takes a year for plant roots to get established.

You should also remove the flowers in the first year. You want to concentrate the plant’s energy in getting roots established.

Here’s another border where I included strawberries. (Photo by Charlotte Ekker Wiggins)

Here’s another border where I included strawberries. (Photo by Charlotte Ekker Wiggins)

I also added June-bearing plants in a couple of flower beds. Those are honestly for the visiting turtles that somehow know when the berries are ripe.

Now the more traditional way to grow strawberries is to have separate planting beds. To grow strawberries in beds, they need to be rotated 3-4 years to give soil time to recover.

Separate strawberry beds are the traditional way to raise berries. (Photo by Charlotte Ekker Wiggins)

Separate strawberry beds are the traditional way to raise berries. (Photo by Charlotte Ekker Wiggins)

After planting, add straw under the leaves. You don’t want the berries touching soil or they will rot.

Charlotte

Delicious Nasturtiums

Nasturtiums come in single and double varieties. (Photo by Charlotte Ekker Wiggins)

Nasturtiums come in single and double varieties. (Photo by Charlotte Ekker Wiggins)

Delicious Nasturtiums

I can’t remember the first time I planted nasturtiums, they have been on my “must do” list for decades. Like zinnias, nasturtiums are easy seeds to grow and give so much back.

First, narturtiums are pretty. Their colors range from beige to a deep burgundy in both single and double varieties with several shades of yellow and gold.

They are also entirely edible, making for pretty additions to salads and to embellish dishes.

These charming flowers are also easy to grow.

  • You can start the seeds indoors 4 to 6 weeks before the last spring frost. 

  • Plant nasturtium seeds in moist, well-drained soil in full sun. They can grow in partial shade, but they will not bloom as well.

  • Nasturtiums prefer poorer soils and they do not need fertilizers.

Soaking the seeds a good day before planting helps them to sprout. (Photo by Charlotte Ekker Wiggins)

Soaking the seeds a good day before planting helps them to sprout. (Photo by Charlotte Ekker Wiggins)

To get them off to a good start, soak the seeds for a good 12 hours prior to planting.

Plant the seeds about half an inch deep and 10 to 12 inches apart. Water. Plants should appear in 7 to 10 days.

I like to plant them in hanging baskets so I can move them around and enjoy the flowers before i add them to my dishes.

Nasturtiums have a fresh, nutty flavor and add a nice touch to any dish.

Charlotte

Homemade Potting Bench

Potting benches can be something simple to save your back. (Photo by Charlotte Ekker Wiggins)

Potting benches can be something simple to save your back. (Photo by Charlotte Ekker Wiggins)

Homemade Potting Bench

Several years ago, I decided I wanted a potting bench on my deck. Something simple, where I could pot plants without hurting my back. A place where I could haul my cut flowers and still enjoy the outdoors while I was getting them arranged in a flower vase. Or two.

Dozens of websites later, I saw a wide range of potting benches from cute cottage style to elaborate, professional-grade florist potting tables. They were lovely. Some were very expensive. And none of them would fit on either my small deck or in my garage, where I wanted to store it for easy access.

Enter my handyman who saw me eyeing this lovely old aged wood plank. What are you going to do with that, he asked. I don’t know, I just like it. It’s old and weathered, like me. I wonder what stories it could tell.

A few days later, I found this very simple potting table waiting for me in my garage. It’s the perfect height to pot plants without bending over. It’s also narrow enough to easily get stored in front of my garage open shelving.

The legs were made out of remnant wood. The only thing we had to buy where the metal brackets that fit underneath to hold the table legs to the top.

If I don’t want to stand, I can now use a stool when I’m working on the bench. And I doubt there is any damage I can cause to the top.

Sometimes simple is better.

Charlotte

June Gardening Tips

Surprise lily greenery is dying back; I will plant zinnias shortly. (Photo by Charlotte Ekker Wiggins)

Surprise lily greenery is dying back; I will plant zinnias shortly. (Photo by Charlotte Ekker Wiggins)

June Gardening Chores

It was a long wet spring this year with a late bump of winter. So I am once again behind getting some of my gardening chores done. I garden in USDA Hardiness zone 5.

1.         Plant a new supply of vegetables every 2 weeks to give yourself a new crop through the season. Early spring crops are done but there is still time for tomatoes, green peppers, green beans, cucumbers, zucchini, squash, pumpkins and annual herbs.

2.       Keep asparagus beds weeded and let the green top ferns grow until they go brown; do not cut. That’s what gives roots energy to produce asparagus stalks again next year.

3.        When mulching, leave 2-4 inches clear from the plant stem and the mulch ring no larger than 5 inches deep. More than that and you are smothering the plant itself.

4.        Leave spring bulb greenery to die off naturally. I gently remove the yellow leaves if they bug me and plant summer perennials to cover them in the meantime.

5.         Japanese beetles show up this month so hand pick and drop in a bucket of water with a few drops of dishwashing soap to drown them. Pick early in the morning when they are sluggish. Also treat your lawn with nematodes and milky spores, both will gradually help eliminate grubs. Add geraniums and tansies to your flower beds, they are natural Japanese beetle repellants.

6.         Trim lilacs immediately after they end flowering so growth the rest of this year will provide blooms next year.

7.         Get flower pots planted. Water the soil first, let drain, then add your flowers for better adjustment.

8.         Plant annual flower seeds such as zinnias, sunflowers, forget-me-nots, cosmos, marigolds and herbs. Some herbs can be moved inside later for winter use.

10.       When planting wildflowers, mark the beds where seeds have been added. Some wildflowers may take 2 years to germinate.

If you don’t have land for a garden, plant tomatoes in pots. (Photo by Charlotte Ekker Wiggins)

If you don’t have land for a garden, plant tomatoes in pots. (Photo by Charlotte Ekker Wiggins)

11.       For those of you with grass, don’t cut more than 1/3 of the grass down at one time.  For spots where grass doesn’t grow, plant flowers.

2.       When adding perennials, focus on native plants. Once established, they will require less water and care than non-natives and they will be food for native pollinators.

13.        Pinch mums once a week to encourage them to grow bushy for fall flowering. I take the pinched off pieces, gently push them into the ground and encourage more plants to grow.

14.        Feed roses and other plants compost to give them a good source of energy. Roses should be fed once a month. A quick pick me up is to dig your banana peels, egg shells and coffee grounds in around roses.

15.         Take photos of your garden. Use the same photo spots you used in spring so you can see the changes from one season to the next.

16.         Also make sure to have a nice seating area in your garden so you can stop and smell the flowers!

Charlotte

Memorial Garden Benches

This is my grandmother’s memorial bench on the north side of my garden. (Photo by Charlotte Ekker Wiggins0

This is my grandmother’s memorial bench on the north side of my garden. (Photo by Charlotte Ekker Wiggins0

Memorial Garden Benches

There are many ways people remember friends and relatives who have died. The US hoiiday Memorial Day at the end of May is a time to honor those who died in military service. There are also monuments on cemeteries, plaques on buildings and a number of other ways people memorialize lost ones.

I’m not originally from Missouri; I chose to live here. When I lose relatives, they are scattered around the country, getting buried in family plots associated with their connections in those places.

As I lost my few relatives, I started to keep their memories alive by adding garden benches in their honor.

Originally these benches were different colors. A couple of years ago I decided to paint them all bluebird blue so they could be easily spotted throughout the limestone hillside garden.

The first bench I added was in honor of my grandmother, who played a very special place in my life. She was a librarian among other careers and hosted lovely tea parties when I visited. She has a bench at the north side of my property where she can watch sunsets and enjoy the garden unfolding. She would have enjoyed doing both at the same time.

When I visit that part of the garden, I think of her as I sit on the bench and enjoy a sunset. Or watch something new growing.

I still have the first gardening book I ever received. It was from my grandmother and spurred me into gardening.

My uncle’s garden bench next to the goldfish pond, he loved to fish. (Photo by Charlotte Ekker Wiggins)

My uncle’s garden bench next to the goldfish pond, he loved to fish. (Photo by Charlotte Ekker Wiggins)

Her son, my Uncle Dave, was the closest thing I had to a father. This kind, quiet man with a twinkle in his eye was an Old School gentleman. He lived in an apartment in San Francisco with two cats after his wife died.

He loved to fish so it was very simple to add this bench in front of my goldfish pond in his honor.

When he was no longer able to fish, one year I took him a small fishing rod with a catnip toy at the end of it. Maybe he couldn’t reel in salmon any more, I told him , but I thought he might get lucky with a cat fish.

I can still remember his laughing when one of his cats jumped on the catnip lure.

My mother’s memorial bench at the top of the hill facing south. (Photo by Charlotte Ekker Wiggins)

My mother’s memorial bench at the top of the hill facing south. (Photo by Charlotte Ekker Wiggins)

My uncle’s sister, my mother, loved my garden. Whenever she would visit she would greet me warmly and the first chance she had she would walk the garden.

I placed her memorial bench on the top at the south side so she could get a full view of the bay window gardens and apiary. I am developing a nearby flower bed where I will move some of the Iris I have from her garden. Iris where her favorite US flowers.

I like having these memorial garden benches so easily accessible. I can’t help but think of the people who they represent and they help keep their memories alive and close to my heart.

Charlotte

Yard of the Month

It’s a meeting of the signs, the latest being from the Rolla Horticulture Club, left. (Photo by Charlotte Ekker Wiggins)

It’s a meeting of the signs, the latest being from the Rolla Horticulture Club, left. (Photo by Charlotte Ekker Wiggins)

Yard of the Month

I was so tickled to have my Missouri limestone hillside garden voted May 2020 Yard of the Month. The honor came from our Horticulture Club, established in 1934. They have invited me to a summer meeting for years to talk about subjects close to my heart. For the record, we have never discussed their yearly awards May-August.

Now getting a special garden designation can bring out the best, and worst, in gardeners. When I was the daily newspaper publisher I used to get requests from gardeners campaigning to have their garden selected. One lady even brought me a lovely bouquet of flowers thinking I had some influence with the selection, which I didn’t. All I did was get their stories and photos published.

So here’s the story that was published for the May 2020 Yard of the Month Selection:

When Charlotte Ekker Wiggins first moved to her forested lot in 1982 to build a house, her neighbors told her nothing would grow. Today Bluebird Gardens, named for the local winged residents, is a Certified Wildlife Habitat, Monarch Way station and apiary. It is also Rolla Floriculture Club’s May 2020 Garden of the Month.

How would you describe your one acre hillside garden?

It is basically a giant cutting garden. Lots of flowering and edible trees, shrubs, perennials and native tenants, the frogs are the noisiest. It can be a very busy place. No grass. My goal was to have enough flowers that I could cut and still have my garden look like nothing was missing.

What do you primarily grow?

Typical of a Missouri garden, I’m sitting on limestone so I grow mostly rocks. My favorite gardening tool is a pickax. I’m also on an incline. Once or twice a year I head to the hill bottom and escort wayward strawberries and other plants back to their flower beds. I use a variety of strawberries such as Ozark Beauty, Everbearing and June Bearing as border plants.

I also have some of my mother’s favorite Blue Bearded Irises; daffodils I gave my brother 15 years ago for his Virginia garden now back home for a vacation, and my sister in law’s New York hostas, which are edible. Herbs and vegetables are intermingled with flowers, that’s how the pollinators easily find them. I also hope it’s a little more camouflage from visiting deer.

For years I have also had a pot garden, growing herbs and vegetables in pots. The pots make it easier to place them in flower beds for pollination and to move herbs inside for winter.

Native Eastern Redbuds circle my house and apiary in spring. (Photo by Charlotte Ekker Wiggins)

Native Eastern Redbuds circle my house and apiary in spring. (Photo by Charlotte Ekker Wiggins)

How do you use native trees, shrubs and flowers?

When I first started this garden, I incorporated existing native trees and flowers. I built garden paths around native Eastern Redbuds (Cercis canadensis) and just a few days ago moved a lovely patch of Germander (Teucrium canadense) away from foot traffic. If it’s already happily growing here I see no reason to toss it.

I also added dozens of native seedlings from Eastern Wahoo (Euonymus atropurpureus)

to Beautyberry bushes (Callicarpa americana L.) Emerald Ash Borer-damaged Elm trees are getting replaced with native Pawpaw trees (Asimina triloba).

 What do you do about weeds?

After a considerable amount of research, I have banished the word “weed” from my vocabulary. I have found most “weeds” growing in my garden are herbs that at one time had medicinal and culinary value. Some still do, we’ve just forgotten about them or pulled them without checking what they were. They grow on their own and add value, what’s not to love. Did you know chicory coffee tastes like chocolate?

How do you keep your garden healthy?

I compost and mulch, two critical steps to make hillside flower bed top soil and keep it fed and happy. Many people don’t realize soil is a living ecosystem all on its own. I also use a variety of ground covers and ground ivy to retain soil from Periwinkle (Vinca minor) to Creeping Charlie (Glecome Hederacia).  

Complimentary plants help to minimize bug damage. If you find it on your plate you know it’s a good garden mate. Basil is an excellent bug deterrent around tomatoes.

My garden is also full of birdhouses for natural pest control. I have resident Pileated Woodpeckers, hummingbirds and a variety of other birds taking up residency including Summer Tanangers, also known as the “bee eaters.” The birdhouses provide homes to other pollinators including paper wasps and the periodic tree frog or two.

One of my honeybees visiting a nearby blooming Bearded Iris. (Photo by Charlotte Ekker Wiggins)

One of my honeybees visiting a nearby blooming Bearded Iris. (Photo by Charlotte Ekker Wiggins)

You also have a bee garden?

I already had native bee houses and wanted to give my 30 plus dwarf fruit trees a little help. About 10 years ago I added two bee hives and now have an apiary, run a bee club, write beekeeping books, lecture on keeping bees and planting for pollinators. Bees pollinate the dwarf fruit trees and increase flower production and fruit yield. One out of every three bites of food we eat are courtesy of honey bees. That is, if I can get to the fruit before the squirrels and other wildlife do. And then there’s the added bonus of delicious, quite local honey.

What advice would you give beginning gardeners?

Take a basic soils class; understand that soil is an amazing interdependent ecosystem that is the foundation to, and of all of our plants. Once you understand soils, keep learning. The master gardeners offer an excellent core course. The core course will teach you the basics of gardening, then your volunteer time will give you exposure to other more experienced gardeners and ideas.

Before you plant anything, have your soil tested through University of Missouri Extension. They not only will tell you what kind of soil you have but how to amend it for what you want to grow.

 As you daydream about your garden, start with native trees, shrubs and lots of flowers; no turf grass. The natives already have an interdependent relationship with the soil, bugs and birds. They will also grow more readily although you do need to water them in their first year. If you want a green carpet look, opt for micro clovers that grow low and still feed pollinators. For more on why bugs matter and how you can develop a healthy garden, see my April 2019 TEDx talk: https://tinyurl.com/yae5a4qr

Charlotte is an advanced master gardener and provisional master beekeeping instructor. 

The Rolla Floriculture Club was established in 1934. The Yards of the Month are chosen May-August. They are floral gardens inside Rolla city limits chosen at the discretion of rotating club members. Aesthetic appeal in the front yard is the biggest factor; getting to know the story behind the plant choices is a bonus. Edible gardens were recently made eligible as long as they are in the front yard and there is both a floral aspect and aesthetic value.

That’s the end of the story. I will add one more thing. This garden inspired my now 22-year old custom gift business Bluebird Gardens. If you are a customer you’ve noticed a distinct floral theme in our handmade quilts. still take walks to be inspired by color combinations and garden gift ideas.

Thank you Rolla Horticulture Club for the honor!

Charlotte

Starting a Pot Garden

This year’s pot garden with snap peas, in back, then a variety of lettuce, basil on the front left and radishes front right. (Photo by Charlotte Ekker Wiggins)

This year’s pot garden with snap peas, in back, then a variety of lettuce, basil on the front left and radishes front right. (Photo by Charlotte Ekker Wiggins)

Starting a Pot Garden

If you are getting the bug to garden, here’s a quick and easy way to get started and learn the basics: pot gardening. No, no that kind of pot. I’m talking about gardening in pots.

I have had a pot garden for a couple of decades now, primarily to provide tomatoes, peppers, onions, lettuce and fresh herbs. Since I started, I also now have a number of fruit trees from key limes to a pomegranate.

There are a couple of considerations when starting a pot garden:

One is providing your plants enough soil to support their growth and fruit production; and

How do you plan to keep the soil moist. Soil is 25% water so it’s important to keep it hydrated so it can keep your plants alive.

Pot Garden Pot Size

For cool spring crops like lettuce and spinach, you can use smaller pots. Depending on how much lettuce and spinach you plan to grow, the crops sit almost on the top of the soil.

As you graduate to deeper rooted plants such as tomatoes, you will need more soil surface to feed the deep roots. 5 gallon paint buckets with holes in the bottom make excellent tomato pots.

Pot Garden Irrigation

Wood chips in pot bottom and plastic bottle with holes. (Photo by Charlotte Ekker Wiggins)

Wood chips in pot bottom and plastic bottle with holes. (Photo by Charlotte Ekker Wiggins)

The other consideration is how do you plan to keep the pots watered. I include plastic bottles with holes all over them in the center of the pots. That way when I water I know the plant roots sitting towards the bottom of the pot will get hydrated.

I also line the bottom of my pots with broken up wood limbs and wood chips. The wood will naturally retain water and help keep the soil moist. You can also use new cut up diapers and old socks to form wicks to hold in water.

Also plan on having dishes of some sort under your pots to slow down water loss.

Where to Place Pots

I keep my pots on little rolling plant stands so that I can easily move them to get their sun requirements. The larger the pot, the more help I need to move them.

Other Pot Gardens

As our soils get exhausted from overuse and lack of refreshing, it can become more difficult to get anything to grow. I wrote a 5-year plan for our local community garden to help them improve their soil but it was not implemented.

Today community garden users depend on large pots to grow their vegetables and flowers.

Our community garden is one large pot garden. (*Photo by Charlotte Ekker Wiggins)

Our community garden is one large pot garden. (*Photo by Charlotte Ekker Wiggins)

To keep your pot garden healthy, compost kitchen scraps and incorporate them into your pot soil before planting. Compost provides soil residents food to keep them healthy. In turn, those soil microorganisms will feed the plants that feed you. Yes, it’s all interconnected!

Time to get my tomatoes in their pots! (Photo by Charlotte Ekker Wiggins)

Time to get my tomatoes in their pots! (Photo by Charlotte Ekker Wiggins)

Once you have your pots set up, it’s time to add seeds or plants. My first tomato, a cherry variety is in and now enjoying rain water.

Charlotte

Zippy Zinnias

A bouquet of last fall’s zinnias brightening my kitchen. (Photo by Charlotte Ekker Wiggins)

A bouquet of last fall’s zinnias brightening my kitchen. (Photo by Charlotte Ekker Wiggins)

Zippy Zinnias

If you are just starting to garden and putting in some vegetables, don’t forget these easy to grow flowers, zinnias. Zinnias are an excellent pollinator magnet, bringing in bees to find your vegetables and increasing your yield.

You will find zinnias in a variety of sizes and colors where you find most seed packets. I like the miniature ones for pot gardens and the single taller ones for regular garden spots. Pick the ones that are single, those are the ones that will attract bees.

Zinnias are native to Mexico and now cover a region stretching from the Southwestern United States to South America.

Zinnias were named after the German Botanist Johann Zinn who first discovered them in Mexico and described the plants as being small and weedy. Zinnias are in the Asteraceae plant family which is referred to as the daisy or sunflower family.

They were brought to Europe in the 1750s and have since been bred and cultivated to include a vast palate of bloom types and colors. The earliest zinnia cultivars were reintroduced to the United States in the 1790s with double flower forms appearing in the mid-1800s. There was a renewed interest in zinnias during the 1920s when the first dahlia-flowered cultivars ‘Giant Dahlia’ and ‘California Giant’ were introduced. These cultivars have large, flat-flower heads and come in a multitude of colors.

Zinnias as they grow in a garden. (Photo by Charlotte Ekker Wiggins)

Zinnias as they grow in a garden. (Photo by Charlotte Ekker Wiggins)

There are single, semi-double, or double flower forms. Single-flowered zinnias are the ones to select if you’re trying to attract pollinators to your garden; the central flower is visible and produces viable nectar and pollen for visiting bees and butterflies.

Semi-double zinnias have several rows of petals with the central flower barely visible.

Double-flowered zinnias have been bred to where all of the visible floral structure produces petals. These can create quite the show in the landscape with the amount of color that is packed onto one stem.

There are several other types including beehive, button, and cactus type zinnias. The most common species grown are Zinnia elegans and Zinnia angustifolia. Zinnia elegans is grown primarily for cut flowers and can grow up to four feet tall and have single or double flowers in the colors of salmon, gold, yellow, white, red, rose, cherry, pink, lavender, purple, orange, and light green. These flowers can be solid or multicolored and range in size from one to seven inches in diameter. Common cultivars of this species include ‘State Fair’, ‘Lilliput’, and ‘Magellan’. Zinnia angustifolia has small, single, golden-orange flowers and have narrower foliage than Z. elegans.


The Lilliput cultivars are excellent for pot gardens and borders. The California Giants and Cactus will grow in most soils and bring a spot of color to any garden spot.

Once they finish the growing season, they may self-seed if the winter is mild. The seeds can also be collected and dried for sowing again the following year.

Zinnia seeds shared with my beginning beekeeping students last winter. (Photo by Charlotte Ekker Wiggins)

Zinnia seeds shared with my beginning beekeeping students last winter. (Photo by Charlotte Ekker Wiggins)

If you plant only one flower this year, plant zinnias. They are very easy to grow and will make you want to plant more!

Charlotte