Seed Snails

How to Plant Seeds in Seed Snails

If you’re short on space, starting a lot of seeds, or just tired of trays everywhere, let me introduce you to one of my favorite low-fuss seed starting methods: seed snails (also called seed rolls).

What Is a Seed Snail?

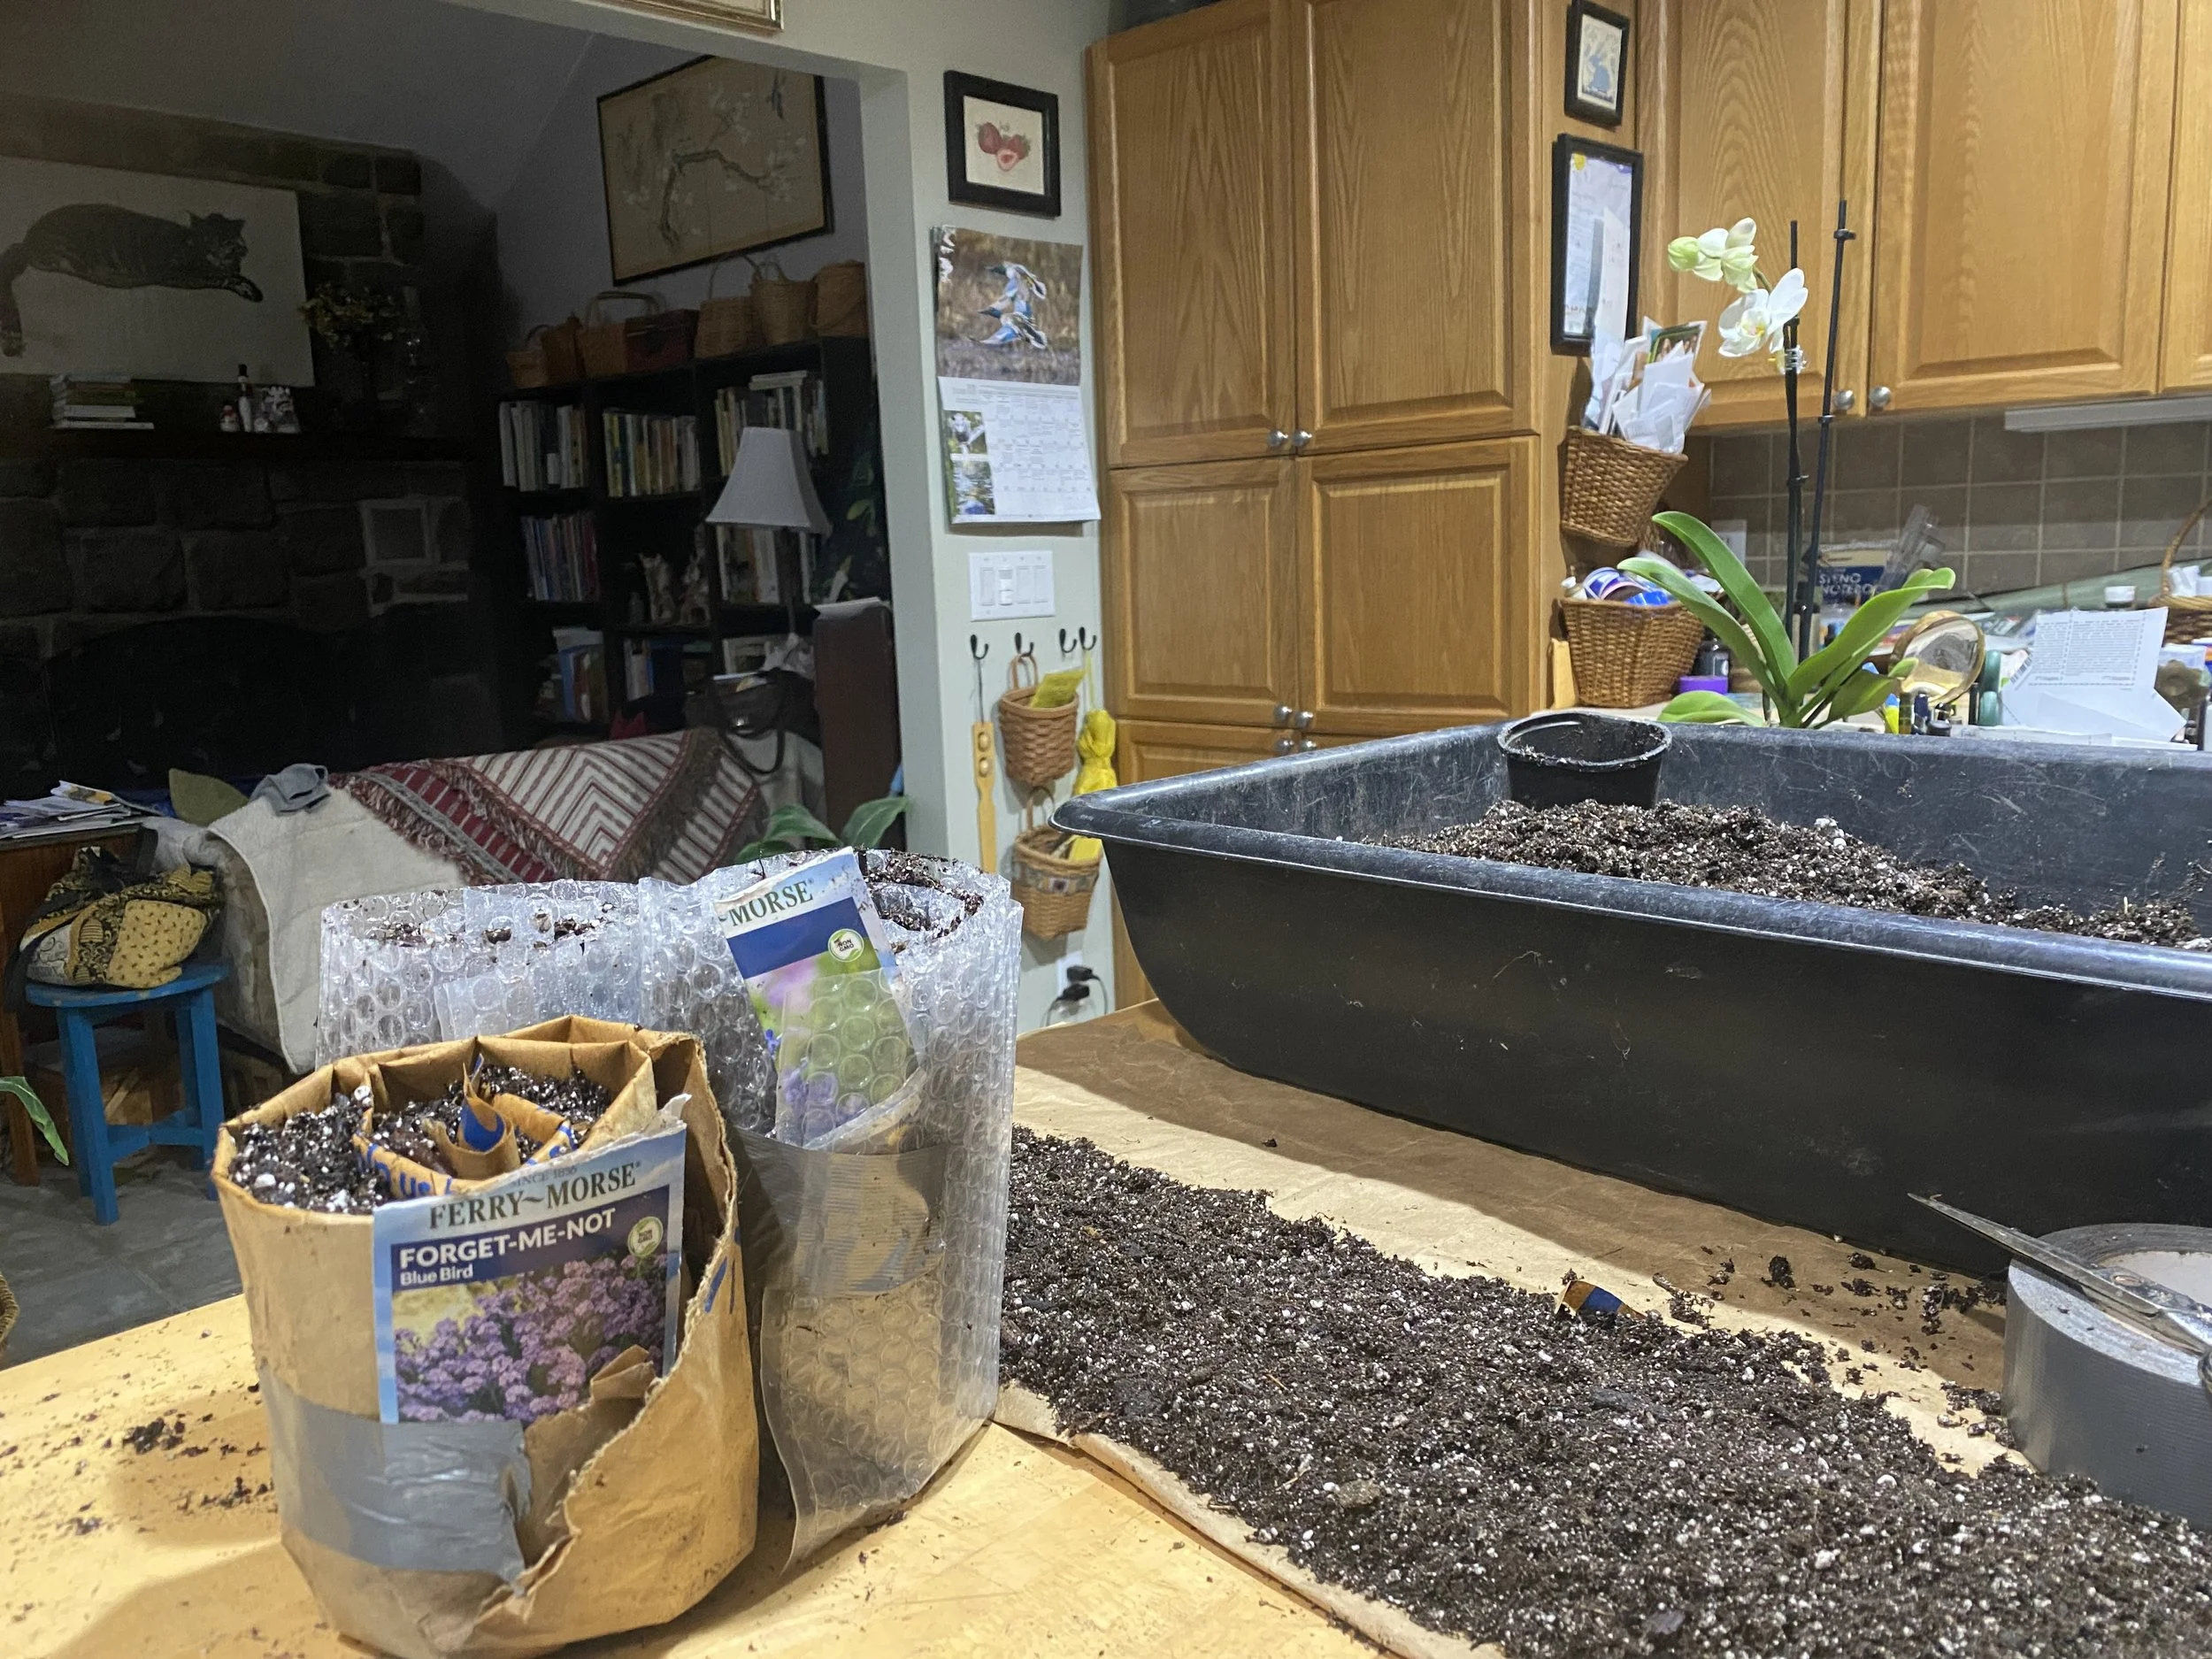
A seed snail is a long strip of material layered with soil, seeded, then gently rolled up like a cinnamon roll. When unrolled, each seedling has its own root space—no tangled mess, no plastic cells to scrub later.

What You’ll Need

  • Flexible base material
    (plastic sheeting, shelf liner, old feed bags, or even thick freezer bags cut flat)

  • Seed-starting mix (light and fluffy—no garden soil)

  • Seeds

  • Spray bottle with water

  • Rubber bands, twine, or clips

  • Shallow tray or container (to stand snails upright)

  • Plant labels or masking tape + marker

Planting Seeds in Seed Snails

  1. Cut strips about 6–8 inches wide and 12–18 inches long.
    Wider strips = deeper roots = happier seedlings.

2. Spread ½–¾ inch of moist seed-starting mix evenly over the strip, leaving about ½ inch bare at the top edge to prevent soil spill when rolling. Soil should feel like a wrung-out sponge—not muddy.

3. Place seeds along the top edge of the soil:

  • Small seeds: sprinkle lightly and gently press in

  • Larger seeds: space according to packet directions

4. Leave about 1–2 inches between seeds.

5. Starting at one end, roll gently but snugly—don’t compress the soil. Secure with a rubber band or twine.

6.Place snails upright in a shallow tray. Mist thoroughly with water.

7. Bottom watering works beautifully once seeds sprout.

Light & Care

  • Place in bright light (grow lights or sunny window)

  • Keep soil consistently moist, not soggy

  • Once seedlings have true leaves, they’re ready to:

    • Be unrolled and potted up

    • Or transplanted directly into the garden (weather permitting)

Best Seeds for Seed Snails

  • Tomatoes

  • Peppers

  • Lettuce & greens

  • Herbs

  • Flowers like zinnias, cosmos, and marigolds

Why I Love Seed Snails

✔ Space-saving
✔ Low cost
✔ Easy transplanting (less root shock)
✔ Perfect for starting dozens—even hundreds—of seeds
✔ Gentle on hands and wrists

Final Tip from the Garden

If a seed doesn’t germinate, just roll the snail back up and keep going—no wasted cells, no empty trays, no guilt.

Sometimes the smartest gardening tools aren’t fancy… they’re just rolled up.

For more gardening, beekeeping, cooking and easy home decor tips, subscribe to Garden Notes, my free weekly newsletter.

Charlotte

Snow and Ice in Garden

snow covers an inch of ice in my southern apiary. (charlotte ekker wiggins photo)

Snow and Ice in Garden

It’s easy to complain about winter snow and ice. However, there also are benefits to having this precipitation, starting with a reduction in areas with on-going drought. The following are pros and cons of ice in the garden and some suggestions on how to manage it.

Pros of Snow and Ice in the Garden

  1. Insulation for Plants

    • Snow acts as a blanket: It traps air and insulates the soil, protecting plant roots and bulbs from extreme cold temperatures. This reduces the risk of frost damage.

    • Prevents soil heaving: By maintaining a steady ground temperature, snow prevents the freeze-thaw cycles that can push plants out of the soil.

  2. Moisture Reservoir

    • Slow water release: When snow melts, it provides a steady supply of water that can penetrate deeply into the soil, replenishing moisture reserves in spring.

  3. Protection for Perennials and Seeds

    • Shield against wind chill: Snow can prevent desiccation by protecting plants from drying winter winds.

    • Encourages dormancy: Consistent cold temperatures under the snow help plants maintain dormancy, reducing the risk of premature growth during winter thaws.

  4. Pest and Disease Control

    • Kills off pests: Harsh freezes can reduce populations of overwintering pests, pathogens, and weed seeds in the garden.

Cons of Snow and Ice in the Garden

  1. Weight Damage

    • Broken branches: Heavy snow and ice accumulation can snap branches, especially on evergreens or young trees.

    • Flattening plants: Snow can damage delicate plants that aren't strong enough to support its weight.

  2. Ice Hazards

    • Ice suffocation: Ice layers can block airflow, potentially suffocating plants underneath.

    • Root rot risk: Prolonged ice in poorly drained soils can lead to waterlogging and root rot once the thaw begins.

  3. Salt and Chemical Damage

    • De-icing runoff: Salt and chemical de-icers used on paths and driveways can leach into the garden, harming soil structure and plant health.

  4. Soil Compaction

    • Frozen soil compaction: Walking on snowy or icy ground compacts the soil, reducing air and water permeability.

  5. Delayed Growth

    • Cold soils in spring: Prolonged snow cover can delay soil warming, slowing down the spring planting season.

Tips to Manage Snow and Ice in Your Garden

  • Shake off snow gently from branches to prevent breakage.

  • Avoid using salt-based de-icers near garden beds; use cracked corn or sand instead.

  • Mulch plants before snow arrives to provide an extra layer of insulation.

  • Redirect runoff from melting snow to avoid flooding or salt contamination.

  • Prune trees and shrubs in the fall to remove weak branches that might break under snow.

Conclusion

With thoughtful management, the benefits of snow and ice often outweigh the negatives. And with snow you get a great excuse to stay warm and dry at home!

For more gardening, beekeeping, cooking and easy home decor tips, subscribe to Garden Notes, my free weekly newsletter.

Charlotte

Winter Mulch; Protecting Plants

A new supply of free recycling center wood chips are wintering over for next year use. (charlotte ekker wiggins photo)

Winter Mulch; Protecting Plants

Winter is a resting time for both gardeners and gardens. One of the last garden activities should be to mulch, which can be the difference between surviving and thriving in spring. Mulching during winter is more than a routine task; it's a strategic defense mechanism that shields your garden from harsh elements while nurturing soil beneath the frosty surface.

Here are crucial steps to effectively mulch your garden over winter and why they're vital for a spring flourishing garden.

  1. Apply a Layer of Compost: Before mulching, apply a thin layer of compost to provide additional nutrients to the soil. Compost enriches the soil, supporting microbial activity and enhancing overall soil health.

  2. Select the Right Mulch Material: Choose appropriate mulch materials such as straw, shredded leaves, wood chips, or pine needles based on your garden's needs. Different materials offer varying insulation, moisture retention, and nutrient benefits.

  3. Mulch Around Plants and Trees: Apply mulch around the base of plants, leaving a small gap between the mulch and plant stems or trunks. This helps retain moisture, regulates soil temperature, and inhibits weed growth.

  4. Layer Mulch Appropriately: Layer mulch at a sufficient depth (typically 2-4 inches) to provide insulation without smothering plants. Thicker mulch layers insulate better but ensure proper air circulation to prevent issues like rot.

  5. Focus on Vulnerable Areas: Pay extra attention to vulnerable areas, such as newly planted trees or shallow-rooted plants. These areas require thicker mulch layers to protect them from freezing temperatures.

  6. Avoid Mulch Piling against Stems: Ensure that mulch doesn’t directly touch the stems or trunks of plants and trees. Direct contact can invite pests and diseases while potentially causing stem rot.

  7. Monitor and Refresh Mulch as Needed: Periodically check the mulch throughout winter. If it thins out due to weather conditions or decomposition, add a fresh layer to maintain adequate protection.

  8. Reap the Benefits in Spring: Understand that these steps aren't just about surviving winter but setting the stage for a vibrant garden in spring. Mulching conserves moisture, prevents soil erosion, and promotes healthy soil, ensuring a bountiful growing season ahead.

The careful application of mulch during winter is an investment in the future health and beauty of your garden.

For more gardening, beekeeping, cooking and easy home decor tips, subscribe to Garden Notes.

Charlotte