Homemade Wood Arbor

This wood arbor combines smooth wood with garden remnants. (Photo by Charlotte Ekker Wiggins)

This wood arbor combines smooth wood with garden remnants. (Photo by Charlotte Ekker Wiggins)

Homemade Wood Arbor

February is a good month to start planning what to want to get done in this year’s garden once spring arrives. I once again have garden arbors on my list.

For inspiration, here is a homemade wood garden arbor made with a basic trellis along with other garden branches.

Pre-made lattice top finishes this easy to make garden arbor. (Photo by Charlotte Ekker Wiggins)

Pre-made lattice top finishes this easy to make garden arbor. (Photo by Charlotte Ekker Wiggins)

As our temperatures continue to get warmer, garden arbors will be an important addition to give growing vegetables and plants a break from the heat.

This arbor is at the doorway into a vegetable patch, a nice opportunity to grow flowers that will attract pollinators to the flowering plants.

To secure the branches to the side, use long nails or an air gun with long staples.

Once plants are growing up the sides, you won’t see the design. The additional tree branches are to give the growing plants a good hand hold.

Charlotte

Water Dogwoods

One of the dogwood trees in my center island is starting to show red fruit. (Photo by Charlotte Ekker Wiggins)

One of the dogwood trees in my center island is starting to show red fruit. (Photo by Charlotte Ekker Wiggins)

Water Dogwoods

Record hot summer temperatures are back in mid-Missouri, even though it’s the beginning of September. We sometimes have hot weather in USDA Hardiness zone 5b/6a this time of year. In the past, though, it was a continuation of August hot temperatures. Now temperatures fluctuate from week to week, sometimes as much as 20 degrees from one week to the next.

As temperatures climb into the high 90s, it’s important to make sure one of my favorite tree roots are protected and hydrated. Flowering dogwoods are understory trees, which means they like shade and cooler growing conditions under the taller, towering trees such as oaks and hickory.

Although they are Missouri’s state tree, they are not easy to plant and grow. Even George O. White Nursery, which sells flowering dogwood seedlings, warns buyers that 40% may not make it.

Gardening on my limestone hillside is a test of patience. It can take trees many years to get their roots established, then a few more years before they find enough nutrition to power their growth.

This dogwood tree, which sits in my center driveway island, had been 2-feet high for more than a decade. I staked it to make sure I wasn’t stepping on it and even moved my garden path to protect it. In the last three years, it has had a nice growth spurt and is now is taller than I am.

Here is how this flowering dogwood looked this past spring:

Here is the same dogwood earlier this spring. (Photo by Charlotte Ekker Wiggins)

Here is the same dogwood earlier this spring. (Photo by Charlotte Ekker Wiggins)

To make sure the flowering dogwood trees can survive the fluctuating record hot temperatures, I am adding a bed of twigs over the base covered in dry leaves. Once watered so the twigs and leaves hold in the moisture, I cover the twigs and leaves with mulch from our local gardening center that has wintered over in my garden.

By waiting a year to use it, the mulch is safe to spread on the garden.

Adding leaves, twigs and mulch are critical to keep dogwoods happy. (Photo by Charlotte Ekker Wiggins)

Adding leaves, twigs and mulch are critical to keep dogwoods happy. (Photo by Charlotte Ekker Wiggins)

The mulch topping will then keep the moisture in and help keep the dogwood roots from feeling the fluctuating temperatures.

Leaves will also help keep the soil on the acid side, which dogwoods prefer.

Here’s the same dogwood tree nicely mulched in spring. (Photo by Charlotte Ekker Wiggins)

Here’s the same dogwood tree nicely mulched in spring. (Photo by Charlotte Ekker Wiggins)

Years ago, our rural community had a lovely residential neighborhood well known for its spring flowering dogwoods. The flowering dogwood trees were so thick, it almost looked like the trees were snow-covered.

I don’t visit the area much but someone who lives there recently told me most of the dogwoods have died. In their zeal to keep their lawns perfectly manicured, the residents removed the much-needed leaf and tree debris cover that kept the dogwoods hydrated.

They would have been better off leaving the twigs and leaves on the ground around the dogwoods. They would have kept the roots hydrated; it would have been less trouble to the homeowners and ensured that the flowering dogwoods would have survived.

Charlotte

Thwarting Squirrels

Think this will work to protect one of my last Bartlett pears? (Photo by Charlotte Ekker Wiggins)

Think this will work to protect one of my last Bartlett pears? (Photo by Charlotte Ekker Wiggins)

Thwarting Squirrels

It’s now mid-September and I can declare, with certainty, the squirrels have won.

Most people complaint about rabbits in their gardens but for me it’s these furry acrobats. I love to watch them in my garden but. At least four squirrels at a time have managed to denude my semi-dwarf Bartlett pear tree from hundreds of green pears over summer. I watched them right before dusk every day, running up the tree, pulling a pear off and sitting on my deconstructed deck to enjoy it.

One of the squirrels eating one of my green Bartlett pears earlier this summer. (Photo by Charlotte Ekker Wiggins)

One of the squirrels eating one of my green Bartlett pears earlier this summer. (Photo by Charlotte Ekker Wiggins)

I would gather the leftovers the next day into a plant saucer, only to find them gone by mid-day.

I was silly enough to say to my handyman that there are more than enough pears to go around.

Apparently not.

The pear tree now only has two pears left. Can you spot one of them in this photo?

One of the two pears still left on my Bartlett pear tree. (Photo by Charlotte Ekker Wiggins)

One of the two pears still left on my Bartlett pear tree. (Photo by Charlotte Ekker Wiggins)

The other pear is on one of the lowest branches, hiding in the middle of construction materials.

My thought is the pear is not easy for squirrels to see so I hooked one of those fruit clam shells around it. The hope is that the clam shell will protect the one little pear until it can ripen enough for me to pick it.

I’m using a clam shell around one of the two pears hoping I will enjoy it. (Photo by Charlotte Ekker Wiggins)

I’m using a clam shell around one of the two pears hoping I will enjoy it. (Photo by Charlotte Ekker Wiggins)

Considering that this tree usually produces hundreds of pears every other year, I will start trimming some of the baby pears next spring and try to protect more for my use.

I have been told squirrels are very smart and will chew through fruit screens so I may need to come up with something hardier.

So far so good!

Charlotte

Dayflowers and Garlic Chives

Isn’t this a lovely flower border combination? (Photo by Charlotte Ekker Wiggins)

Isn’t this a lovely flower border combination? (Photo by Charlotte Ekker Wiggins)

Dayflowers and Garlic Chives

Just when I was beginning to think that I was getting my limestone hillside garden nicely pulled together, nature shows me up - again.

Not that I take credit for a lot of what is growing in my one acre garden. I learned a long time ago to let the plants find their happy spots and leave them there. I also embrace things that show up uninvited, and unannounced. Life is so much easier when one is not wrestling plants all of the time.

Several years ago, I decided I wanted some native pink phlox in one of the front flower beds. After painstakingly transplanting starts, I waited for the following year. The plants settled in the flower bed opposite of where I wanted them to grow. And there they stay.

So when I was invited to dig up plants at a neighbor’s home, I picked up these small tufts of greenery without knowing what they were. I used them as border plants since the greenery was a good size for marking flower beds.

When they bloomed, I identified them as garlic chives, a good bee plant although the scent may be better for keeping vampires away.

These garlic chives came from a neighbor’s house and finally bloomed this year. (Photo by Charlotte Ekker Wiggins)

These garlic chives came from a neighbor’s house and finally bloomed this year. (Photo by Charlotte Ekker Wiggins)

As I was taking my morning walk in my garden, I was startled to see the dayflowers growing in the middle of the garlic chives.

Originally from China, dayflowers have naturalized in Missouri and are now considered a wildflower. I like them because they are one of the few true blue flowers that grow in my garden. They also retain moisture in their stems, making them easy to grow without a lot of water through our Missouri heat.

Dayflowers are originally from China but have settled well in Missouri. (Photo by Charlotte Ekker Wiggins)

Dayflowers are originally from China but have settled well in Missouri. (Photo by Charlotte Ekker Wiggins)

When I pull them out of an area, I transplant them to another spot since they so nicely get along with other plants.

On this particular morning, I was struck by the blue dayflowers growing in the middle of the flower bed bordered with garlic chives. It was such a sweet combination.

Garlic chives and blue dayflowers together in one of my flower beds. (Photo by Charlotte Ekker Wiggins)

Garlic chives and blue dayflowers together in one of my flower beds. (Photo by Charlotte Ekker Wiggins)

Yet another reason why I encourage dayflowers to bloom throughout my garden.

Charlotte

Mystery Solved

The flower bed island at the head of my driveway where the mystery plant was growing. (Photo by Charlotte Ekker Wiggins)

The flower bed island at the head of my driveway where the mystery plant was growing. (Photo by Charlotte Ekker Wiggins)

Mystery Solved

For a number of years, the small flower bed at the top of my driveway has had a mystery plant growing in it.

At first I just cut it down to a couple of feet off the ground so that I could see my street sign number. The plants didn’t grow very tall, and I didn’t see them growing in other garden spots.

As I added mulch and the flower bed developed better soil, the mystery plants started to get taller.

This year, I decided to let everything grow to its full potential so that I could identify what they were, including the mystery plant in the front island.

After reaching a good 7-feet tall, I started to see flower buds branching off the top. Okay, so I had to carefully bend the plant down to see the buds but they were definitely there.

Here is the plant almost 6 feet tall with flower buds. (Photo by Charlotte Ekker Wiggins)

Here is the plant almost 6 feet tall with flower buds. (Photo by Charlotte Ekker Wiggins)

Sawttooth Sunflower

As soon as I saw the yellow flowers, I was able to identify the mystery plant: sawtooth sunflower Helianthus grosseserratus, a member of the daisy family, one of the six large plant families that provide bees and other pollinators like butterflies food throughout the US Midwest growing season.

The Latin name grosseserratus gives a hint to this plant’s description of being a giant herb. The ones on the lower end of this flower bed are growing taller than the ones on the shorter, or left side.

Because they can grow up to 16-feet tall, they do get knocked over by rain storms.

The tall plant stalks are now all blooming. (Photo by Charlotte Ekker Wiggins)

The tall plant stalks are now all blooming. (Photo by Charlotte Ekker Wiggins)

According to Missouri Department of Conservation, sawtooth sunflowers sometimes grow in dense colonies, other times as single specimens.

Lower stems are often hairless, reddish, sometimes with a white waxy coating. Flower heads are all yellow to 3½ inches across, with 10–25 fairly wide ray florets. Blooms July through October, providing pollinators with food during Missouri’s hot August dearth.

The leaves are about 10 inches long and 2½ inches wide, coarsely toothed.

Interestingly enough, sunflowers readily hybridize with each other, which can make identification difficult. Not counting hybrids, there are 16 species of Helianthus recorded for Missouri. This species is perhaps best identified by its leaves, which are mostly alternate, very narrow, folded lengthwise along the mid vein, with flat (uncurled) leaf margins, and yellow disk florets.

I have seen similar-looking yellow flowers but the leaves were different.

Great Pollinator Plant

The Illinois wildflowers website notes “the most common visitors to the flowers are bees, especially long-tongued species. Among these are honeybees, bumblebees, Cuckoo bees (Epeolus spp., Triepeolus spp.), digger bees (Melissodes spp.), and leaf-cutting bees (Megachile spp.).

Other insect visitors include Syrphid flies, bee flies, butterflies, moths, and beetles. Both nectar and pollen are available as floral rewards. Other insects feed on the foliage, plant juices, pith of stems, developing seeds, etc., of sunflowers. These insect feeders include caterpillars of the butterflies Chlosyne nycteis (Silvery Checkerspot) and Chlosyne gorgone (Gorgone Checkerspot), stem-boring caterpillars of Papaipema necopina (Sunflower Borer Moth) and Papaipema rigida (Rigid Sunflower Borer Moth), seed-eating caterpillars of the moths Homoeosoma electella (Sunflower Moth) and Stibadium spumosum (Frothy Moth), foliage-eating caterpillars of Grammia arge (Arge Tiger Moth) and Phragmatobia fuliginosa (Ruby Tiger Moth), and other moths.”

Now that I know what they are, they get to stay. I will move the street sign. After all, who wouldn’t want to claim to be growing a giant herb in their garden that provides for so many pollinators!

Charlotte

September Garden Chores

Keep an eye out for fall plant sales, there’s still growing time before the ground freezes. (Photo by Charlotte Ekker Wiggins)

Keep an eye out for fall plant sales, there’s still growing time before the ground freezes. (Photo by Charlotte Ekker Wiggins)

September Garden Chores

Where has this year gone? Just when I think I am making progress we have much appreciated rain but too much all at once. Have you ever tried to dig holes on a slippery, muddy limestone hillside? I don’t recommend it!

On the other hand, my potted plants are enjoying a much-needed break from record hot temperatures so I will wait until I don’t have to tie a rope around my waist to get things into the ground.

I live in USDA Hardiness Zone 5b/6a and here are some of the other garden chores I tackle in September:

Start cleaning up flowerbeds and vegetable gardens by removing spent plants and saving seeds.  Leave the ragweed to treat the soil, they will die once their work is done.

If you have been fertilizing, it is time to stop. Plants need to start slowing down and get out of the growth they usually pursue through spring and summer, even without the boost of fertilizers. Add a last dollop of compost mixed in the soil and that should be it for this season.

Do keep watering trees and shrubs from now through hard frost. Our first hard frost is usually mid to end of October.

 If you plan to start a new garden next year, this is the time to cover it with cardboard to kill off any current growth.

Good time to start drying favorite herbs for winter use. (Photo by Charlotte Ekker Wiggins)

Good time to start drying favorite herbs for winter use. (Photo by Charlotte Ekker Wiggins)

Bring some of your herbs inside including parsley, chives, rosemary , catnip and stevia. Basil can also be brought inside; sow seeds now to get new plants started for later use. Dry the herbs and store in airtight container.

Good time to move peonies. I have several I buried too deep so when replanting, remember to not bury any more than an inch or two beneath the soil surface.

Daylilies and iris can also be dug up and divided.

Make notes in your garden diary about to dos for next year. Note what plants worked well this year, what seeds you had meant to plant but didn’t get to – whatever you want to tackle next year.

Have favorite annuals? I do, too, and I trim them now before bringing them inside. You can also take root cuttings and start young plants if you have good indoor light. Geraniums, coleus, wax begonias, impatiens all will winter over inside if you keep them pinched and bushy. Geraniums will winter over stored in brown bags without soil.

Order spring bulbs. Daffodils are toxic to deer so they won’t get munched on. Tulips are edible so buy a few for color, then plant them behind a solid wall with wire if you don’t want wildlife snacking on them in the meantime.

If you have left over Amaryllis bulbs, put them in a dry, dark place without water and let them rest for a couple of months. If you want to time when they bloom, pot and water them 6 weeks prior to when you want them in bloom.

Don’t bag and rake clippings, leave them on your lawn to return Nitrogen to the soil.

This is also a good time to stock up on mulch. Buy it in bulk or load up at your local recycling center before they close down for the season.

Start trimming plants you plan to bring inside to overwinter.

Charlotte

The Race is On!

One of my resident squirrels snacking on my very green Bartlett pears. (Photo by Charlotte Ekker Wiggins)

One of my resident squirrels snacking on my very green Bartlett pears. (Photo by Charlotte Ekker Wiggins)

The Race is On!

Mid to late summer the race is on, a contest between wildlife and a gardener on who will get to the ripe produce first. In my Missouri hillside garden, the race is currently between a family of grey squirrels and I, who likes ripe Bartlett pears.

I have a semi dwarf Bartlett pear tree that started to fruit after growing for 30 years. I planted it next to my deck with the thought that one day I could sit on the deck and pick a ripe pear, one of my all-time favorite fruits. It’s my version of a tree of life.

My deck is currently torn up and getting rebuilt but that hasn’t stopped the squirrels, they have developed a taste for green pears and somewhat of a similar plan.

Gray squirrel selecting a green pear to pick. (Photo by Charlotte Ekker Wiggins)

Gray squirrel selecting a green pear to pick. (Photo by Charlotte Ekker Wiggins)

Like clockwork, they show up in my garden late afternoon and start shopping for their fruit snack. I know they are around because I see the tree branches shaking.

Once a pear is selected and removed, they settle in on my deck. Well, what is currently left of the old deck.

One of my resident squirrels enjoying an afternoon green pear snack. (Photo by Charlotte Ekker Wiggins)

One of my resident squirrels enjoying an afternoon green pear snack. (Photo by Charlotte Ekker Wiggins)

If I try to discourage them from climbing the pear tree, they scamper off for a few minutes only to return to their shopping.

Once they have a pear, they settle back on the deck to enjoy it.

Another grey squirrel enjoying a Bartlett pear on my torn up deck. (Photo by Charlotte Ekker Wiggins)

Another grey squirrel enjoying a Bartlett pear on my torn up deck. (Photo by Charlotte Ekker Wiggins)

So far there seems to be enough pears to go around but my handyman is not so sure. His comment sounded like one of those math questions - if four squirrels consume a pear a day and it takes the Bartlett pear three 4 weeks to ripen, how many squirrels will help plant more trees.

Next year I may hedge my bets and cover part of the tree with some kind of netting. In the meantime, I am still counting on sharing these pears with these enterprising squirrels.

Charlotte

Growing Straight Redbuds

To strengthen Eastern Redbud trunks, try braiding several together. (Photo by Charlotte Ekker Wiggins)

To strengthen Eastern Redbud trunks, try braiding several together. (Photo by Charlotte Ekker Wiggins)

Growing Straight Redbuds

Missouri’s native Eastern Redbuds are a sight during spring. The greyish trunks get covered in small pink edible blossoms, a favorite nectar source for bees.

One of my honey bees visits a blooming Eastern Redbud tree in my spring garden. (Photo by Charlotte Ekker Wiggins)

One of my honey bees visits a blooming Eastern Redbud tree in my spring garden. (Photo by Charlotte Ekker Wiggins)

Growing Eastern Redbuds straight, however, is another matter.

The trees in nature are an understory tree, which means they grow in that area between the ground and the taller trees such as oaks and hickories. They are more on the same level as Missouri’s state tree, the dogwoods, also a spring-blooming tree that often follows in the Eastern Redbud footsteps. I like to think of these trees as the spring Trees of Life, a popular handmade patchwork quilt design.

Living on a Missouri limestone hillside, I tend to encourage as many Eastern Redbuds to grow since they already are established. To help them along, I do several things to encourage their straight trunk growth, starting with the very simple process of tying them to a nearby tree.

I make sure the tree I’m attaching will not compromise its growth by being tied to a nearby Eastern Redbud start.

Doubling and tripling twine ensures the Redbud will grow straight. (Photo by Charlotte Ekker Wiggins)

Doubling and tripling twine ensures the Redbud will grow straight. (Photo by Charlotte Ekker Wiggins)

Sometimes I can use two Eastern Redbud trees to anchor each other in their growth.

Those tend to be similar in size, or a trunk that has double trunk growth to stabilize one Eastern Redbud tree with the other one.

I place the string where I can see it as well as out of the way of my garden paths.

Here two Eastern Redbuds are being encouraged to grow straight together. (Photo by Charlotte Ekker Wiggins)

Here two Eastern Redbuds are being encouraged to grow straight together. (Photo by Charlotte Ekker Wiggins)

Periodically there is an Eastern Redbud without anything nearby where I can tie it. Then my handy, reusable pieces of rebar come in handy.

I can place the rebar at an angle to anchor the trunk and tie the Eastern Redbud to it.

Sometimes a piece of rebar helps to hold a Redbud tree trunk straight. (Photo by Charlotte Ekker Wiggins)

Sometimes a piece of rebar helps to hold a Redbud tree trunk straight. (Photo by Charlotte Ekker Wiggins)

When I have several young Eastern Redbud trees growing together, I can pretend to be a spider and weave a web of string between the young trees and a nearby oak. Keep the strings where you can easily see them in case you need to walk through the area.

In terms of when to do this, you can tie up trees almost any time of the year. I would be a little cautious doing it in winter when the tree trunk sap is not running and the trunk may be a little more brittle.

Several Eastern Redbuds are tied to this larger tree trunk to anchor them. (Photo by Charlotte Ekker Wiggins)

Several Eastern Redbuds are tied to this larger tree trunk to anchor them. (Photo by Charlotte Ekker Wiggins)

It may take a couple of years to give the Eastern Redbuds their straight trunks before I can untie them. The effort is well worth it for the beauty the trees offer my spring garden.

Charlotte

Cardboard Mulch

Cardboard makes a great flower bed mulch to kill off unwanted growth. (Photo by Charlotte Ekker Wiggins)

Cardboard makes a great flower bed mulch to kill off unwanted growth. (Photo by Charlotte Ekker Wiggins)

Cardboard Mulch

I’m taking a break from uncovering my latest new flower bed and creating a new one, courtesy of my stash of cardboard. If you garden on a hillside like I do, trying to even establish a new flower bed is a challenge. If you have an area that has established growth, it’s even more of a trial. That’s where my cardboard mulch kicks in.

Instead of using harmful chemicals to get rid of the unwanted growth, I use cardboard. The cardboard keeps the soil underneath moist as it kills off unwanted growth.

This is a cardboard pile that’s been sitting for about a month. (Photo by Charlotte Ekker Wiggins)

This is a cardboard pile that’s been sitting for about a month. (Photo by Charlotte Ekker Wiggins)

Once I establish my new flower bed site and make sure there is nothing growing there I want to keep, I haul my stash of repurposed cardboard to the new flower bed site, scattering the first layer over the new flower bed foot print. As I get more cardboard, I add it to the area, adding rocks to hold it down.

If I’m extra industrious, I will pour shovel fulls of wood mulch on top. If you have grass clippings, you could dump those on the cardboard.

By the time the new flower bed is ready for planting, the dry grass clippings could be incorporated to improve the soil. Make sure the grass is dry; still green grass is very hot and will burn.

Then it’s a matter of ignoring the looks of a cardboard-covered garden area for a couple of months as the cardboard kills off whatever is growing under it.

I do periodically peek underneath. I often find worms moving through the soil, a good indication that the cardboard is keeping the soil inhabitants happy. Birds and butterflies are not the only garden tenants we should cater to, the ones in the soil are what give us the flowers.

When I don’t see anything green anymore, I pile up the cardboard and move it to a new future planting area.

Underneath the cardboard, moist soil ready for planting. (Photo by Charlotte Ekker Wiggins)

Underneath the cardboard, moist soil ready for planting. (Photo by Charlotte Ekker Wiggins)

The cardboard lasts for about 3 new flower beds depending on the time of year. Early spring and late fall, when we have rain, the cardboard deteriorates faster.

In between, the cardboard holds out longer, even through summer rains. I suspect the heat dries out the cardboard faster.

I have also used cardboard as mulch, then dug a hole through it and planted it. It might be easier to plant something and then surround it with cardboard covered with mulch but I sometimes forget where I have used cardboard to kill off - usually - the vinca ground cover. Vinca is not a native plant but it has been invaluable to hold in my soil on this hillside until I develop the new flower beds.

If you have an area that is being taken over by unwanted plants, such as an iris bed or peonies, try small pieces of cardboard around them covered in mulch. After a few weeks you will find it easier to remove the unwanted plants and you will have both cardboard and mulch handy to keep the area clear of further unwanted guests.

And it will keep your soil moist, which is a huge plus, especially during Missouri’s infamous August dearth.

Charlotte


Removing Daylily Stems

Daylily stems after flowering and still green. (Photo by Charlotte Ekker Wiggins)

Daylily stems after flowering and still green. (Photo by Charlotte Ekker Wiggins)

Removing Daylily Stalks

The daylily blooming season is wrapping up here in Missouri USDA Hardiness zone 5b/6a. The season started with the traditional single orange daylilies blooming. These edible plants were originally brought over from Europe by our settlers in the 1600s and now are considered one of Missouri’s native wildflowers, featured on this Native Wildflowers handmade quilt. The daylily season starts mid-May. They are now nude tall green stems, some with seed heads.

There is a tendency to want to grab clippers and go cut them down but I suggest waiting. In a couple more weeks, the stalks will dry on their own, making it very easy to gently pull them out of the leaves without having to bend over and cut them at the bottom.

Every day I see more and more of these dried stems among my flower beds.

When daylily stalks dry out, they can easily be removed. (Photo by Charlotte Ekker Wiggins)

When daylily stalks dry out, they can easily be removed. (Photo by Charlotte Ekker Wiggins)

The dried out daylily stalks are now hollow, making them lightweight and easy to remove.

If you compost them, cut them up into smaller pieces so they can mix into the other green items. They will count as a “brown” in the green/brown mixture in your composter.

I have also considered whether the dried stalks can be used to weave something. A basket comes to mind but a floor mat would probably be a better project to try.

Let me just add that to my “to do in winter when I have nothing else to do” list.

Charlotte


August Gardening Chores

Missouri’s native pink phlox blooms now until frost. (Photo by Charlotte Ekker Wiggins)

Missouri’s native pink phlox blooms now until frost. (Photo by Charlotte Ekker Wiggins)

August Gardening Chores

With unexpectedly cool days heading into August this year, I hope to get more done than I usually do but I still won’t do much planting.  The soil in USDA zone 5b/6a tends to be on the dry side this time of year so unless it is some form of emergency I will pot plants and keep them hydrated until fall. Other gardening chores for August include:

1.     Water plants at root level, which means no sprinklers. Use underground wands and move the wands to saturate soil. Gardens need an inch of rain a week. Don’t forget established shrubs and older trees, they also need moisture delivered to their roots to make sure they make it through the record hot August temperatures.

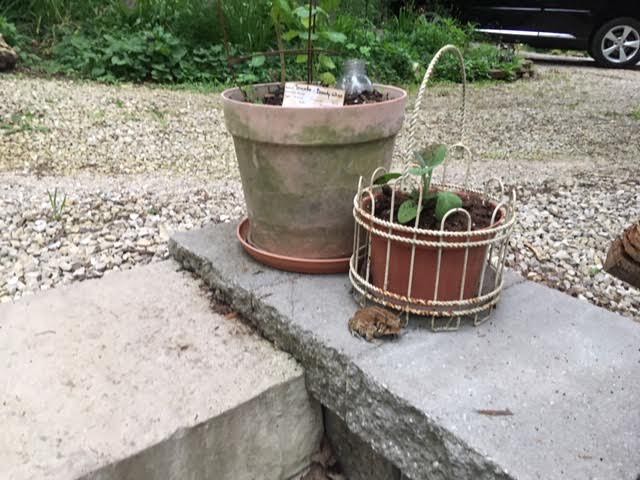
2.     Water potted plants daily; if temperatures are once again hitting record levels, maybe twice a day and move them into shade.

Add compost to keep the potted soil healthy.

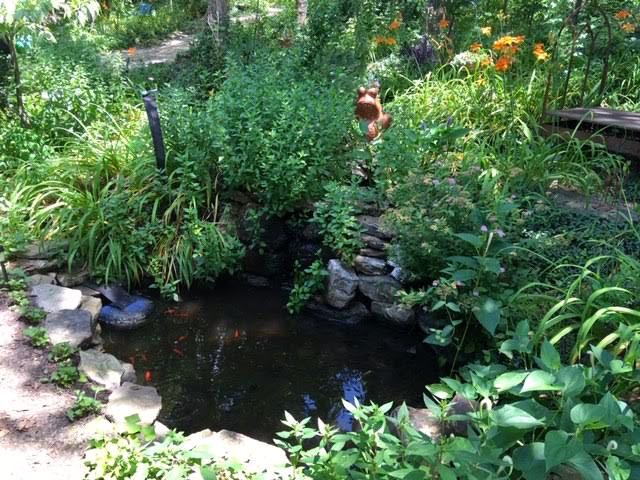
Mulch flower beds, especially after a good rain.

3.     If you didn’t get to planting your garden this year, at least toss a few buckwheat seeds to help improve your soil. Buckwheat will sprout in about 6 weeks and will be welcome fall food for pollinators as well.

4.     If you haven’t been using your fresh herbs, this is a good time to start. Most may have flowered and lost some of their potency but they still can be added to salads and other summer dishes.

Rosemary and chamomile can be harvested and used in bloom. I chop up and freeze some of mine in ice cubes for winter use in soups.

5.     My tomatoes set late this year but they are finally ripening. Try to keep them evenly watered to minimize cracking.

6.     Have peonies you want to divide? Wait until after a good rain but you can start dividing them from now through September. Bury the root “eyes” no more than an inch or two beneath the soil; if you bury them deeper the plants won’t flower. If you have to move peonies without rain, use a hose to soak the soil around the plant before you try to dig it up.

7.     You can also dig up daylilies and iris now to divide and re-plant. Again I would wait until after a good rain. If you still need to move them, at least water the area with a hose first so you don’t rip roots when you try to dig them up.

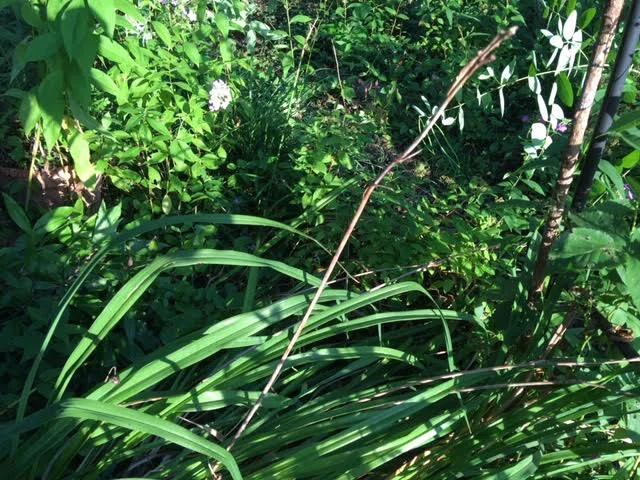
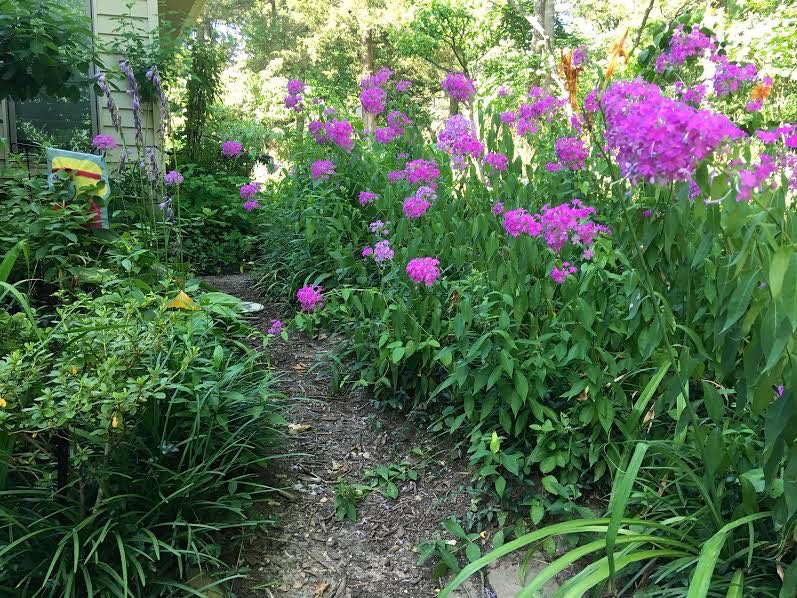
8.     If you have Missouri’s native pink phlox growing in inconvenient places, wait after a rain and dig them up with soil around their shallow roots. Move to their new location and make sure their roots are hydrated for the rest of the month. They tend to settle in quickly.

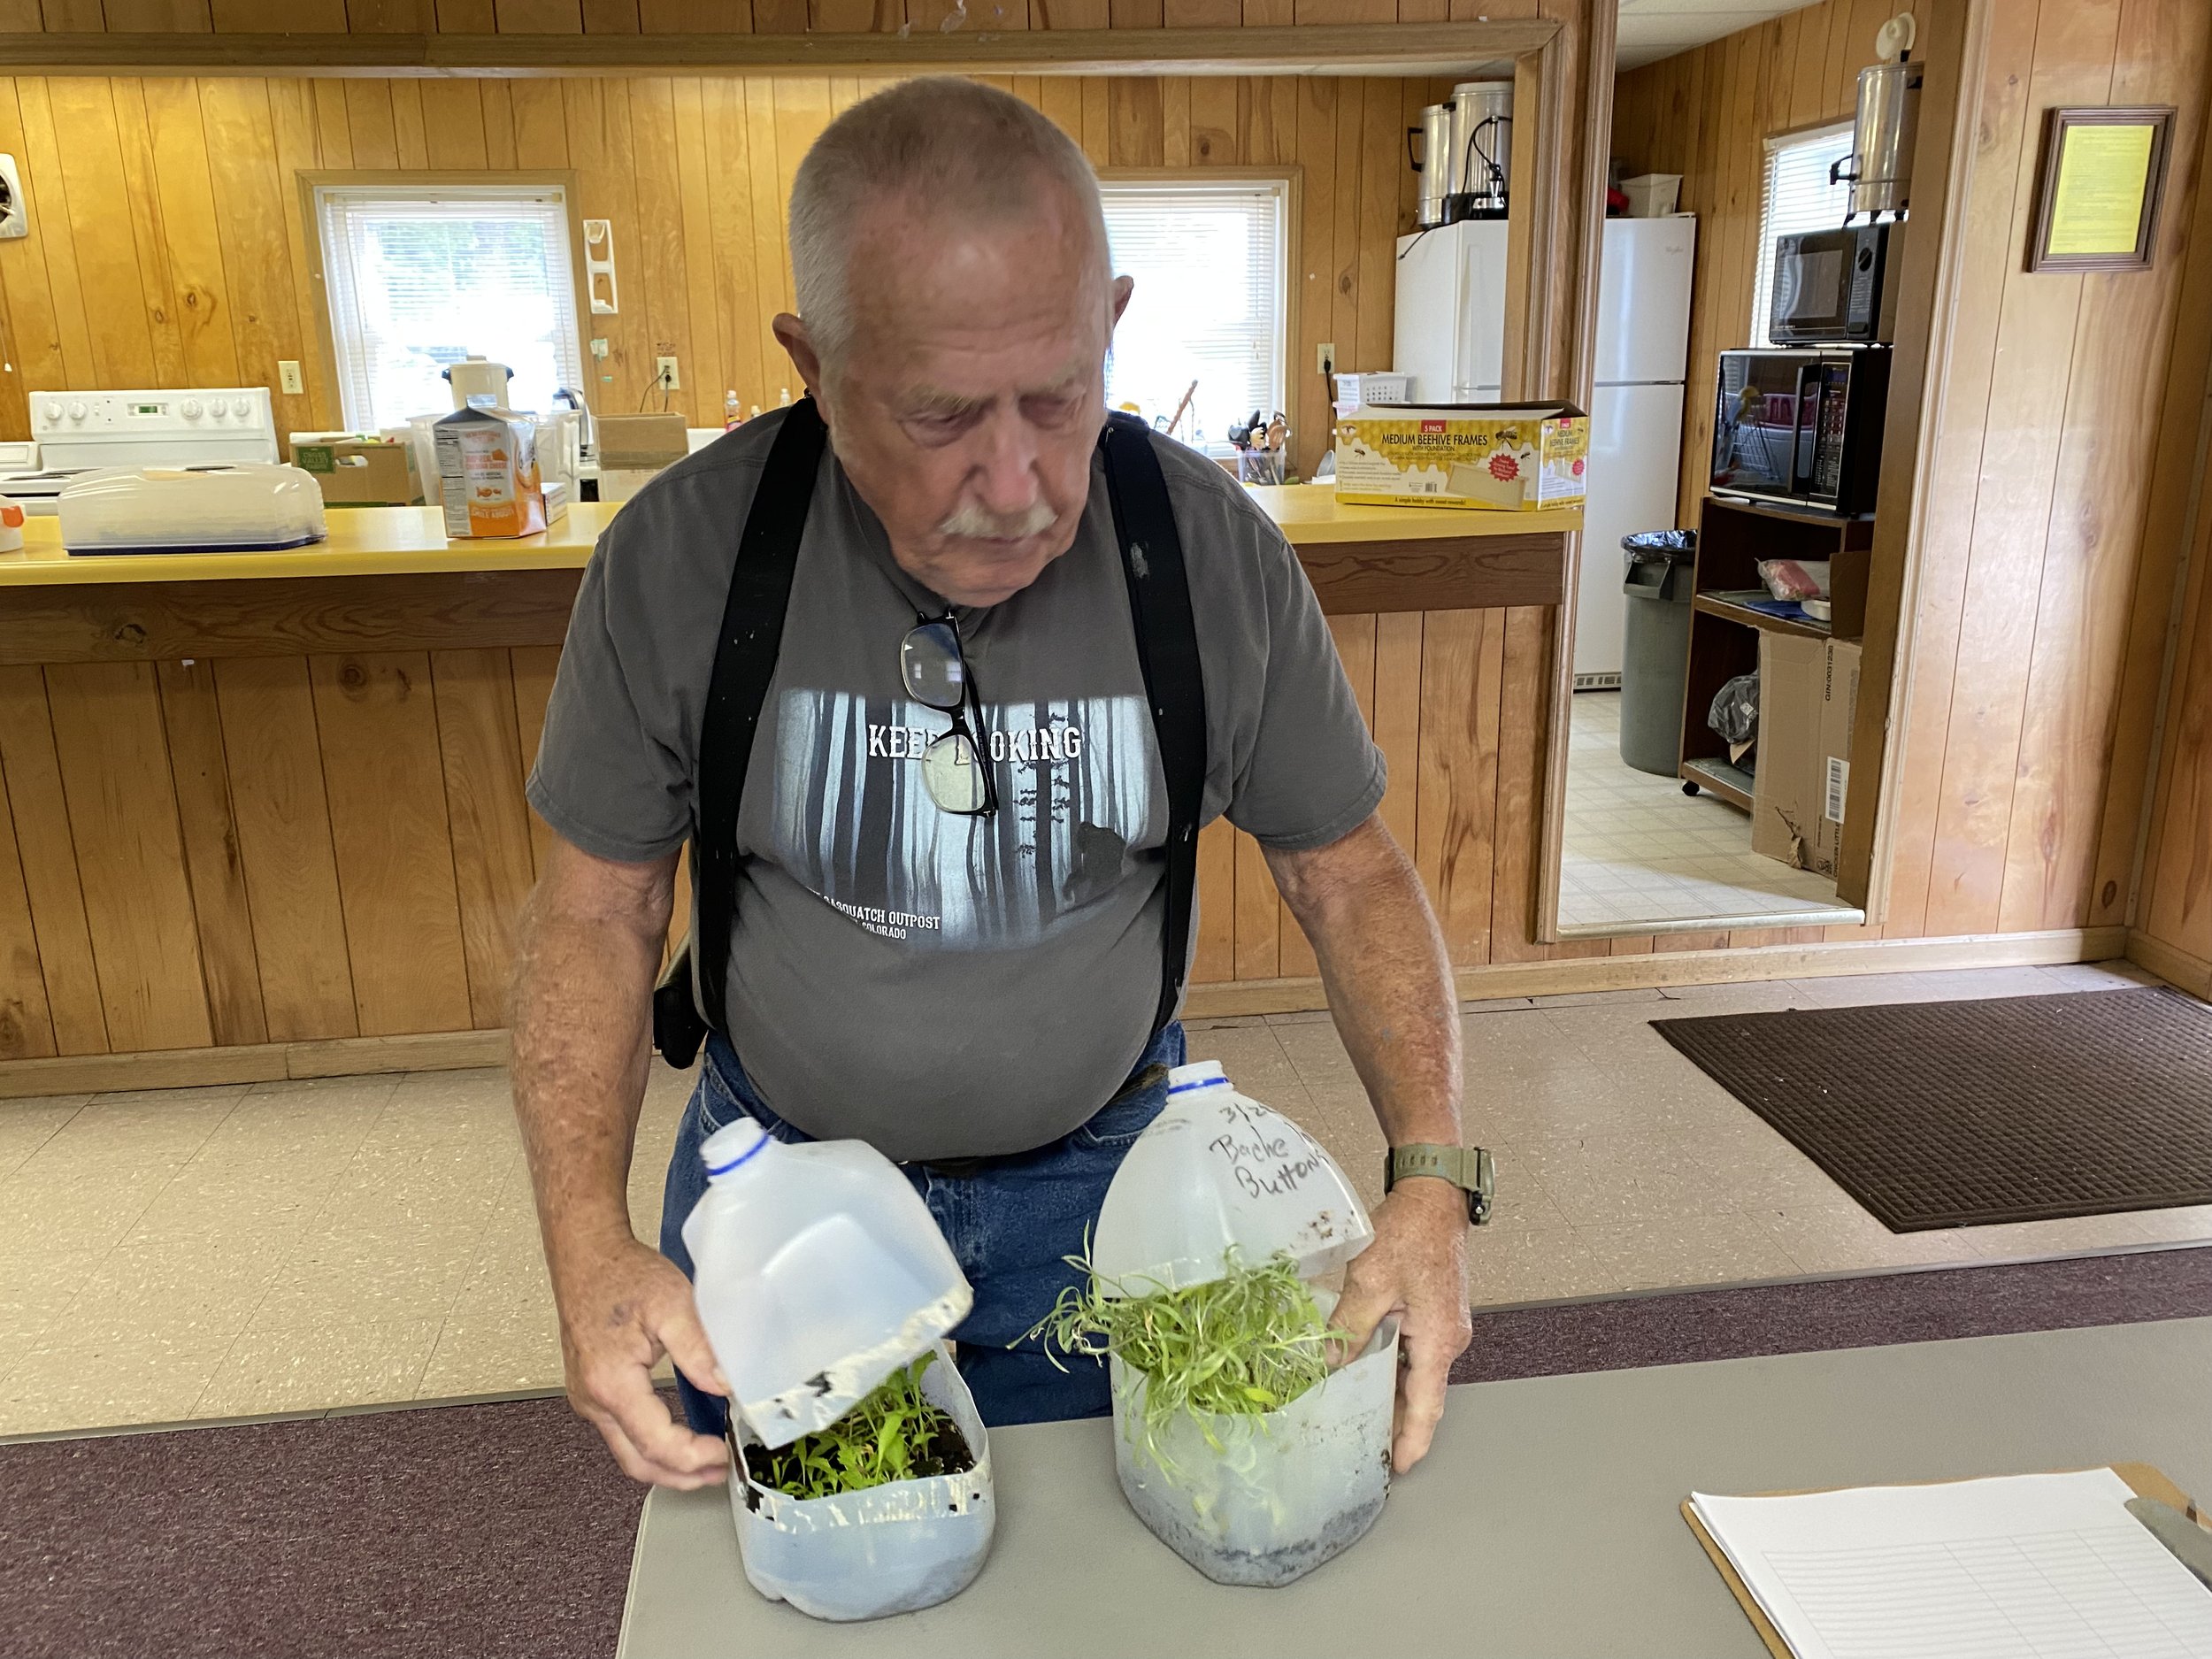
9. Start saving seeds for next year. Marigolds, zinnias and sunflowers have a lot of seeds than can easily be stored.

10.     I am also developing new flower beds for next year by removing starts, adding cardboard and mulching.

11. Hot temperatures can prompt trees to drop leaves early. Leave leaves on the ground to return nitrogen to the soil. If you are worried about them sitting on grass, set your mower to a higher setting and cut them up when you mow. Leaves are a wonderful source of soil amendments. They also work well as mulch, helping to retain water when leaves are underground or under mulch.

Charlotte

Assassin Bugs

Assassin bug makes a meal out of a Japanese beetle in my garden. (Photo by Charlotte Ekker Wiggins)

Assassin bug makes a meal out of a Japanese beetle in my garden. (Photo by Charlotte Ekker Wiggins)

Assassin Bugs

Looks like we do have a garden ally in our quest to control Japanese beetles, the assassin bug!

I have seen a few of these in my garden in the last couple of years. They are quick and retreated when I tried to approach so I just kept an eye out for them. Since I don’t use pesticides in my garden, I have been seeing more of them and they are most welcome, especially when I caught the large light grey one making a meal out of a Japanese beetle.

Assassin bugs (family Reduviidae) are predatory insects that are of great benefit to gardeners so they fall under the beneficial insects category along with praying mantis and ladybugs. They capture and feed on a wide variety of prey including Japanese beetles, flies, caterpillars and yes, sometimes bees.

The assassin bug sits quietly until the prey gets close enough for them to stab it with its long mouthparts. After being immobilized by a paralyzing toxin, the prey’s body fluids are then drawn through the assassin bug’s soda straw-like mouthparts, very much like a bug drinking a milk shake.

Several insect books noted most species of assassin bugs are gray to black or brownish in color, though some unique to ecosystems can also be bright.

There are several kinds of assassin bugs:

Ambush bugs are a type of assassin bug that lie in wait for their prey on flowers. Some of these species are colored to blend in perfectly with their flower hiding places.

The wheel bug is the largest of the 150 or so species of North America assassin bugs. Adult wheel bugs are gray and approximately 3 cm (1 ¼ inches) long. Its name comes from the distinctive, cog-like crest arising from the top of the thorax, or middle section, of the wheel bug’s body . Wheel bugs will attack larger insects like grasshoppers and larger caterpillars.

Although most assassin bugs are highly beneficial, the cone nosed bug or kissing bug is parasitic on humans and other mammals. Cone nosed bugs have the same elongated head as the wheel bug, but can be distinguished from wheel bugs by their lack of a crest and by their orange and black markings where the abdomen extends laterally past the folding wings.

This assassin bug patrols one of my dwarf cherry trees. (Photo by Charlotte Ekker Wiggins)

This assassin bug patrols one of my dwarf cherry trees. (Photo by Charlotte Ekker Wiggins)

Don’t Mess With Assassin Bugs

The bug’s name is enough to keep me at bay but I know some people like to fiddle with what they find in their gardens. Some assassin bugs, most notably the wheel bug, will bite if picked up and handled carelessly. The bite of the wheel bug is immediately and intensely painful.

See bug name as motivation not to pick it up!

Persons who are bitten should wash and apply antiseptic to the site of the bite. Oral analgesics, such as aspirin or ibuprofen, may be useful to reduce the pain. Treatment by a physician is not usually needed.

As with any insect sting or bite, the victim should seek medical attention immediately if there is any sign of anaphylactic reaction, such as generalized swelling, itching, hives or difficulty breathing.

Charlotte

For the Love of Red

Margaret in one of her favorite garden spots, where she can watch frogs. (Photo by Charlotte Ekker Wiggins)

Margaret in one of her favorite garden spots, where she can watch frogs. (Photo by Charlotte Ekker Wiggins)

For the Love of Red

Margaret loved anything red. Red birds, red toys, my one pair of wool red socks, which often disappeared from my closet only to be found under sofas. Or sitting next to her as she napped.

Margaret was a part-Siamese cat who died a year ago after almost 21 years of keeping me company. I still miss her; she used to wake me up around 5:30 a.m., her favorite time to sit on my lap at a window waiting for birds to appear.

Her successor, Boo Boo Bartholomew takes my 10 p.m. bedtime seriously but he prefers to sleep in mornings so I had to buy an alarm clock.

When I started to consider how to mark Margaret’s grave, the gorgeous Cardinal flower came to mind. A true red, the tall flower can grow up to 6 feet tall, which I can easily see from my living room window.

It can take plants a good year for their roots to get established in my Missouri limestone hill so I wasn’t sure the plant had made it. Earlier today I found it starting to bloom, the stalk needing a little support so I gave it a stake to lean on.

The cardinal flower now blooming in Margaret’s memorial garden. (Photo by Charlotte Ekker Wiggins)

The cardinal flower now blooming in Margaret’s memorial garden. (Photo by Charlotte Ekker Wiggins)

Cardinal flowers Lobelia cardinalis is a Missouri native perennial which typically grows in moist locations along streams, sloughs, springs, swamps and in low wooded areas. According to Missouri Botanical Garden, it is a somewhat short-lived, clump-forming perennial which features erect, terminal spikes (racemes) of large, cardinal red flowers on unbranched, alternate-leafed stalks rising typically to a height of 2-3' (infrequently to 4').

Tubular flowers are 2-lipped, with the three lobes of the lower lip appearing more prominent than the two lobes of the upper lip. Finely-toothed, lance-shaped, dark green leaves (to 4" long). They usually bloom this time of year, late summer.

Cardinal flowers are very attractive to butterflies and hummingbirds, but not cardinals.

There are also white and rose-colored forms of this same plant.

The Genus name honors Matthias de l'Obel (1538-1616), French physician and botanist, who with Pierre Pena wrote Stirpium Adversaria Nova (1570) which detailed a new plant classification system based upon leaves.

Specific epithet means scarlet or cardinal red. Common name is in reference to the red robes worn by Roman Catholic cardinals.

I considered a number of possibilities including Lambs Ear, which reminds me of Margaret’s soft pink ears. I did add a pussy willow bush in the memorial flower bed as well as some catnip, another one of Margaret’s favorites.

As I look closely at the Cardinal flower, it’s proud erect stance reminded me of when Margaret proudly stood up to me. I also recalled the times she carried my red socks around the house.

I’m sure Margaret will like having the lovely red flower close by!

Charlotte

My Red American Toad

Red Toad.jpg

My Red American Toad

I met him on one of my morning garden walks. I know I have a variety of toads in my garden, mostly black so this was startling to say the least, and exciting - a red toad!

This toad is an American Toad bufo americanus. Toads, like other amphibians, do not drink with their mouths. Instead, they absorb moisture from the ground through a pelvic patch and store it in a lymph sac or bladder. The stored fluids are released when the toad becomes frightened, as most anyone who has picked up a frightened toad knows.

I didn’t pick this one up. I watched it watch me, then moved on. I saw no point in getting it unnecessarily excited.

According to Missouri Department of Conservation, toads are inactive during the day and burrow underground in sand or soil, also hiding under organic litter, bark, partially buried logs, and rocks. They become active in the evening and during rains.

This lack of daytime activity and their color camouflage are two of the toad’s defense mechanisms, along with their ability to puff themselves up to look more fearsome in the eyes of a predator. Toads also have a secret weapon that protects these otherwise harmless creatures from becoming another animal’s meal.

Kidney-shaped paratoid glands located behind toads’ eyes secrete a moderately potent toxin known as bufotoxin. The milky substance irritates the mucous membranes in predators’ mouths and can even cause death if an animal chooses to ignore the irritation and swallows the toad.

Contrary to popular folklore, toads do not cause warts, but because of bufotoxins, it’s a good idea to wash your hands after touching or holding a toad.

Toads are favorite foods of raccoons and hog-nosed snakes.

I like having toads in my garden because they consume mosquitoes, ants, spiders, beetles, crickets, and locusts, as well as snails, cutworms, and earthworms — 10,000 or more in one season.

Toads do not have teeth and must swallow prey whole. Toads blink their eyes when they snag a meal, which causes their eyeballs to roll into the roof of their mouth, pushing their prey into their throat, a characteristic shared with frogs.

Male toads woo potential mates with a long musical trill generated from an inflated vocal sac. They can sing alone, but in most cases large choruses can be heard at night. On occasion, they have been known to romance toads of other species. Although males are the most vocal, some female toads make chirping sounds when handled.

The American toad can be found statewide, with one subspecies, A. a. americanus, inhabiting northern Missouri, and a second dwarf species living predominately in the southern half of the state.

Bumpy red American toad is easy to spot. (Photo by Charlotte Ekker Wiggins)

Bumpy red American toad is easy to spot. (Photo by Charlotte Ekker Wiggins)

A female toad lays between 2,000 and 20,000 eggs. And unlike many frogs, which deposit their eggs singly or in masses, toads lay eggs in long strings. Most eggs hatch within a week, and the tiny, black tadpoles develop into toads that are ready to hop onto dry land in six to eight weeks.

Now I am wondering how many of the tadpoles in my tiny pond were actually toads instead of frogs.

For comparison, this is one of my sleek bullfrogs. (Photo by Charlotte Ekker Wiggins)

For comparison, this is one of my sleek bullfrogs. (Photo by Charlotte Ekker Wiggins)

Toads

  • Dry, warty skin

  • No teeth

  • Shorter hind legs than most frogs

  • Hop or crawl

  • Lay eggs in long, parallel strings

    And now, for frogs:

  • Smooth, wet skin

  • Tiny teeth on both upper and lower jaws

  • Jump or leap

  • Lay eggs singly, in small clumps, in large masses, or as a film of eggs on the water surface.

Now what do you have in your garden, toads or frogs, maybe both?

Charlotte

Native Missouri Phlox

I tried to get the phlox to grow on the left but it moved to the right. Oh, well! (Photo by Charlotte Ekker Wiggins)

I tried to get the phlox to grow on the left but it moved to the right. Oh, well! (Photo by Charlotte Ekker Wiggins)

Native Missouri Pink Phlox

If there is one flower that represents a Missouri summer to me, it’s phlox Phlox paniculata. One of Missouri’s native wildflowers, the pink phlox is a smorgasboard for pollinators, especially butterflies and hummingbirds and benefit clearwing moth pollinators.

The plant itself is hardy and grows almost anywhere on my Missouri limestone hillside, except sometimes where I want it to grow. Nevertheless I leave it where it settles; sometimes nature has a much better idea of garden design than I do!

They prefer wet, moist conditions and grow in full sun to part shade in average to moist soil. Allow for ventilation to prevent miidew.

Pink phlox flower heads are tiny flowers growing together. (Photo by Charlotte Ekker Wiggins)

Pink phlox flower heads are tiny flowers growing together. (Photo by Charlotte Ekker Wiggins)

Many years ago I was tempted to buy some of the hybrid phlox varieties on the market. After doing some research, I found out the hybrids have to be kept separate from other phlox or they will revert back to the original phlox - you guessed it, the native Missouri pink phlox.

I do have a couple of patches of pink phlox where the flowers have a white petal center but it is not easy to distinguish from the other pink phlox, which has a solid pink color through the flowers.

This batch of phlox has a white center but is very similar otherwise to my other phlox. (Photo by Charlotte Ekker Wiggins)

This batch of phlox has a white center but is very similar otherwise to my other phlox. (Photo by Charlotte Ekker Wiggins)

Native phlox can grow almost anywhere, from shady spots in front of my house to the full sun areas facing south.

They also have a tendency to spread so I transplant the ones in inconvenient locations in spring. Their starts are easy to distinguish from other plants by their pointed green spring leaves.

Butterflies are usually visiting this Missouri native phlox flower bed all summer. (Photo by Charlotte Ekker Wiggins)

Butterflies are usually visiting this Missouri native phlox flower bed all summer. (Photo by Charlotte Ekker Wiggins)

Another advantage to native pink phlox is that it will continue to grow through the heat of August, keeping purple coneflowers and black eye Susans, also natives, company and providing my garden some much needed color.

They also apparently provide good cover for birds nests.

A little bird’s nest was built in a native Missouri phlox bed in my garden. (Photo by Charlotte Ekker Wiggins)

A little bird’s nest was built in a native Missouri phlox bed in my garden. (Photo by Charlotte Ekker Wiggins)

I read they can be started from seed but I haven’t tried to do that. I suspect I am growing them from seed in my garden seeing how far and wide they have spread without my help. Based on that, I would say they are easy to start from seed.

They are also excellent cut flowers although I confess to feeling a little guilty of depriving butterflies and hummingbirds.

Only a little, I love having fresh flowers inside!

Charlotte

Tiger Lilies

I have several tiger lily plants now growing together. (Photo by Charlotte Ekker Wiggins)

I have several tiger lily plants now growing together. (Photo by Charlotte Ekker Wiggins)

Tiger Lilies

For a number of years I have had tiger lilies growing scattered through my Missouri hillside garden. Some I planted; others birds did the honors. I used to have a piece of cotton fabric where tiger lilies turned into small charming tigers, an image that I still recall when I see these perennial flowers, not to mention Winnie the Pooh’s buddy Tigger, who makes an appearance on Hunny Buzz Crib Quilt Gift Set.

To give them more of a place of honor in my garden, earlier this year I decided to move them all together. I carefully dug up the bulbs with soil around them so I was sure I had the whole plants.

Plants classified as Lilium lancifolium (alternate botanical name, Lilium tigrinum) is a true lily and not a daylily such as Stella D-Oro. The sword shape of the leaves gives the plants their species name (lancifolium means "lance-leafed" in Latin).

Tiger lilies remind me of Asiatic lilies and Stargazer lilies gone wild. Between their black spots, dramatic orange color and flaring stamens with pollen, Tiger Lilies make a dramatic garden focal point.

Tiger lilies can grow 5-foot tall or more. (Photo by Charlotte Ekker Wiggins)

Tiger lilies can grow 5-foot tall or more. (Photo by Charlotte Ekker Wiggins)

Tiger lilies can be invasive but not on a limestone hillside. It’s not easy for plants to establish themselves let alone take off without first hitting a rock.

Although I love tiger lilies, I don’t bring them inside. Tiger lilies are poisonous to cats. Even small ingestion such as less than one to two petals or leaves, pollen, or water from the vase may result in severe, acute kidney failure. If you suspect your cat has ingested any part of one of these lilies, bring your cat (and the plant) immediately to a veterinarian for medical care. Generally, the sooner treatment is started, the better the prognosis.

Tiger lily seeds are called bulbils and grow at the base of the leaf. (Photo by Charlotte Ekker Wiggins)

Tiger lily seeds are called bulbils and grow at the base of the leaf. (Photo by Charlotte Ekker Wiggins)

Seeds of tiger lilies are called bulbils. Propagate this plant by bulbil or by bulb division. Ideally, this should be done during the spring before it starts to grow anew, but you can divide them in the fall in warmer climates.

Bulb division requires digging up the entire plant carefully when it is dormant and gently separating the individual bulbs. Replant your bulbs as separate plants with the pointed side aimed upward.

Bulbils will form along the stem of the plant at leaf axils. If you wish to minimize spreading, remove the bulbils and dispose of them. Or, if you wish to propagate more, you can carefully remove the bulbils and pot them as if they were bulbs to grow a new plant. These will take an extra year of time before they begin to bloom, so it is a slower growth process.

I happen to think these are interesting plants to have in a garden corner so if someone gives you a start, give them a try.

Charlotte

Froggy Bottom Pond Bullfrog

The bottom of my hill frog pond with goldfish. (Photo by Charlotte Ekker Wiggins)

The bottom of my hill frog pond with goldfish. (Photo by Charlotte Ekker Wiggins)

Froggy Bottom Pond Bullfrog

When I used to commute to Washington D.C., I spent a lot of time on the Metro rail subway, which inspired the name of this garden room, Froggy Bottom. Sitting at the lower end of the limestone hillside slope between the road and my garage, Froggy Bottom hosts two small ponds built from the holes made when the driveway was moved and concrete removed. It was easier, and less expensive, to make the ponds than to try to fill the holes with concrete.

The two ponds are small in size but big in use. Besides goldfish, the ponds are spring nurseries for a number of Missouri frogs. The constant turnover inspired this unique handmade quilt, Froggy Bottom handmade quilt.

In summer, dragonflies flit around the spearmint lining the west side of the pond.

Honey bees collect water from the water lettuce I add every year so they can safely access the water. Periodically I find birds taking baths under the small waterfalls.

As I was feeding the goldfish this one afternoon, I found a new pond resident sitting on the chest of my very old clay frog.

My clay ceramic pond frog now has a friend. (Photo by Charlotte Ekker Wiggins)

My clay ceramic pond frog now has a friend. (Photo by Charlotte Ekker Wiggins)

The next question was, what kind of Missouri frog is this?

Earlier this spring, I counted 23 tadpoles growing legs before they became land animals but I didn’t know what species they were.

Can you identify the species with this photo?

See the tiny tadpole now turned frog on the ceramic frog leg? (Photo by Charlotte Ekker Wiggins)

See the tiny tadpole now turned frog on the ceramic frog leg? (Photo by Charlotte Ekker Wiggins)

The tiny frog looked very much like the adult frogs hanging around the two ponds. Here two of the adult frogs were sitting on the rocky ledge.

Two frogs sit on the rocky ledge on the right. (Photo by Charlotte Ekker Wiggins)

Two frogs sit on the rocky ledge on the right. (Photo by Charlotte Ekker Wiggins)

So back to our frog identification, can you identify this frog?

Can you identify this Missouri frog? (Photo by Charlotte Ekker Wiggins)

Can you identify this Missouri frog? (Photo by Charlotte Ekker Wiggins)

A friend of mine suggested looking behind the eyes and identifying a saucer shape that is indicative of the Missouri bullfrog.

According to Missouri Department of Conservation, the bullfrog is Missouri’s largest frog; it ranges from green to olive to brown. The back may have small brown spots or dark, indistinct, irregular blotches. The hind legs are marked with distinct dark brown bars. The belly is white, and the throat may have some gray mottling. The external eardrum is large and round. On adult males this tympanum is much larger than the eye; on females, it’s about the same size as the eye. This species has been known to reach 8 inches from snout to vent. Call is a deep, sonorous “jug-a-rum, jug-a-rum” that can be heard from half a mile away or more.
I know I have a bullfrog in these ponds because I hear it when I walk by.

Well, it stops croaking when it is disturbed but I can hear one when I open my front door. It’s a wonderful sound to hear.

Look at the side of the head to identify the disc behind the eye. (Photo by Charlotte Ekker Wiggins)Frogs are good additions to a garden, they are part of the cycle of life consuming flies, mosquitos, dragonflies and other insects. Frogs are carnivo…

Look at the side of the head to identify the disc behind the eye. (Photo by Charlotte Ekker Wiggins)

Frogs are good additions to a garden, they are part of the cycle of life consuming flies, mosquitos, dragonflies and other insects. Frogs are carnivorous so as the frog gets larger, so do their meals.

You can see the round disc behind the eyes better in this photo. (Photo by Charlotte Ekker Wiggins)

You can see the round disc behind the eyes better in this photo. (Photo by Charlotte Ekker Wiggins)

Now I know I have not only Missouri tree frogs but now a bullfrog.

Or maybe another twenty one.

Charlotte

Feedlot Panel Arbor

This is a cattle panel bent into an arbor shape and covered in vines. (Photo by Charlotte Ekker Wiggins)

This is a cattle panel bent into an arbor shape and covered in vines. (Photo by Charlotte Ekker Wiggins)

Feedlot Panel Arbor

What can be more homey in your garden than a lovely greenery-covered arbor. Well, maybe an apple tree in late summer like this bless this home lap quilt and wall hanging apple tree but short of that, let’s take a closer look at the arbor idea.

If you have shopped for garden arbors, you know they can be pricey. The last ones I saw on sale started over $200.

What if I told you with a little ingenuity, you can add garden arbors to your garden without breaking the bank.

I have shared the garden arbors I am building in my Missouri hillside pollinator garden made out of cattle panels covered in cedar. However, if you need something smaller, take inspiration from this cattle panel arbor made out of a feedlot panel, which is 16 feet by 34 inches wide.

Built by one of my beekeeping students, this feedlot panel arbor was made by bending the panel in half to form the arch.

Clematis vines grow over the panels, covering the metal and providing shade as one walks under it.

The feedlot panel arbor is secured to the ground with rebar to ensure the panel doesn’t open back up.

The cost? Around $25 for the feedlot panel at your local hardware or farm and home center with another $10 for the rebar.

You can find other panels in various lengths and widths so pick one that will best fit your space.

Once the feedlot panel gets covered by the green, one doesn’t even know what forms the foundation of the arbor.

Are you tempted to make one of these?

Charlotte

Bluebird Gardens Summer Garden Tour

A variety of daylilies line my driveway to the house. (Photo by Charlotte Ekker Wiggins)

A variety of daylilies line my driveway to the house. (Photo by Charlotte Ekker Wiggins)

Bluebird Gardens Summer Garden Tour

My Missouri hillside garden is transitioning from the vestiges of spring into summer. Daffodils have made way for bee balm and Shasta daisies, and a variety of daylilies guide the walker through starting to overgrow mulched paths.

If I had to select a flower for the month for June it would be daylilies. From the original daylilies that migrated with European settlers along with bees and dandelions in the 1600s, daylilies provide a nice splash of color in a range of colors from orange to light yellow.

For the month of July, the flower of the month should be pink phlox, a native Missouri variety that easily grows in both sun and shade.

For my honey bees I have a variety of bee balm, a plant I suspect Dr. Seuss would have drawn if nature had not beat him to it.

Raspberry bee balm has spread through the hyssop flower bed. (Photo by Charlotte Ekker Wiggins)

Raspberry bee balm has spread through the hyssop flower bed. (Photo by Charlotte Ekker Wiggins)

Raspberry bee balm is a cultivated version of the native Missouri bee balm, glad I can entertain both in my garden. This batch of raspberry bee balm is growing in part shade.

One of my favorite perennial plants are daisies so it is with delight that I found this supply of Shasta daisies blooming quite well in another shady flower bed.

Shasta daisies bloom in a part shaded flower bed. (Photo by Charlotte Ekker Wiggins)

Shasta daisies bloom in a part shaded flower bed. (Photo by Charlotte Ekker Wiggins)

In addition to perennials, I have batches of herbs scattered through my garden. Spearmint surrounds the small pond at Froggy Bottom with a few sprigs sprouting roots when the tips hit the water.

Froggy Bottom includes a goldfish pond. (Photo by Charlotte Ekker Wiggins)

Froggy Bottom includes a goldfish pond. (Photo by Charlotte Ekker Wiggins)

More raspberry bee balm, this patch growing in full sun along with the Missouri native pink phlox.

Native Missouri pink phlox keep more bee balm company. (Photo by Charlotte Ekker Wiggins)

Native Missouri pink phlox keep more bee balm company. (Photo by Charlotte Ekker Wiggins)

Combined, both perennials and natives coexist quite nicely!

Charlotte

No More Pinching Mums

One of my mums that didn’t get quite pinched this year. (Photo by Charlotte Ekker Wiggins)

One of my mums that didn’t get quite pinched this year. (Photo by Charlotte Ekker Wiggins)

No More Pinching Mums

The Fourth of July US Independence Day celebration marks another garden milestone: no more pinching chrysanthemums.

Unpinched, chrysanthemums will grow tall and leggy. They will also bloom several months earlier than fall, when most people want the color in their garden.

Pinching, or removing the top 2-3 inch plant growth in spring keeps the chrysanthemum plants shorter and bushy. Once in bloom, the plants will be covered in flowers and sit closer to the ground.

Although some of the chrysanthemums in my garden were regularly pinched this year, others were not so it will be interesting to see how soon they start blooming. I also plan to stake the ones that may fall over from being too leggy.

Chrysanthemums are an excellent cut flower and natural bug repellent so I plant them in front of garden beds for easy access and bug patrol. I did find ladybugs on one earlier today so maybe the beneficial insects were just passing through.

If you want to add chrysanthemums, do it in spring so the plants have most of the growing season to establish themselves. They also work well to naturally repel bugs.

Charlotte