Missouri Native Columbine

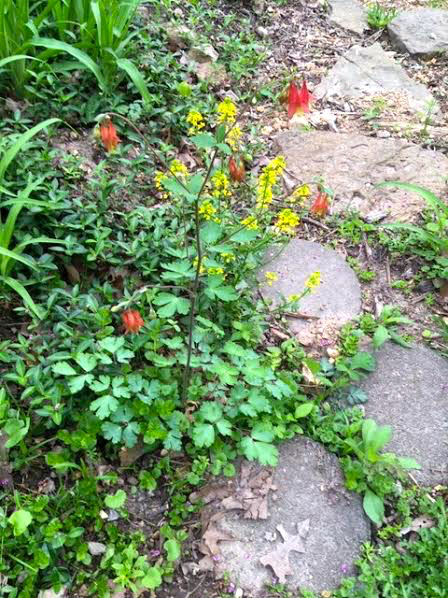
Missouri native columbine lining the path to my front door. (Photo by Charlotte Ekker Wiggins)

Missouri native columbine lining the path to my front door. (Photo by Charlotte Ekker Wiggins)

Missouri Native Columbine

As my Missouri limestone hillside garden transitions from early to mid-spring, one of my favorite native wildflowers adds delicate color: Missouri native columbine, which appears at about the same time as the first hummingbird scouts return from South and Central America.

According to the Missouri Botanical Garden, Missouri’s native columbine Aquilega canadensis is easily grown in average, medium, well-drained soil in full sun to part shade. I collect seeds, then scatter them in flower beds only to be surprised the following year where they show up on their own.

These native Missouri plants tolerate a wide range of soil as long as drainage is good. I find them growing in rich, moist soils in light to moderate shade.

Remove flowering stems after bloom to encourage additional bloom. Keep soils uniformly moist after bloom to prolong attractive foliage appearance. When foliage depreciates, plants may be cut to the ground.

This Missouri native spring wildflower shows up on rocky woods, slopes, ledges and open areas throughout the State. The perennial plant features drooping, bell-like, 1-2", red and yellow flowers (red sepals, yellow-limbed petals, 5 distinctive red spurs and a mass of bushy yellow stamens). Delicate, biternate foliage is somewhat suggestive of meadow rue (Thalictrum) and remains attractive throughout the summer as long as soils are kept moist. Flowers are quite attractive to hummingbirds.

Missouri native columbine with yellow rocket along a path. (Photo by Charlotte Ekker Wiggins)

Missouri native columbine with yellow rocket along a path. (Photo by Charlotte Ekker Wiggins)

Genus name comes from the Latin word for eagle in reference to the flower’s five spurs which purportedly resemble an eagle’s talon.

This species has very good resistance to leaf miner which often causes severe damage to the foliage of many other columbine species and hybrids. The leaf miner looks like tiny white or yellowish lines through the leaves.

Missouri native columbine is red with yellow and delicate. (Photo by Charlotte Ekker Wiggins)

Missouri native columbine is red with yellow and delicate. (Photo by Charlotte Ekker Wiggins)

Missouri native columbine looks good almost any where it settles - orders, cottage gardens, open shade gardens, woodland gardens and naturalized areas.

Missouri Botanical Garden recommends continuing to water plants after bloom to enjoy the ground cover effect of the attractive foliage. After it yellows, it can be cut to the ground.

I have both hydbrid as well as native columbines in my garden and, of the two, I prefer the delicate native ones. And so do the hummingbirds!

Charlotte

Tree Stumps Bench

My new tree stumps bench replacing the larger blue bench. (Photo by Charlotte Ekker Wiggins)

My new tree stumps bench replacing the larger blue bench. (Photo by Charlotte Ekker Wiggins)

Tree Stumps Bench

Who remembers taking a walk in the woods in the spring and settling down on a tree stump to take a break and think about life? That was the inspiration for this make shift tree stumps bench I now have in my Missouri hillside garden at the center of my retaining wall. I like to think it’s a new take on garden decor, too.

Originally I was using a painted blue wood bench but the bench takes up too much space between the retaining wall and the nearby path. I wasn’t sure what to place there in its stead until I found these pre-cut, almost perfectly level tree stumps.

The two smaller stumps were stuck together when I found them but broke apart in the move. No problem, they now form the foundation for the bench and I can use them as little side tables.

I will let the stumps weather for the season and then apply a sealing coat this fall to help slow down their decomposition.

In the meantime, I have tested the tree stumps bench a number of times and it is just the right height and level.

Using the smaller tree stumps for side tables at the bench. (Photo by Charlotte Ekker Wiggins)

Using the smaller tree stumps for side tables at the bench. (Photo by Charlotte Ekker Wiggins)

It also makes a nice set of steps to pop up on the retaining wall when I see something I want to trim.

The side pieces make for nice little resting tables. (Photo by Charlotte Ekker Wiggins)

The side pieces make for nice little resting tables. (Photo by Charlotte Ekker Wiggins)

Can’t you just see how surprised a squirrel will be when they see these? And I can more easily jump onto my retaining wall from the center when I see something I want to move!

Charlotte

First Lilacs "Run In"

Old fashioned lilacs finally in bloom at the top of my driveway. (Photo by Charlotte Ekker Wiggins)

Old fashioned lilacs finally in bloom at the top of my driveway. (Photo by Charlotte Ekker Wiggins)

First Lilas “Run In”

It was a grey, rainy day as I walked up my driveway stewing on something. I was also carrying a plastic container of used cat litter but that isn’t as romantic as stewing on a grey, rainy spring day but I am talented in that I can do both at the same time.

As I headed around the corner of my driveway to the garbage container, I was looking at the tulips at the corner and wondering how much longer they will bloom.

Heading up my driveway to the garbage container. (Photo by Charlotte Ekker Wiggins)

Heading up my driveway to the garbage container. (Photo by Charlotte Ekker Wiggins)

Then I was back to stewing, not paying attention to what was right in front of me, and I ran smack dab into it.

Making the turn and not watching where I am going. (Photo by Charlotte Ekker Wiggins)

Making the turn and not watching where I am going. (Photo by Charlotte Ekker Wiggins)

As my face plowed into the wet old-fashioned lilacs, I jumped back. When did those get there, was my first thought but that’s not a fair question since I myself planted those there a few years back.

The better question is what finally made them bloom this year when they haven’t bloomed in the past.

I did add mulch to them last year and this one, and having bees around may have improved their odds of reproduction but oh, that scent.

Running straight into these old-fashioned lilac flowers. (Photo by Charlotte Ekker Wiggins)

Running straight into these old-fashioned lilac flowers. (Photo by Charlotte Ekker Wiggins)

After I emptied out the cat litter container, I went back to the house for my camera and retraced my steps.

The droopy flowers this year are just lovely, who could stew even a little after literally running into these lovely flowers?

Aren’t these old-fashioned lilac flowers just lovely? (Photo by Charlotte Ekker Wiggins)

Aren’t these old-fashioned lilac flowers just lovely? (Photo by Charlotte Ekker Wiggins)

And yes, I leaned into the flowers and took a big breath to take in the lovely scent.

I planted these old-fashioned lilacs under my bay windows many years ago so I could catch a whiff of their scent as they bloomed. The idea was to have a reading nook in those windows and have them opened in spring to enjoy the weather.

Today I was too busy with other things to even think about doing that but this “run in” was a good intervention. I walked back to the house calmer and smiling just at the thought of these flowers in bloom, which remind me of bluebells. Only purple. And this was a good reminder.

Do you remember the smell of old-fashioned lilacs? (Photo by Charlotte Ekker Wiggins)

Do you remember the smell of old-fashioned lilacs? (Photo by Charlotte Ekker Wiggins)

We all should stop and smell the lilacs!

Charlotte

My Tulip Time

My driveway bunnies now have flowers all their own. (Photo by Charlotte Ekker Wiggins)

My driveway bunnies now have flowers all their own. (Photo by Charlotte Ekker Wiggins)

My Tulip Time

When I first started planting tulips several decades ago, I had the worst luck. If it wasn’t some hungry little mouse eating the bulbs, a family relative going through a vegan stage picking and frying them. Yes, tulips are edible although I can’t remember them to describe the taste.

When I moved to the house on my one acre Missouri limestone hill, I swore off tulips, opting to plant daffodils and related natives for spring color.

Last fall, however, my gardening buddy gifted me with a huge box of discounted bulbs including tulips. It was such a lovely, exciting gift that I got to planting them. Also helped that the first hard frost was in the forecast for about a week later.

Winter has been colder than usual but it’s still a bit of a gamble how many bulbs will make it without becoming food for mice and squirrels.

This spring, in addition to the regular spring colors of pink Eastern Redbuds, vanilla white Dogwoods, blue Grape Hyacinths and flowering vinca, I now have a lovely pop of red, yellow and purple color courtesy of these gift tulip bulbs.

Would you like to see them?

This is the flower bed across the driveway from my concrete bunnies. I see this flower bed as I walk up the driveway to my garbage can and down the road to my mail box.

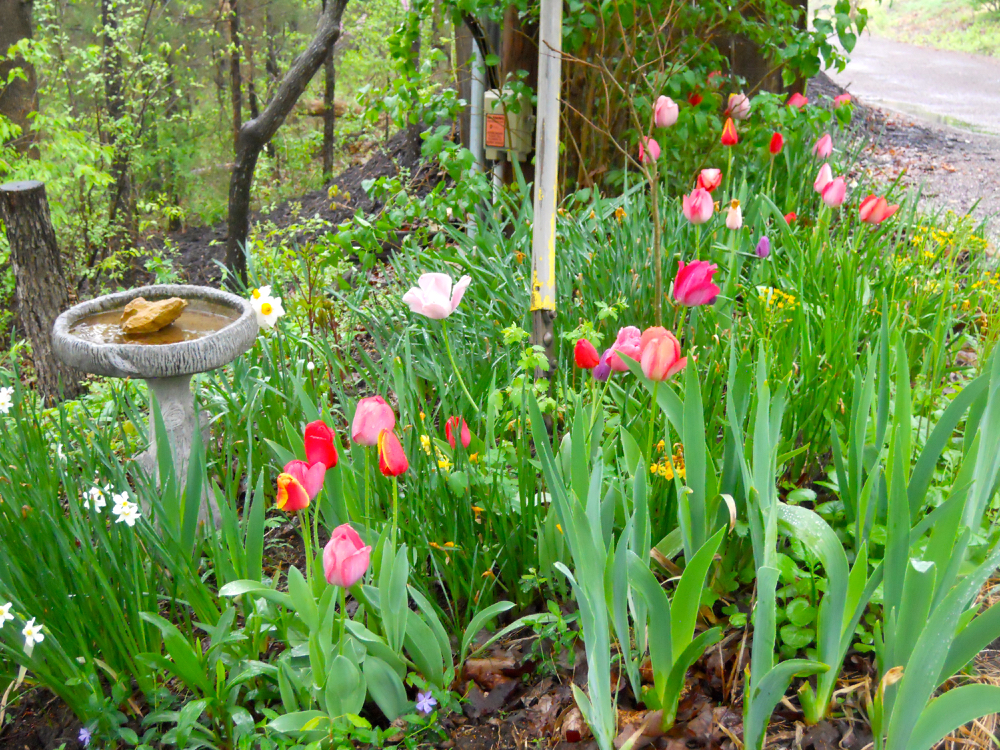
A sprinkling of tulips greet me at the top of the driveway. (Photo by Charlotte Ekker Wiggins)

A sprinkling of tulips greet me at the top of the driveway. (Photo by Charlotte Ekker Wiggins)

As I return from my mailbox, I detour to a path that takes me to one of my memorial seating areas.

This one is for my Uncle Tony, who lived in Louisiana. The little pop of red tulips brightens up this corner while other summer-blooming plants get their start.

A group of tulips in my Uncle Tony’s memorial bench area. (Photo by Charlotte Ekker Wiggins)

A group of tulips in my Uncle Tony’s memorial bench area. (Photo by Charlotte Ekker Wiggins)

Another way to approach my house is through this series of round concrete steps leading to, and from, the front door.

Sometimes I walk down the road and return to my garden through these steps so I lined them with a little pop of tulips as well. Frankly I don’t have large swaths of available soil to plant so I sneak tulip bundles in where I can and still protect them.

Tulips welcome visitors walking down my front door path. (Photo by Charlotte Ekker Wiggins)

Tulips welcome visitors walking down my front door path. (Photo by Charlotte Ekker Wiggins)

Rainy days mean time spent in reading nooks through my house so I added a little plop of tulips where I could enjoy them from a window seat. This view out one of my windows made me think I really should add one of my Pink Tullp Quilts on my bed, then I thought no, I have enough tulips around me as it is.

A few tulips brighten up the southern flower beds. (Photo by Charlotte Ekker Wiggins)

A few tulips brighten up the southern flower beds. (Photo by Charlotte Ekker Wiggins)

This little clay pidgeon has been with me for more than 20 years so I gave her a little embellishment by planting orange tulips around the path that leads to her sitting spot.

My clay pidgeon gets company with orange tulips. (Photo by Charlotte Ekker Wiggins)

My clay pidgeon gets company with orange tulips. (Photo by Charlotte Ekker Wiggins)

Back to the other side of the garden, where I am walking back to the house from Uncle Tony’s memorial bench.

The path leads by my driveway retaining wall, which now has little bouquets of blooming tulips. You can see staining from how the water perculates through the wall, giving it a nice aged look.

This will be the third year for the retaining wall plantings and I am looking forward to seeing how it grows.

Small bunches of tulips brighten up my retaining wall gardens. (Photo by Charlotte Ekker Wiggins)

Small bunches of tulips brighten up my retaining wall gardens. (Photo by Charlotte Ekker Wiggins)

As I walk down the path to the back of my house, I added another small bundle of tulips at the bottom. Once they stop blooming, other plants will take over and hopefully give them some cover so they will return next year.

A few tulips welcome you to this garden path. (Photo by Charlotte Ekker Wiggins)

A few tulips welcome you to this garden path. (Photo by Charlotte Ekker Wiggins)

Thanks to my gardening friend Tom for this lovely gift of spring color, I hope it’s a gift that keeps on giving!

Charlotte

Lovely Wild Violets

Recently-transplanted Missouri wild violets next to last year’s cousins. (Photo by Charlotte Ekker Wiggins)

Recently-transplanted Missouri wild violets next to last year’s cousins. (Photo by Charlotte Ekker Wiggins)

Lovely Wild Violets

If there is one native Missouri flower that represents spring to me, it’s wild violets, viola sororia or “sister,” because it looks so much like other violets.

I remember “discovering” these native flowers many decades ago in a field behind where I was living. It was in a neighborhood without street lights so it was easy to sit outside and gaze at stars at night, then walk through the field and try to find flowers.

These Missouri natives are called “common violets.” Photo by Charlotte Ekker Wiggins

These Missouri natives are called “common violets.” Photo by Charlotte Ekker Wiggins

Common violets can vary in color from a dark, almost navy color to the light lavender here, which reminds me of the lavender applique cat in our Pastel ABCs baby quilt, which I am currently working on as a custom gift.

There are other Missouri native violets living in my garden. Some have moved in on their own, others have been invited in, such as these white violets with purple accents.

These violets look like they can use a drink of water, don’t they? (Photo by Charlotte Ekker Wiggins)

These violets look like they can use a drink of water, don’t they? (Photo by Charlotte Ekker Wiggins)

I also have yellow violets in one spot - don’t ask, I don’t remember where so I need to wait for them to bloom - and all white violets, which I planted at the entrance to my house so I can enjoy them every day.

The white violets tend to bloom later than the common violets. (Photo by Charlotte Ekker Wiggins)

The white violets tend to bloom later than the common violets. (Photo by Charlotte Ekker Wiggins)

These wild violets are not only pretty March-June but the flowers are edible and high in Vitamin C. Since I don’t use toxic chemicals in my garden, I can pick a handful of flowers and add to a salad. Not only is the color pretty but I am adding vitamin C and a little tartness to my meal.

I confess, I also love the look of them on my plate.

Wild violets from non-chemical treated spot in my garden, ready for lunch. (Photo by Charlotte Ekker Wiggins)

Wild violets from non-chemical treated spot in my garden, ready for lunch. (Photo by Charlotte Ekker Wiggins)

These are also welcome resting spots for bees and other pollinators, and their heart-shaped leaves add a nice contrast to other garden greenery. I tuck these in at the front of flower beds wherever I can. don’t know why some people find these plants to be unwelcome, we have to rethink our standard of beauty being a sterile green carpet. These are the plants we should welcome into our gardens!

Charlotte


Cat Hair for Birds Nests

The first cat hair offering disappeared in less than a day. (Photo by Charlotte Ekker Wiggins)

The first cat hair offering disappeared in less than a day. (Photo by Charlotte Ekker Wiggins)

Cat Hair for Birds Nests

Do you have long-haired pets? I have one cat and, over winter, I save the hair from her daily brushings to give to birds for their spring nests.

There have been a number of suggested bird nesting materials and some are do nots: aluminum, plastic, human hair, yarn and dryer lint. Also on the do not use list are string and dog hair. The best nesting material I have found to date is the long cat hair. It lasted less than a day in the repurposed suet feeder, now refreshed with a second batch.

Suet holder has been re-filled with another batch waiting to be added. (Photo by Charlotte Ekker Wiggins)

Suet holder has been re-filled with another batch waiting to be added. (Photo by Charlotte Ekker Wiggins)

Later this year I will check birdhouses and look for tufts of cat hair sticking out of nexts and birdhouse corners.

The cat fur is a favorite because it is very soft and warm, giving the nest extra insulation and protection.

To save your long haired cat fur, clean your brush after every brushing session. Clean your winter suet holder before filling with pet fur, then hang back on a tree.

If you can watch the suet holder, periodically check it and you may catch a bird helping themselves to the fur.

Charlotte

Apiary Cattle Panel Arbor

This double cattle panel arbor guides me into my north apiary. (Photo by Charlotte Ekker Wiggins)

This double cattle panel arbor guides me into my north apiary. (Photo by Charlotte Ekker Wiggins)

Apiary Cattle Panel Arbor

If a bee skep represents beekeeping then cattle panel arbors represent Ozark backyard gardens. Over the years, I have seen many of these either spanning garden beds or forming welcoming arbors in front of farm houses.

When a friend showed me how to bend these metal structures to form the arbor shape, I started to add them to my garden. If you have shopped for garden arbors, you know they can be quite expensive so having an alternative that provides for creativity was right down my alley.

Cattle panels are popular garden arbors in the Ozarks. (Photo by Charlotte Ekker Wiggins)

Cattle panels are popular garden arbors in the Ozarks. (Photo by Charlotte Ekker Wiggins)

Once painted black, the cattle panel arbor nicely disappears into the background but I still wasn’t happy with the overall look.

The same friend who showed me how to bend the cattle panels made a lovely gate out of cedar boughs, which inspired me to add cedar boughs to the cattle panels.

Carefully cutting the boughs so I that i can weave them through the metal squares, I started to add cedar limbs from discarded trees from our local recycling center. Setting them two squares apart, they form the skeleton for the overall cedar covering.

Weaving cedar branches into the cattle panel takes time and some creativity. (Photo by Charlotte Ekker Wiggins)

Weaving cedar branches into the cattle panel takes time and some creativity. (Photo by Charlotte Ekker Wiggins)

I have the structure in, now to collect, clear and add more cedar boughs.

I already have grapes and blackberries growing over the cattle panels so it will be a matter of time to see who covers the cattle panel first, the plants or me!

Adding cedar branches to the arbor side. (Photo by Charlotte Ekker Wiggins)

Adding cedar branches to the arbor side. (Photo by Charlotte Ekker Wiggins)

This is an excellent way to reuse long-lasting cedar while giving the cattle panels a nice texture and finish.

Here is the first apiary cattle panel arbor I made, located at the front and entrance to my garden:

Once seated on the garden bench, the view is to my north apiary. (Photo by Charlotte Ekker Wiggins)

Once seated on the garden bench, the view is to my north apiary. (Photo by Charlotte Ekker Wiggins)

I like to have seating areas all around my garden, places where I can sit down and enjoy the view. Some of the areas have arbors, others now have these cattle panel arbors that will provide shade.

Each of the cattle panel arbors have plants already growing over them: blackberries and grapes. Over a couple more arbors rescued clematis vines are being encouraged to grow. Looking forward to seeing these arbors covered in green!

Close up you can see the painted cattle panel under the cedar. (Photo by Charlotte Ekker Wiggins)

Close up you can see the painted cattle panel under the cedar. (Photo by Charlotte Ekker Wiggins)

Charlotte

Secret to Bare Root Plants

Bare root Itoh peonies are getting a start first in a container. (Photo by Charlotte Ekker Wiggins)

Bare root Itoh peonies are getting a start first in a container. (Photo by Charlotte Ekker Wiggins)

Secret to Bare Root Plants

It’s that time of year when gardeners dreams turn to buying bare root plants because they are less expensive, or something they can’t easily find locally. Or maybe you get a bare root tree for Arbor Day, or as a store giveaway at your local home and garden center. Regardless of how you get them, there is a simple secret to getting bare root plants to grow.

You need to pot them first.

That’s right, no planting directly into your garden this first year. Instead, get them in pots with potting soil and let them grow in the pot for the first year. What the plant is doing is establishing roots, which will ensure the plant survives when you transfer it into its final growing spot.

A number of friends have bought bare root plants from places like George O. White Nursery in Licking, Mo., one of my favorite places to get local native plant stock. The prices are hard to beat, the most expensive tree seedling is 90 cents per seedling, and the price goes down as you buy in larger quantities.

However, you don’t want to take those seedlings and plant them straight into your garden or landscape. The roots need a little more time developing so once you get the bare root seedling, get them into a pot. Make sure the pot is about twice the size of the current root structure to give it room to grow.

This bare root dwarf fruit tree is getting a start in a pot. (Photo by Charlotte Ekker Wiggins)

This bare root dwarf fruit tree is getting a start in a pot. (Photo by Charlotte Ekker Wiggins)

And be patient. It can take a little time for new seedlings to get used to their new environment, which is why I use plain potting soil, not soil with added fertilizer. I can then monitor how the plant is doing and add my own fertilizer as I see fit.

How do you know if the plant is settling in?

New green growth is a sure indication the plant is settling in. (Photo by Charlotte Ekker Wiggins)

New green growth is a sure indication the plant is settling in. (Photo by Charlotte Ekker Wiggins)

Green growth along the trunk nodes is one good sign. And don’t be discouraged if you don’t see much growth this first year above ground, with the right conditions most of the energy should be going into root development.

I leave my seedlings in pots through the growing season, then add them to my garden in fall or the next spring. I keep an area that I call my nursery and plop the plants, pot and all, in the nursery to winter over there if I haven’t moved them to their permanent location.

And don’t forget to water them. Since they are now in pots, they may need water more frequently than the established plants in your garden.

You will know they are ready to plant in the garden when the tree seedlings are looking more like the Tree of Life lap quilt.

Charlotte

My Hardy Geraniums

My favorite geraniums are these raspberry-colored ones. (Photo by Charlotte Ekker Wiggins)

My favorite geraniums are these raspberry-colored ones. (Photo by Charlotte Ekker Wiggins)

My Hardy Geraniums

As you think about what plants you want to have in pots this year, make sure you include geraniums. I have had a variety of different geranium colors in pots for many years, giving me wonderful color in the dead of a dreary winter.

Most geraniums offered on the market are annuals, and it is assumed they will be planted one year and allowed to die when cold weather sets in. Even if you have them planted in your garden, you should be able to dig them up and move them inside in pots to continue growing, and blooming, through winter.

The raspberry-colored geranium in the top photo is my favorite. The plant is now 4 foot tall and lives in my business office, keeping my printer and desk company through the year. It tends to bloom most of the year taking a short break around fall.

I do give them watered down fertilizer, 1/2 tsp per gallon of water every other month, and worm castings a couple of times a year mixed into the soil. I remove the top soil, mix in the worm castings, then replace it all back into the pot. Every three years or so I remove as much soil as I can and replace it with new soil.

This next geranium is blooming in living room pot. Its red color pops nicely against the purple leaves, a beacon among the sea of plants wintering over in the bay window. The red color compliments the red in the amaryllis blooms currently in bloom.

These red geraniums are pretty among the purple leaves. (Photo by Charlotte Ekker Wiggins)

These red geraniums are pretty among the purple leaves. (Photo by Charlotte Ekker Wiggins)

One more reason why you should save at least one geranium for winter. This is a tomato red geranium blooming in another pot in my dining room, brightening up the area on cloudy, gray days.

Tomato red geraniums in bloom in my living room. (Photo by Charlotte Ekker Wiggins)

Tomato red geraniums in bloom in my living room. (Photo by Charlotte Ekker Wiggins)

Now these geraniums are different than the native, hardy geraniums. Even though they are only annuals with a little care they can bloom year after year if you keep them inside over winter.

Here’s another way to bring in these colors to your room, our Ribbon Flowers Lap Quilt will add the same colors to the back of a chair or sofa and be ready for that unplanned nap!

Charlotte

Daffodil Bouquets

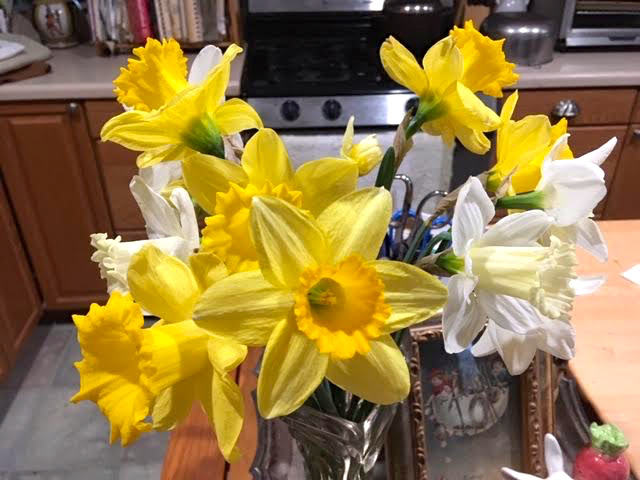
Most of these daffodils where picked in bud form. (Photo by Charlotte Ekker Wiggins)

Most of these daffodils where picked in bud form. (Photo by Charlotte Ekker Wiggins)

Daffodil Bouquets

There are few things that brighten up a room than a bouquet of spring-growing yellow gold daffodils, these remind me of our Yellow Gold Double Wedding Ring Quilt.

To have longer lasting inside bouquets, pick the daffodils when they are still in bud. Once exposed to the warmth of a room in a flower vase with water, the buds will open into flowers and give you a longer-lasting display.

These daffodil buds are excellent cut flower candidates. (Photo by Charlotte Ekker Wiggins)

These daffodil buds are excellent cut flower candidates. (Photo by Charlotte Ekker Wiggins)

When cutting daffodils, leave at least one flower bud so you will know what type and colors that group of bulbs produce.

I also only pick one or two buds from each group so I can also enjoy the flowers in bloom outside as well as cut flowers inside.

Daffodils don’t play well with other flowers so don’t mix your daffodil bouquets with other flowers straight out of the garden. If you want a blend, let the cut daffodils sit in water by themselves for a good 24-48 hours. The toxins in daffodils that deter deer will drain and then you can mix them with other flowers.

Large King Alfred in the back and small Tete-A-Tete daffodils in front at Bluebird Gardens, (Photo by Charlotte Ekker Wiggins)

Large King Alfred in the back and small Tete-A-Tete daffodils in front at Bluebird Gardens, (Photo by Charlotte Ekker Wiggins)

Also take clippers with you when cutting daffodils out of the garden. The clippers will give you cleaner cuts and you won’t have to tug at the green stem to easily remove it. Keep the green leaves on daffodils so the leaves can collect sunlight and, through photosynthesis, translate it into energy they store in bulbs for use next year.

Finally change the water in the vase every couple of days and recut the stems to give your daffodils a long life inside.

King Alfred daffodils are the largest daffodils currently on the market. (Photo by Charlotte Ekker Wiggins)

King Alfred daffodils are the largest daffodils currently on the market. (Photo by Charlotte Ekker Wiggins)

If you don’t have daffodils in your garden, or you want to plant more this fall to have enough to cut, King Alfred daffodils are the largest available on the market. Just a few make quite a statement and are hard to miss either in the garden or in a vase.

If you want something smaller, look for Tete-A-Tete daffodils, which qualify as miniatures and are long lived once cut and used in flower vases as well.

In between, there are a variety of early, mid and late blooming daffodils and jonquils, providing a nice variety of flowers to enjoy over the next few months. Happy spring!

Charlotte

Dandy Daffodils

Can you distinguish these daffodils? King Alfred in back, Tete-a-Tete in front. (Photo by Charlotte Ekker Wiggins)

Can you distinguish these daffodils? King Alfred in back, Tete-a-Tete in front. (Photo by Charlotte Ekker Wiggins)

Dandy Daffodils

Rain is in the forecast and I can’t wait. Every spring thunderstorm encourages yet another patch of daffodils to bloom. The old-fashioned, early daffodils have finished blooming and King Alfred is making a statement along with the Tete-A-Tete smaller splashes of yellow. I truly love seeing the daffodils in bloom, their sunny colors are a great way to celebrate spring. And since I don’t remember where I have planted them, it’s a bit of a treasure hunt to walk my paths and discover what is blooming around the corner.

According to the Daffodil Society of the US, there are 13 1/2 daffodil divisions. I added the half for the “Miniature Daffodil” category.

According tot he Daffodil Society, “there are thirteen descriptive divisions of  daffodils.  Miniatures have the same descriptive divisions as standards, only with smaller blooms, usually less than 2 inches (50mm) in diameter.

A Daffodil Society poster with the 13 different daffodil categories. (Photo by Charlotte Ekker Wiggins)

A Daffodil Society poster with the 13 different daffodil categories. (Photo by Charlotte Ekker Wiggins)

Daffodil Divisions

Division 1 – Trumpet Daffodils

One flower to a stem; corona (“trumpet”) as long as, or longer than the perianth segments (“petals”).

 Division 2 – Large-Cupped Daffodils

One flower to a stem; corona (“cup”) more than one-third, but less than equal to the length of the perianth segments (“petals”)

 Division 3 – Small-Cupped Daffodils

One flower to a stem; corona (“cup”) not more than one-third the length of the perianth segments (“petals”)

 Division 4 – Double Daffodils

One or more flowers to a stem, with doubling of the perianth segments or the corona or both.

Division 5 – Triandrus Daffodils
Characteristics of N. triandrus clearly evident: usually two or more pendent flowers to a stem; perianth segments reflexed.

 Division 6 – Cyclamineus Daffodils

Characteristics of N. cyclamineus clearly evident: one flower to a stem; perianth segments significantly reflexed; flower at an acute angle to the stem, with a very short pedicel (“neck”)

 Division 7 – Jonquilla Daffodils

Characteristics of Sections Jonquilla or Apodanthi clearly evident: one to five (rarely eight) flowers to a stem; perianth segments spreading or reflexed; corona cup-shaped, funnel-shaped or flared, usually wider than long; flowers usually fragrant.

See the frilly trumpet on these light blond daffodils? (Photo by Charlotte Ekker Wiggins)

See the frilly trumpet on these light blond daffodils? (Photo by Charlotte Ekker Wiggins)

 Division 8 – Tazetta Daffodils
Characteristics of Section Tazettae clearly evident: usually three to twenty flowers to a stout stem; perianth segments spreading not reflexed; flowers usually fragrant.

 Division 9 – Poeticus Daffodils
Characteristics of N. poeticus and related species clearly evident; perianth segments pure white; corona very short or disc-shaped, not more than one-fifth the length of the perianth segments; corona usually with a green and/or yellow centre and red rim, but sometimes wholly or partly of other colours; anthers usually set at two distinct levels; flowers fragrant

Division 10 – Bulbocodium Hybrids
Characteristics of Section Bulbocodium clearly evident: usually one flower to a stem; perianth segments insignificant compared with the dominant corona; anthers dorsifixed (ie attached more or less centrally to the filament); filament and style usually curved.

 Division 11a – Split-Cupped Collar Daffodils
Split-corona daffodils with the corona segments opposite the perianth segments; the corona segments usually in two whorls of three.

Division 11b – Split-Cupped PapillonDaffodils
Split-corona daffodils with the corona segments alternate to the perianth segments; the corona segments usually in a single whorl of six.

 Division 12 – Other Daffodil Cultivars
Consists of daffodils not falling into any of the previous categories. Many are inter-division hybrids.

Division 13 – Daffodils distinguished solely by Botanical Name 
Consists of the Species, Wild Variants, and Wild Hybrids found in natural daffodils.

 Miniature Daffodil
Miniatures have the same descriptive divisions as standards, only with smaller blooms, usually less than 2 inches (50mm) in diameter. My tete-a-tete daffodils are a welcome miniature daffodil welcoming visitors to my garden.

I get to enjoy blooming daffodils all four seasons with this Four Seasons Lap Quilt I use as a wall hanging off my den.

 How many of these do you have in your garden?

Charlotte


Tomato Starts

One of my tomato starts in their own pot near my kitchen. (Photo by Charlotte Ekker Wiggins)

One of my tomato starts in their own pot near my kitchen. (Photo by Charlotte Ekker Wiggins)

Tomato Starts

It’s about time to start planting seeds indoors for outside growing after the danger of frost. Where I live, that is usually Mother’s Day, around May 10. But before you start, check your potted plants for any volunteers that have hitchhiked in that soil. If you replanted in previously-used soil or had plants sitting close together, you may already have plant starts growing.

Although I love having fresh, homegrown tomatoes, I don’t grow tomatoes from seed. They tend to take matters into their own seeds and sprout all by themselves and, this year ,they are right on schedule.

Over the years, I grow tomatoes in pots on my deck. The seeds end up in neighboring pots and tend to start growing on their own late winter. This year, I found the tomato starts in a potted banana tree.

Tomato starts popping up all by themselves in a banana plant. (Photo by Charlotte Ekker Wiggins)

Tomato starts popping up all by themselves in a banana plant. (Photo by Charlotte Ekker Wiggins)

The tomato seedlings don’t show up all at once. The first one is now sitting in its own pot, crushed eggshells in the bottom and coffee grounds mixed up in the plain potting soil, no added fertilizer. This way I can control how much fertilizer is going into the soil.

After noting the first tomato plant, I started to check the soil for any other arrivals. Sure enough, more tomato plants are showing up so I will be potting those as well.

See the little seed on the tomato start bottom left? (Photo by Charlotte Ekker Wiggins)

See the little seed on the tomato start bottom left? (Photo by Charlotte Ekker Wiggins)

I let the little seedling get established before I move it and I take a whole glob of soil around the roots so that it has the least amount of trauma making the move.

When I see these seedlings, I can’t help but think of my Vegetables Baby Quilt with talking tomatoes.

This is gardening at it’s easiest. How many of us overlook those seedlings by pulling them out or piling rocks on top of them?

Charlotte

How to Get Christmas Cactus to Bloom at, Lets Say, Christmas

March 20 xmas cactus bloom.jpg

How to Get Christmas Cactus to Bloom at, Lets Say, Christmas

I have a “Christmas” cactus blooming right now, the first day of spring 2019. I’m embracing the blooms and calling it my Spring cactus although there are different Schlumbergera plant relatives, one that is currently a Thanksgiving cactus called a Christmas cactus; the original Christmas cactus (in photo) no longer on the market and an Easter cactus that is not even related.

These hardy but tropical plants need a little help to bloom on cue here in North America. Back in their native habitat in Brazil, they have weather triggers to get them to bloom in December, the beginning of the South American summer. I grew up near their native habitat, Christmas without swimsuits still seems a little odd to me but now I’m happy just unwrapping them as a gift and staying bundled up in my coat and blankets.

Most cactuses sold on the market today are actually Thanksgiving cacti, which explains why they tend to bloom end of November. They are also grown in greenhouse conditions to get them to set bud for sale around Thanksgiving.

To determine what kind of cactus you have, look at the green fronds. The original Christmas cactuses (Schlumbergera bridgesii) have smooth, round edges (photo) while Thanksgiving cacti (Schlumbergera truncata) have pointy, jagged ones.

Like other succulents, cacti are well-adapted to life with little precipitation. The leaves have evolved into spines, which in addition to allowing less water to evaporate than regular leaves, defend the cactus against water-seeking animals. Photosynthesis is carried out by enlarged stems, which also store water. Unlike many other succulents, the stem is the only part of a true cactus where this takes place.

My Thanksgiving cactus started to bloom because I had it outside on my back porch earlier this fall. The cooler temperatures triggered the buds to form without my doing any adjusting to the amount of light it was getting every day.

Holiday cacti are called "short day plants" meaning in order to produce flower buds, they require fewer daylight hours and/or cool night temperatures. The shorter days and cooler nights signal the plant to produce buds. I have tried both triggers and found the cooler temperatures are the easier way to encourage blooms.

To get your holiday cactus to bloom when you want the blooms, locate holiday cacti indoors in a cool, bright location where daytime temperatures are 65-70° F and evening temperatures are 55-65° F. If plants are exposed to cooler night temperatures of 55° F, plants will bloom in approximately 5-6 weeks, sometimes regardless of the day length.

I frankly don’t mind when they bloom out of season, it reminds me of how I enjoy my “Let it Snow” Lap Quilt Throw after Christmas as well. I just love having them in bloom any time they decide the time is right.

Happy Christmas in March!

Charlotte

Fighting Japanese Beetles

Japanese beetles making a meal out of a Rose of Sharon flower in my garden. (Photo by Charlotte Ekker Wiggins)

Japanese beetles making a meal out of a Rose of Sharon flower in my garden. (Photo by Charlotte Ekker Wiggins)

Fighting Japanese Beetles

I was meandering through my garden at sunset when I spotted the beautiful iridescent green spots on a milkweed. Juvenile Japanese beetles, starting to hatch from last year’s buried grubs. For the next 6 weeks, it will be a battle between these wily bugs and I.

The 3/8th of an inch hard shell beetles are eating machines, devouring more than 200 plant species. Once they turn from grubs into beetles, they set off a scent that says "let's party" to other Japanese beetles, yet another reason why you shouldn’t crush the bugs, no matter how tempting.

If you don't see them, you'll know you have them when your plant leaves turn into lace.

Leaves turned to lace is a sure sign of Japanese beetles. (Photo by Charlotte Ekker Wiggins)

Leaves turned to lace is a sure sign of Japanese beetles. (Photo by Charlotte Ekker Wiggins)

Prior to the beetle's accidental introduction into the United States, the Japanese beetle was found only on the islands of Japan, isolated by water and kept in check by its natural enemies. The beetles entered the country as grubs in soil on Japanese iris roots. By 1920, eradication programs were dropped; the beetle proved to be too prolific a breeder.

One of the popular options to eliminate these voracious bugs is Japanese beetle traps, which I don’t recommend. Those are basically pheromone-laced paper bags that attract Japanese beetles. The challenge is the bags don’t catch all of them so having more Japanese beetles in your garden means more potential grubs to hatch out next year.

If you insist on using Japanese beetle traps, make sure you place them at the edge of your property and down wind.

What has worked very well for me over the years is dropping them in a can of soapy water early morning, while they are still sluggish. I pop the soapy water-filled coffee can underneath the plant branches, then shake them. The bugs fall into the water without my touching them.

Soapy water in an old coffee can quickly dispatches Japanese beetles. (Photo by Charlotte Ekker Wiggins)

Soapy water in an old coffee can quickly dispatches Japanese beetles. (Photo by Charlotte Ekker Wiggins)

According to University of Missouri Extension Service, Pyrethrins and Spinosad are effective and non-toxic sprays to try to manage Japanese beetles.

For a long term solution, my brother in Virginia has treated his lawn with milky spores. He has dozens of crepe myrtles, one of Japanese beetles favorite munchies. According to him, Japanese beetle grubs eat the spores; get sick; die and, in the process, release more milky spores. It can take several years to eliminate the Japanese beetles, not counting whether your

Neighbors have treated their lawns.

Believe it or not, there are plants Japanese beetles avoid. The typical kind of plant that will help to drive away Japanese beetles will be strong smelling and may taste badly to the insect. Some plants that deter Japanese beetles include many herbs such as garlic, rue, tansy, catnip and chives. Other Japanese beetle deterrent plants include white chrysanthemums, leeks, onions, marigolds, white geraniums and larkspur.

There are also plants that Japanese beetles skip or only munch on towards the end of their season. I assume these are just not tasty plants: begonias, caladiums, common lilacs, common pear, tulip tree, flowering dogwood, forsythia, hydrangea, hickory, magnolia, persimmon and most oak trees.

Ok, time to soap up and start picking off those pesky bugs!

Charlotte

The Beauty of Iris

Several friends have posted that this color iris was also their Mom's favorite. (Photo by Charlotte Ekker Wiggins)

Several friends have posted that this color iris was also their Mom's favorite. (Photo by Charlotte Ekker Wiggins)

The Beauty of Iris

I blame Mom for my fascination with Iris. These blue iris were her favorite, a North American version of the orchids that grew wild in our backyard trees in Brazil.

When we lived in southern Illinois in an old farm house, she had several beds of iris off to the side of our driveway. It was our job as kids to keep those beds weeded, something that was hit and miss some years depending on what other activities took up our after school time.

I loved weeding those Iris beds. There was something cathartic about pulling out plants that didn't belong and standing back to see my work. In those days I didn't know what the unwelcome plants were, I just knew Mom would not be happy until all of the funny green tufts of green growth were out of her precious Irises.

It's one of the reasons why I started to carry these Iris throws. The applique fabric iris are lovely against the white cotton back drop and so quickly bring a garden vibe into any room.

When a gardening friend heard about my love of iris, he brought me a few new starts last year. Another gardening friend shared a supply of white ones so now I have more than Mom's iris keeping me company in my garden.

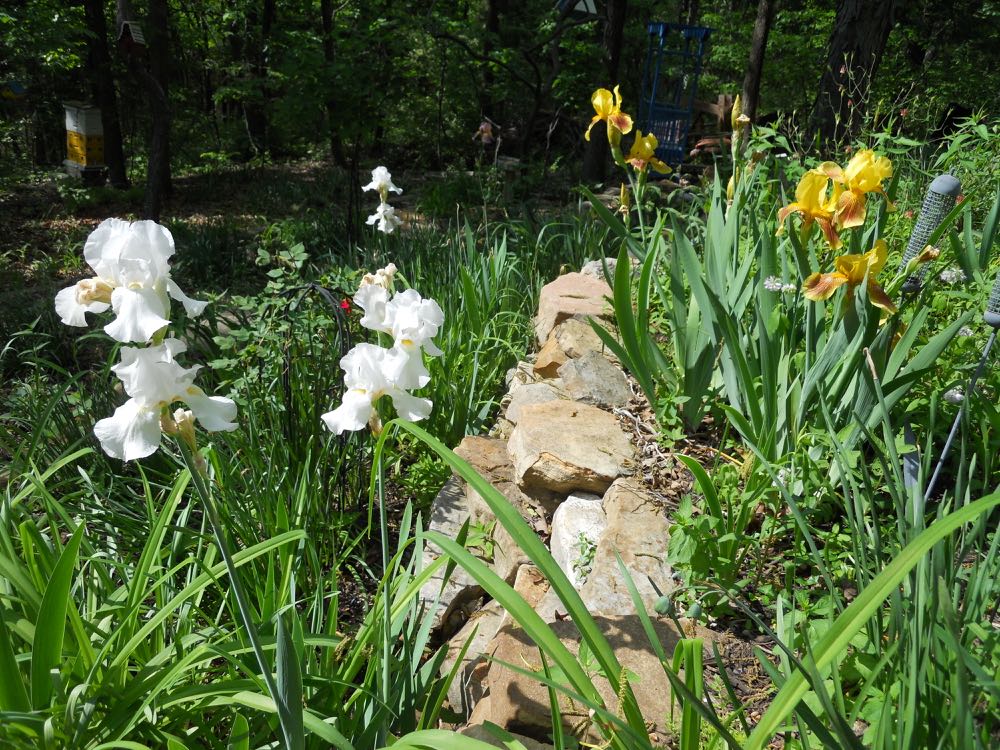
White and yellow iris were added last year courtesy of a couple of friends. (Photo by Charlotte Ekker Wiggins)

White and yellow iris were added last year courtesy of a couple of friends. (Photo by Charlotte Ekker Wiggins)

My peach bearded iris have bloomed in this spot for years. (Photo by Charlotte Ekker Wiggins)

My peach bearded iris have bloomed in this spot for years. (Photo by Charlotte Ekker Wiggins)

This iris was a surprise bloom this year, love the color combination. (Photo by Charlotte Ekker Wiggins)

This iris was a surprise bloom this year, love the color combination. (Photo by Charlotte Ekker Wiggins)

Over the years, as I moved from one house to the next, Mom's irises were dug up and moved with me. I didn't always plant them in the best conditions so it could take a couple of years before I had them in the right light and soil conditions to bloom.

It doesn't take much. They like sun but will bloom in partial shade. They don't want to be wet and need to be planted so the root rhizomes sit on top of the soil while the roots are covered.

One of Mom's irises bloomed this year along my cedar fence. (Photo by Charlotte Ekker Wiggins)

One of Mom's irises bloomed this year along my cedar fence. (Photo by Charlotte Ekker Wiggins)

This spring, Mom's bluish/purple Irises made a lovely showing, giving me the opportunity to mark them so once blooming is over, I can group them back together in one color blocked flower bed.

The best time to move Iris is June through September. The shallow-rooted plants need a little time to settle into their new growing spot. Add a little compost to enrich the soil and mulch after planting.

Mom's irises in another spot blooming along with peonies and columbine. (Photo by Charlotte Ekker Wiggins)

Mom's irises in another spot blooming along with peonies and columbine. (Photo by Charlotte Ekker Wiggins)

Mom's irises bloomed this year, along with my peonies, on Mother's Day. Suppose that's a sign?

I like to think that's my mother, who loved my garden, saying from Heaven she approves.

Charlotte

June Gardening Chores

Blackberries ripen in June around the same time as mulberries. (Photo by Charlotte Ekker Wiggins)

Blackberries ripen in June around the same time as mulberries. (Photo by Charlotte Ekker Wiggins)

June Gardening Chores

It was a record-breaking long spring so why not a record-breaking summer. This year it seems we went straight to summer from winter with no spring in between. Anyone else have any kind of spring?

There’s still time this month to try to catch up on some chores and plant, June traditionally is our wettest month of the year.

1.         Plant a new supply of vegetables every 2 weeks to give yourself a new crop through the season. Early spring crops are done but there is still time for tomatoes, green peppers, green beans, cucumbers, zucchini, squash, pumpkins and annual herbs.

2.       Keep asparagus beds weeded and let the green top ferns grow until they go brown; do not cut.

3.        When mulching, leave 2-4 inches clear from the plant stem and the mulch ring no larger than 5 inches deep. More than that and you are smothering the plant itself.

4.        Leave spring bulb greenery to die off naturally. I gently remove the yellow leaves if they bug me and plant summer perennials to cover them in the meantime.

5.         Japanese beetles show up this month so hand pick and drop in a bucket of water with a few drops of dishwashing soap to drown them. Pick early in the morning when they are sluggish. Also treat your lawn with nematodes and milky spores, both will gradually help eliminate grubs. Add geraniums and tansies to your flower beds, they are natural Japanese beetle repellants.

6.         Trim lilacs immediately after they end flowering so growth the rest of this year will provide blooms next year.

7.         Get flower pots planted. Water the soil first, let drain, then add your flowers for better adjustment.

8.         Plant annual flower seeds such as zinnias, sunflowers, forget-me-nots, cosmos, marigolds and herbs. Some herbs can be moved inside later for winter use.

10.       When planting wildflowers, mark the beds where seeds have been added. Some wildflowers may take 2 years to germinate.

11.       For those of you with grass, don’t cut more than 1/3 of the grass down at one time.  For spots where grass doesn’t grow, plant flowers.

Native flowers such as coneflowers start to bloom this month and continue until fall frost. (Photos by Charlotte Ekker Wiggins)

Native flowers such as coneflowers start to bloom this month and continue until fall frost. (Photos by Charlotte Ekker Wiggins)

12.       When adding perennials, focus on native plants. Once established, they will require less water and care than non-natives and they will be food for native pollinators.

13.        Pinch mums once a week to encourage them to grow bushy for fall flowering. I take the pinched off pieces, gently push them into the ground and encourage more plants to grow.

14.        Feed roses and other plants compost to give them a good source of energy. Roses should be fed once a month. A quick pick me up is to dig your banana peels, egg shells and coffee grounds in around roses.

15.         Take photos of your garden. Use the same photo spots you used in spring so you can see the changes from one season to the next.

16.         Also make sure to have a nice seating area in your garden so you can stop and smell the flowers!

Charlotte


Tomato Trouble

This tomato is definitely in trouble for several reasons! (Photo by Charlotte Ekker Wiggins)

This tomato is definitely in trouble for several reasons! (Photo by Charlotte Ekker Wiggins)

Tomato Trouble

Several readers are having trouble getting tomato seeds started this year and for good reason. Not only has it been record cold but we have jumped from winter to summer with little spring in between.

Tomatoes are very close to my heart. I wrote a speech in high school about tomatoes first name, “love apples.” They are actually fruits re-categorized as vegetables to work around a 19th Century import tax.

There are several factors that can cause trouble with tomatoes, starting with seedlings that die off. The condition is called “damping off” and covers several possible fungi that can kill off seedlings. Start again with brand new potting soil use  a washed or new container. Add crushed egg shells in bottom before adding more soil to ward off blossom end rot, which is caused in the fruit by a calcium deficiency. Keep the pot in a window for warmth and away from drafts. Water with a spray bottle so you don’t over-water.

The second problem is flowers that drop. There are several reasons tomatoes drop their flowers, starting with the impact of record high temperatures. Tomatoes, like most flowering plants, go into survival mode if temperatures are above 90F for five or more days in a row.

Plant survival mode means most systems are shut down, including pollen production. It’s why a plant may seem to die in hot weather and yet reappear the following year. As long as the roots can pull through, most plants will survive.

Tied to temperature is high humidity. Humidity that is too high prevents pollen from sticking to the stigma once it is released. Without pollen, there are no pollinators and without pollinators, there are no flowers that produce tomatoes.

These cherry tomatoes grew over winter inside my house, the last of my winter crop. (Photo by Charlotte Ekker Wiggins)

These cherry tomatoes grew over winter inside my house, the last of my winter crop. (Photo by Charlotte Ekker Wiggins)

In addition to weather conditions, tomatoes need pollinators such as native bumblebees. These little hoodlums of the bee world literally shake the tomato plant, releasing pollen all over the stigma and themselves. When high temperatures shut down pollen production, they also put bees out of business.

As they grow, make sure tomato plants don’t get too much nitrogen fertilizer. A balanced plant meal requires nitrogen for growth, phosphorous for moving energy through the plant, and potassium for stress tolerance.  Our Ozark soil can provide nitrogen but the other two fertilizer elements usually need a boost.

The other delicate part of raising tomatoes is watering. Tomato roots in open ground can grow to 5 feet deep. Tomatoes even grown in containers prefer to be evenly moist so with temperatures, and humidity, either at record levels or varying widely, requires careful monitoring.

Plant herbs with your tomatoes. The herbs will help detract bugs. Basil is the number one herb for tomatoes, but other herbs compliment tomatoes as well: bay, chives, dill, marjoram, oregano, parsley, rosemary, savory, tarragon and thyme. 

I have sunken plastic bottles with holes in pots keeping my tomatoes company so that I can better keep the roots moist. I also use a paint stick propped into the side and moved over an inch to check how wet the soil is before I water.

And that speech about tomatoes I gave in high school?

I got an A. I suspect it would have been an A+ if I had not eaten the display.

Charlotte


Visiting New York Hostas

My sister-in-law's visiting New York hostas have established themselves well in my garden. (Photo by Charlotte Ekker Wiggins)

My sister-in-law's visiting New York hostas have established themselves well in my garden. (Photo by Charlotte Ekker Wiggins)

Visiting New York Hostas

I was talking to family and heard my sister-in-law say she missed seeing her New York hostas. I can understand why. These used to grace crape myrtle trees in her front yard in Virginia, the varigated leaves a nice contrast against the grey crape myrtle trunks.

Variegated hostas have white, cream or yellow in their leaves that may look like solid patterns, blotches or stripes. ‘Marginate’ variegation is when variegation occurs on the margin of the hosta’s leaves. ‘Medio variegation’ is when variegation is in the center of the hosta’s leaves.

According to the American Hosta Society members' rankings, in 2008 variegated hostas made up 8 of the top 10 and 17 of the top 25 hostas. 

Turns out the varigated hostas with white centers can be touchy to grow. Without enough sunlight, white-centered hostas lack chlorophyll in the main portion of the leaf. In more sun, the green portion of the leaf can often produce the extra food needed for the hosta to thrive.

Some white variegation hostas can tolerate full sun without burning. Generally, a hosta with thicker leaves can tolerate more intense light.  White variegated hostas with thin leaves should be restricted to partial shade, bright shade, or early morning or evening sun to look their best. Direct sun exposure is often too intense for the white variegated hostas and may cause them to burn or turn brown, which isn’t harmful but can certainly make the plant unsightly. 

I don't have all of them, I just hand-carried a dozen or so home when I flew back from a short visit. I also had daffodil bulbs and some crape myrtle starts in hand but the hostas travelled in my carry-on, their leaves waving in the airport as I hopped the flights.

When I first planted them in a shady part of my garden, they were bedraggled and looking a bit tired, somewhat akin to being munched on by deer. Deer love to eat hostas so I would not have been surprised to see my visitors nibbled on. So far only rabbits have made a little visit to the flower bed.

Here they are now, looking brand new and quite happy on their little Missouri vacation!

The varigated leaves add a lot of interest to these visiting New York hostas. (Photo by Charlotte Ekker Wiggins)

The varigated leaves add a lot of interest to these visiting New York hostas. (Photo by Charlotte Ekker Wiggins)

They will remain in this lovely shady flower bed until my sister-in-law wants them back. I will only be too glad to personally deliver them!

Charlotte

Tulip Types and Varieties

Parrot tulips bloom among double pink tulips in the Bluebird Gardens retaining wall. (Photo by Charlotte Ekker Wiggins)

Parrot tulips bloom among double pink tulips in the Bluebird Gardens retaining wall. (Photo by Charlotte Ekker Wiggins)

Tulip Types and Varieties

Did you know tulips are edible? As members of the lily family, they're also related to onions, which may explain the first part. Although I rarely hear anyone promote tulips for a meal, they do make for a lovely addition to any dish assuming no chemicals have been applied to them as they were growing.

One other interesting thing about tulips. If you have them planted in a bulb garden, watch the flowers follow the sun by literally moving in the dish. They will also do that as cut flowers in a flower vase.

According to the National Garden Bureau, tulips say “spring” like no other flowers. Their "vivid, paint-box colors are a feast for winter-weary eyes" and I couldn't agree more. Who doesn't think of spring when they see tulips in bloom??

These members of the lily family typically grow a single stem and flower from teardrop-shaped bulbs that are planted in fall for spring flowers. Tulip bulbs require a dormancy period with cool, winter-like temperatures for several weeks. During this time, the bulbs sprout roots and the embryonic leaves and flowers inside the bulb begin to develop.

Tulips are native to southern Europe, the eastern Mediterranean, North Africa and Asia. Works of art depicting their distinctive shape date back to the 10th century. They have been cultivated in earnest for at least 400 years including generating the short-lived "tulipmania" in the 1600s where collectors were spending literally fortunes to possess one tulip bulb.

By leveraging the tulip’s natural tendency toward diversity, generations of breeders and tulip collectors have produced a mind-boggling array of flower forms, heights, colors and bloom times. Today, Holland produces most of the world’s annual tulip crop, which exceeds 4 billion bulbs annually.

My garden frog is unimpressed but I love the double yellow tulips blooming. (Photo by Charlotte Ekker Wiggins)

My garden frog is unimpressed but I love the double yellow tulips blooming. (Photo by Charlotte Ekker Wiggins)

Basic Tulip Types and Varieties

There are more than 150 species of tulips with over 3,000 different varieties and are classified into Divisions by type. The tulip names include links to a variety of suppliers so you can see the actual tulip varieties.

Division 1: Single Early. Medium size blossoms with a classic tulip shape. Short, sturdy stems with an overall height of 10-14," often fragrant. FlairPurple PrinceBestseller, Apricot Beauty

Division 2: Double Early. Extra petals give these flowers a full look. Shorter than most other tulips, most are about 12” tall. Lovely cut flowers. AbbaMonsellaFoxtrotMonte Orange

Division 3: Triumph. This class offers the widest range of tulip colors. Triumphs are midseason bloomers and stand 15 to 20”. Barcelona, BastogneJimmyPrincess IreneRonaldo

Division 4: Darwin Hybrid. Strong plants with large flowers. Bulbs often return and bloom for several years. Mid-Spring. 22” tall. Ad RemApricot ImpressionBanja LukaPink Impression

Division 5: Single Late. Tall, egg-shaped flowers are large and long-lasting. Regal presence in the landscape. Heat tolerant. 22” tall. La CourtineMentonDordogneViolet Beauty

Division 6: Lily-Flowered. Long, narrow cups with pointed petals that flare out at the top. Excellent for cutting. 12-20” tall. Elegant LadyMarilynMerlotPieter de LeurSapporo

Division 7: Fringed. The top edge of each petal is whiskered and often slightly paler in color. Bloom time is mid to late spring. Overall height 20”. CarouselFancy FrillsLambadaRed Wing

Division 8: Viridiflora. Streaks of green give these tulips a distinctive look. Most cultivars bloom mid to late spring. Long-lasting cut flowers. 20” tall. Groenland, Spring GreenFlaming Spring GreenArtist

Division 9: Rembrandt. Petals display exotic markings and color breaks and resemble the tulips in 17th-century paintings. 20-24” tall. Rembrandt Mix

Division 10: Parrot. Ruffled, puckered and fringed petals twist as they mature. Excellent cut flowers. Heights vary from 14-22”. Black ParrotEstella RijnveldSilver ParrotTexas Flame

Division 11: Double Late. Plush, peony-like flowers are long-lasting in the garden or in a vase. Many cultivars are fragrant. 15-22” tall. I planted several Angelique this fall because those are supposed to be very fragrant.  AngeliqueCarnaval De NiceUpstarYellow Pomponette

Division 12: Kaufmanniana. Early bloomers with a tall, narrow cup and pointed petals. Blossoms open out flat in the sun. 8-10” tall.  Johann Strauss, Scarlet Baby, StresaHeart’s Delight

Division 13: Fosteriana. Also known as Emperor tulips. Big flowers are  4-5” tall and open wide on sunny days. Early spring. 18” tall. Albert HeijnOrange EmperorPurissimaRed Emperor

Division 14: Greigii. Decorative foliage adds to the appeal of these flowers. Some cultivars have two to four flowers per stem. 12” tall. Mary AnnQuebecRed Riding HoodToronto

Division 15: Species. Wild or wild-like cultivars with relatively small flowers on slender stems. Good naturalizers. 4-10” tall. Lilac WonderLady JanePeppermint Stick

Division 16: Multiflowering. Sometimes called “bouquet” tulips. Three to five flowers per stem extends bloom time and impact. 14-20” tall. Candy ClubFlaming Club

As members of the lily family, tulips are also relatives to onions.

Charlotte

Where to Find Missouri Gardener Magazine

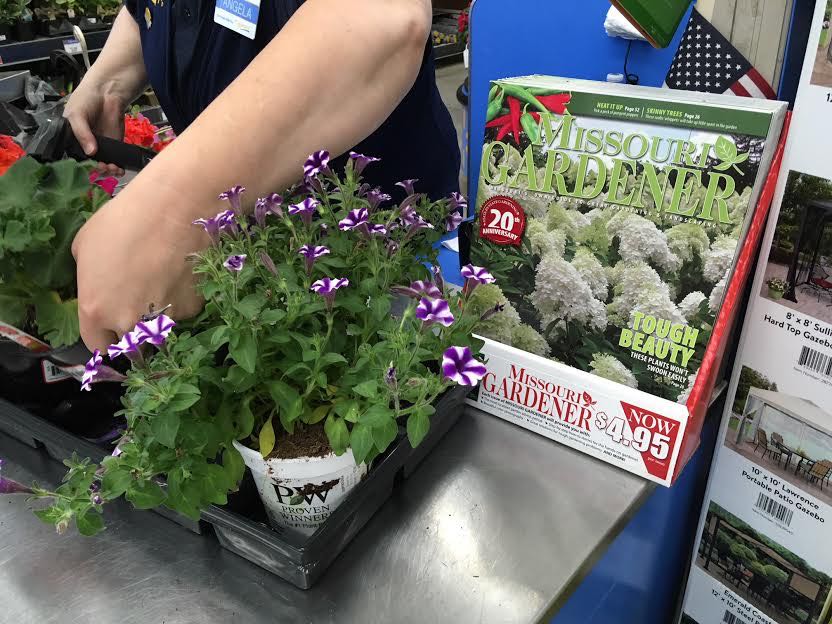
Missouri Gardener Magazine now available at Walmart Garden Center check out. (Photo by Charlotte Ekker Wiggins at Rolla, MO store.)

Missouri Gardener Magazine now available at Walmart Garden Center check out. (Photo by Charlotte Ekker Wiggins at Rolla, MO store.)

Where to Find Missouri Gardener Magazine

Every time a garden feature I've written is published in Missouri Gardener Magazine, I try to find at least one outlet where the story subject can find copies of the magazine. It was easier said that done.

For many years, the only local source for this wonderful gardening magazine was local book stores. 

Now the bi-monthly glossy magazine is available through Walmart stores in their garden center section. I stumbled upon this development as I was checking out in my regular haunt, our local garden center. There on the check out counter, taking up space for where I was placing my sale plants was a pile of the magazines.

When I queried the clerk, she said she was told the chain is now carrying the magazine, a wonderful development for gardeners looking for Missouri and regional-specific gardening information.

In addition to interesting garden features, the magazine has regional updates from University of Missouri Extension horticultural experts, something we no longer can easily access since those positions are no longer available at the county level. Although books by gardeners like Jerry Berry are interesting - he was the master gardener who made a name for himself concocting gardening mixtures from beer mixed in with other kitchen products - the advice in this magazine is more reliable.

If you don't want to buy individual magazines, you can also subscribe to have it mailed to you, an annual subscription is $19.95 per year. No, I don't get a cut on the subscriptions, I'm happy to be associated with a gardening magazine that provides good advice and pertinent information.

These were the events for fall 2017, what do you know is scheduled for this fall? (Photo by Charlotte Ekker Wiggins)

These were the events for fall 2017, what do you know is scheduled for this fall? (Photo by Charlotte Ekker Wiggins)

You don't see me listed?

Leaf back to the back, every issue features a calendar of upcoming gardening events that I collect and edit, it's a great way to get a sneak peek at what is coming up. I'm collecting September-October 2018 events so if you have something to share, email me by May 25. Thanks!

Charlotte